Players have been interested in making elevators in Minecraft since the Alpha version when Redstone made its first appearance. Since then, new mechanics have made it possible to make automatic water elevators that work are, without Redstone, the fastest way to go up!
How to Make a Minecraft Water Elevator
There are several essential blocks you'll need to make a full functioning, safe elevator, but the crucial ones are Soul Sand and Magma Blocks. The Soul Sand creates bubbles in your water elevator that make you move up, and the Magma Block creates bubbles in your water elevator that make you go down.
In the guide below, we've explained how to use these blocks to make a single elevator that allows you to go up or down. However, you don't need to follow the pattern we've made. Be creative with your elevator! The only essential direction you'll need to follow is that you must use the Soul Sand to go up, and the Magma Block to go down.
Related: How to Move Villagers in Minecraft - Pro Game Guides
Step One: Build the Walls
You can use any type of block to build the walls of your elevator. We used glass for ours to make it easier to see the process.
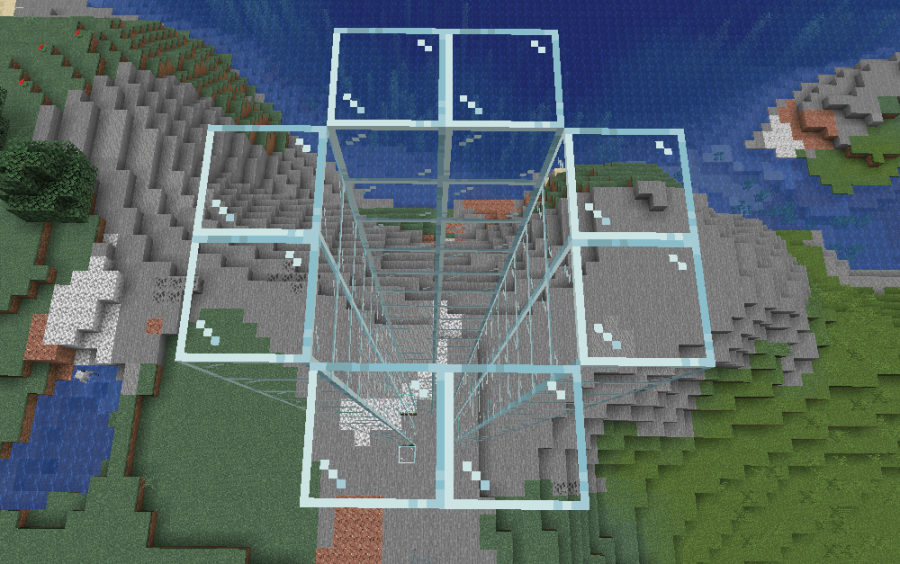
In the image above, you'll see the basic pattern to design your walls. Place a ring around an empty two-by-two block section and build up! Make your elevator as tall as you'd like, just make every wall the same height. We made our 30 blocks high, but you can build yours all the way up to the build height, if you'd like!
Step Two: Make the Base
There are two parts to this step. First, you need to make an archway on one side of the elevator that is two blocks high by two blocks wide.
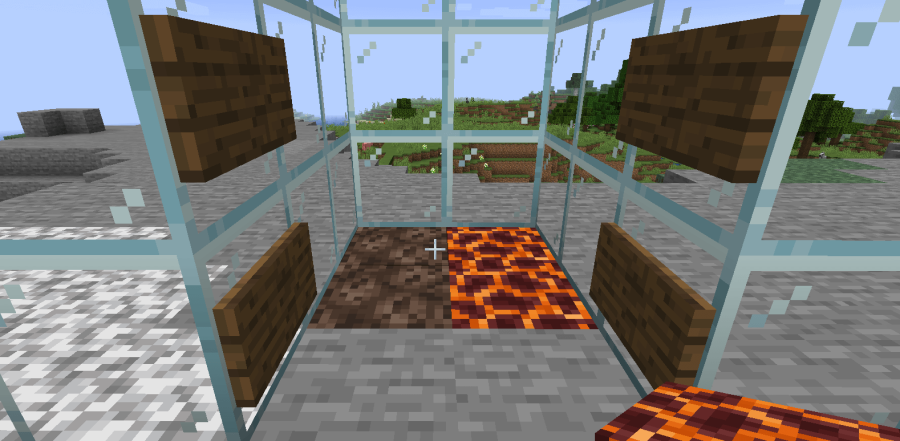
Once you have done that, place signs on the outside of the archway, as shown in the image above. These signs are used to hold in the water that you'll be placing in Step Three. You'll need four signs total.
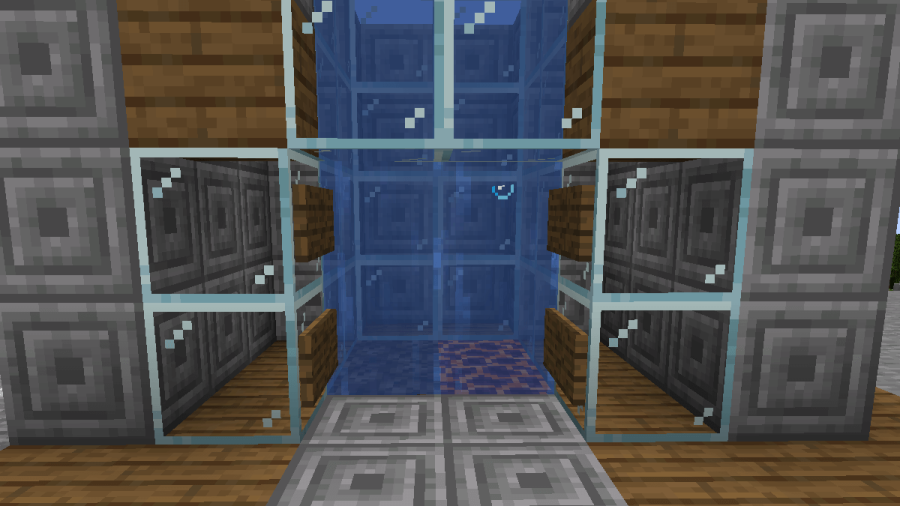
The other part of this step requires you to place the Magma Blocks and Soul Sand. Continue to use the image above for reference on how to do this. At the very bottom of the water elevator, place two Soul Sand blocks on one side, and two Magma Blocks on the other.
This will allow for seamless transfer between going up or down in the elevator. Still, you can separate these two sections if you want to make your elevator look a little cleaner.
Related: How to get music discs in Minecraft - Pro Game Guides
Step Three: Place the Water
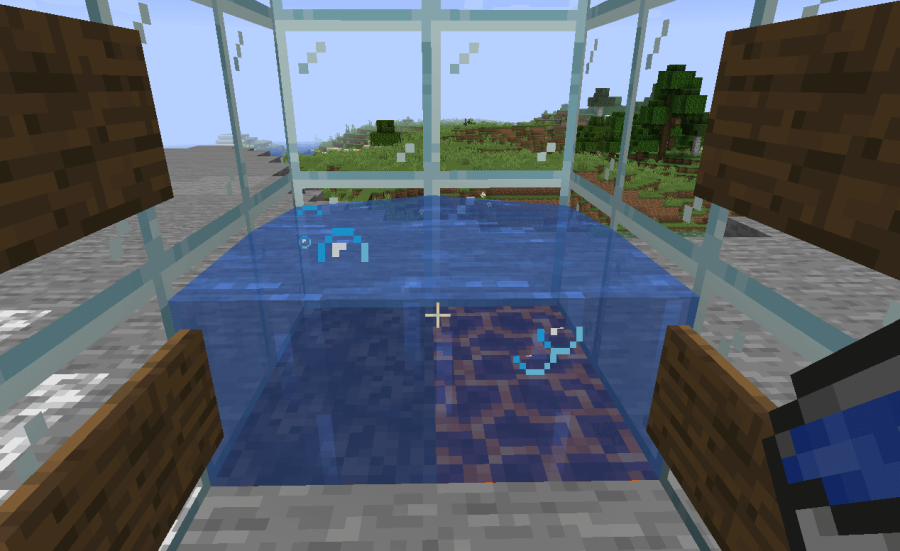
You need a lot of water source blocks for this step. With the Magma Blocks and Soul Sand placed, grab two Water Buckets. Place one on any of the four blocks at the base, and place the other Water Bucket on the block in the opposite corner. This will create an infinite water supply from which you can collect the water for the next level.
From here, you need to repeat the step above on every level of your water elevator. The reason for this is that the bubbles created by the Soul Sand and Magma Blocks only work on Water Source blocks, not running water.
With every level of the elevator, fill your fill your Bucket with the Water Source on the level below, which will then be refilled from the two Water Sources next to it. Do as you did before, and place another Water Source on the corner opposite of the one you just placed. You'll now have another level of water. Repeat this process until you reach the top of your elevator.
Once you have done all this, you will have a basic (and efficient!) working water elevator! You can edit the blocks around it as wish to make the elevator elegant or fancy. However, you always need to have the Magma Blocks and Soul Sand at the bottom of the elevator.
Step Four: Add Multiple Floors (Optional)

If you wish to add multiple floors to your base, you can easily modify this elevator to accommodate for that. Make a two-by-two hole where you want the level to be and place signs outside the elevator like you did on the ground floor. While you're going up or down, walk out where you made that floor's exit. This is an easy way to go to a specific floor in your base!
Want to see how to make some produce farms? Check out our guides on How to Make an Automatic Mushroom Farm and How to Make an Automatic Pumpkin/Melon Farm!