


Updated on October 29, 2026: Updated for the latest October reworks and balance changes, added the missing Stands and advanced forms, removed Khnum, and refreshed obtainment and evolution details. Soft & Wet now reflects its Josefumi rework, while entries still missing complete current kits are clearly marked.
Looking for the best Stands in Bridger Western? Guns still settle plenty of arguments in the Wild West, but the right Stand gives you far more ways to win a fight. This Bridger Western Stand Tier List compares combat strength, utility, build requirements, and consistency after the October updates, with the important obtainment and evolution routes explained below.
Bridger Western Stands Tier List - Best Stands Ranked
⇓ BEST STANDS ⇓

The World

TWAU

King Crimson

D4C

D4C: Love Train

C-MOON

Weather Report

Tusk Act 4
⇓ VERY GOOD STANDS ⇓

Ball Breaker

Cream

The Hand

Star Platinum: The World

Star Platinum

Silver Chariot

Gold Experience

Killer Queen

Mandom

Tusk Acts 1–3

Whitesnake

Soft & Wet

Sticky Fingers

White Album

Oasis

Metallica

Emperor

Six Pistols

Hermit Purple
⇓ DECENT STANDS ⇓

The Fool

Oh Lonesome Me

Catch the Rainbow

Chocolate Disco

Hierophant Green

Magician's Red

Crazy Diamond

Purple Haze

Stone Free

20th Century Boy

Tubular Bells

Mr. President

Oyecomova (Boku no Rhythm)

Hey Ya
⇓ UNRANKED / TESTING ⇓

Green Day
All Stand icons are sourced via the official Bridger Western Trello Board
Stands are a major extra combat system in Bridger Western. When you get one, you gain a unique kit of passive and active abilities that can reshape how you fight. Not all Stands do the same thing. Some are built for close-range pressure and burst, some focus on zoning and traps, while others are more about utility, mobility, survivability, or time-based mechanics.
The rankings prioritize overall PvP usefulness, including damage, control, defense, and how reliably a Stand can use its best tools. Advanced forms are rated with their requirements met: early Tusk is not equivalent to a developed Act 4 setup. Provisional entries need more checking after recent reworks, while Unranked means there is not enough current kit information for a fair placement. These are editorial rankings, not an official developer tier list.
RELATED: Bridger Western Fishing Guide – How To Fish, Drops & Cooking
IMPORTANT NOTE: The general Stand rules list 15% lower gun and Spin damage for Humanoid users and 5% lower damage for Non-Humanoid users, with some gun exceptions. Zero summon stamina does not mean zero damage penalty. Timestop damage is also restricted: the documentation lists 75% reduced damage during timestop and a 60-damage cap. Base health increased by 15 in October, so older one-combo claims should not be assumed to hold.
| Stand | Passives & Abilities | Pros & Cons |
|---|---|---|
Stand 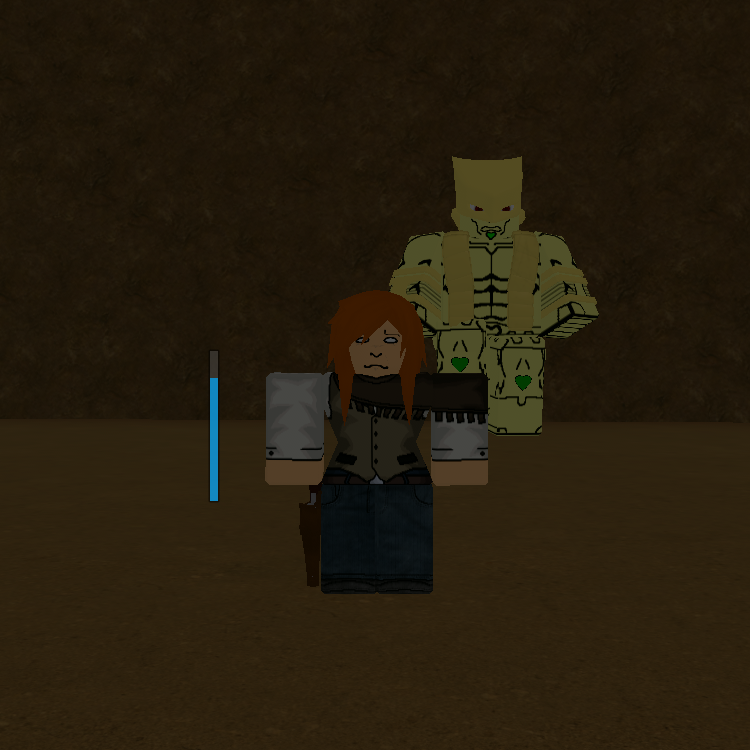 The World | Passives & Abilities Barrage (E): Close-range punch barrage. Teleport / Strong Muda Kick (R): Timeskip toward the cursor; targeting an enemy produces a 20-damage kick with wallsplat. The launched target receives damage resistance during the sequence. Knife Throw (T): Throws 12 knives. Requires knives in your inventory but does not consume them. Kick Barrage (G): Grab into a kick barrage; you cannot take other actions during it. Time Stop (V): Five-second stop after a windup, with a listed 55-second cooldown. | Pros & Cons
|
Stand 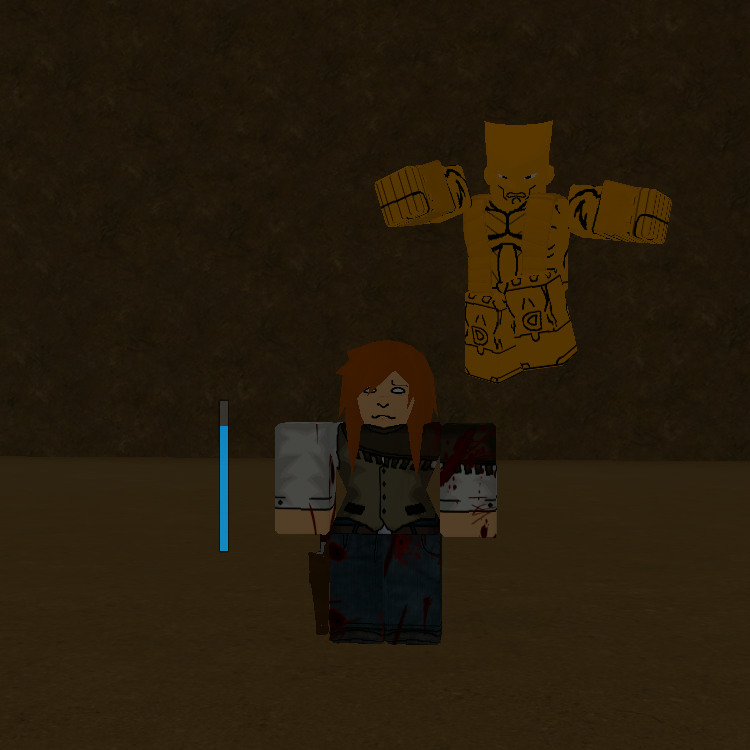 TWAU | Passives & Abilities Passives: Checkmate adds Stand knife volleys; Ol' Reliable permits revolver shots during Me Time. Chop / Advancing Muda Punch (E): Land Chop, then reuse E during its cooldown for the advancing follow-up. Gasoline and Match (R): Soak enemies and create a gasoline puddle, then ignite it while dashing back. Soaked targets are slowed and take increased damage. Dual Knife Throw (T): Cursor-aimed volleys; requires knives. Barbed Wire (G): Damages and ragdolls enemies, reflects bullets, and allows the user through. During timestop it slows rather than ragdolls. The old Steel Wireset requirement is removed. Me Time (V): Tap for one second (11-second cooldown), hold for about five seconds (40-second cooldown), or activate below 25% HP for a near-instant four-second panic stop (30-second cooldown). | Pros & Cons
|
Stand 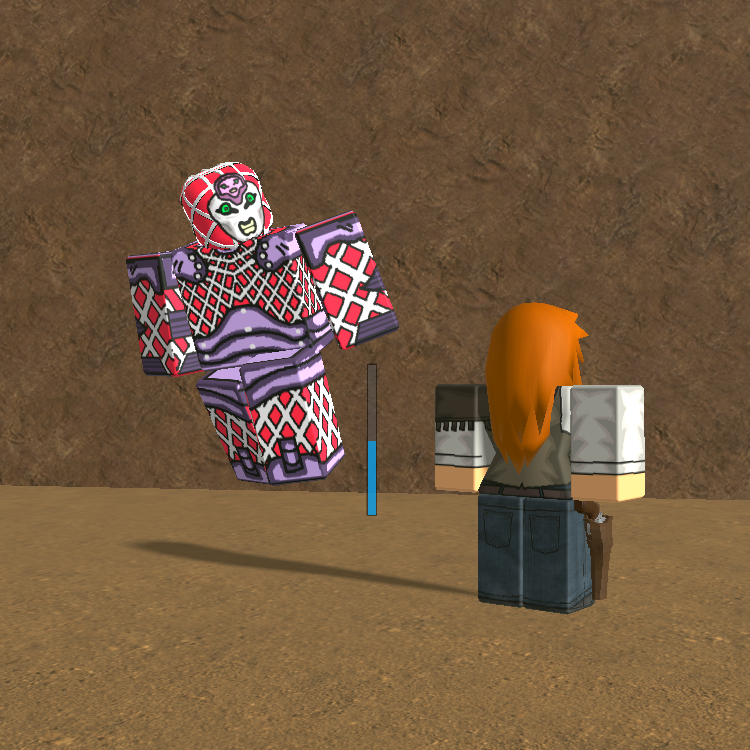 King Crimson | Passives & Abilities Frail: Lose 20 maximum HP. Eye Gouge (E), Heavy Chop (R), and Donut (T): Blind, knock down, or impale opponents, with enhanced attacks after Time Erase. Foresight (G): Predict movement and gain one automatic dodge after the October 24 change. Time Erase (V): Become invisible and invincible during the erased interval; the next Stand move is enhanced. The cooldown scales with time erased. Foresight + Time Erase: Repositions nearby players according to their projected movement. Timing a move before erasing can skip its windup and bring King Crimson to a nearby target. Low-health follow-up: The October update adds a blood-trail move after Time Erase ends; its exact input and damage are still being checked. | Pros & Cons
|
Stand 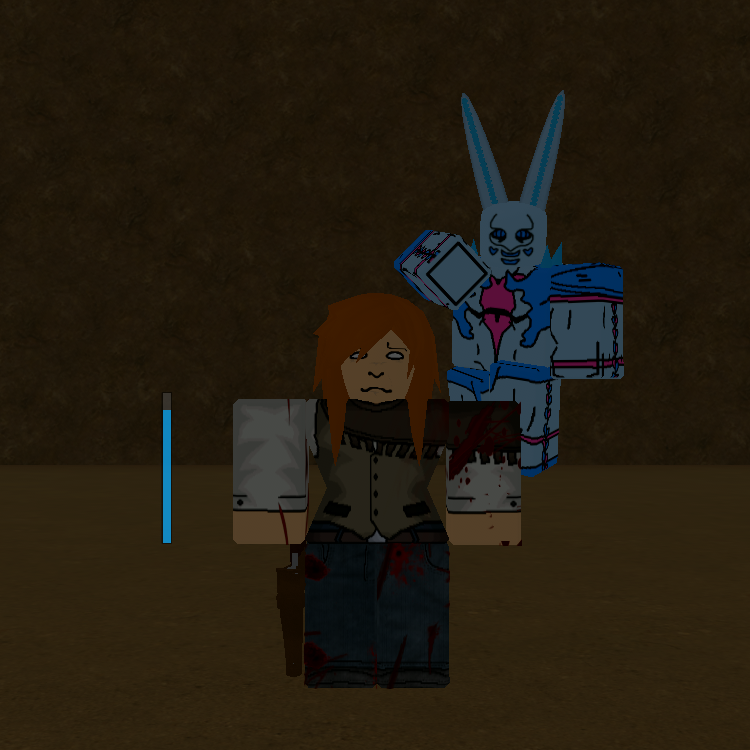 D4C | Passives & Abilities Frail: Lose 20 maximum HP. Poncho usage enables travel between the world and a pocket dimension. Dimension Save: With a poncho equipped, a hit above 20 damage triggers a short dimensional escape and damage-linked healing. Chop Barrage / Chop (E): Tap for a barrage or hold for a longer-range chop that applies Grounded. Transferring Grab (R): Chokeslam into a dimensional uppercut; using it in the pocket dimension summons attacking clones. The October fix removes the old hardcoded +15 maximum-HP behavior, so do not rely on that as a fixed recovery amount. Clone / Clone Swap (T / T + G): Create a weapon-wielding clone and swap health and position with it. Swapping reduces maximum HP until respawn and reduces age. October fixes improve spawning and target acquisition. Poncho variants: Clone Opponent creates an attacking duplicate; G provides Aerial Clone Kick, with Dimension Chop available in the pocket dimension. | Pros & Cons
|
Stand 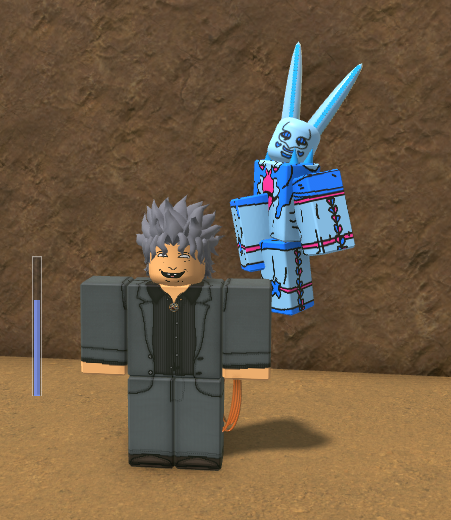 D4C: Love Train | Passives & Abilities Unlock: With D4C, fuse with the remaining corpse parts other than the Heart: both arms, both legs, and the ribcage. Base kit: Retains D4C's dimensional and clone mechanics. Love Train (V): Deal damage to fill the meter, which enables the mode and determines its duration. Incoming damage consumes the meter to heal you and redirect damage toward its source. Listed cooldown: 240 seconds. Limits: Healing and reflected damage weaken as the meter drains. Attacking briefly disables protection; this is not invulnerability while freely attacking. | Pros & Cons
|
Stand 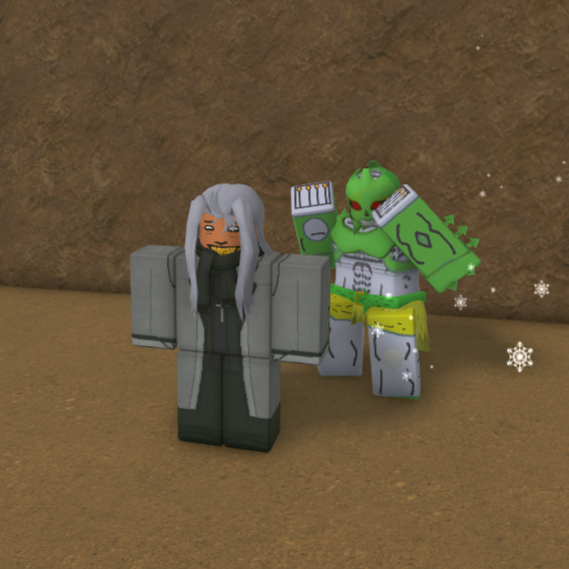 C-MOON | Passives & Abilities Gravitationalized: Hits add 5% to a stacking debuff, up to 50% increased damage intake and 50% longer cooldowns. The permanent cooldown-increase bug has been fixed. Time Acceleration: Timestop ticks down 30% faster when a C-MOON user enters it. Barrage (E), Double Arm Strike (R), Surface Inversion (T): Combine close-range pressure, guard breaking and arm disabling, and ground debris projectiles. All I Need Is One Punch (G): Uppercut, wallsplat, and heart-inversion damage. The airborne target has 75% damage resistance during that part of the sequence. Center of Gravity (V): Requires 50 damage dealt. Creates a gravity-shifting enclosure for up to 25 seconds, with a 210-second universal cooldown; interruption during windup or leaving the area ends it. Center of Gravity tool: Changes the direction of gravity for traversal and can affect nearby players. | Pros & Cons
|
Stand 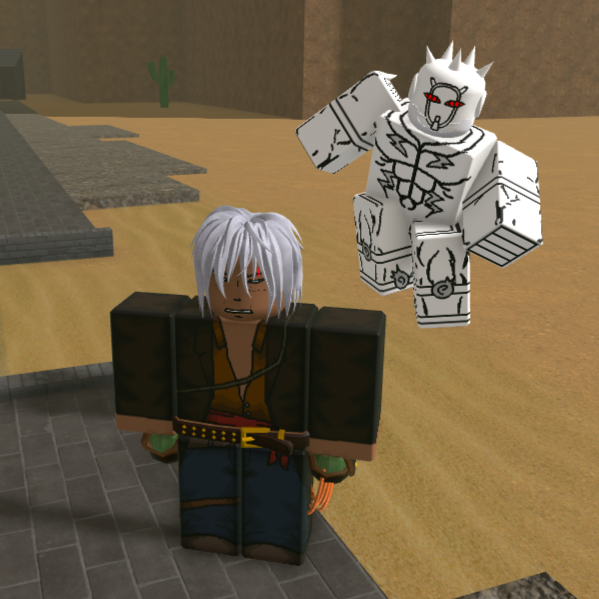 Weather Report | Passives & Abilities Awakening: Stand damage fills a meter. At capacity, gain an enhanced kit and a cloud suit with damage resistance and enhanced jumps for about 60 seconds. Barrage (E) and Weather Chop (R): Close-range pressure; missing the chop can cause self-damage and create frozen spikes. Lightning Jolt (T): Ranged lightning with chaining and an additional strike in the awakened mode. Oxygen Thinning (G): Disrupts nearby players and projectiles with atmospheric pressure. Torrential Rain (V): Requires the awakened mode; creates poisonous frog rain and changes the weather. | Pros & Cons
|
Stand  Tusk Act 4 | Passives & Abilities Progression: Requires Tusk progression and Super Spin. The strongest rotation tools depend on horse activation and Golden Ratios. Straight Shot (E): A tracking nail followed by a barrage on a direct hit. Spiraling Slam (R): Sends Tusk toward a target for a grab and slam. Wormhole Combo (T): Sends Tusk through a ground wormhole to pursue a nearby opponent with uppercuts. Infinite Rotation (G): Requires horse activation and at least two Golden Ratios. Creates a pulling singularity and applies 20% increased damage intake until death or another Infinite Rotation shot. Lesson 5: With full Spin and four Golden Ratios, use Gift From Gyro on a nearby horse for a launching shot and barrage with guaranteed limb loss/disable on hit. Without Golden/Infinite Rotation: Moves consume Spin charge, have weaker homing, and no longer open Love Train; several listed cooldowns are longer off horseback. | Pros & Cons
|
Stand 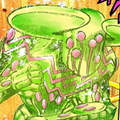 Ball Breaker | Passives & Abilities Autonomous Stand: Extends Spin rather than providing a separate conventional E/R/T/G combat kit. Charges Spin faster and requires Super Spin for activation. Direct drilling barrage: Direct or nearby Spin/Wrecking Ball impacts trigger Ball Breaker's barrage. Indirect drilling punch: More distant surface impacts summon a lunging punch toward the nearest player. Barrage Mode (V with Steel Balls): Three seconds of 25% damage resistance and knockback immunity, allowing rapid pitches with lower Spin cost, reduced range, and lower damage per hit. Scan pitches: Add slight homing, reveal targets and weak points, and reward weak-point hits with critical explosions. October improvements: Spin charges 20% faster, can charge while busy or ragdolled, and direct pitches deal 18% more damage. Wrecking Balls' listed damage penalty falls to 22%. | Pros & Cons
|
Stand 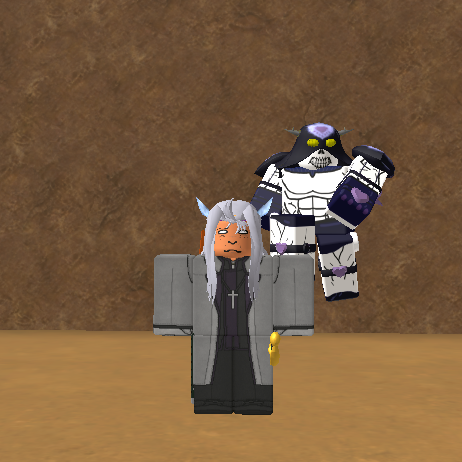 Cream | Passives & Abilities Void: Void-related hits can erase bodies on execute. Void moves have a shared seven-second lockout in addition to individual cooldowns. Chop (E): Long-range knockdown chop; becomes three lighter chops in Half-Eaten mode. Void Curved (R): Cream traces an oval attack path. Void Chevron (T): Cream follows a zigzag path. Void End (G): Cream scatters around the user for area pressure. Half-Eaten Toggle (V): Grants double jump and swipe attacks, and changes R/T/G into steerable void travel of different durations with blacked-out vision. Ends when toggled off or stamina runs out. | Pros & Cons
|
Stand 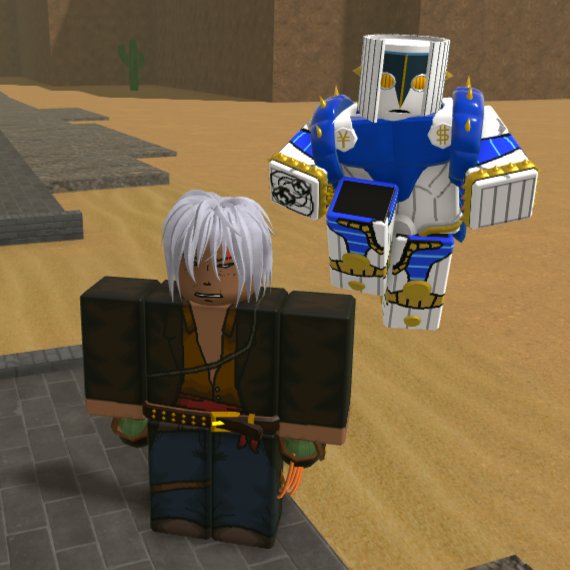 The Hand | Passives & Abilities Passives: No basic Stand M1s. Erasure can remove limbs, projectiles, and bodies on execute. Erasure Swipe (E): 32 damage, with cripple and execution potential. Erasure Accelerate (R): Movement by erasing space; no damage is listed. Erasure Pull (T): 10 damage, pulls nearby players/objects, and can cripple. Stomping Brigade (G): A ground stomp; airborne use has a separate multi-hit variant. | Pros & Cons
|
Stand  Star Platinum: The World | Passives & Abilities Obtainment: Use Star's Essence with Star Platinum. Its item entry lists the essence as guaranteed from using timestop movement. Barrage (E): Close-range punch barrage. Ora Punch (R): Counter stance that timeskips projectile attacks or punishes melee with a knockdown. During timestop, it has an uppercut/slam variant. Bearing Shot (T): Three projectiles, listed at 10 body damage or 16 headshot damage each. Time Stop (G): Approximately three seconds, with a 30-second cooldown. Beatdown (V): Grab into a barrage; other actions are unavailable during it. | Pros & Cons
|
Stand  Star Platinum | Passives & Abilities Barrage (E): Heavy close-range pressure. Ora Punch (R): Multipart kick and advancing punch, with a low-health execution variant. Star Finger (T): Extending finger strike that pulls and ragdolls a target. G update: The October 24 patch adds Stand Jump. Star's Essence remains tied to timestop movement in the item documentation; the current contextual input distinction is still being checked. Judgement Grab (V): Grab into a beatdown that commits the user to the animation. | Pros & Cons
|
Stand  Silver Chariot | Passives & Abilities Rapier Usage: Longer forward M1 reach but a narrower hitbox. Barrage (E), Flying Star (R), Last Gambit (T), Circular Slash (G): Rapier barrage, orbiting dive, long lunge, and close-range area slashes. Low-health T: Fires the rapier as a ricocheting projectile, homing after the third bounce. Armor Off (V): Faster, altered multi-part attacks, including Octo Slash, but take 50% more damage. The low-health projectile is unavailable in this mode. | Pros & Cons
|
Stand  Gold Experience | Passives & Abilities Reworked in October: Now Rare; the old Life Giver resource bar is disabled. Barrage (E): Includes a QTE 7 Page Muda variant that consumes stamina. Treebranch Assault (T): Traveling plant snare into kick-barrage pressure. Variant Switcher (V): Changes R and G between Life Giver, Plant Life, Animals, and Critters. Life Giver: Disorienting Life Punch and a 25-HP heal, targeting a very nearby ally instead when applicable. Plant Life: Tree attack and restraining vines. The tree reflects damage and can reflect your own attacks back at you. Animals: Homing eagle and a crocodile summon for pressure. Critters: Tracking scorpions and a reflecting frog. Frog projectile protection covers the front of your torso; melee reflection requires facing the attack. | Pros & Cons
|
Stand  Killer Queen | Passives & Abilities Bomb Cooldown: Explosive moves share a three-second lockout and short ragdolls. Barrage (E) and Chop (R): Close-range attacks; Chop plants and detonates a bomb after a delay. Primary Bomb (T): Mark a surface, player, or item and detonate on reuse. Object bombs can transfer to players on contact. Sheer Heart Attack (G): Tracking explosive with stamina drain and recall. It targets heat sources or players; its behavior received an October update. Bubble Bomb (V): Stray Cat projectile that cannot pass through surfaces. The October 24 update removes its effect on the user. | Pros & Cons
|
Stand 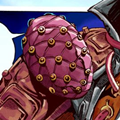 Mandom | Passives & Abilities Time Rewind (G): Rewinds nearby combat states and now includes molotovs, dynamite, and other hazards. The October update shortens the rewind interval without specifying its new exact duration. Interruption: Ragdoll can interrupt startup. Once rewinding begins, only death cancels it. Set Watch (T): Set a snapshot and rewind to it six seconds later. Cooldowns: Rewind and Set Watch share a 20-second cooldown. Other Mandom users caught in your rewind receive a 10-second cooldown on both moves. Utility: No summon/retention stamina cost. The former revolver-damage passive is disabled. | Pros & Cons
|
Stand  Tusk Acts 1–3 | Passives & Abilities Obtainment: 6% chance when merging with a Saint's Left Arm. Act progression requires Spin. Crippled: Reduced movement, no normal sprint/dash or gun use. Super Spin restores mobility while active. Nail resource: The October mini-rework replaces the old charge bar with a nail counter; drinking tea replenishes nails. Act 1: Nail shooting and Nail Glide remain central. G and T were replaced in October; their complete current behavior is still being checked. Act 2: Wormhole-producing nails and Golden Rotation Bullet provide ranged pressure. Act 3: Spatial Wormhole repositions the body; Wormhole Turret relocates an arm to fire through a wormhole. Act Switch: Hold V to cycle available Acts. Act 4 is ranked separately because its requirements and strongest attacks are different. | Pros & Cons
|
Stand  Whitesnake | Passives & Abilities Disc Removal: A complete M1 string or Head Grab removes the target's disc. Their Stand is disabled until they recover it or approximately 20 seconds pass. Barrage (E), Head Grab (R): Close-range attacks supporting disc removal. Command Disc (T): Disrupts player controls; surface hits explode, while enemy-entity hits can convert the target into an ally. Melt Your Heart (G): Acid pools with damage over time, sleep after prolonged exposure, and hallucinations. Pilot (V): Grounded remote control. Can evolve into C-MOON through Pucci's quest. | Pros & Cons
|
Stand  Soft & Wet | Passives & Abilities October 29 rework: Uses Josefumi's version of Soft & Wet. Placement is provisional while the new kit settles. R: Creates debris for the collection mechanic. T: Collects small items, projectiles, and debris, including dynamite, R debris, and cactus spikes. G: Fires collected objects. F: Blocking collects incoming projectiles; heavier projectiles are reflected toward your cursor after a delay. V: Gliding Punch replaces the old Plunder shot. Exact current damage and collection limits are not confirmed. | Pros & Cons
|
Stand  Sticky Fingers | Passives & Abilities Zippers: Damage creates zipper chip; M1ing two surfaces creates a portal between them for characters and projectiles. Unzipped limbs slow targets until recovered/damaged or the effect expires. Barrage (E) and Zipper Punch (R): Close-range pressure and an extended punch that applies Unzipped. Zipper Heal (T): Heals 15 HP, with a repeat-use evasive dash and a nearby-enemy attack interaction. Are You Prepared? (G): Dashing grab into an underground combo; targeting a detached limb provides a pull-and-combo variant. Zipper Glide (V, hold): Ground traversal and wall climbing. | Pros & Cons
|
Stand  White Album | Passives & Abilities Obtainment: Approximately 8% from a Corpse Part during Winter. Suit off: Ice Spikes (E), freezing Ice Punch (R), Ice Breath (T), and projectile-blocking Ice Wall (G). G followed by E converts the wall into spikes. Suit Toggle (V): Enables ice armor, M1s, skating, and ice traction, but drains stamina. Suit on: Glacier (E), Tendon Severance (R), and Ice Age (T) provide damage and freezing control. Gently Weeps (suit G): A ten-second projectile-reflecting aura with nearby freezing. Also reflects Steel Balls and freezes Shabon bubbles; does not negate melee damage. | Pros & Cons
|
Stand 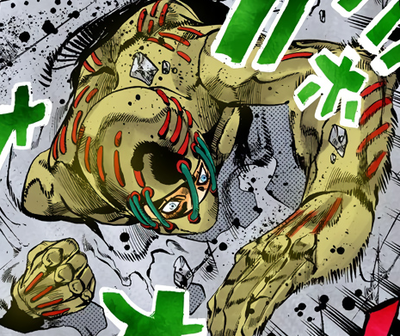 Oasis | Passives & Abilities Liquefaction: Certain hits slow opponents and increase their damage intake. Stamina: The October balance update removes all costs except swimming. While equipped, Oasis is immune to Green Day's mold. Normal kit: Jabs (E), dashing Double Strike (R), and Mud Spit (T). Dive (G): Travel underground and take nearby opponents with you, ejecting them with a stun when the move ends. Can be canceled early. Submerge (V): Sink into the ground and change the moveset. Submerged kit: Stronger barrage, Ground Muddification with a follow-up spike wave, and an altered Mud Spit. | Pros & Cons
|
Stand  Metallica | Passives & Abilities Ferrokinesis: Iron depletion increases enemy stamina costs and cooldowns and strengthens certain attacks within your effective range. Fragile Frame: Lose 20 maximum HP; severed limbs can be recovered manually or reattached automatically after a delay. Scalpels (E): Prepare sets of projectiles for aimed or nearby automatic attacks. Pins and Needles (R): Delayed internal damage; enemies can escape its range or interrupt by dealing at least 15 damage during the timer. Scissor (T): A throat-scissor QTE with a throwable follow-up. During the QTE you are committed and the target has damage reduction. The Razor (G): Damage scales with iron depletion. Camouflage (V): Conceals you from Ocular Prowess, but changing tools ends it. | Pros & Cons
|
Stand  Emperor | Passives & Abilities Obtainment: Approximately 8% when merging with a Corpse Part while holding a gun. Regular Shot / Aim (M1/M2): Bullets consume stamina rather than ordinary ammunition. Bullet Barrage (E): Rapid eight-shot volley. Slow Bullet / Guided Mode (R): A slower projectile and a follow-up mode that guides airborne bullets toward your cursor. Dodge Shot (T): Directional dash with invulnerability frames and a three-shot burst. Low Kick / Slide Kick (G): Ragdolling kick, with a sprinting variant for more reach. | Pros & Cons
|
Stand  Six Pistols | Passives & Abilities Cycle (E): Select Normal, Ricochet, Boost, Rodeo, or Controlled firing. Ricochet: Redirects bullets toward enemies or stationed Pistols. Boost increases damage by 5% per Pistol, up to 30% with six, with additional stationary-chain interactions. Rodeo: Adds repeated area hits after a bullet connects. Controlled puts the camera into the bullet for directional kicks until it hits or meets its bounce limit. Summon (R) and Direct (T): Bring out and position Pistols to alter firing behavior; used Pistols go on cooldown. Feed Pistol (G): Uses cooked fish to shorten their cooldowns. Quick Reload (V): After feeding, uses Pistols to reload your weapons. | Pros & Cons
|
Stand  Hermit Purple | Passives & Abilities Utility: No summon/retention stamina cost. Grapple (E): Pull yourself to terrain or pull a hit player toward you. Player grappling is more consistent after October 29. Chop / Dropkick (R): Stronger chop after a successful player grapple; use grapple momentum for the dropkick variant. Silent Tendril (T): Hidden trip or tether that can bind players to terrain or each other. Moving too far breaks it and damages you. Barrel Throw (G): Throws an explosive barrel; shooting it triggers damage and burning that can also hurt the user. | Pros & Cons
|
Stand 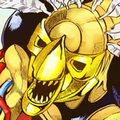 The Fool | Passives & Abilities Sand Manipulation: Has sand M1s and a block despite being non-humanoid. Mimic (E): Sand dummy lunges forward, grabs, and slams a target. Swipe (R): Short-range Stand swipe. Great Tsunami (T): Wave of sand that carries targets and damages them when it collapses. Sand Dome (G): Defensive shelter; nearby enemies can be damaged and trapped inside. Glide (V): Steerable aerial movement while allowing other hotbar tools. Ends on landing, being shot, or collision; collisions deal self-damage. | Pros & Cons
|
Stand 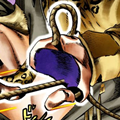 Oh Lonesome Me | Passives & Abilities Obtainment: Guaranteed when merging with a Corpse Part while holding a lasso. Unravel Toggle (E): Detach your arm along a rope while retaining weapon, utility, and throwable use. Unravel More (E + R): Spread more limbs along the rope, up to three stages. Elongate Ropes (T): Extend range for ten seconds. Unraveling Assault (G): Cursor-directed dash attack, usable without already being unraveled. Arm Hook (V): Grab, reel in, and slam a nearby opponent. | Pros & Cons
|
Stand 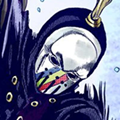 Catch the Rainbow | Passives & Abilities Weather dependence: The Stand relies on rain for its strongest abilities. Natural rain became 50% rarer on October 29. Rework status: Rescripted and reworked October 24; T changed again to Rain Grasp on October 29. Documented role: Rain-based offense and aerial movement remain the basis of this provisional placement, but the older full kit and damage values are not treated as verified after the reworks. Rain Grasp (T): New move confirmed; its full current behavior is still being checked. Team interaction: Weather Report can create rain, making the pairing much more dependable than relying on natural weather. | Pros & Cons
|
Stand 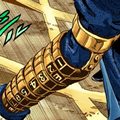 Chocolate Disco | Passives & Abilities Grid Layout (E): Places a terrain-adapting grid. Mark (T): Select an entity or grid position; each mark uses roughly 23 stamina. Redirect: Relocates projectiles and throwables within the grid, including Spin balls, nails, arrows, smoke, and explosives. Fuse interaction: Redirected timed explosives have their remaining fuse shortened to 0.25 seconds. Tonic interaction: Splashing an entity with tonic enables repositioning that entity through Mark. | Pros & Cons
|
Stand 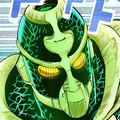 Hierophant Green | Passives & Abilities Emerald Relay (E): Up to two placed relays automatically shoot nearby targets and fire additional emeralds alongside Emerald Splash. Emerald Splash (R): Ranged emerald pressure; October 29 lowers emerald damage overall. Puppeteer (T): Disrupts camera/control and briefly forces enemy movement, as described in the existing kit. Barrier (G): Larger, nearly invisible field with a longer windup, lower damage, and five seconds of persistence after unequipping. Pilot (V): Aerial remote control. | Pros & Cons
|
Stand 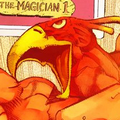 Magician's Red | Passives & Abilities Pyrokinesis: Fire attacks create burning and lingering zones on appropriate surfaces. Barrage (E) and Sweeping Kick (R): Close-range attacks, with burning on the kick. Fireball Fury (T): Fireballs travel outward before homing toward targets, applying burn and creating fire zones. Crossfire Hurricane (G): Large projectile; reusing G redirects and splits it into several smaller projectiles. Pilot (V): Aerial remote control. Card synergy: Pyromaniac increases your fire damage and prevents your own qualifying fire from damaging you. | Pros & Cons
|
Stand  Crazy Diamond | Passives & Abilities Barrage (E) and Range Strike (R): Close-range pressure and an advancing barrage. Bearing Shot (T): Ranged shot with a tracking restoration variant after marking an enemy with Blood Blade. Restoration Mode (V): October 29 swaps the former G and V inputs. Restoration changes applicable attacks into healing or alternate effects. Blood Blade / Restoration Trap (G): Normal mode spends health to fire a marking projectile; restoration mode creates the trap/wall variant. Reconstruct (restoration R): Reconstructive punch or terrain wall. New finisher: Restoration-mode G followed by normal R. Exact execution conditions are not specified in the update notes. | Pros & Cons
|
Stand 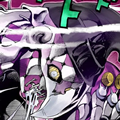 Purple Haze | Passives & Abilities Poison Bulbs: Limited regenerating capsules create damaging clouds. Your own poison can hurt you. Barrage (E), Virus Punch (R), Capsule Shot (T), and Capsule Drop (G): Release poison through melee, projectiles, and traps. Poison update: No longer staggers. Applies the listed 10% defense and 10% speed penalties instead. Pilot (V): Grounded remote pressure; the Stand is immune to its own poison while piloted, but your body remains vulnerable. | Pros & Cons
|
Stand 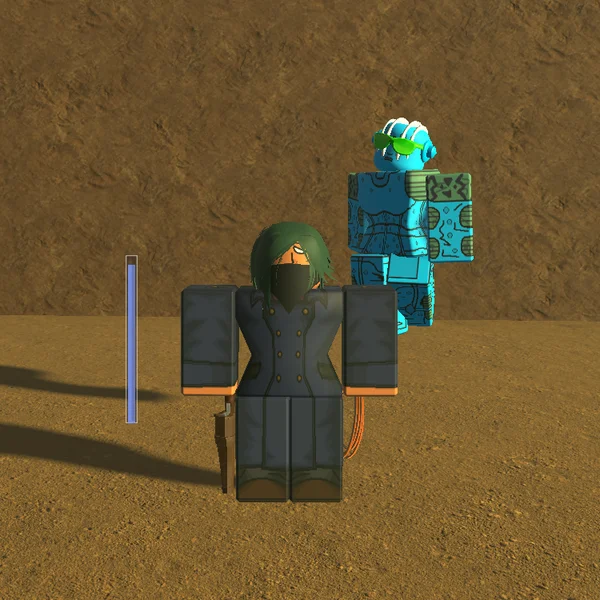 Stone Free | Passives & Abilities Thread Weaving: Surface threads can pull a subsequently hit opponent toward the anchor. Barrage (E) and Ora Punch (R): Close-range pressure; R is listed at 15 damage. Tether (T): Pull toward terrain; hitting an enemy triggers a barrage and Grounded. Self Heal (G): Restores 1 HP per second for ten seconds and counters C-MOON flesh inversions with Mobius Strips. Rock Tether (V): Multi-hit rock attack listed at 54 total damage, with an execution variant. | Pros & Cons
|
Stand 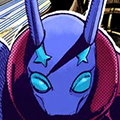 20th Century Boy | Passives & Abilities Passives: No summon/retention stamina cost; 10% reduced damage while summoned. Absolute Defense (G): Redirects attacks into the ground for up to 15 seconds, reduced to eight seconds in boss fights. Dynamite Strap (V): Uses six dynamite for an explosion that can also hurt you; Absolute Defense avoids the self-damage. | Pros & Cons
|
Stand 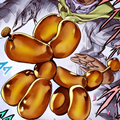 Tubular Bells | Passives & Abilities October 24: Reworked and rescripted. Previous documented role: Balloon-based ranged pressure with different tracking patterns and enhanced jumps while balloons are present. Current details: The full reworked kit is still being checked. Treat older balloon damage, keybinds, and cooldowns with caution. | Pros & Cons
|
Stand 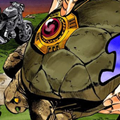 Mr. President | Passives & Abilities President's Room: Provides three drinks that refresh every 28 seconds; each heals 15 HP, with a separate 7.5-second consumption cooldown. Key Action (E): Drop the key, enter nearby, or operate the room door depending on context. Throw Key (R): A hit deals damage and sends the target into the room. Eject Self (T) / Eject Others (G): Leave alone or expel other occupants while remaining inside. Limits: Cannot enter during boss fights. A placed/thrown key breaks after five minutes unless picked up, disabling further key use until death. | Pros & Cons
|
Stand 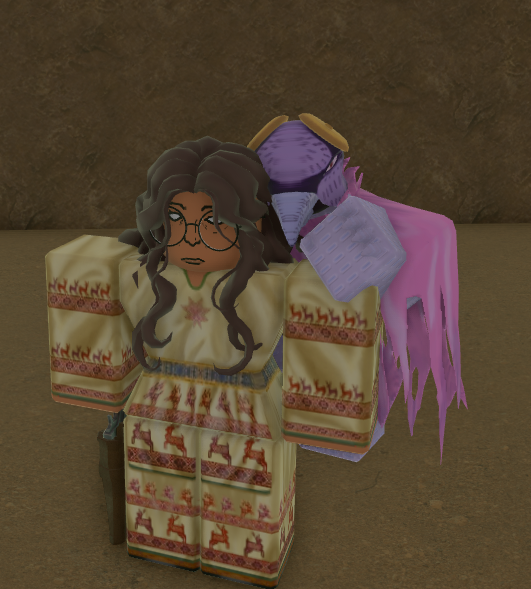 Oyecomova (Boku no Rhythm) | Passives & Abilities Naming: Listed as Oyecomova in the Stand export; October notes also refer to Boku no Rhythm. Clock Toss (E): Throws three delayed explosive pins; pressing again while active performs a chop. Crow Assault (R): Sends three crows that drop explosive pins on collision. Delay Bombs (T): Extends active pin timers by four seconds. Glide (G): Cursor-following movement that drops pins and damages enemies in its path. Second Skin (V): Movement drops pins, up to 16; using R cancels it. Powder Formula: Its smoke can conceal the user from Ocular Prowess with this card equipped. | Pros & Cons
|
Stand  Hey Ya | Passives & Abilities Utility: No summon/retention stamina cost. Encouragement: Supplies varying buffs, including healing, speed, auto aim, and lucky dodges. Deus Ex Machina: At low HP, Super Clutch Mode speeds up encouragement and reduces the chance of receiving no buff. Exact thresholds and intervals are not specified. | Pros & Cons
|
Stand  Green Day | Passives & Abilities Confirmed October changes: Up to 16 scalpels, faster charging, and a randomized spread with distance-dependent scaling to limit close-range stacking. Surgeon mode: A severed leg permits faster crawling but prevents sprinting and dodging. Mold siphon: Mold damage has a 1:0.25 siphon ratio. Other changes: Longer barrage and faster Enstrangle/Brainrattler throws. The complete current kit is not described in the current Trello entry. | Pros & Cons
|
Stand Cream Starter | Passives & Abilities Added October 24. The current Trello entry does not describe the full moveset. G root: Can be destroyed by Molotovs and breaks automatically after the trapped player takes at least 30 damage. Khnum removal: Existing Khnum copies were converted into an unobtainable Cream Starter skin, not a separate playable Stand. | Pros & Cons
|
BUILD SYNERGIES: Ball Breaker relies on Spin and Super Spin, Tusk now replenishes nails through tea, and Powder Formula conceals Boku no Rhythm users inside their smoke. Weather Report can provide rain for Catch the Rainbow, while natural rain is now 50% rarer. Weapon choice matters for gun-support Stands: the October 29 patch tightened bullet hit detection and nerfed M1911 and Nagant damage.
RELATED: Ultimate Bridger Western Tier List
All Bridger Western Stand Rarities
Rarity groups are Default and Rare. Rare includes Mandom, The World, King Crimson, TWAU, Soft & Wet, Star Platinum, Weather Report, The Hand, The Fool, Cream, Sticky Fingers, Green Day, Gold Experience, and Whitesnake. The general roll notes list 5% Rare and 95% Default, explicitly noting that Arrow rates differ. Special obtainment routes and evolutions are separate from this ordinary pool. A 5% shiny chance is listed for methods that roll a Stand; cosmetic skins do not receive separate combat ranks.
Halloween skins: CatchTheLake, GourdExperience, OhBonesomeMe, FrankAndStein, TitaniumTyrant, The Maw, and FishyCB are cosmetic variants. The Mud Witch sells the Spirit of Halloween for 35 Candy and two Arrow Shards; you need the corresponding Stand. Khnum has been removed, with existing copies converted into an unobtainable Cream Starter skin. Gold Experience Requiem and Wonder of U remain outside the normal obtainable ranking.
How to Obtain Stands in Bridger Western
Unlike guns and utility items, which you can purchase from various sources, Stands in Bridger Western are gacha-style items that you have to pull. There are currently two main ways to obtain them, and they are quite different from each other. Depending on what you want, either method can work. There is also a 5% chance to receive a shiny skin whenever your Stand is rolled through any obtainment method. Here's how to get them.
Corpse Parts (Main Stand Obtainment Method)
Corpse Parts are the primary way to get a Stand in Bridger Western, but they're also the most difficult. By design, they are a point of contention - an objective meant to draw attention and trigger PvP engagements, as other players will want to take them from you. Their value also rises the more players are around them. Here's how it works:
- Corpse Parts can only start spawning when there are at least 3 players in the server.
- Their spawn chance increases with player count.
- When one spawns, the game gives it away with:
- Loud sound
- Yellow beam
- Sphere of light
- The yellow beam disappears after 30 seconds.
- Server-wide announcements display the state of the Corpse Part (Spawn, Taken, Lost, Absorbed).
The tricky part isn't picking it first. If you pick up a Corpse Part, you do not immediately get a Stand. Now comes the hardest part:
- You need to hold onto it for a short period to absorb it.
- While holding it, you pulse yellow through walls periodically, which makes you much easier to track.
- The longer you hold it, the higher your chance of getting a Stand becomes (starts at 0.5% per pulse, rises by 0.5 percentage points with each pulse, and caps at 50%).
Keep in mind that you can lose hold of a Corpse Part at any point while carrying it. This will always happen if you get knocked down or if the body part containing it gets broken or dismembered. As you can probably tell from all this, Corpse Parts are a high-risk, contested way of obtaining a Stand. The game basically announces them to the entire lobby, then forces the holder to survive long enough to cash them in.
SPECIAL OBTAINMENT: Tusk has a 6% chance from a Saint's Left Arm. Holding a lasso while merging guarantees Oh Lonesome Me; holding a gun gives approximately 8% for Emperor. White Album has approximately 8% during Winter, and Ball Breaker has a 10% chance with maximum Spin mastery. These conditions are not a guarantee that every Stand is available from an ordinary Arrow roll.
Corpse Part spawn rates:
- Minimum (3 players): every 30 seconds, there is a 1/150 chance for a Corpse Part to spawn
- Maximum (25 players): every 30 seconds, there is a 1/40 chance for a Corpse Part to spawn
The full per-player spawn rate breakdown, sourced from the official Bridger Western Trello, is as follows:
- 3 players = 1/150
- 4 = 1/145
- 5 = 1/140
- 6 = 1/135
- 7 = 1/130
- 8 = 1/125
- 9 = 1/120
- 10 = 1/115
- 11 = 1/110
- 12 = 1/105
- 13 = 1/100
- 14 = 1/95
- 15 = 1/90
- 16 = 1/85
- 17 = 1/80
- 18 = 1/75
- 19 = 1/70
- 20 = 1/65
- 21 = 1/60
- 22 = 1/55
- 23 = 1/50
- 24 = 1/45
- 25 = 1/40
RELATED: Bridger Western Card Tier List
Arrow Shards (Secondary Stand Obtainment Method)
Unlike Corpse Parts, Arrow Shards are a guaranteed Bridger Western Stand obtainment method, and they can grant any Stand, except for currently unobtainable ones and those with specific obtainment methods. In my opinion, Arrow Shards are extremely valuable because they are both a guaranteed Stand obtainment, and with them, you skip the whole Corpse Part survival process.
Arrow Shards come from several activities. Their Trello entry lists them as a Legendary fishing result at approximately 0.1–0.2%, with additional sources including bounty chests, robbery loot, mini-safes, and Moe Wolff's boss chest. They guarantee an eligible Stand and skip the contested Corpse Part absorption process. Keep these restrictions in mind:
- Arrow Shards can be banked or stored.
- They are NOT lost upon death or leaving the server.
- They cannot be used if you already have an active Stand.
- They cannot be dropped from the inventory.
- While held, they have a glowing, smoky aura.
RELATED: Bridger Western Weapons Tier List
D4C: At the Sandtown pit, sacrifice five Dogbanes, three Rokakakas, or one Arrow Shard plus one Rokakaka or Dogbane. The next spawned Corpse Part becomes a Saint's Heart. To merge, be standless with at least 125 career kills; the listed 16% D4C chance also requires a current 15-kill streak. An unsuccessful D4C result gives another Stand. To unlock Love Train afterward, merge with both arms, both legs, and the ribcage.
Star Platinum: The World: Use Star's Essence while you have Star Platinum. The item entry says the essence is guaranteed from using timestop movement. This replaces the old advice about a random 1% evolution. October also added a G Stand Jump, so check the current contextual move prompt when using G.
C-MOON: Start with Whitesnake, Inlaw or neutral reputation, and Pucci's completed Disc quest. Give Pucci one each of Vampire Fang, Rokakaka, Meteor Shard, Bison Hide, Crocodile Hide, Bison Horn, and Arrow Shard for Dio's Bone. Bury it on stable Greenlands/Forest ground, kill three unique players within 250 studs, then complete the Green Baby's 14-phrase interaction without mistakes and merge it with Whitesnake.
Super Spin and Tusk Act 4: Complete Road to Spin and reach maximum Spin mastery, then take Gyro's second questline: defeat six different Stand users without losing the streak, pay 15,000 Moola, complete the race, and return to Gyro. On horseback, fully charge Spin and use Ocular Prowess to align two Golden Ratios. This activates Super Spin for Ball Breaker or lets Tusk access Act 4 with V while the Spin resource remains active.
Corpse Part protection: Merging repels nearby hazards; the documentation specifically notes extinguishing nearby fire. You can still lose the part through knockdown or the loss of the limb carrying it, so this does not make merging safe from other players.
How to Reroll and Remove Stands in Bridger Western
You cannot use an Arrow Shard while you already have a Stand. Store a Stand you want to keep in a Disc, or remove an unwanted one with a Dogbane Herb at the Mud Witch. Discs transfer your Stand and its skin; the Disc itself survives a character wipe, but a Stand stored inside it does not. Pucci's one-time Disc quest requires three Arrow Shards, Tier 3, and an existing Stand; additional Discs are listed at 500 Robux. To remove a Stand permanently:
- Obtain a Dogbane Herb: listed sources are a 5% chance from swamp trees, 4% from chests, and 3% from safes.
- Bring it to the Mud Witch in the swamp area.
- From interaction with her, select wipe your Path (Stand). Her other exchanges include reducing age by 20 years, receiving 2,500 Moola, or removing Spin. Choose the Stand removal option carefully.
- This will remove your current Stand, making way for equipping a new one.
Roblox Bridger Western Stands FAQ
Absorb a Corpse Part or use an Arrow Shard for an eligible Stand. Arrow Shards can be banked and come from fishing, bounty chests, robberies, and Moe Wolff loot. Tusk, D4C, Emperor, White Album, Oh Lonesome Me, and Ball Breaker have special conditions; advanced forms need their own progression.
The World, TWAU, King Crimson, D4C, Weather Report, and C-MOON are strong top-tier choices. D4C: Love Train and Tusk Act 4 are also rated highly with their progression and activation conditions met. Your weapons, preferred playstyle, and ability to manage the kit matter more than rarity alone.
Generally, yes. The documented penalties are 15% for Humanoid Stand users and 5% for Non-Humanoid users, also applying to Spin damage, with some gun exceptions. A Utility Stand having no summon stamina cost does not exempt it from damage penalties.
No. Rare is an obtainment category, not a guaranteed power advantage. Some default or specialist Stands work better with a particular weapon or team. Gold Experience is now Rare after its October rework.
Yes. Store a Stand and its skin in a Disc if you want to preserve them, or exchange a Dogbane Herb at the Mud Witch to remove your current Stand. You must clear the active Stand before using an Arrow Shard.
Sacrifice five Dogbanes, three Rokakakas, or an Arrow Shard plus a Rokakaka or Dogbane at the Sandtown pit to make the next corpse spawn a Saint's Heart. Be standless with at least 125 career kills; a current 15-kill streak is also required for the listed 16% D4C chance. Failing the D4C roll gives another Stand.
The current board has 41 Stand entries before its Unobtainable section, grouping Tusk Acts together and D4C with Love Train. This article uses 43 entries by separating Tusk Act 4 and D4C: Love Train, including two unranked entries awaiting fuller kit information. Khnum is removed and cosmetic skins are not counted as separate playable Stands.
Whitesnake removes a target's disc through a full M1 string or Head Grab, temporarily disabling their Stand until the disc is recovered or about 20 seconds pass. It also has control-disrupting discs, acid with sleep and hallucinations, grounded piloting, and the progression route to C-MOON.
And there you have it - now you know everything you need to know about Stands in Roblox Bridger Western: what they do, how they work, how to obtain and reroll them, which ones are the best, and much more. Thanks for reading! While you're here, make sure to see all Bridger Western guides at our hub page!


