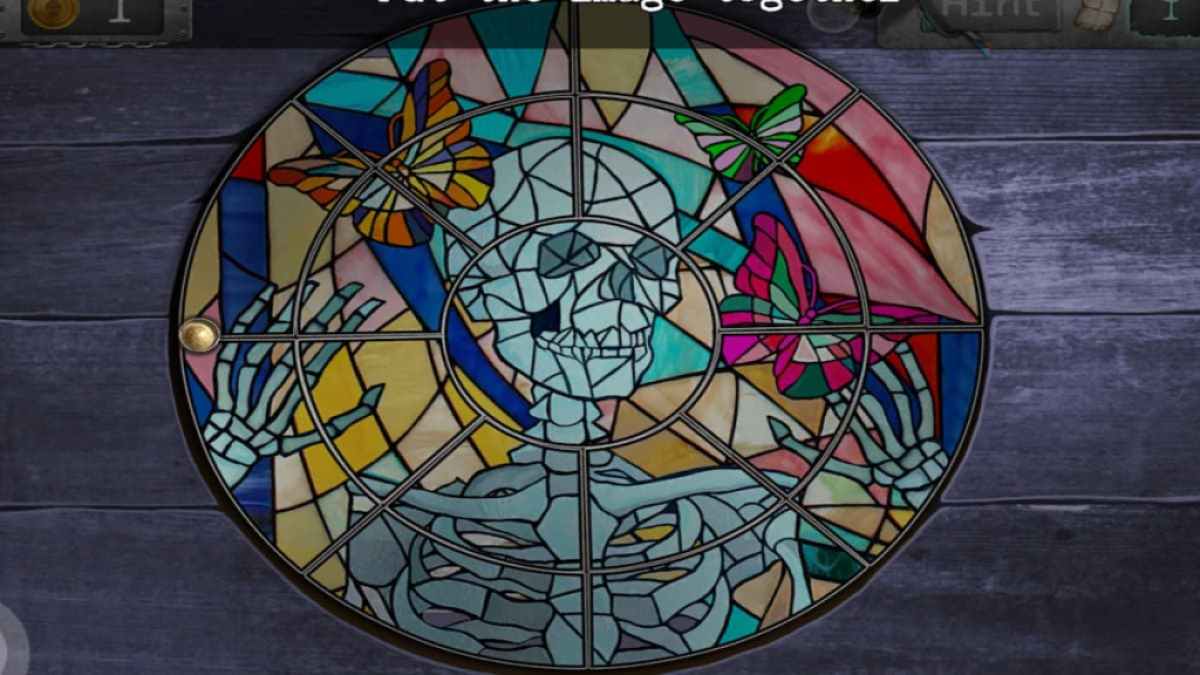
The third chapter of Scary Horror 2 brings more scares, new environments, and tricky puzzles that took me hours to figure out. If you're struggling to get through some of the game's sections, follow this in-depth Scary Horror 2 chapter 3 walkthrough and complete difficult puzzles with ease!
Complete Scary Horror 2 Guide, Chapter 3
If you still haven't completed the previous chapters, follow the Scary Horror 2 chapter 1 and Scary Horror 2 chapter 2 walkthroughs to help you complete them more easily.
Alleyway


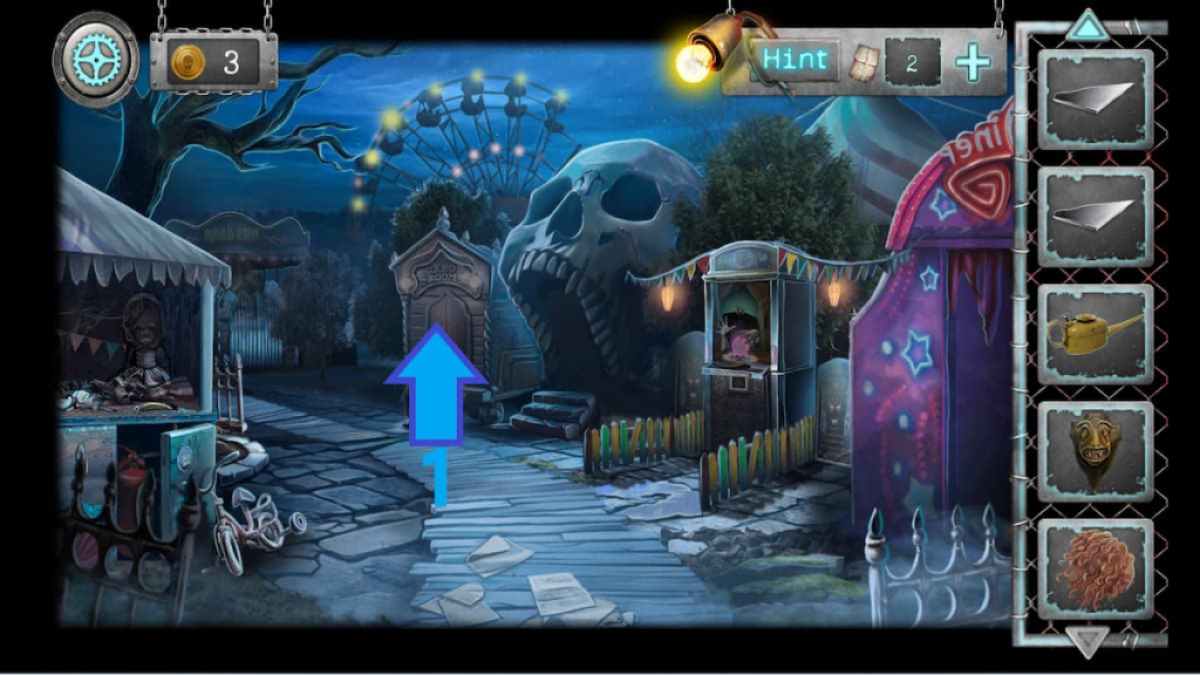
Scary Horror 2 chapter 3 starts you off in an abandoned alleyway with seemingly no way to go, but with patience and a sharp eye for details, you will find your way out of every area in the game. Here's what you need to do in the Alleyway:
- Turn around (1), take the crowbar (2) and inspect the lever in the wall (3).
- Take the stepladder (4) and the jerrycan (5).
- Use the crowbar to take the lever (3) and use it again to open the sewer drain (6).
- Move the garbage and take the wallet with money underneath.
- Approach the vending machine (3) and use the wallet with money to insert cash.
- Use the wallet three times and press the top three buttons on the machine to collect expired canned food, dirty soda and a rotten pie.
- Turn around (1), collect the stick (7) and turn around again.
- Combine the stick with the dirty neckerchief and place it into the burning barrel (8) to receive a torch.
- Approach the gutter (9) and drag the torch across the bugs to burn them.
- Move the torch around until the flame has extinguished and collect the blue chip inside the gutter.
- Turn around (1), scan the chip on the door (10), and type in the code 912 to unlock the door.


- Collect the flyer and approach the trashcans (1).
- Input the code 6942 to unlock the cage and enter.
- Throw the expired canned food into the right trashcan, the soda in the left trashcan, and the rotten pie in the middle.
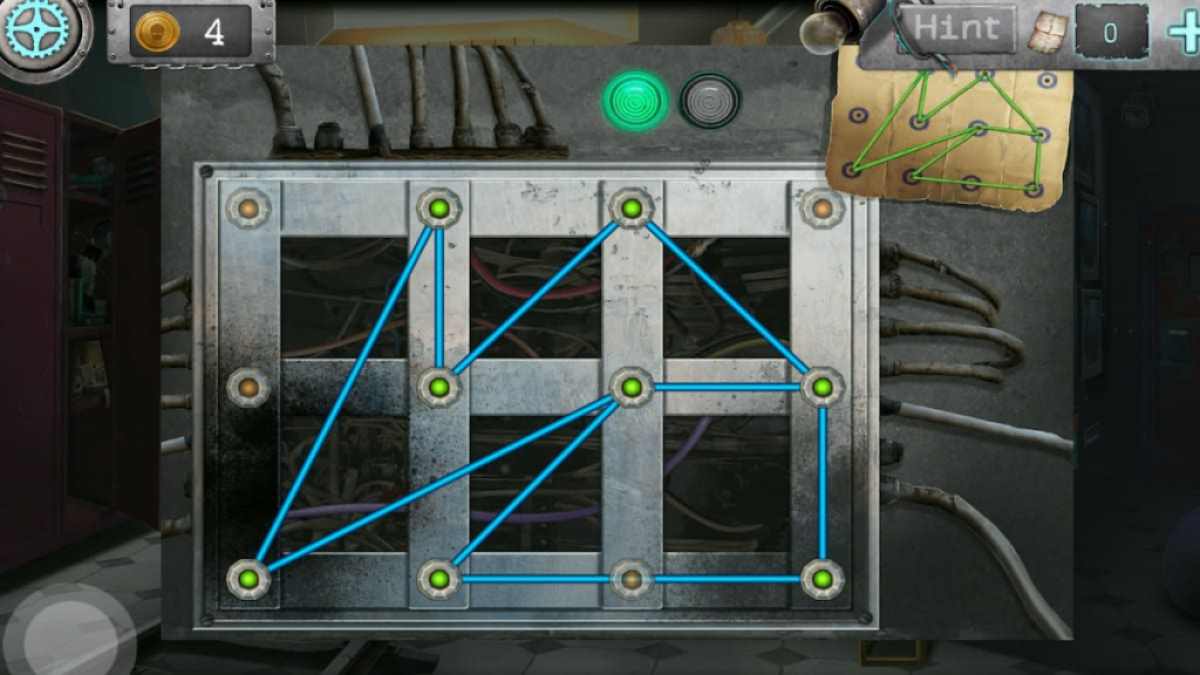
- Go back, turn around and use the bolt cutter to open the fuse box (2).
- Take the magnet and go back to the open door.
- Place the magnets so that all of the spaces are filled (Image 3), collect the wire cutters and the scheme from the safe.
- Place the stepladder next to the door (3), climb up and collect the wet wipes from the roof.
- Use the wire cutters to fix the wires and tap them again.
- Connect the wires according to the scheme (Image 4) and climb up the stepladder again.
- Collect the pike pole from the roof and inspect the box.
- Use the code 4548 to unlock the box and collect the lighter and key for transformer.
- Go back to the fuse box (2) and use the key to unlock the transformer.
- Take the red button from the sewer drain (4) using the pike pole.
- Go back to the fuse box (2) and add the red button and lever to the transformer.
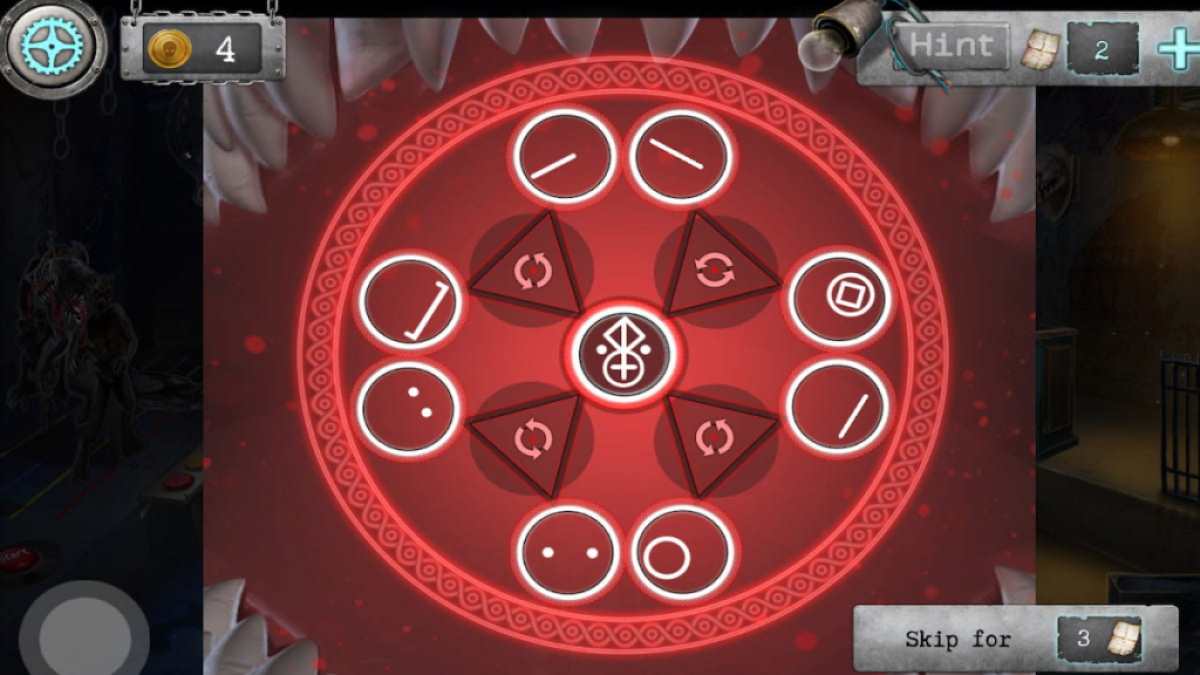
- Press the button, arrange the wire values (Image 5) and pull the lever to turn off power.
- Turn around, tap the stepladder to move it to the fence and climb over it.
Over the fence
You've found your way out of the alleyway, but on the other side you're greeted by a headless gargoyle in a dimly lit path. Before you go any further, you'll need to find some light!


- Approach the lantern (1) and use the jerrycan with fuel to add fuel to the lantern.
- Light the lantern using the lighter and collect the stone (2) and dry branches (3).
- Collect the part of the lock (4) and go forward (5) to reach the lake.
- Approach the bench (6), collect paper and move the bag.
- Take the boat repair manual behind the bag and use wet wipes to wipe the mud off the bench.
- Place the paper into the bag to remove worms.
- Collect the bucket (7) and inspect the extinguished bonfire (8).
- Collect the machete, place paper on the pile and add branches.
- Light the fire using your lighter and place the can on the fire.
- Turn around (9) and use your machete to cut the ivy (10).
- Take the forked stick below the second statue and go back to the lake.
- Approach the tree (11) and use the forked stick to chase the snake away.
- Approach the lock pad and move the switch in the following sequence: Left x2, right x3, left x4.
- Take the pruning shears and the bitumen from the box and go back to the fire.
- Place the bitumen into the can, use the stick to stir it, and receive grout for holes.


- Use pruning shears to cut the spiked thorns (1) and approach the puzzle.
- Arrange the colored balls to match the colors on the patterns (Image 2).
- Open the box and collect a fish hook inside.
- Throw the stone into the lake (2) and pull the net to the shore.
- Move the floats to the right to untangle the net, matching the rope color with their color (Image 3).
- Once you receive a net and a ladle, use your bucket to collect the water from the lake.
- Turn around and pour the bucket with water into the well.
- Fill the bucket with water again and repeat the process.
- Use the ladle to retrieve a reel, and attach the hook and the reel to the fishing rod next to the lake (3).
- Add maggots to the rod and start the fishing mini game.
- Catch the fish by tapping the fishing rod only when the fish in the left-hand corner is completely still.
- Use the net to pull the boat (4) to the shore.
- Use the grout for holes to patch up the holes in the boat.
- Go back, turn around and approach the overgrown fence (5).
- Throw the fish to the dog and collect the pump behind it.
- Go back to the lake and use the pump to inflate the boat.
- Tap the boat once the marker reaches the green area, repeat four times.
- Pour the fuel into the boat and drive off.
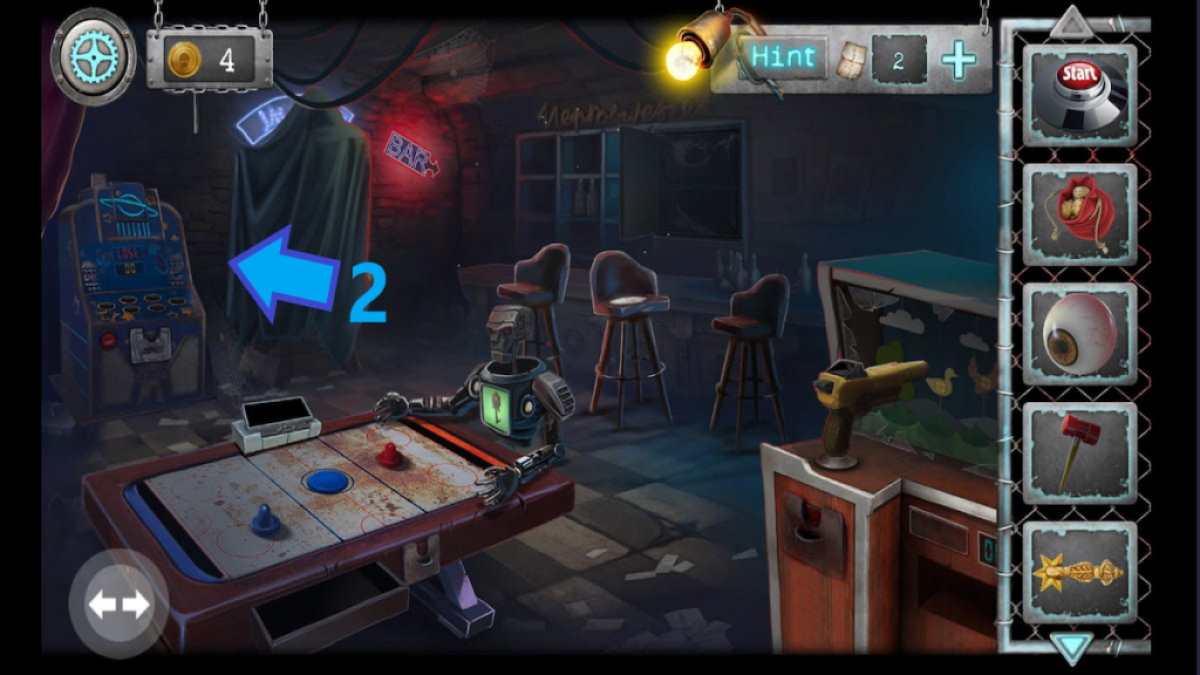
Amusement park
You used the tiny boat to get off the island, but you've found yourself next to a creepy and seemingly abandoned amusement park. Could there be a way to get in?

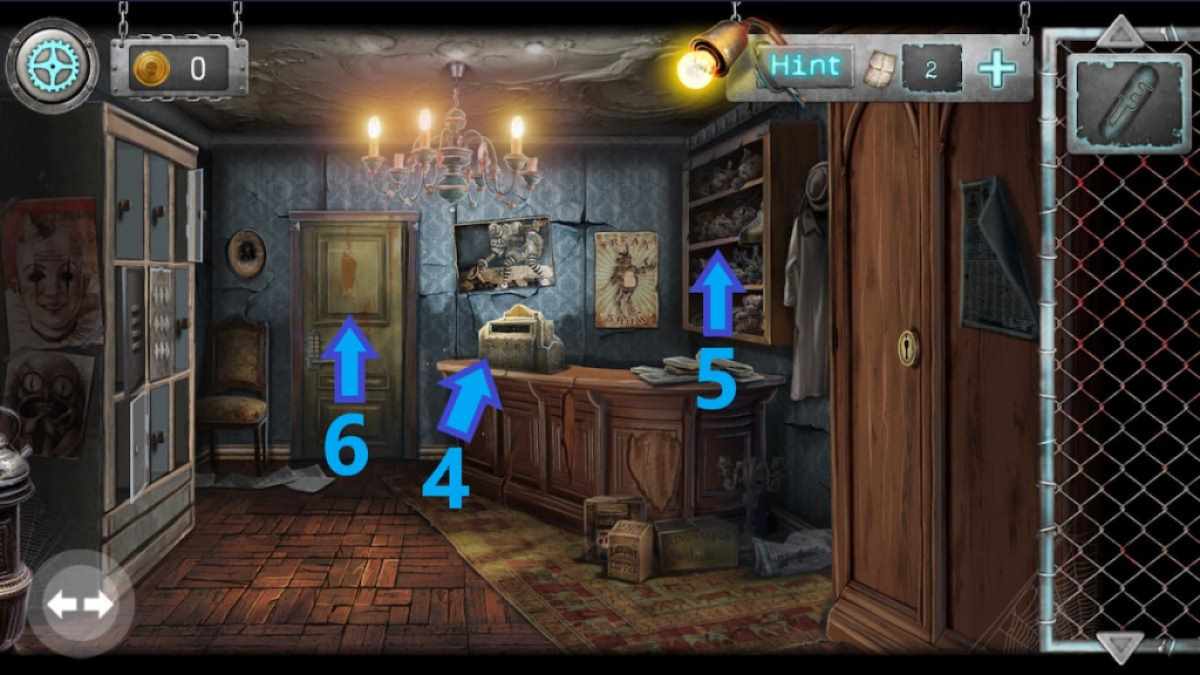


- Take the long cane (1), use it to knock the raven animatronic down (2) and collect the key.
- Use the key to open the door to the right (3) and enter.
- Approach the cash register (4) and look at the drawer below.
- Add the part of the lock and connect the shapes from left to right (Images 3-5).
- Take the toggle switch from the drawer and approach the shelves (5).
- Move the dolls and take the gargoyle head.
- Go back to the gargoyles and place the head on the headless gargoyle.
- Solve the puzzle below (Image 6) and collect the piece of a poster from the gargoyle's head.
- Go back to the boat and cross the lake to reach the amusement park.
- Add the piece of poster to the rest of the poster (6) and go back to the cash register (3).
- Look at the buttons, enter the code 79153 and collect the square coin and the coin with a horned profile.
- Look at the metal plate to see a clue and go to the other door (6).
- Use the code 512 to enter, and collect the numbers from the floor.
- Pull the switch to make the power come back on and go outside.
- Approach the viewing scope (7) and insert the square coin.
- View the fireflies through the zoomed scope and go back.


- Go back inside the building and approach the lockers (1).
- Take the coin from the top-right locker and view the locker in the middle.
- Press the buttons based on the fireflies sequence: 1,3 ,5, 7, 8, 9, 6, 4, 2 (Image 2).
- Collect the razor blade and the mysterious cube.
- Cross the lake again using the boat and go back to the gargoyles.
- Place the cube onto the left gargoyle's hand.
- Match the blocks to their corresponding symbols (Image 3) and collect the locker key inside.
- Go back to the amusement park and approach the machine (2).
- Use the coin with a horned profile to start a game of dodging angels and jumping over cauldrons.
- Receive a pouch with coins and use it on the claw machine on the left.
- Press the red button to grab items using the claw, and keep grabbing until you get a puck and chewing gum.
- Go back to the lockers and use your locker key to unlock the drawer (4).
- Collect the panel key and use it to open the panel in the generator room (5).
- Add chewing gum to connect the torn wires, and add the numbers to the panel.
- Press all the buttons except the purple button in the bottom right corner.
- Go back outside and approach the ticket booth (3).
The fortune telling machine
What appeared to be a woman fortune teller turned out to be a machine. Luckily, she can still help you find your way to the other side of the park.
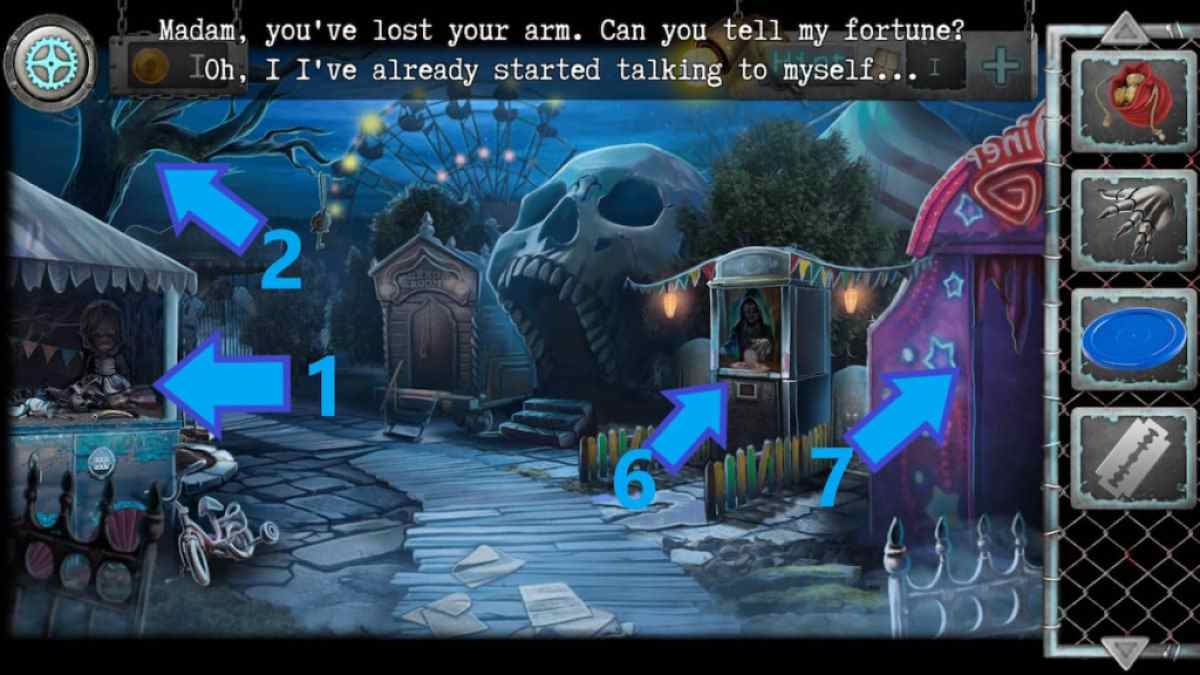


- Collect the mechanical hand and approach the gate mechanism.
- Add the toggle switch to the mechanism and toggle the correct switches (Image 1).
- Enter the park and approach the stand to the left (1).
- Move the baby doll head, take the mirror shard I, and collect the ginger wig below.
- Go to the tree (2) and tap the hanged clown mannequin (3) to bring it down, collecting the rope.
- Take the monster head trophy (4) and go to the popcorn cart to the right (5).
- Use the pouch of coins to make popcorn and take the second mirror shard from the cart.
- Go back, approach the fortune teller machine (6) and add the mechanical hand to the machine's right arm.
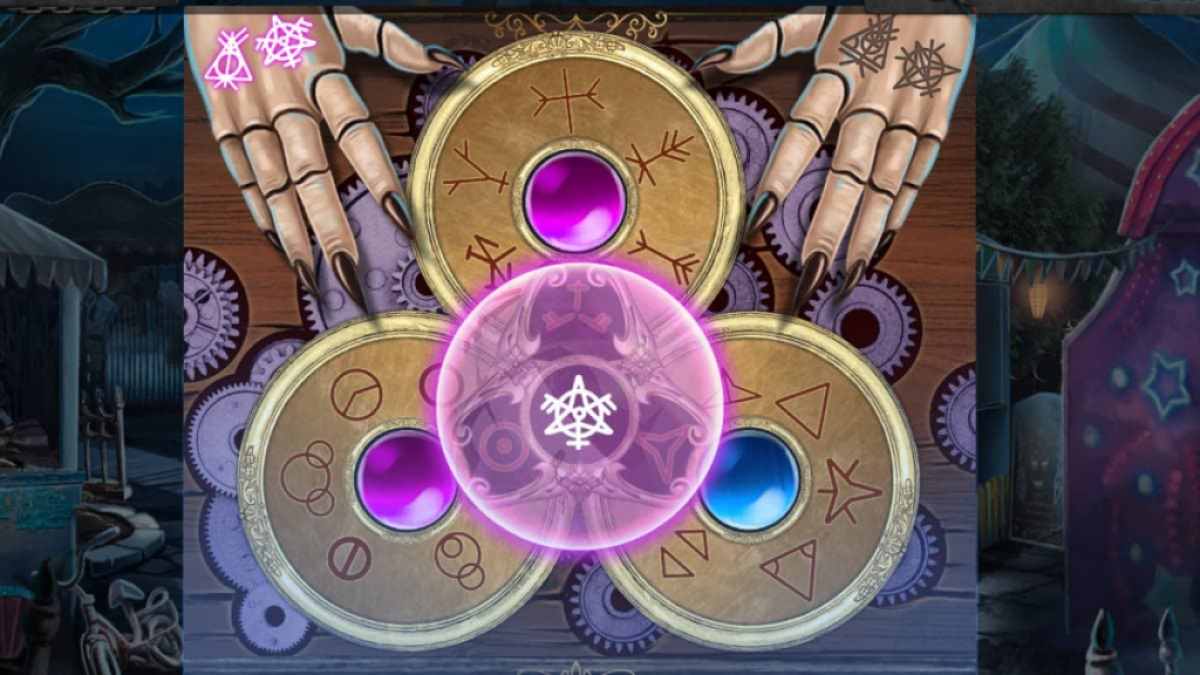
- Use the pouch of coins again and tap the fortune teller again to start a disc mini game.
- Move the discs to create the four symbols seen on the fortune teller's hands (Images 3-6).
- Tap the mosaic above the MAGICAL PREDICTION sign to start the mosaic mini game.
- Assemble the mosaic (Image 7), collect the door handle and the key with a horse.
- Go through the door on the right (7) and take the packet of balloons from the floor.
- Add the puck to the rusty air hockey table, use your pouch with coins and tap the table.
- Win a game of air hockey and take the red lever from the table drawer.
The arcade
You stumbled upon an arcade room shrouded in darkness, but each game offers an essential piece of the puzzle.


- View the stools (1) and use the razor blade to cut the stool open
- Collect the start scheme and the third mirror shard.
- Approach the wall behind the red stools (2) and solve the clown puzzle (Image 2).
- Collect the oiler and return to the tree with the hanging mannequin.
- View the control box (3) and use the key with a horse to unlock it.
- Add the lever and the start scheme to the box, and tap the buttons (Image 4) in the following order: C x3, D x1, A x1, B x2.
- Pull the lever and take the small key inside the box.
- Approach the carousel and inspect the sign.
- Unlock the weapon crate keypad (4) using the small key and input the code FUNERAL to open the crate.
- Take the toy gun and the start button.
- Go back to the air hockey room and add the toy gun to the game in the right-hand corner (5).
- Use the pouch of coins to insert a coin and press start.
- Move the crosshair and tap the toy gun to shoot.
- Hit all three targets and collect the creepy eye.


- Exit outside and go to the stand to the left.
- Add balloons to the inflator and use the code 139 to unlock the base cabinet.
- Collect the light bulb and hold the pump handle to inflate the balloon.
- Once the balloon is big enough, use the rope to tie it.
- Repeat the process three times, go back and tap the balloons to release them.
- Collect the mirror key from the floor and place it into the mirror room door (1).
- Turn the key left twice, right twice and then left once to unlock the door.
- Take the cute puppy and click the mirror to reflect the light onto a shelf.
- Approach the shelf (2), move the rubble from the middle shelf and collect the cute bunny.
- Add the light bulb to the spotlight and go back.
- Take the metal brush from the chest (3) and play the puzzle.
- Tap the mouths in the following order: A, B, C, D, E, F, G, B, H, D, B, G, D, A, G, A (Image 3).
- Collect the light bulb and the little kitten, and place the light bulb into the spotlight next to the chest.
- Start the second puzzle (4) and move the mirrors to reflect the light from all sources (Image 4).
The mirror room
The mirror room holds the key to progressing into the next area in Scary Horror 2. The three mirrors to the left serve as a puzzle you can solve using three seemingly innocent plushy toys.


- Approach the doors on the left (1) and place the following items in order from left to right: cute bunny, little kitten, cute puppy.
- Pull the levers into the correct positions from left to right: Up, down, middle.
- Take the clown nose and hammer among the mirror shards.
- Exit the mirror room and go back to the air hockey room.
- Add the hammer to the blue machine (2), use the pouch of coins and press start.
- Smash 20 clowns to win, move the pieces of the machine and collect the second creepy eye and the fourth mirror shard.
- Exit the room, go back to the clown mannequin and add creepy eyes, a ginger wig and a clown nose to the mannequin.
- Take the scary key from the mannequin's mouth and return to the mirror room.
- Approach the broken mirror (3) and add all four shards to the mirror.
- Exit the mirror room and view the giant skull building.
- Add the creepy face to the door and match the faces to the heads (Image 3).
- Insert the scary key into the keyhole and enter.
Related: Open 50 Doors Walkthrough
The House of Horrors
The train is disabled, the tunnel is boarded shut, and the two monster heads are missing a third one—sounds like a challenge!


- Collect the gas lighter (1) and approach the game (2).
- Add the start button and press it to begin the game.
- Press the buttons to stop the figures in the center of the lanes, and observe the numbers
- Go to the dark door (3) and ignite the lamplight using your gas lighter.
- Add the door handle to the keypad and use the code 28301 to unlock it and enter.
- Take the screwdriver on the shelf and go back to the train.
- Approach the broken lever (4) and unscrew it using the screwdriver.
- Add the monster head trophy between the two heads (5) and tap the middle head.
- Form the three symbols shown on the monsters heads (Images 2-4) to receive a locker room key.
- Use the broken lever to break the glass and collect the fire extinguisher.
- Go back to the fire and use the fire extinguisher.
- Move the fire debris and take the lever underneath.
- Add the lever to the podium (4) and approach the train wheels (6).
- Remove the stones to receive a radiotelephone headset and use the metal brush to clean the wheels from rust.
- Use the oiler on the wheels and pull the lever.
- Take the lantern next to the door and enter the tunnel behind the train.
- Use the lantern to drive off monsters and reach the station.
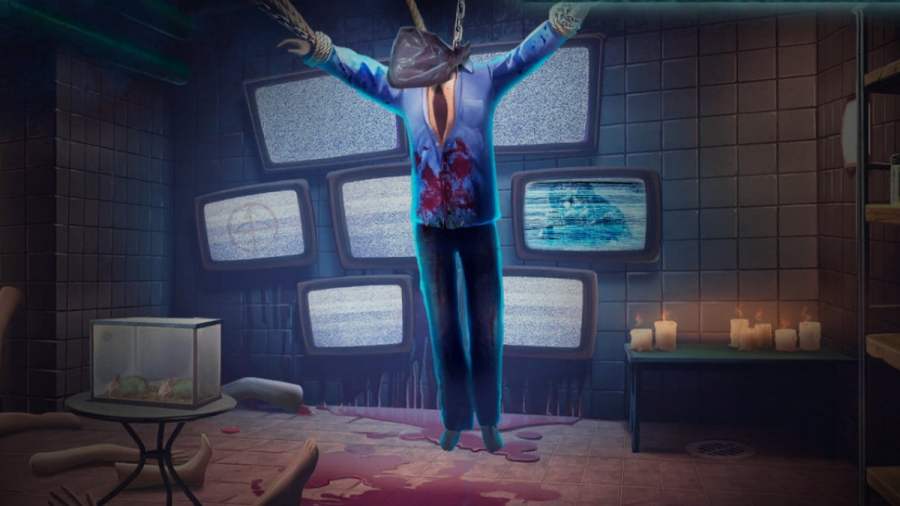
The Station
You've reached the end of the tunnel, both literally and figuratively! The exit door is closer than ever, but a mysterious masked man stands on the other side of the glass. He's not going to let you go that easily!


- Take the paper from the floor (1) and approach the red lockers.
- Open the locker using your locker key and collect the sheet with the code.
- Approach the reception desk (2) and add the radiotelephone headset.
- Look at the telephone dial and sort the numbers accordingly (Image 2).
- Take the wires from the broken phone and tap the suitcase.
- Type the code 3199 to unlock the suitcase and collect the remote control.
- Go to the TV screens (3), take the wires in the bottom-left corner and add the telephone wires.
- Rearrange the wires to their correct positions (Image 3) and add the remote control to the screens.
- Follow the number sequences on the screens and guess three times to receive a keyboard.
- Add the keyboard to the photo booth next to the locker.
- Type the code 12345, enter the booth and collect a baseball bat.
- Use the baseball bat to break the glass and escape.
For more point-and-click puzzle game walkthroughs, check out Room Escape Strange Case Walkthrough and Lost Lands 6 – Bonus Chapter Walkthrough & Solutions on Pro Game Guides.