
Dual Evidence is the first World Quest in the Old Notes and New Friends questline. Part of the objective is to follow the stone slate's guidance and obtain full clearance, you need to explore three areas in any order:
- Place of Rebirth
- Place of Breath
- Place of Swallowing
This guide will walk you through how to find the Place of Swallowing and solve all the puzzles to obtain clearance.
How to turn on the quest navigation in the Dual Evidence World Quest in Genshin Impact
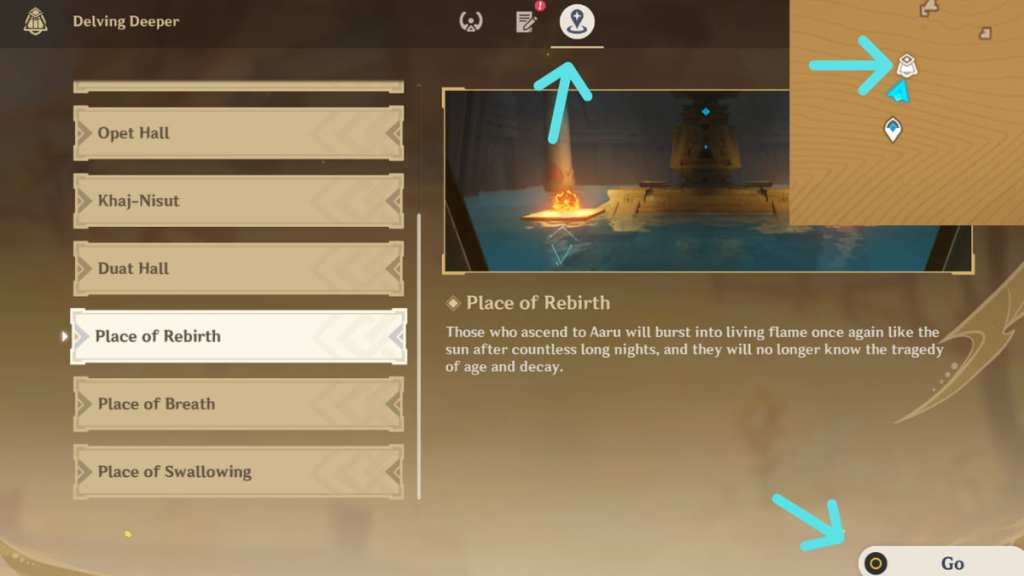
The quest marker doesn't work as it usually does in Dual Evidence. To help you get from one place to another, head to your Quest Item Inventory and open the Scarlet Sand Slate. Switch to the third tab and select the area you want to explore, then click Go when you're ready. The navigator will look like an icon of a slate on the World Map and mini-map.
Related: Genshin Impact Escape From the Hospital Achievement guide
Follow the stone slate's guidance and obtain full clearance Place of Swallowing guide – Genshin Impact
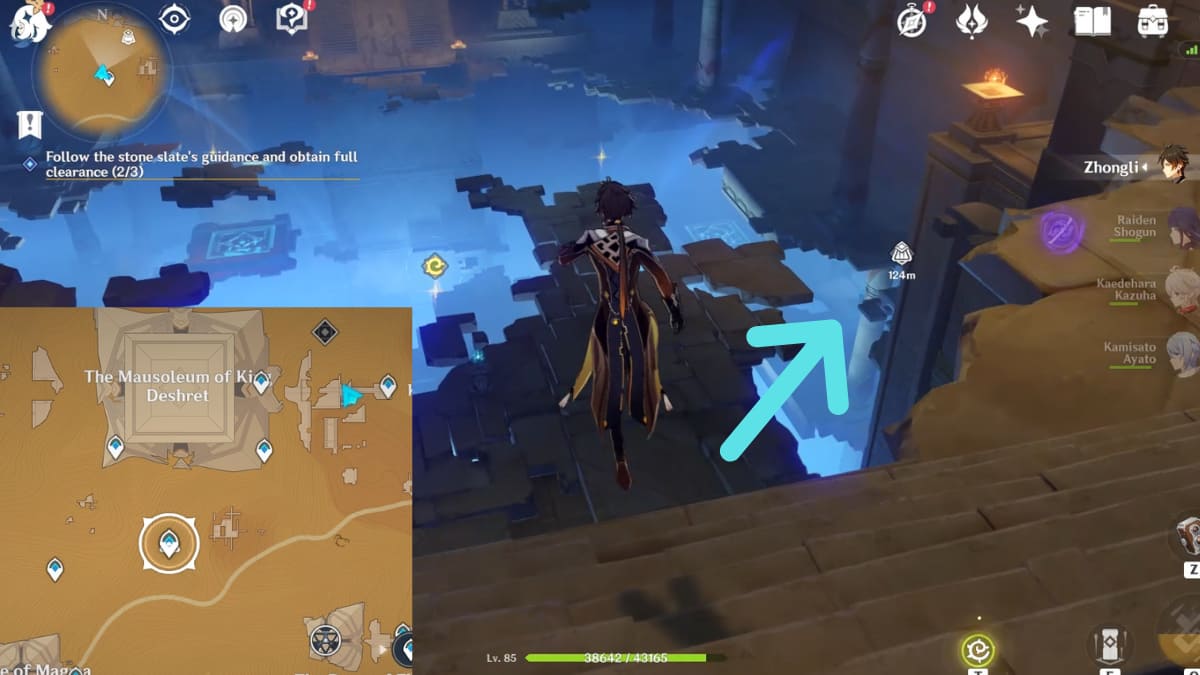
Head to the Teleport Waypoint south of The Mausoleum of King Deshret and enter the Duat Hall. You must glide toward the area the arrow points to in the image above to find a pyramid-shaped entrance. Upon entering, you'll find three torches that need to be lit using Primal Embers. All the Primal Embers are located in Duat Hall, and you can follow them in any order.
First Primal Ember
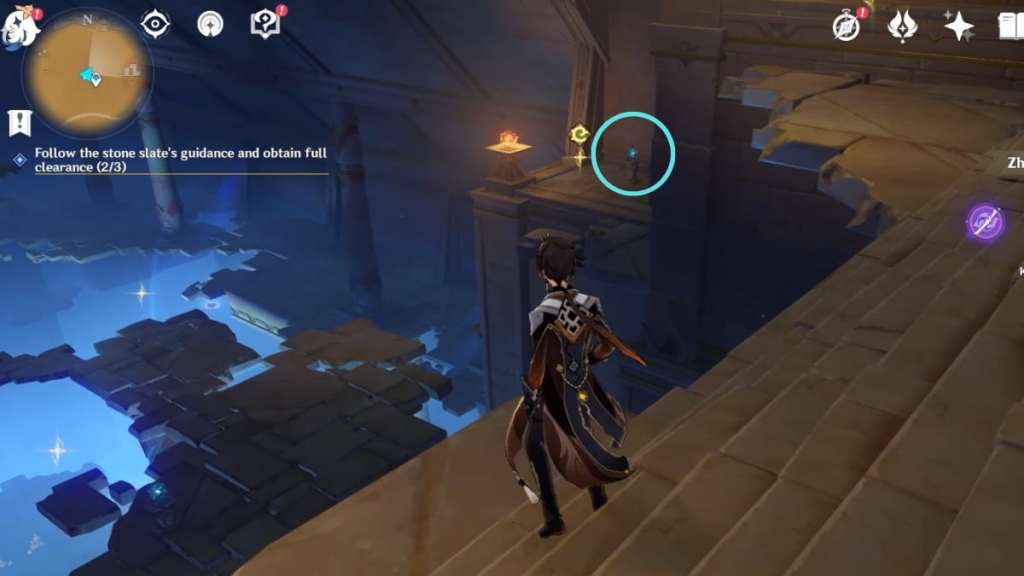
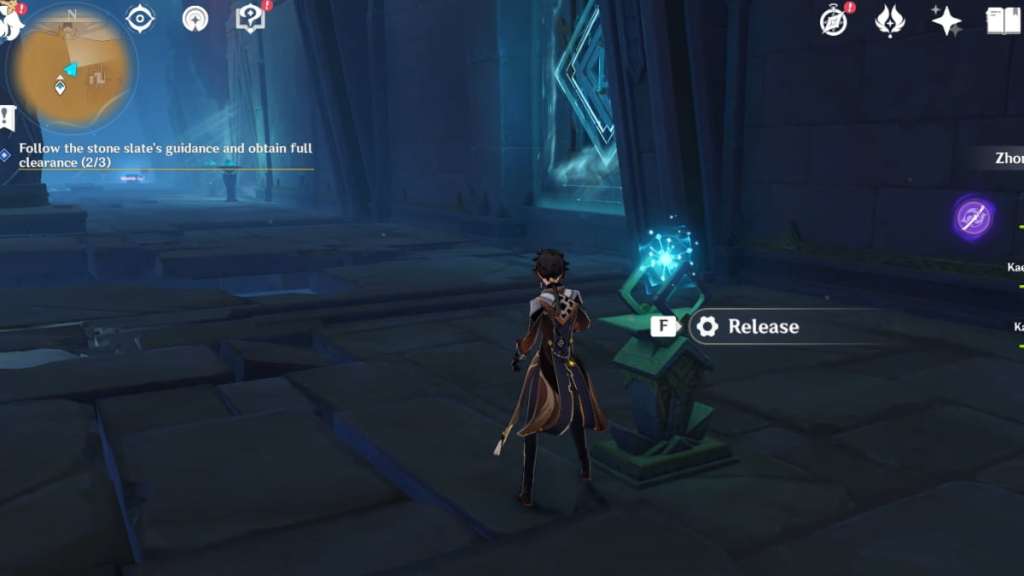
Teleport back to the Waypoint under The Mausoleum of King Deshret to enter Dual Hall. Turn right to find the first Primal Ember. Release it and begin following it back to its post.
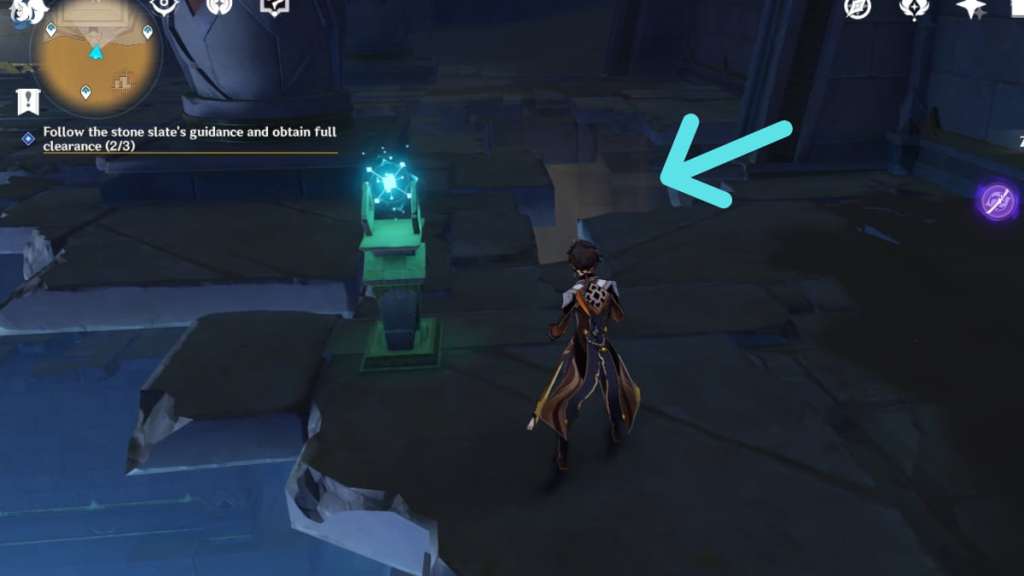
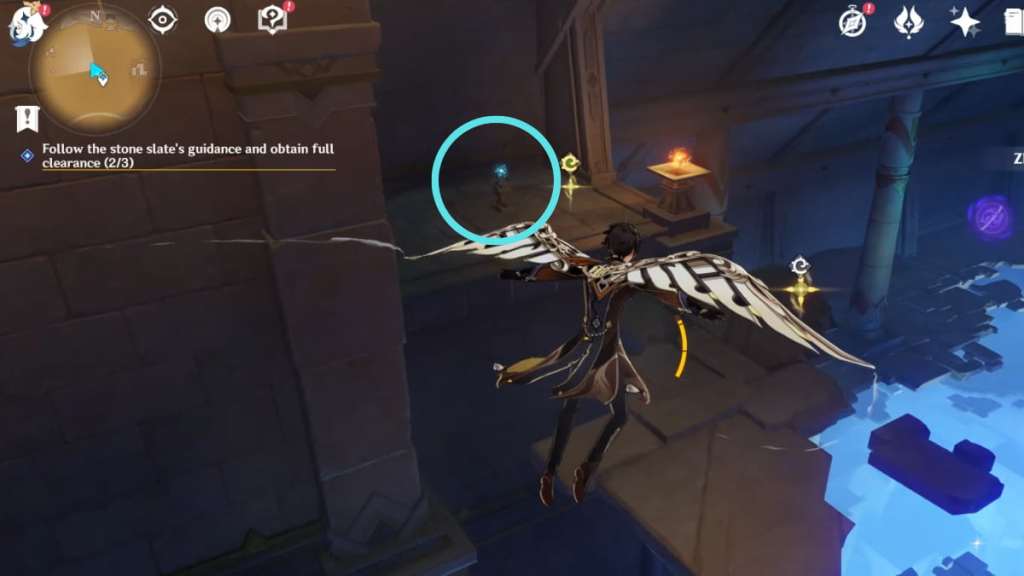
When the Primal Ember attaches itself to the device pictured above, be careful and wait for the sandstorm to end on the small crevice in the ground. The Primal Ember can't pass through when Large Fan Blades are turned on, so wait until there is no airflow before releasing. The rest of the path is straightforward—follow the Primal Ember to the main room to complete this segment.
Related: Genshin Impact What Does This Button Do? & The Breakthrough hidden Achievement guide
Second Primal Ember
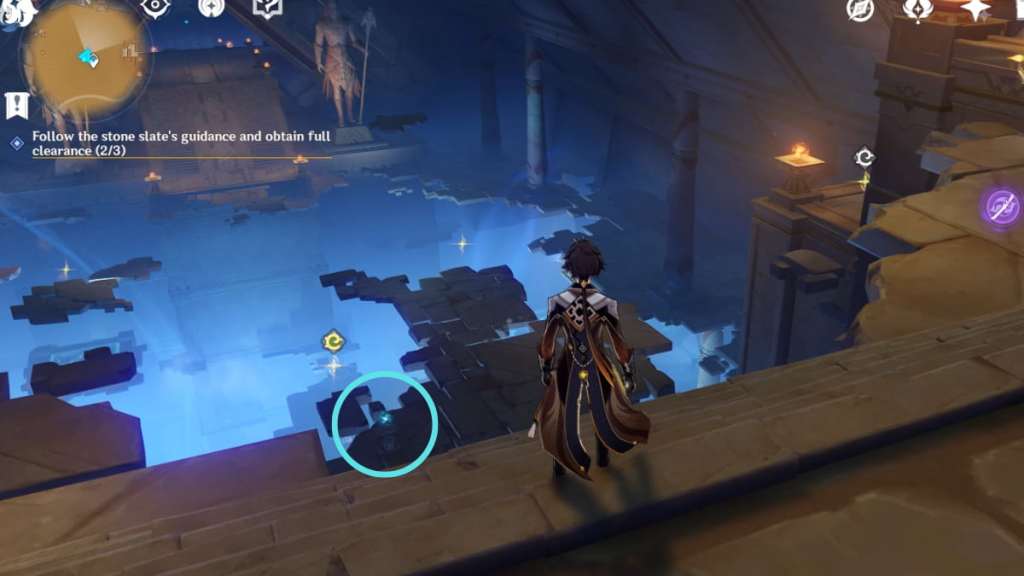
Teleport back to the Waypoint under The Mausoleum of King Deshret to enter Dual Hall. Glide toward the floating platform pictured above to find the second Primal Ember. Release it and begin following it back to its post.
This part is pretty straightforward, but when you reach the point pictured above, you must wait for the Large Fan Blade to turn off. Otherwise, the Primal Ember will be blown away by the sand current. Once you're through, follow the Primal Ember to the main room until it lights up its designated torch.
Third Primal Ember
Teleport back to the Waypoint under The Mausoleum of King Deshret to enter Dual Hall. Turn left to find the first Primal Ember. Release it and begin following it back to its post. This Primal Ember will take you on a tour around the floating platforms, so watch your step and glide carefully to avoid falling off.

As soon as you release the Primal Ember, it will float downward. You must wait until the Large Fan Blade turns off before prompting the Primal Ember to move again. Otherwise, the wind current will make the Ember float back to its previous post, and you'll have to start all over again. The rest of the path is straightforward—accompany the Primal Ember to the main room until it lights up its torch, completing this segment. A small cutscene will play, and you'll obtain one of the three clearances you need to complete this segment in the Dual Evidence World Quest.
Check out our Genshin Impact Afratu’s Dilemma World Quest guide to complete another important World Quest in the desert.