
The Golden Apple Archipelago is back for Genshin Impact's Summertime Odyssey event, which runs from July 15, 2022, to August 24, 2022. Various characters will have personalized Domains (also called Mirage) that you can clear once to loot a ton of Chests and learn more about their lore. Fischl's Mirage is the Immernachtreich Apokalypse, which is divided into three parts. In Part 3, you can loot four Chests and one Nightwatch Contract.
How to unlock the Immernachtreich Apokalypse Part 3
To unlock Part 3 of the Immernachtreich Apokalypse Mirage, all you need to do is complete the second part. At the end of Part 2, you'll find the third volume of the Hymn of the Holy Land. Opening it will transport you into the second segment of the Mirage.
All puzzle solutions and Chest locations in Immernachtreich Apokalypse Part 3
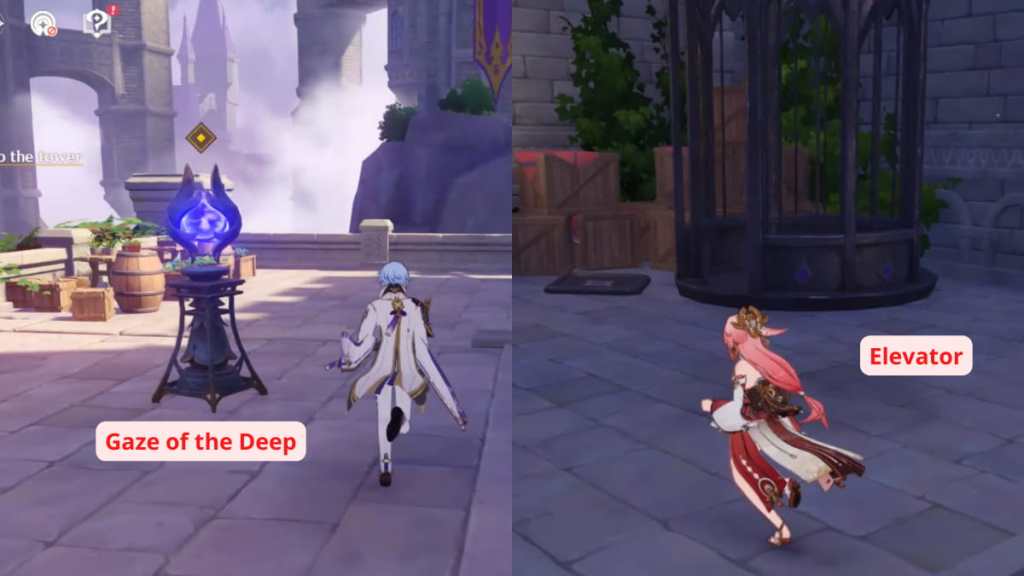
Before starting, reference the image above for two common terms used in this guide. The Gaze of the Deep is the primary puzzle mechanic across the Mirage. Meanwhile, the Elevator can be used to go up and down floors. If you left an Elevator upstairs or downstairs, step on the small platform on the side to summon it.
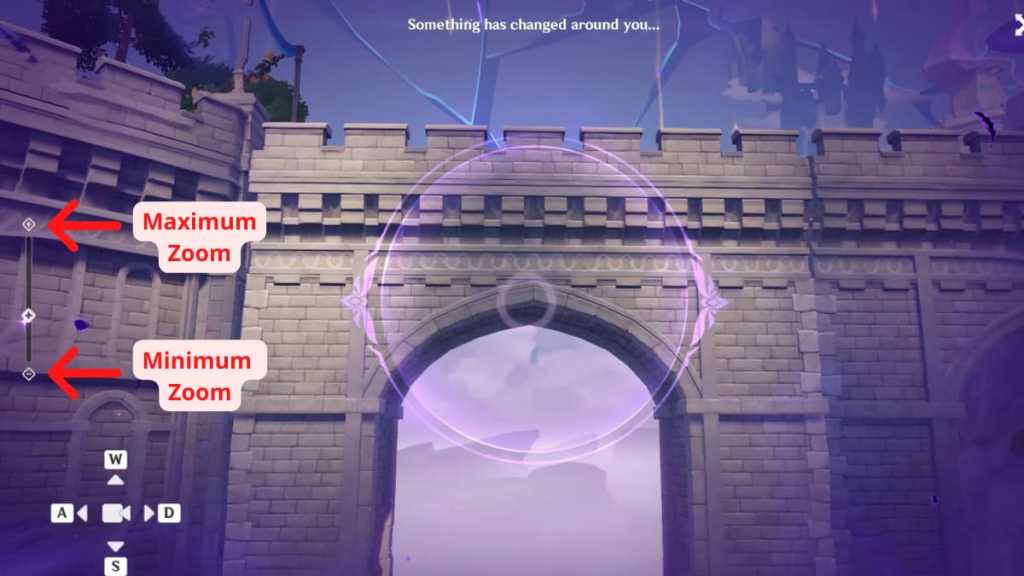
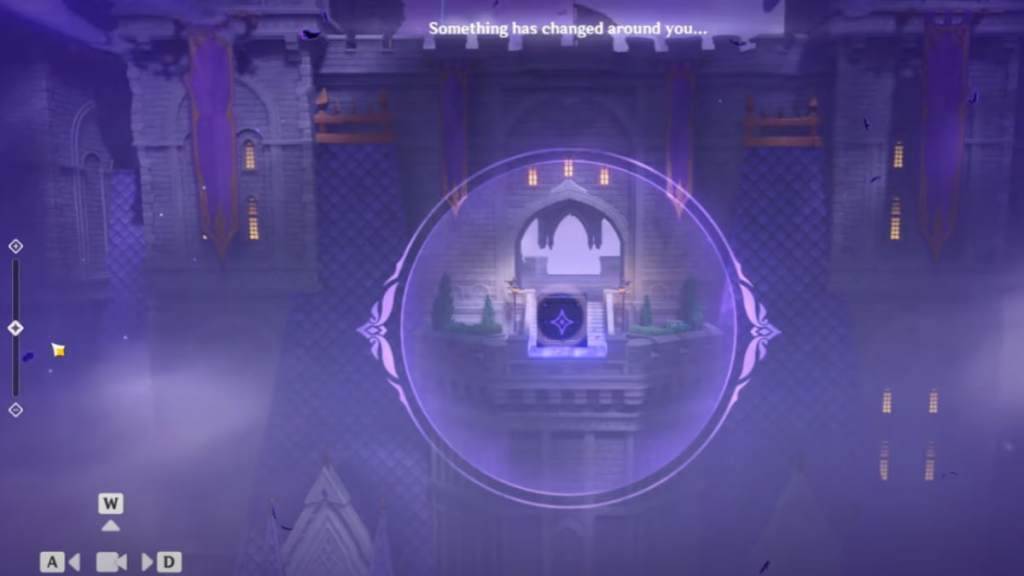
You need to adjust the camera angles to solve Gaze of the Deep puzzles. The directional angles need some approximating, but the camera zoom can be calculated by adjusting the zoom bar on the left. So if our instruction is to "set the camera zoom to +4 of the minimum," we mean to set the zoom to the minimum, then click the plus sign four times.
Chest #1 (Quest Item - Nightwatch Contract)
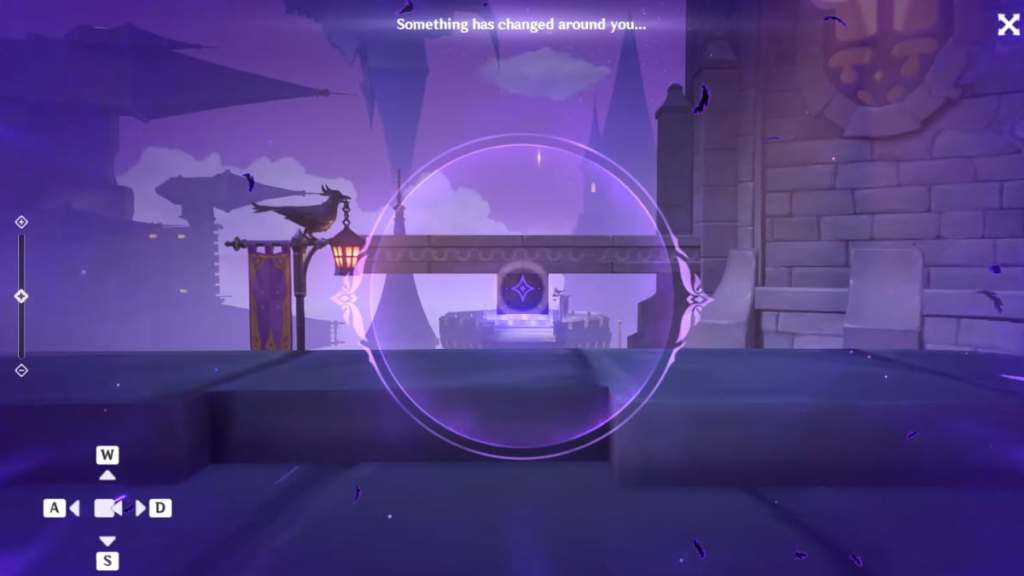
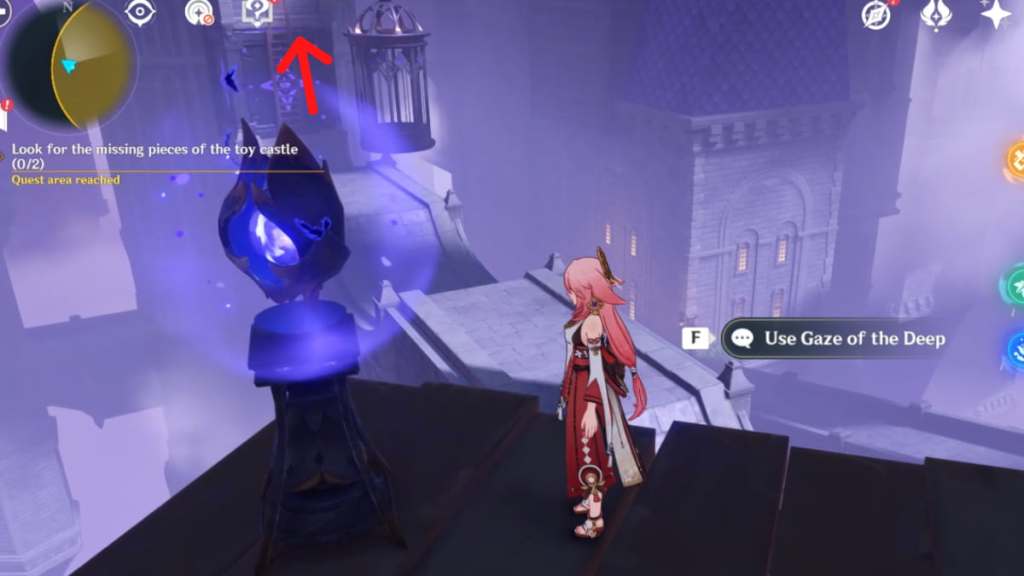
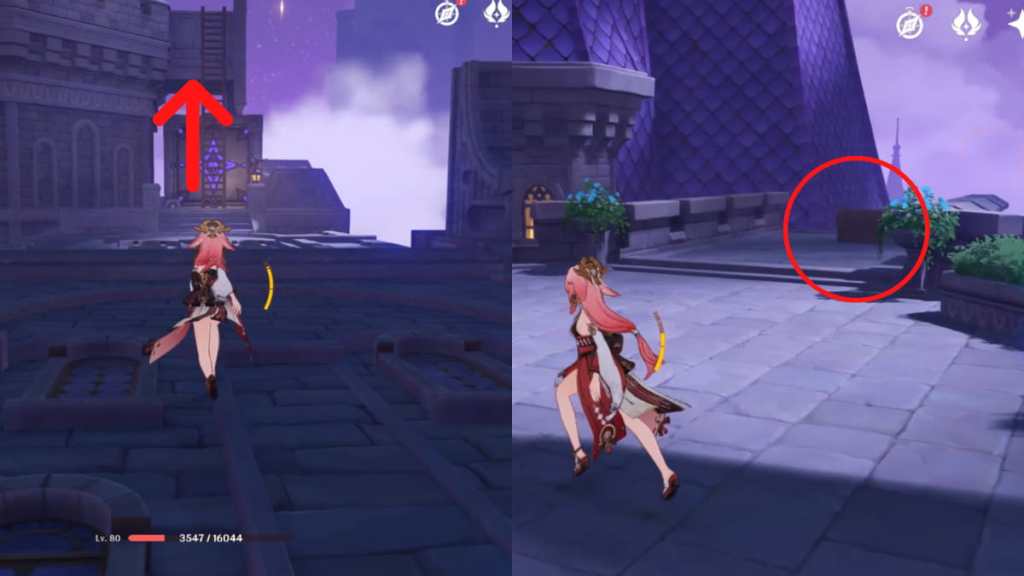
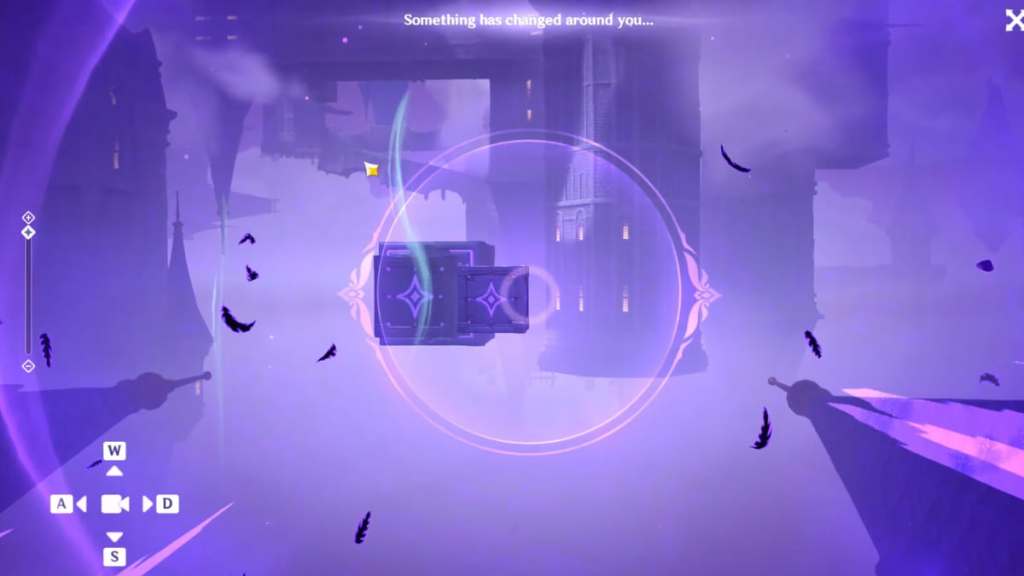
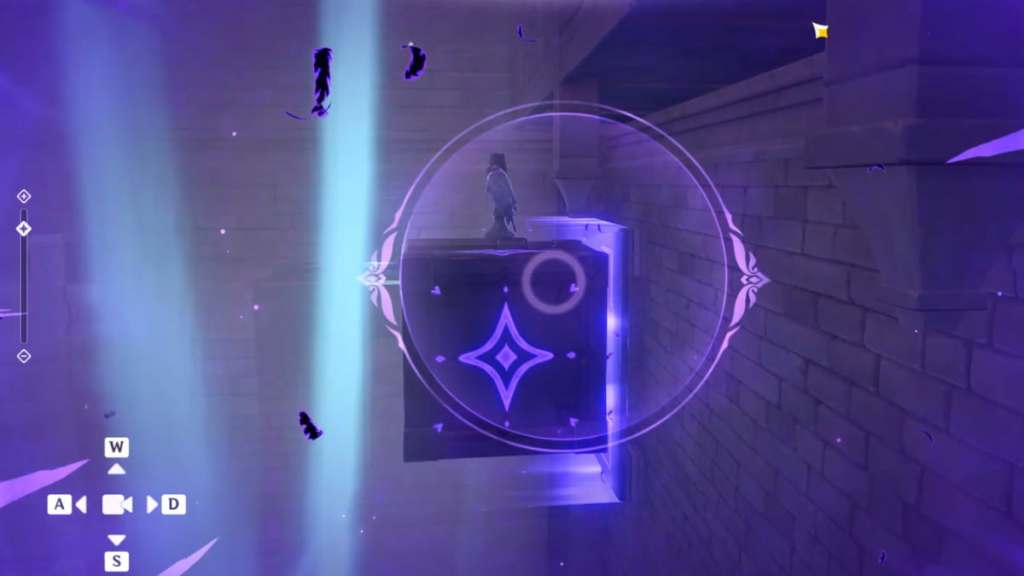
- Upon entering the Mirage, you'll find a Gaze of the Deep. Use it and reference the image above for the approximate zoom and angle used or follow the steps below to solve the puzzle to connect the tile.
- Move the camera upward.
- Move the camera slightly right.
- Once that's done. A bridge will emerge. Cross the bridge to find a glowing Investigate spot that will prompt dialogue.
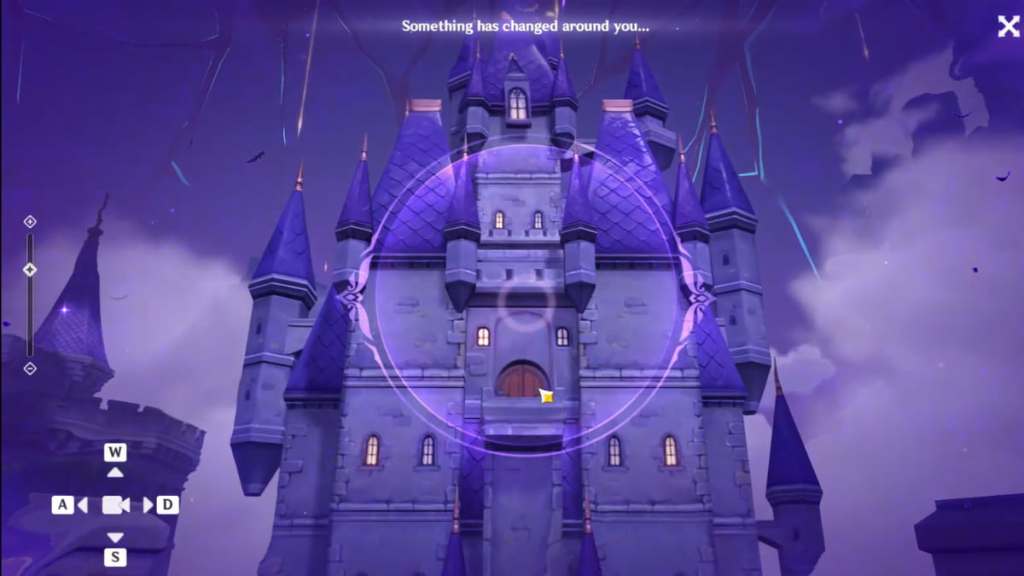
- You'll find yourself in a clearing that we'll label as the starting point in this guide. Assuming the floating castle is in front of you, turn left to cross the bridge.
- Defeat the Hilichurls and Abyss Mage that intercept you. You'll see a Gaze of the Deep ahead.
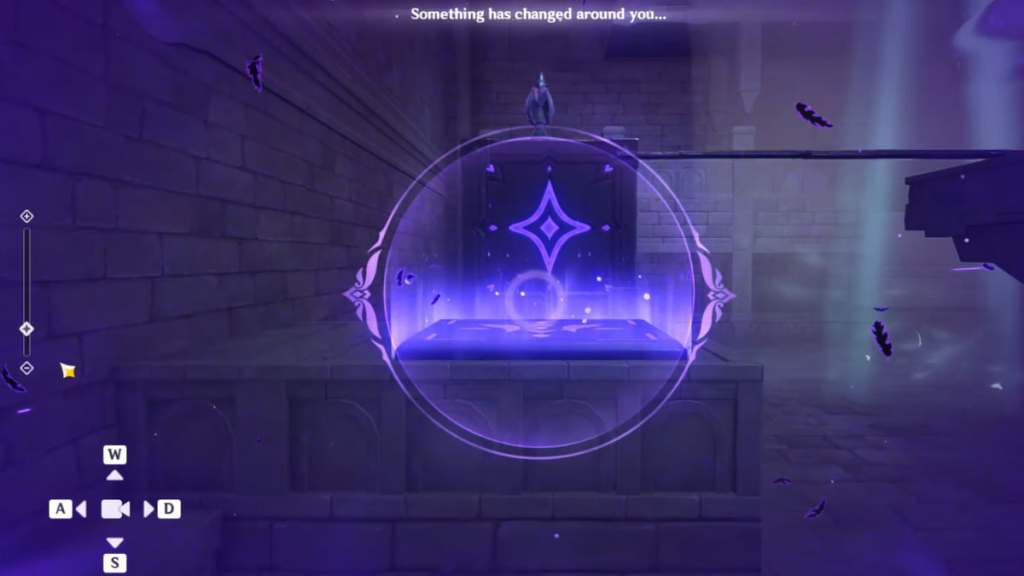
- Use the Gaze of the Deep and reference the image above for the approximate zoom and angle used or follow the steps below to solve the puzzle to connect the tile.
- Move the camera downward.
- After that, turn right toward the bridge with the Hilichurls.
- Keep going straight until you reach the very edge, where you'll find a Precious Chest that contains the Quest Item Nightwatch Contract.
Chest #2
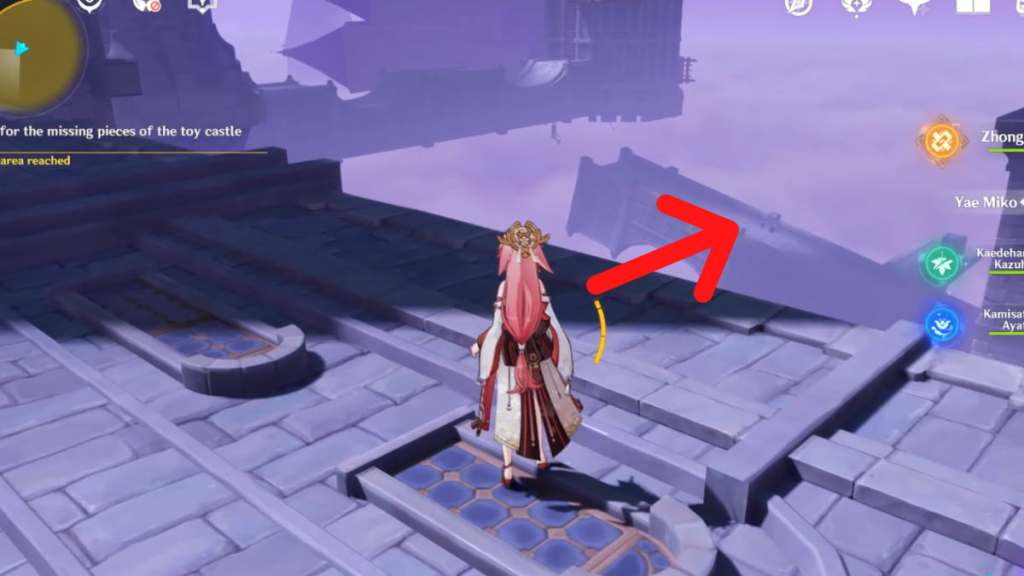
- After looting the Chest, turn around and run straight ahead, but keep your eyes on the right side.
- Once you see the bridge referenced in the image above, glide over to it.
- Once you're on the bridge, turn right and you'll find a Gaze of the Deep beside an Elevator.
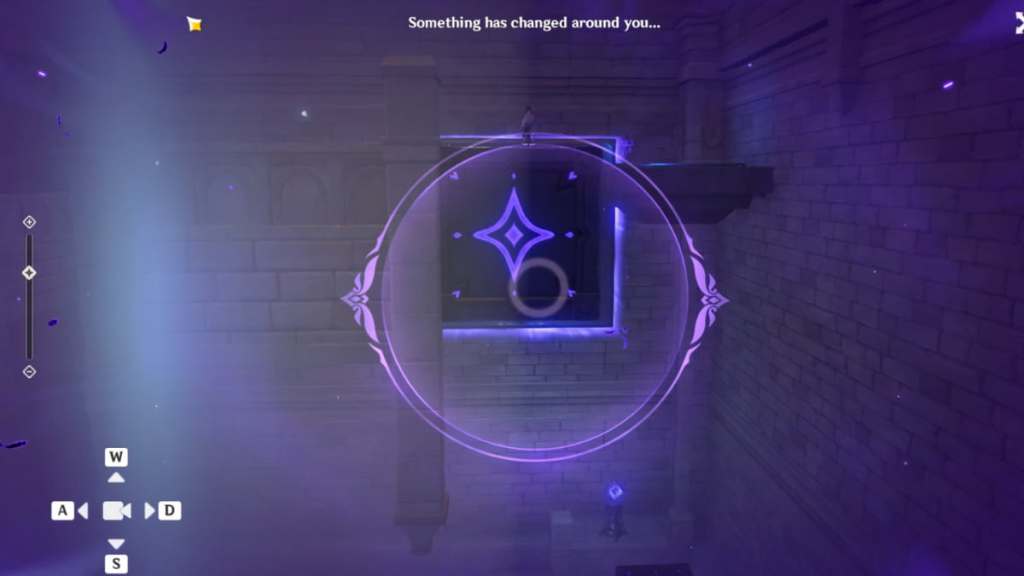
- Use the Gaze of the Deep and reference the image above for the approximate zoom and angle used or follow the steps below to solve the puzzle to connect the tile.
- Move the camera upward.
- Move the camera right.
- After that, step on the Elevator and let it take you up.
- Upon leaving the Elevator, turn left and climb the ladder. There's another Gaze of the Deep on a ramp at the top of the ladder.
- Use the Gaze of the Deep and reference the image above for the approximate zoom and angle used or follow the steps below to solve the puzzle to connect the tile.
- Move the camera right.
- Move the camera slightly upward.
- Once you're done, glide back to the bridge on the right.
- Climb the ladder up. You will see a fountain.
- From the fountain, turn right and defeat the enemies that intercept you.
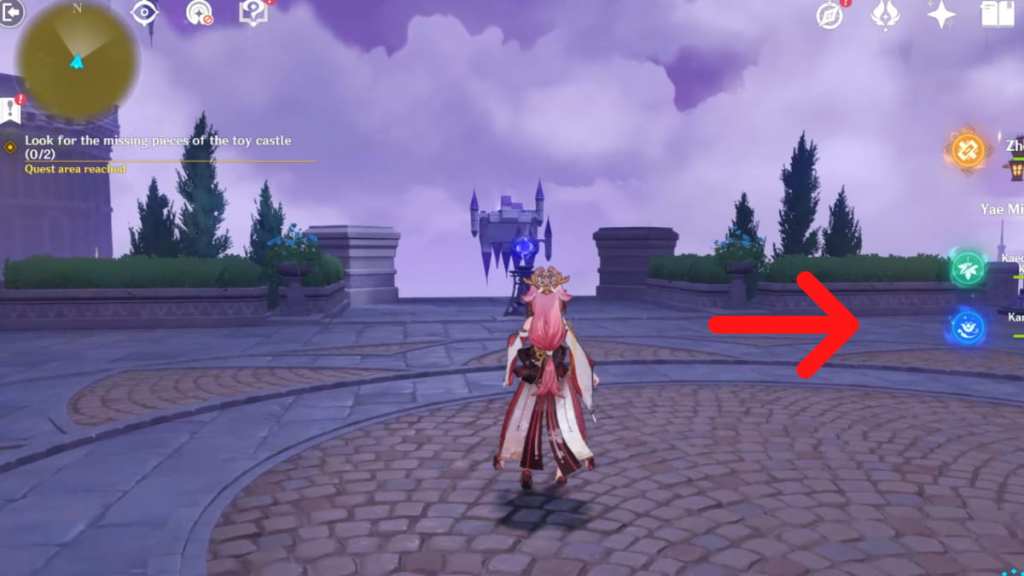
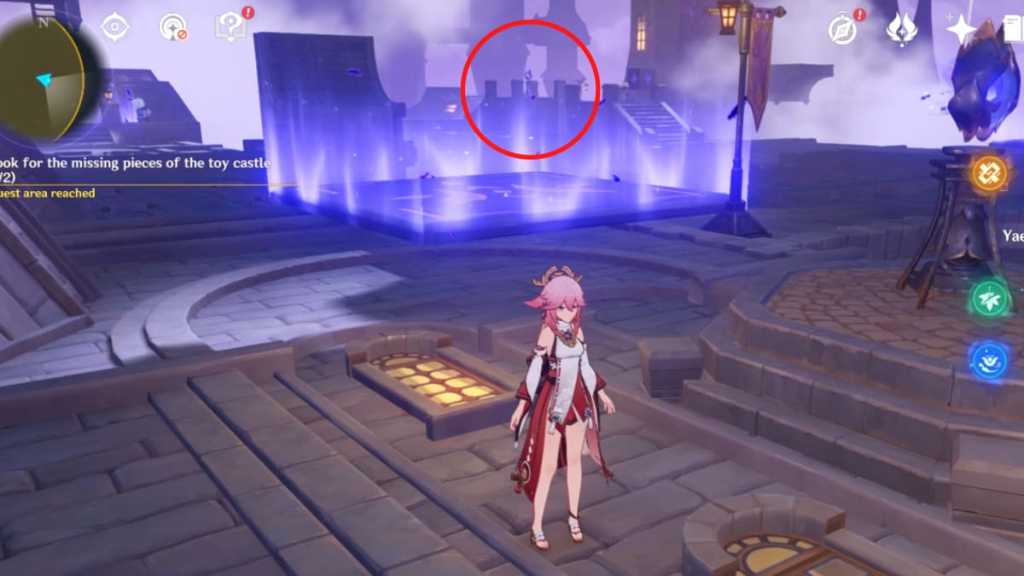
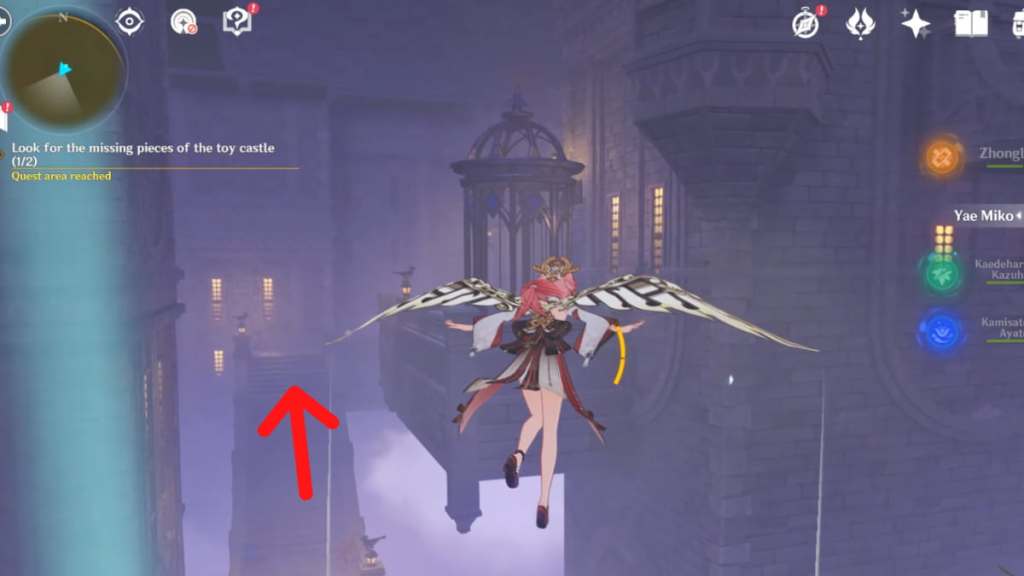
- Keep going forward until you see the first piece of the toy castle.
- Approach the toy castle to claim it. You know it's been claimed when it disappears.
- After that, turn right and you'll see a wind current.
- Use the wind current to glide onto the clearing on the right, which is the starting point of the Mirage.
- From the starting point, assuming that the floating castle is in front of you, turn right.
- You'll encounter a Gaze of the Deep and some Hilichurls. Defeat the enemies to get them out of the way.
- Use the Gaze of the Deep and reference the image above for the approximate zoom and angle used or follow the steps below to solve the puzzle to connect the tile.
- Set the camera zoom to the minimum.
- Move the camera upward.
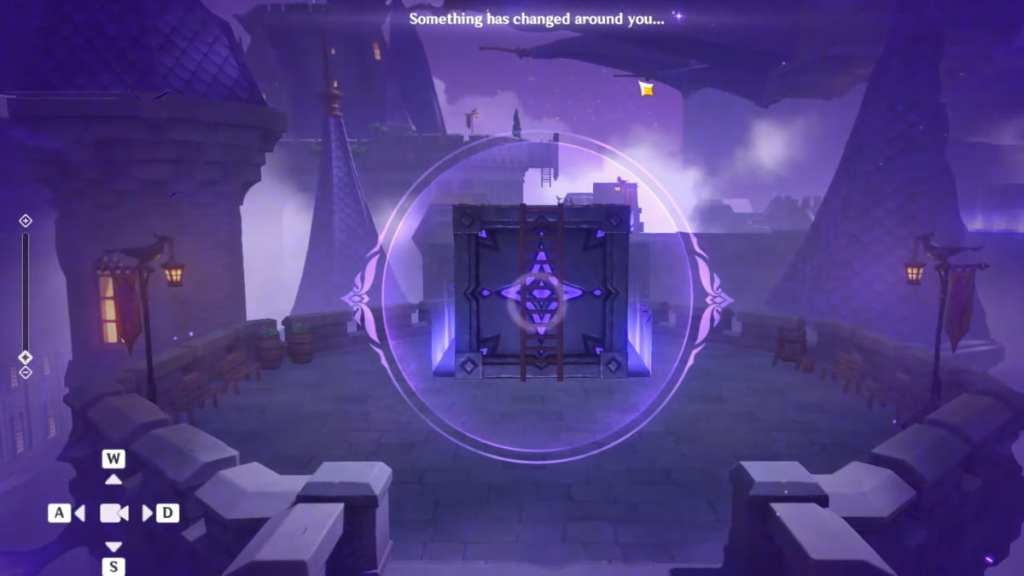
- Climb up the ladder and glide toward the next platform.
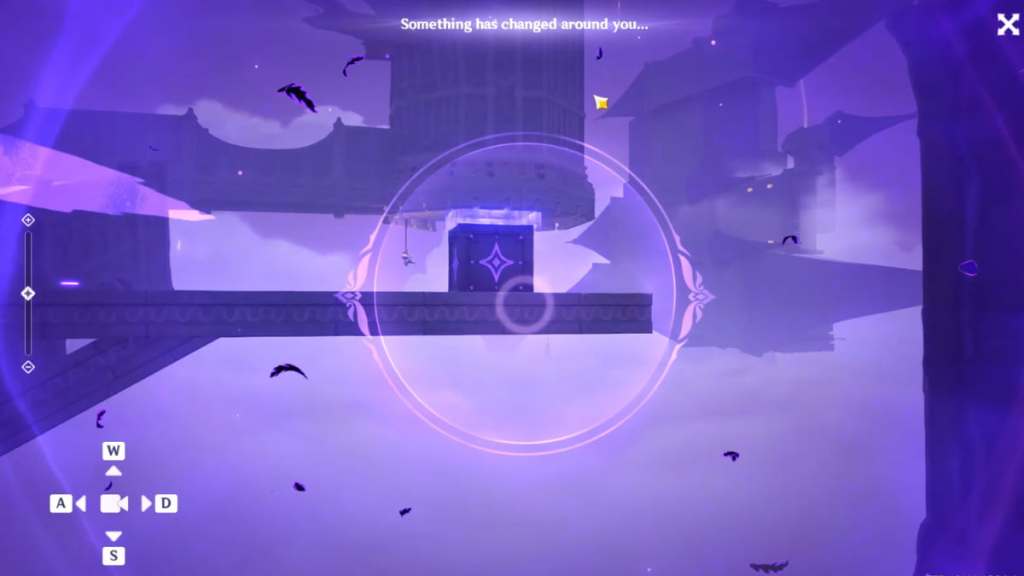
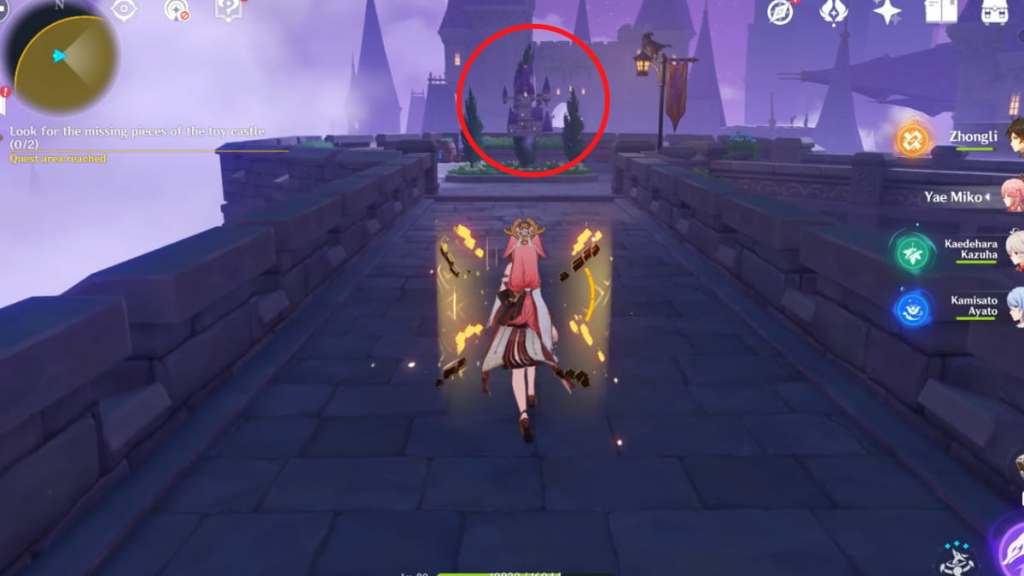
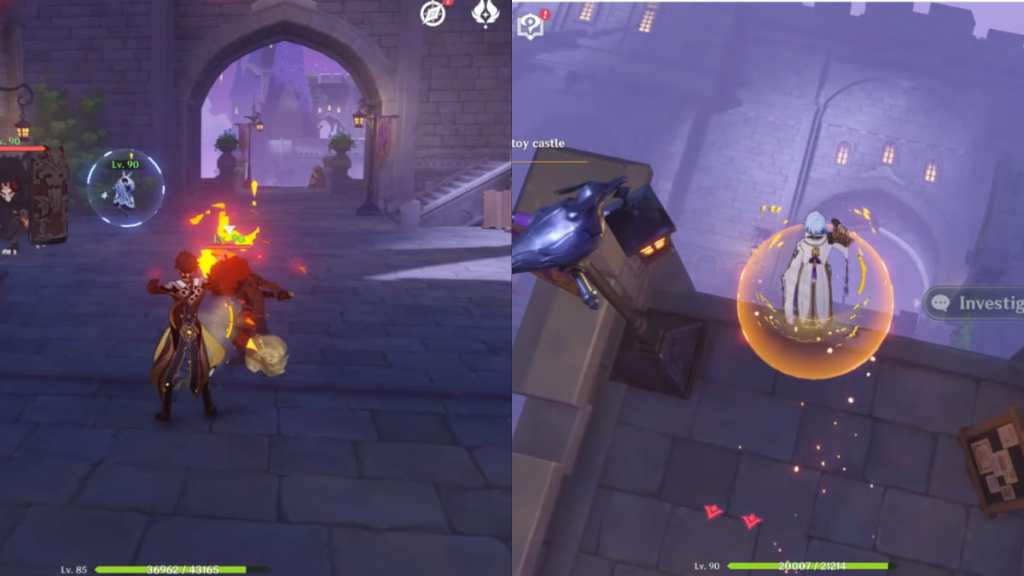
In this new clearing, you will see multiple Gazes of the Deep. They need to be cleared in a specific order.
- Start by heading to the area circled in the image above. You'll find a Gaze of the Deep there.
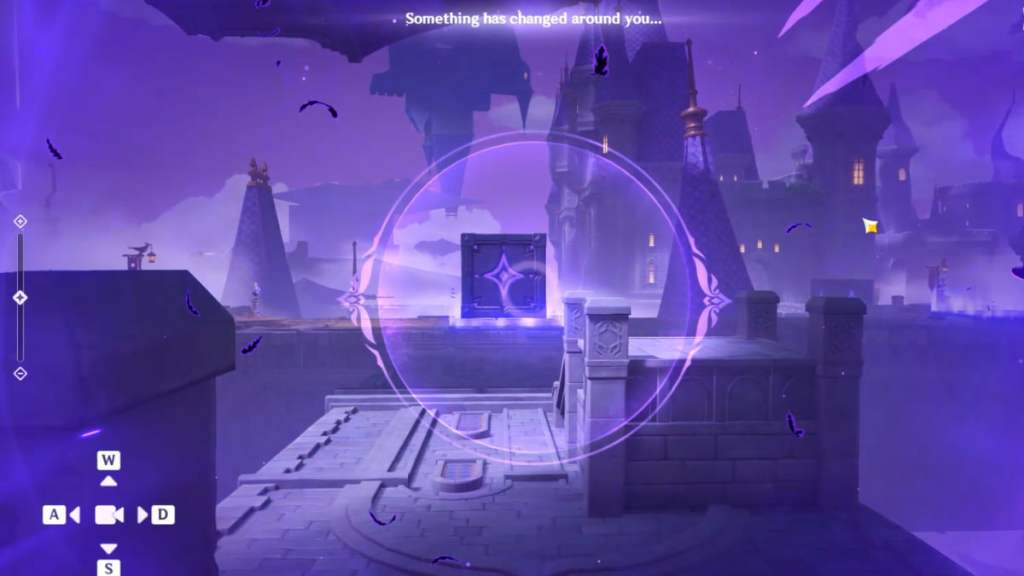
- Use the Gaze of the Deep and reference the image above for the approximate zoom and angle used or follow the steps below to solve the puzzle to connect the tile.
- Move the camera left.
- Run forward, then turn left. You'll find another Gaze of the Deep, but save that for later.
- Keep running behind the Gaze of the Deep until you get to the very edge, where you'll find a Common Chest to loot.
- After looting the Chest, turn back and solve the Gaze of the Deep.
Chest #3
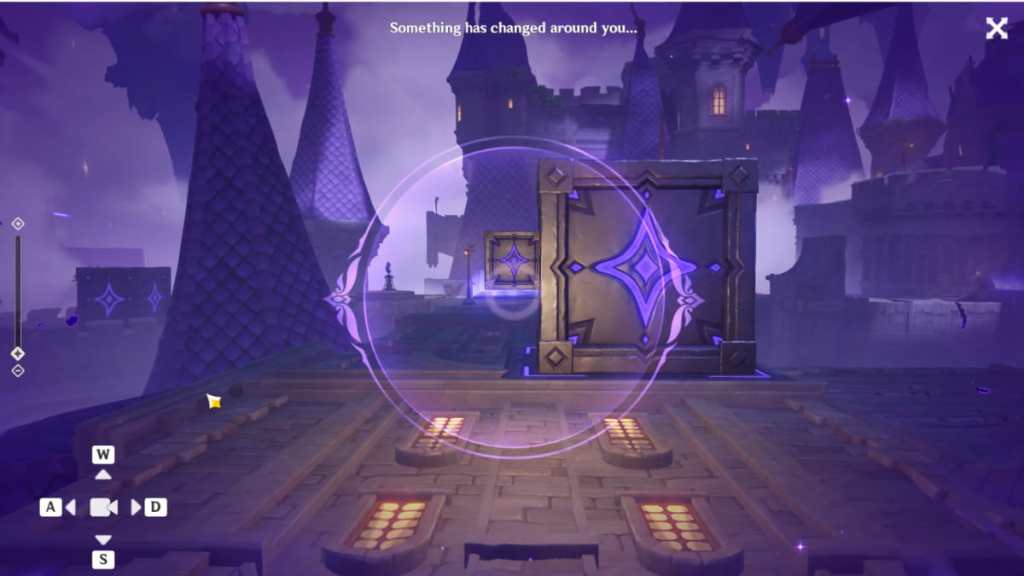
- Use the Gaze of the Deep and reference the image above for the approximate zoom and angle used or follow the steps below to solve the puzzle to connect the tile.
- Set the camera zoom to the minimum.
- Move the camera upward.
- After that, run forward and turn left to find the last Gaze of the Deep.
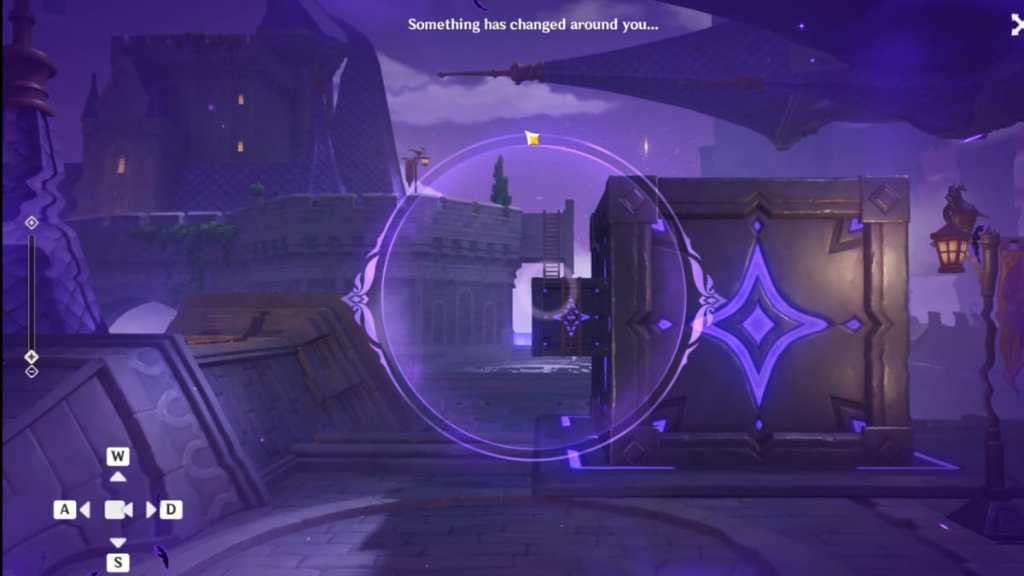
- Use the Gaze of the Deep and reference the image above for the approximate zoom and angle used or follow the steps below to solve the puzzle to connect the tile.
- Set the camera zoom to the minimum.
- Move the camera upward.
- Move the camera left.
- Head straight ahead and climb the ladder.
- Once you're up, turn right to find a Common Chest.
Chest #4 (Quest Item - Nightwatch Contract)
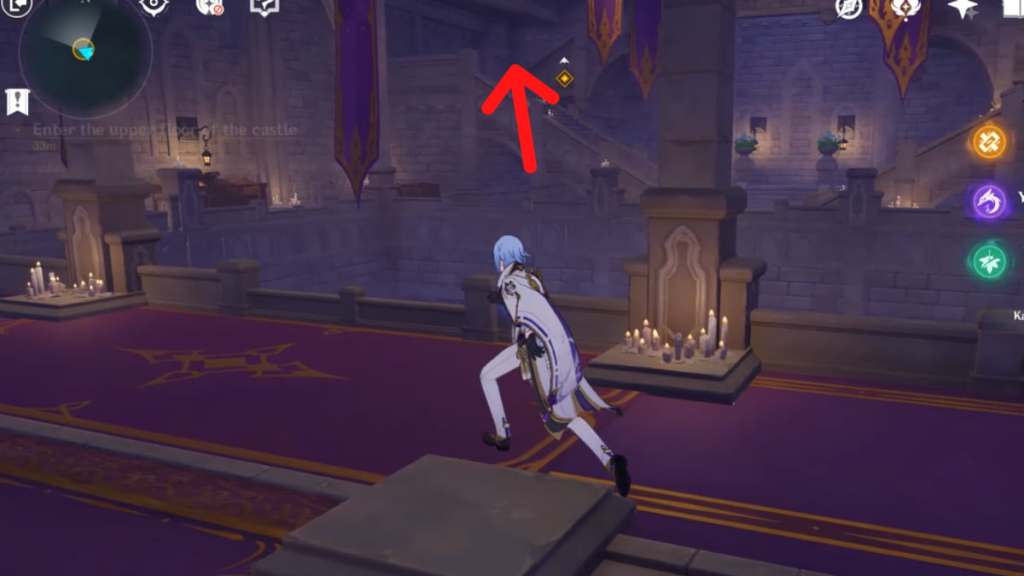
- After looting the Chest, follow the path ahead. A lot of Hilichurls and Abyss Mages will attack you, so just get rid of them along the way.
- Keep following the path until you see an enclosed space with an arch exit.
- Enter that arch, then glide down to the very bottom.
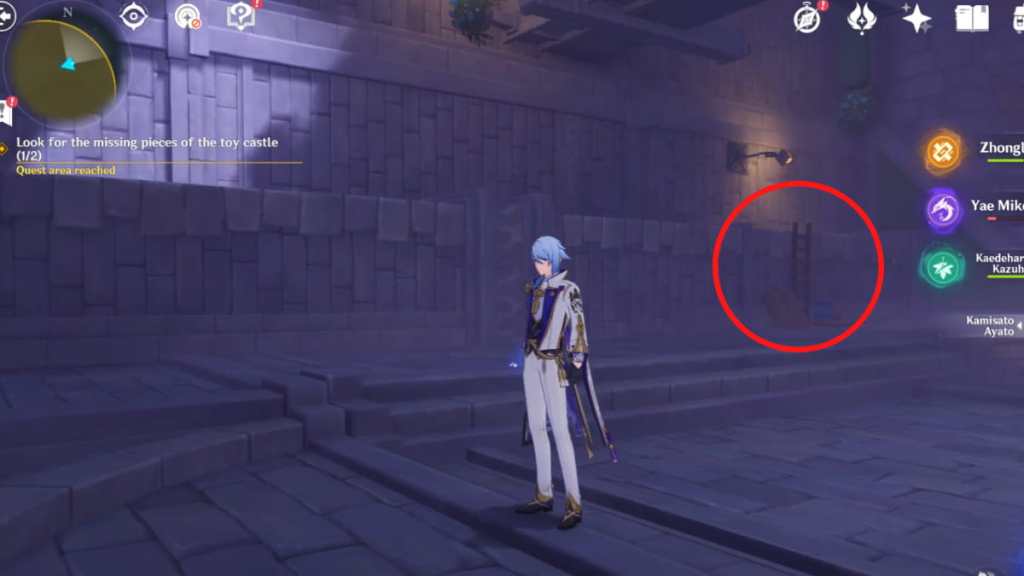
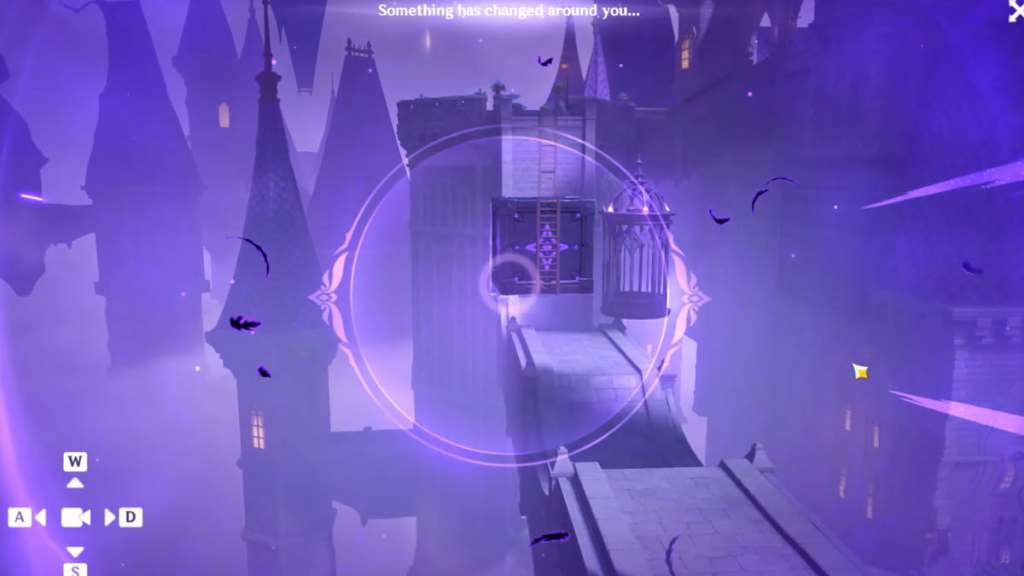
You'll find yourself in a clearing with two Gazes of the Deep and wind currents. But first, turn your attention to the ladder circled in the image above.
- When you climb the ladder, you'll be on a narrow ledge that will go around the structure. You need to follow the path of the narrow ledge to find a Chest.
- The path is as follows: Climb the ladder > go straight ahead > turn right > turn right. You'll see a Precious Chest that you can loot for another Nightwatch Contract.
- After looting, head back to the clearing to solve the Gazes of the Deep.
This is the last Chest, but you need to power through the rest of the Mirage to complete the Event Quest and unlock more things to do in the Golden Apple Archipelago.
- Assuming the wind currents are in front of you, use the Gaze of the Deep on the left and reference the image above for the approximate zoom and angle used, or follow the steps below to solve the puzzle to connect the tile.
- Move the camera downward.
- Move the camera left.
- Next, use the Gaze of the Deep on the right and reference the image above for the approximate zoom and angle used, or follow the steps below to solve the puzzle to connect the tile.
- Set the camera zoom to the maximum.
- Move the camera upward.
- Move camera left.
- Use the wind currents to propel you upward, then glide toward the staircase on the left.
- Follow the staircase upward, and you will find the second toy castle. Make sure that it disappears to indicate that it's been claimed.
- After getting the toy castle, keep going upward and step on the Elevator. It will take you back to the starting point.
- Use the Gaze of the Deep and reference the image above for the approximate zoom and angle used, or follow the steps below to solve the puzzle to repair the castle.
- Set the camera zoom to -7 of the maximum.
- Move the camera downward.
- A wind current will appear. Use it to glide to the library, where you'll meet your good friend Leon in another precarious situation.
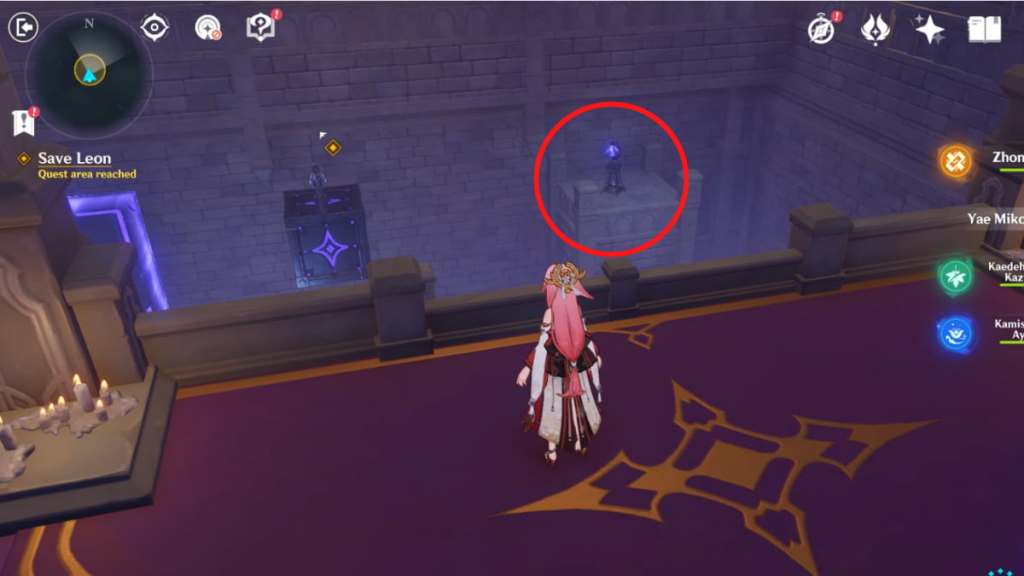
There are three Gazes of the Deep in the area, but they need to be solved in a specific order. The first one is circled in the image above. The second is at the very bottom of the pit, and the third is basically the last one in the area.
- Use the Gaze of the Deep and reference the image above for the approximate zoom and angle used, or follow the steps below to solve the puzzle to connect the tile.
- Move the camera upward.
- Move the camera left.
- If it's still not capturing, try setting the camera zoom to -2 of the maximum.
- Glide down to find the second Gaze of the Deep.
- Use the Gaze of the Deep and reference the image above for the approximate zoom and angle used, or follow the steps below to solve the puzzle to connect the tile.
- Set the camera zoom to +5 of the minimum.
- Use the wind current to propel yourself to the platform containing the last Gaze of the Deep.
- Use the Gaze of the Deep and reference the image above for the approximate zoom and angle used, or follow the steps below to solve the puzzle to connect the tile.
- Set the camera zoom to -9 of the maximum.
- Move the camera downward.
- Once that's done, use the wind current to propel yourself upward again, then speak to Leon.
- Climb up the stairs.
- At the very top, you'll find the last barrier. Interact with it to get through.
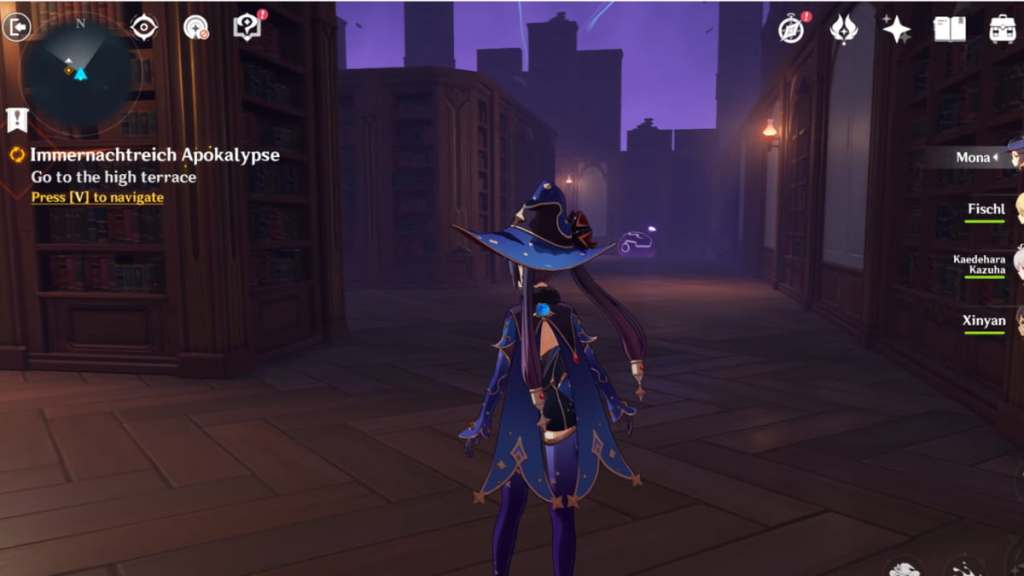
Dialogue between the cast will play. After, you'll be in a party with trial characters Mona, Fischl, Kazuha, and Xinyan. You need to find a way through the library maze. There will be enemies but defeating them is optional.
- From this position, follow these exact steps to make it out of the maze: left > left > right > right > left > left > left > right > right > left > left > left > right > right > left > left.
A cutscene and dialogue will play afterward, marking the end of Fischl's Mirage and Event Quest. If you missed any of the Chests in any Parts, simply head to Fischl's Island north of the Twinning Isle, then interact with the book and select Immernachtriech Keep. Under Phantasmal Tales, select which part you want to play, then click Enter Mirage at the bottom right of the screen.
Other Immernachtreich Apokalypse guides
- Immernachtreich Apokalypse Part 1 walkthrough – Genshin Impact Summertime Odyssey Fischl Mirage Chest & puzzle guide
- Immernachtreich Apokalypse Part 2 walkthrough – Genshin Impact Summertime Odyssey Fischl Mirage Chest & puzzle guide
Check out our Genshin Impact Resonating Visions event guide – All Phantasmal Conch locations for free Fischl skin! to collect the Prinzessin's Outfit, which was also featured in this Mirage!