
The Golden Apple Archipelago is back for Genshin Impact's Summertime Odyssey event, which runs from July 15, 2022, to August 24, 2022. Various characters will have personalized Domains (also called Mirage) that you can clear once to loot a ton of Chests and learn more about their lore. Fischl's Mirage is the Immernachtreich Apokalypse, which is divided into three parts. In Part 1, you can loot three Chests and a Nightwatch Contract.
How to unlock the Immernachtreich Apokalypse Event Quest and Domain in Genshin Impact
You can unlock the Immernachtreich Apokalypse Event Quest after completing the following:
- The Golden Apple Vacation Returns!
- As the Courtyard in Spring Once Appeared (all three Parts of the Mirage)
- Blazin' Trails! (Event Quest only, the Mirage is optional)
After completing Blazin' Trails!, you will automatically get a prompt to change your in-game time to 6:00-24:00 of the next day and begin the Immernachtreich Apokalypse Event Quest. Much like Kazuha's segment, the Immernachtreich Apokalypse quest and Mirage are interconnected, so you'll need to complete all parts of Fischl's Domain to proceed with the rest of the event content.
All puzzle solutions and Chest locations in Immernachtreich Apokalypse Part 1
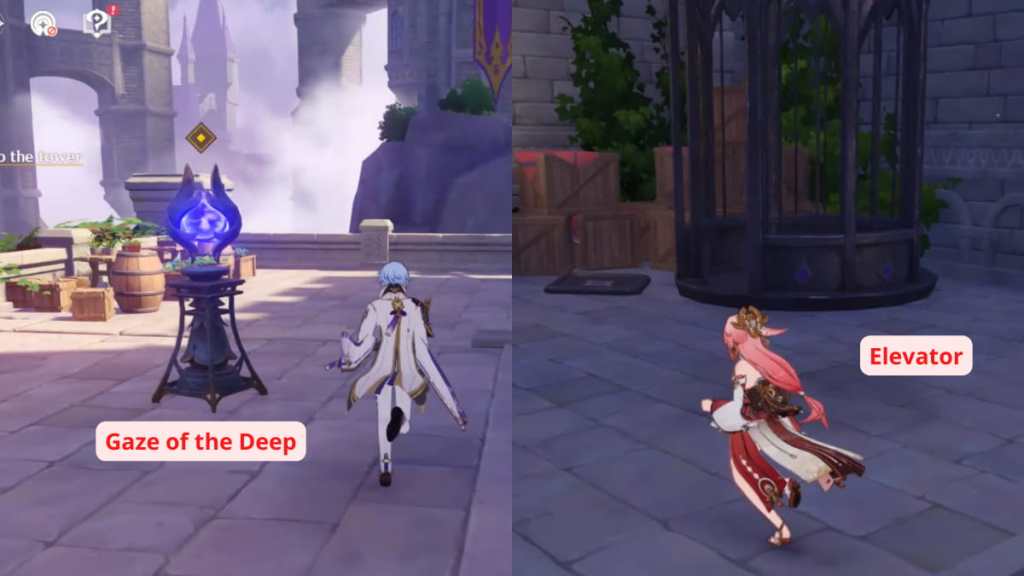
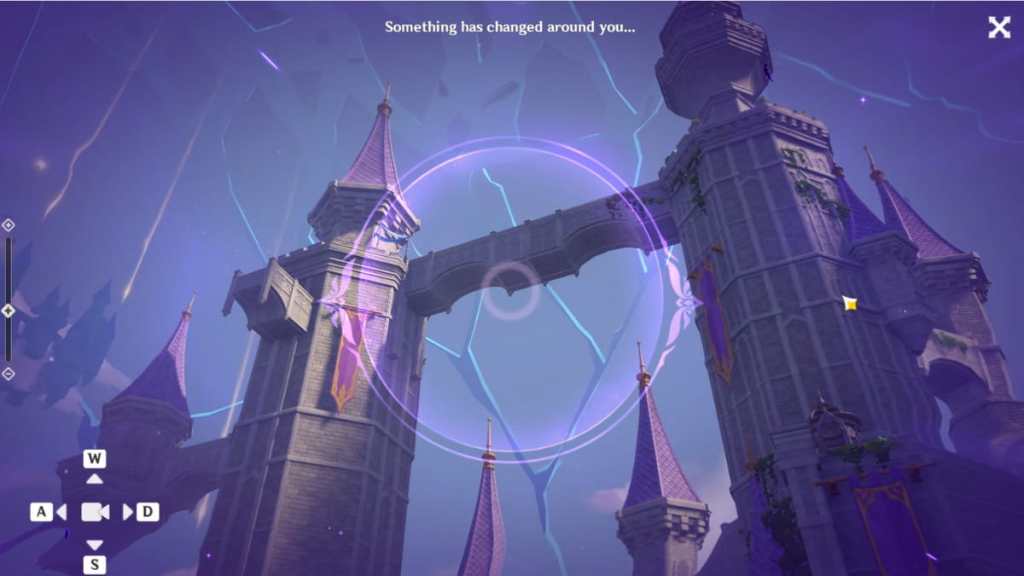
Before starting, reference the image above for two common terms used in this guide. The Gaze of the Deep is the primary puzzle mechanic across the Mirage. Meanwhile, the Elevator can be used to go up and down floors. If you left an Elevator upstairs or downstairs, step on the small platform on the side to summon it.
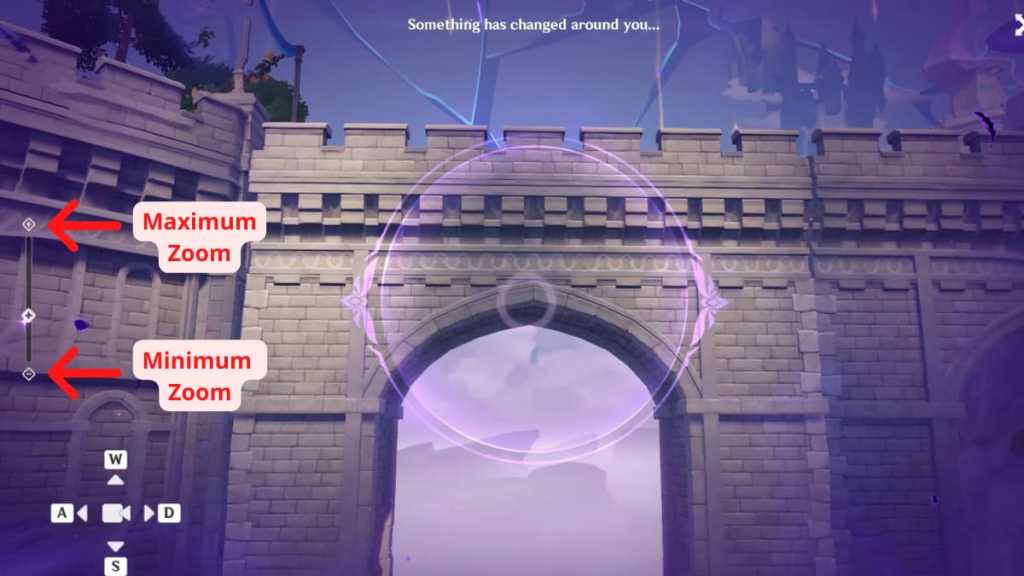
You need to adjust the camera angles to solve Gaze of the Deep puzzles. The directional angles need some approximating, but the camera zoom can be calculated by adjusting the zoom bar on the left. For example, if our instruction is "set the camera zoom to +4 of the minimum," we mean to set the zoom to the minimum, then click the plus sign four times.
Chest #1

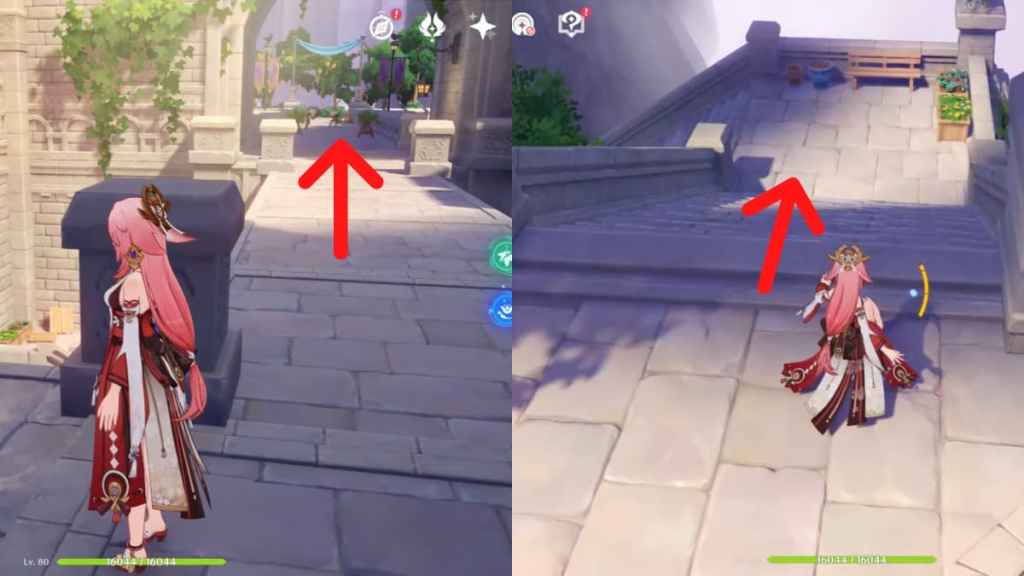
Upon entering the Mirage, you need to solve use Gaze of the Deep puzzle to connect the stairway used to progress.
- Use the Gaze of the Deep reference the image above for the approximate zoom and angle used or follow the steps below to solve the puzzle to connect the stairway.
- Move the camera left.
- Once that's done, turn right and go down the stairs, then go up the stairs you just formed.
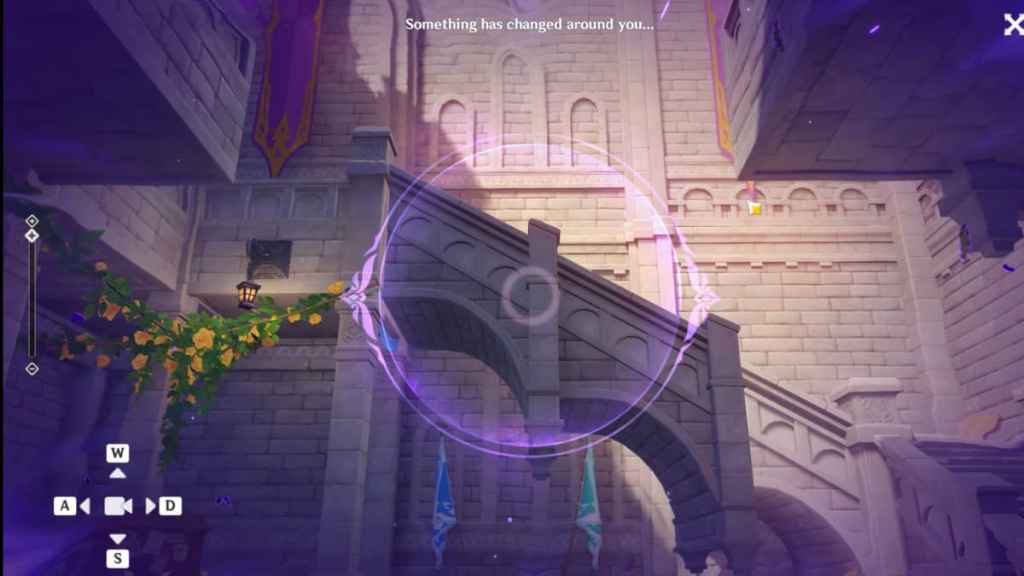
- There will be a Gaze of the Deep in front of you—use it to form another set of stairs.
- Reference the image above for the approximate zoom and angle or follow the steps below to solve the puzzle.
- Max out the camera zoom.
- Once that's done, go up the stairs on the right and keep going forward until you see the Elevator.
- Use the Elevator to go down.
- Upon landing, turn right to find another Gaze of the Deep.
- Use the Gaze of the Deep to put together a pathway. Reference the image above for the approximate zoom and angle used to connect the pathway or follow the steps below.
- Set the camera zoom to +5 of the minimum.
- Move the camera upward.
- Move the camera slightly left.
- Once that's done, step on the Elevator again to go up.
- Once you step out of the Elevator, go through the path on the right, where you'll encounter enemies.
- Defeat the Hilichurls, then go down the stairs.
- You'll find two Gazes of the Deep. Solve them in the order prescribed in the image above.

- For the first Gaze of the Deep, reference the image above for the approximate zoom and angle or follow the steps below.
- Set the camera zoom -4 of the maximum.
- Move the camera upward.
- Move the camera slightly left.
- For the second Gaze of the Deep, reference the image above for the approximate zoom and angle or follow the steps below.
- Set the camera zoom to +10 to 11 of minimum.
- Move the camera upward.
- After both puzzles are done, turn back and go up the stairs.
- At the top of the stairs, you'll be faced with an intersection. Choose to go left and defeat the Hilichurls along the way.
- Inside the new room, you'll encounter two more Pyro Hilichurls—defeat them as well.
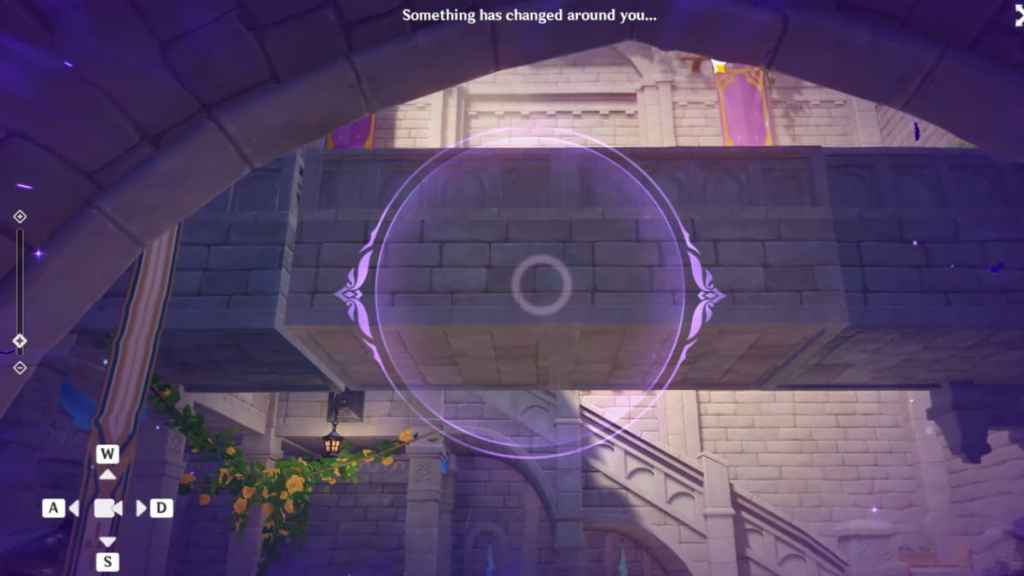
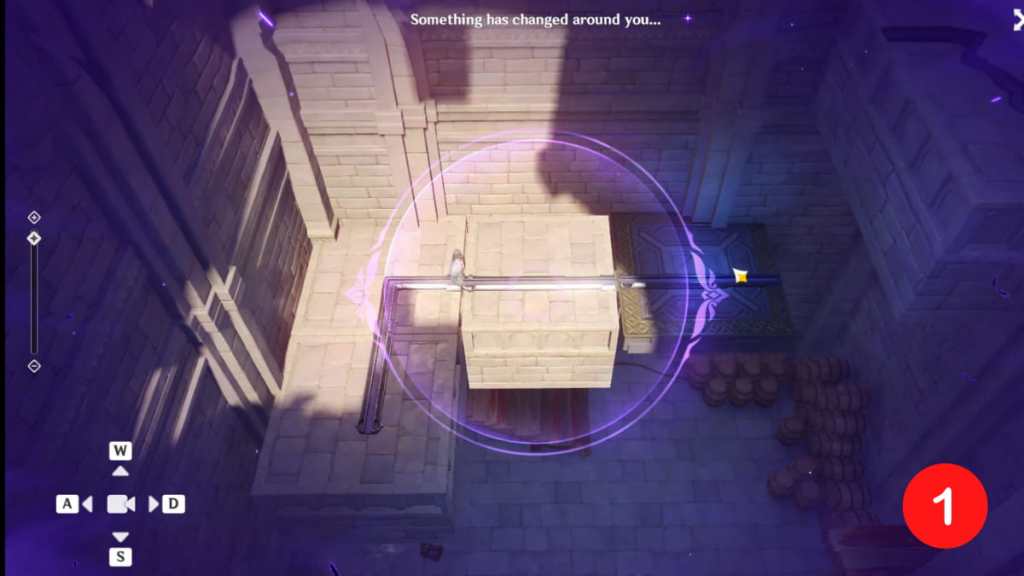
There will be two Gazes of the Deep. One beside the glowing vines, and one beside the staircase. We'll solve the one beside the staircase first.
- Use the Gaze of the Deep and reference the image above for the approximate zoom and angle or follow the steps below.
- Set the camera zoom to +10 to 11 of the minimum.
- Move the camera upward.
- Move the camera to the right.
- After that, step on the Elevator to go up.
- Climb the staircase and loot the Common Chest.
- Step on the Elevator again to go down.
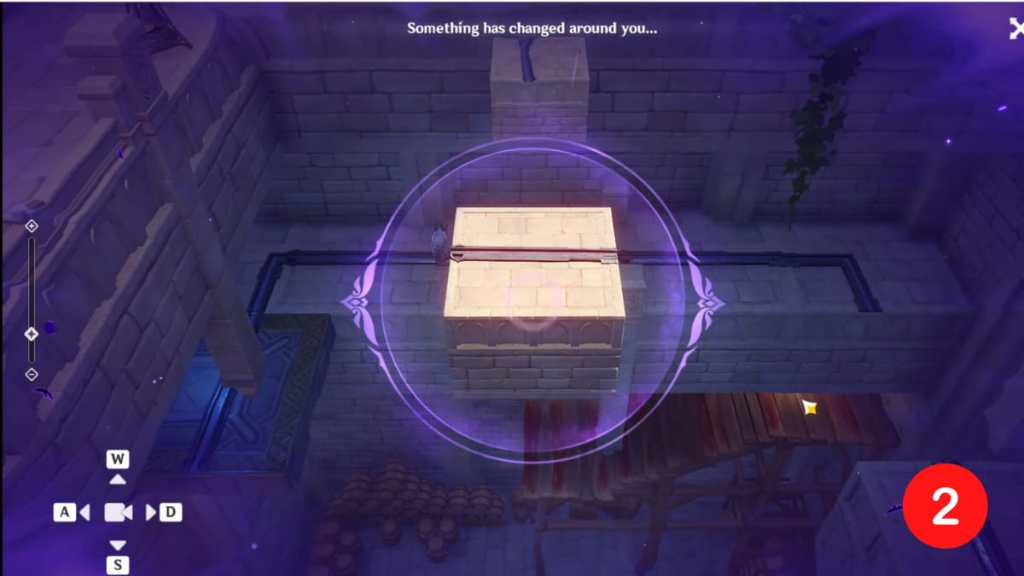
Chest #2
- Interact with the Gaze of the Deep beside the staircase again and move the camera angle downward to disconnect the bridge.
- Now, we can solve the Gaze of the deep beside the glowing vines. Reference the image above for the approximate zoom and angle or follow the steps below.
- Set the camera zoom to -4 of the maximum.
- Move the camera upward.
- Move the camera left.
- Once that's done, step on the Elevator to go up.
- You'll be able to climb another stairway to loot a Common Chest.
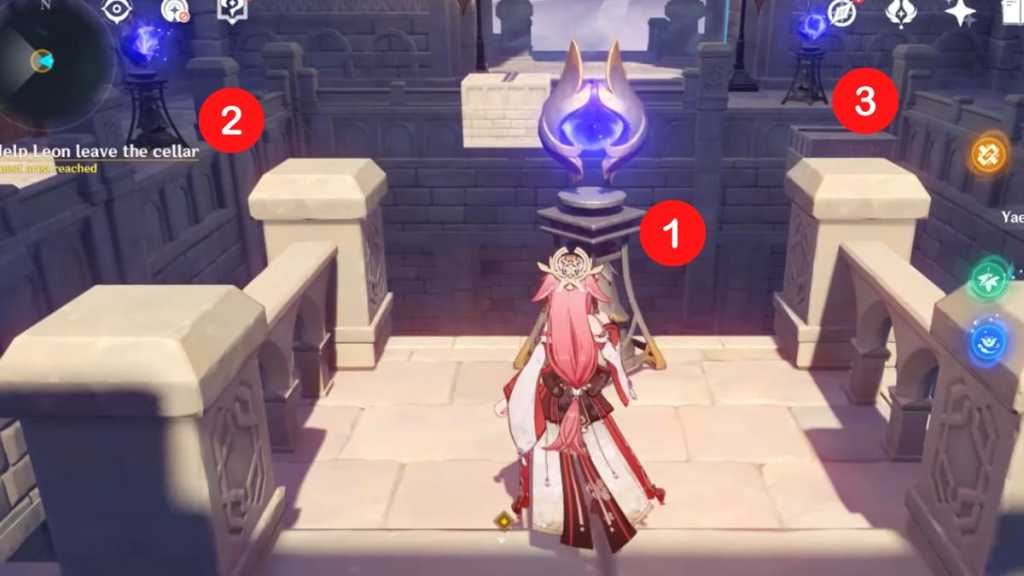
Chest #3 (Quest Item - Nightwatch Contract)
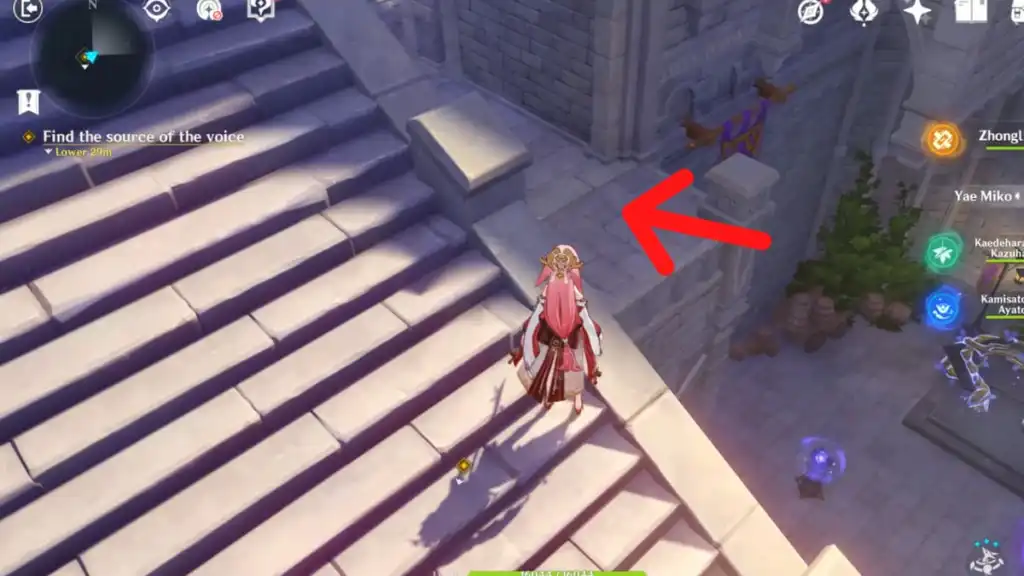
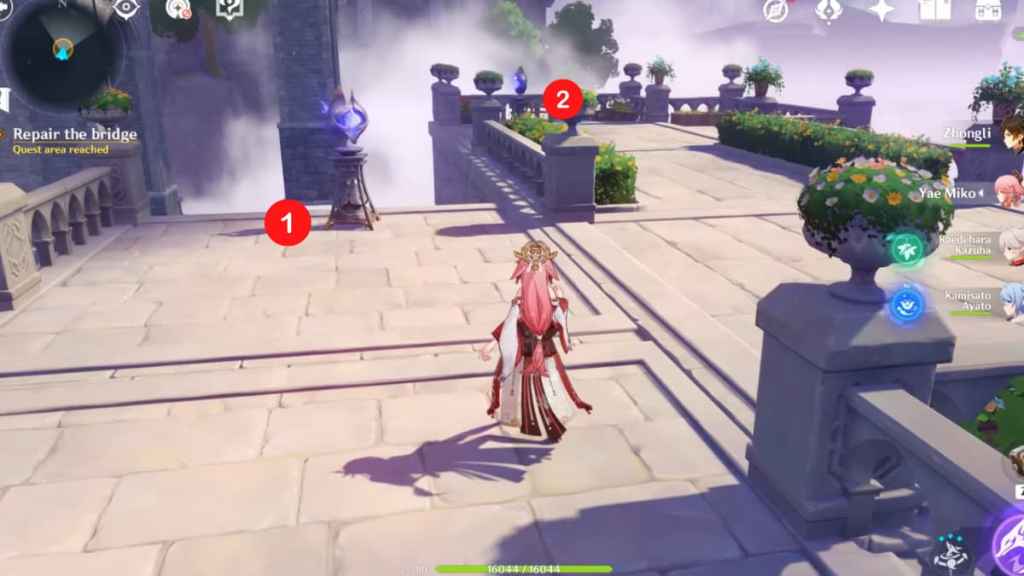
- After looting the Chest, turn right and glide onto the platform marked in the image above.
- You'll encounter Hilichurls at the edge of the platform. Defeat all of them!
If you accidentally glide all the way down, don't worry—just use the Elevator and climb the stairs again, then glide to the correct platform.
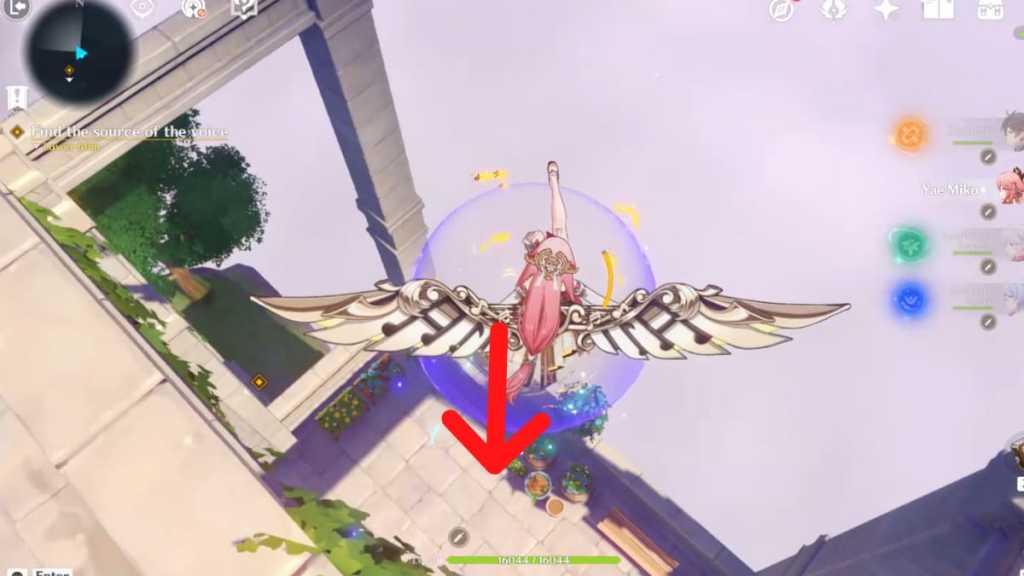
- From the edge of the platform, glide down to the platform one floor down.
- You'll encounter a Precious Chest. Loot it to obtain a Quest Item called Nightwatch Contract.
- Once that's done, step onto the nearby Elevator to go up a floor.
- Follow the quest marker and glide down to the glowing Investigate spot to prompt dialogue with the Raven named Leon.
This is the last Chest in Part 1. However, you need to complete the rest of the Mirage to move on to the next Part. Follow the steps below to solve the rest of Immernachtreich Apokalypse Part 1.
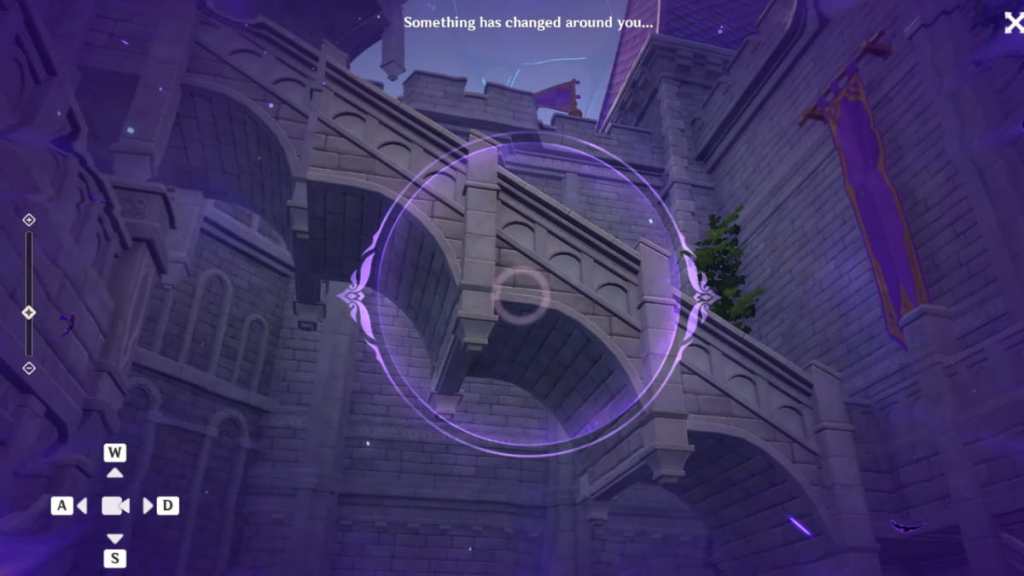
There are three Gazes of the Deep in the area. Solve them in the order specified in the image above.
- For the first Gaze of the Deep, reference the image above for the approximate zoom and angle or follow the steps below.
- Set camera zoom to the maximum.
- Move the camera upward.
- For the second Gaze of the Deep, reference the image above for the approximate zoom and angle or follow the steps below.
- Move the camera upward.
- Set camera zoom to +6 to 7 of the maximum.

- For the third Gaze of the Deep, reference the image above for the approximate zoom and angle or follow the steps below.
- Move the camera upward.
- Move the camera right.
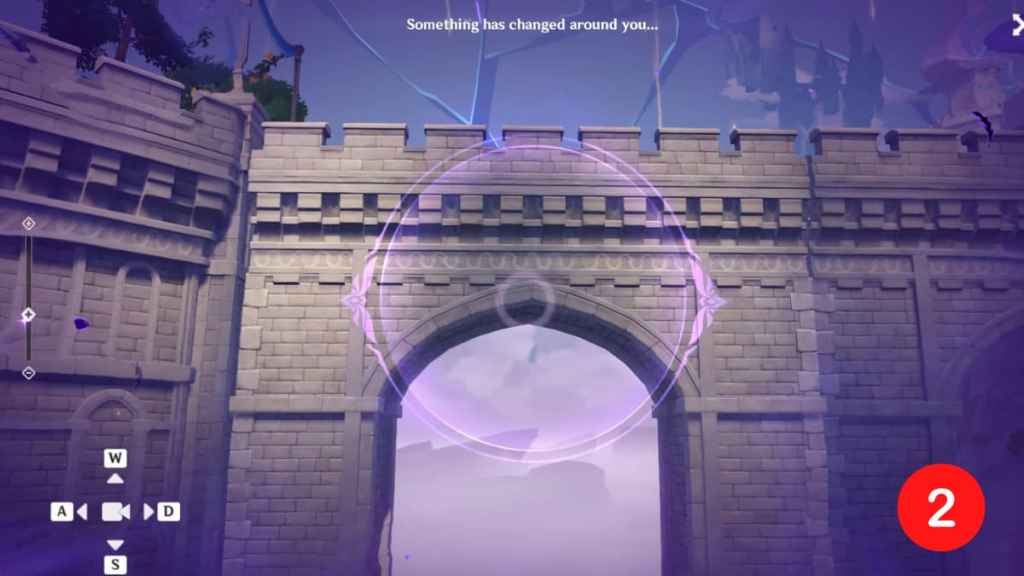
Once that's done, a cutscene will prompt.
- Interact with the barrier, and Paimon will speak the password from Leon.
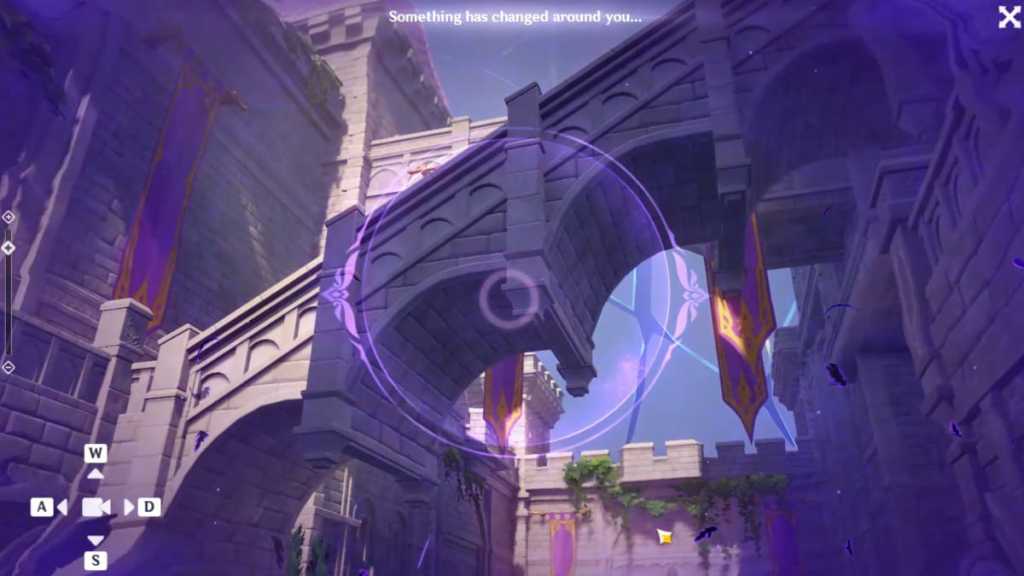
- Go down the stairs and defeat the Hilichurls. There's a Gaze of the Deep on the same floor.
- Use the Gaze of the Deep and reference the image above for the approximate zoom and angle or follow the steps below. This one is a little tricky because the connection is so subtle.
- Set zoom to +10 to 11 of the minimum.
- Move the camera upward.
- Move the camera left.
- Go up the stairs.
- At the intersection, turn left.
- At the top of the staircase, you'll find an Elevator. Step on it to go up a few floors.
- Once you land, turn left and follow the path to continue the story.
- After the dialogue ends, leave Fischl's room through the door.
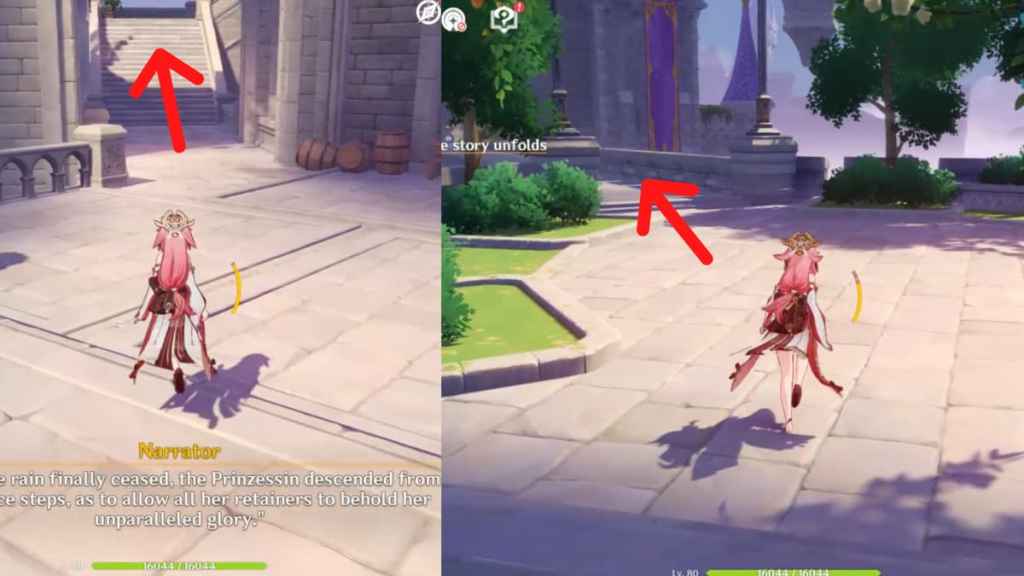
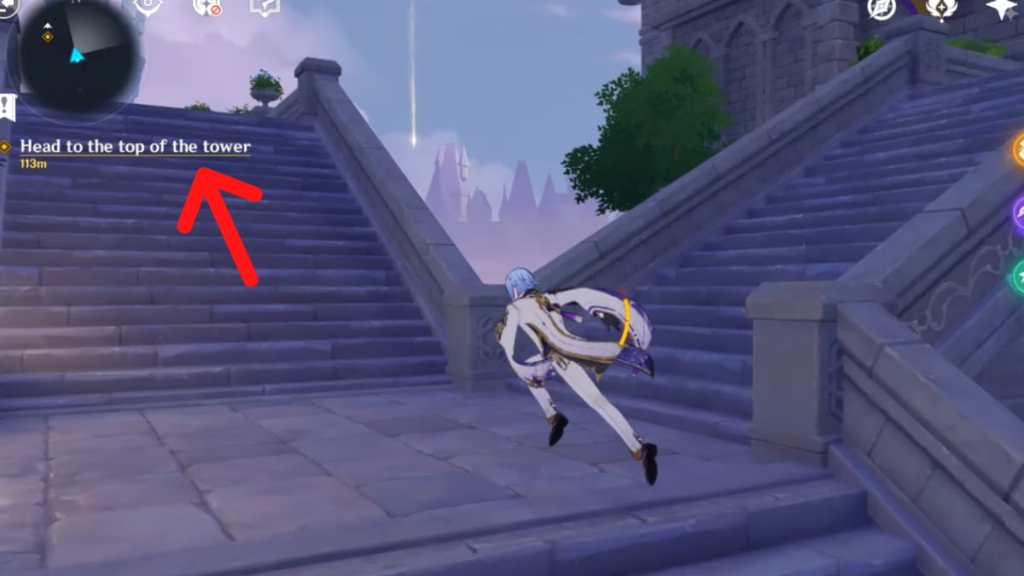
Next, you need to climb to the top of the castle. But don't waste your time climbing. Instead, follow the instructions to make it to the top.
- Upon leaving Fischl's room, turn left.
- At the intersection, you will see Hilichurls on the left. Ignore them and turn right.
- There's an Elevator waiting for you. Step on it to get to the top of the castle.
- Follow the path on the right leading into the castle.
- From there, a dialogue with the Ravens will prompt.
- Once that's done, simply follow the quest marker to the second volume of the Hymn of the Holy Land, ending this part of the Mirage.
This marks the end of Part 1. You'll be in front of the second volume of the Hymn of the Holy Land, which you can interact with to initiate Part 2 of the Mirage. If you missed any of the Chests in any Parts, simply head to Fischl's Island north of the Twinning Isle after completing Part 3, then interact with the book and select Immernachtriech Keep. Under Phantasmal Tales, select which part you want to play, then click Enter Mirage at the bottom right of the screen.
Other Immernachtreich Apokalypse guides
- Immernachtreich Apokalypse Part 1 walkthrough – Genshin Impact Summertime Odyssey Fischl Mirage Chest & puzzle guide
- Immernachtreich Apokalypse Part 2 walkthrough – Genshin Impact Summertime Odyssey Fischl Mirage Chest & puzzle guide
Check out Genshin Impact Resonating Visions event guide – All Phantasmal Conch locations for free Fischl skin! to get the Prinzessin's rightful Outfit.