The main quests in Hogwarts Legacy are full of challenging puzzles that utilize a number of the spells at your disposal. One such quest is The Helm of Urtkot, where Sirona's acquaintance Lodgok asks you to meet them near The Collector's Cave on the outskirts of Hogsmeade.
This mission unlocks after you complete The Caretaker's Lunar Lament quest, where you acquire the Alohomora spell to unlock doors. Read on to find out how you can collect all chests, solve puzzles, and complete The Helm of Urtkot quest in Hogwarts Legacy.
How to complete The Helm of Urtkot Quest in Hogwarts Legacy
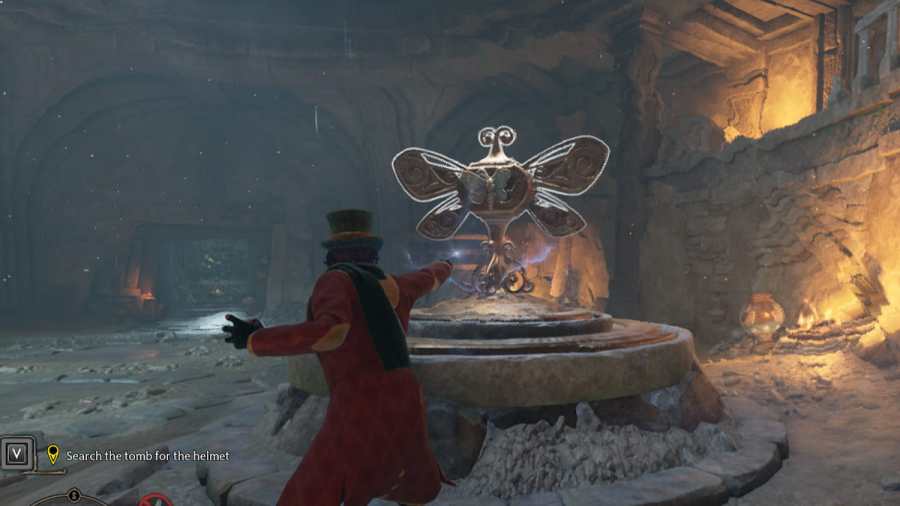
The Helm of Urtkot is a mission where you are tasked with retrieving a valuable goblin Helmet for Lodgok. After meeting him near Hogsmeade, he will escort you to The Collector's Cave dungeon to carry out the mission. Before proceeding, make sure to have the Lumos and Depulsio spells equipped, as they are crucial for solving the Moth Door puzzles you will find within the dungeon.
Moth Door Puzzle #1

As you enter, you will face the first Moth Door puzzle. The door appears to have one moth missing from its slots. Head toward the right of the door, and you will find the moth on a pedestal. Use the Lumos spell to attract the moth, and then guide it towards the door. Once near the door, cast your spell to attach the moth to the door and unlock it.
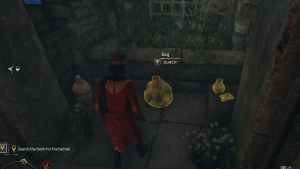
On the other side of the door will be a small hall with two narrow corridors on each side. Inside these corridors will be a Chest and a Bag of loot. Make sure to collect them before moving on toward quest marker.
Moth Door Puzzle #2

The second Moth Door puzzle will require you to find three moths. Two moths can be easily found by the walls of the main hall. To find the third moth, you need to break the cracked door by using Depulso spell. Once you find the moth on the pedestal inside, guide it toward the door using Lumos to unlock it.
After the second Moth Door puzzle, you will enter a large hall with pillars. Here, you will encounter one wave of Inferius. These monsters are vulnerable to fire damage. Therefore, we suggest equipping at least two fire-based spells in your kit, like Incendio or Confringo, if you want to make easy work of them. You will also find two chests in this location.
Related: How to get the spell for Avada Kedavra (Killing Curse) in Hogwarts Legacy
Moth Door Puzzle #3

Moving on toward the main quest marker, you will encounter the third Moth Door Puzzle. Here, two moths can be easily accessed, except one which is located in an elevated spot. The trick here is to guide one moth by using Lumos to the mechanism in the middle of the room. Once the device is activated, use the Depulso spell to spin it. Doing so will cause a block to rise up, allowing you to collect the moth from its high perch.

Once you open the door, go through it and head left. You will find yourself in a room with a heavy object hanging above. Strike the rope this object is attached to with a basic spell cast; it will drop down creating a huge hole in the floor. Drop down through this hole, and move toward the quest marker to the final Moth Door puzzle.
Moth Door Puzzle #4

Once you drop down the hole, you will enter another large hall with the final Moth Door puzzle. However, be wary of the Inferius, as you will need to battle two waves of these monsters when you enter this hall. Once they are defeated, you can focus on the puzzle at hand.

You will find two moths in the lower areas of this hall. Guide one of these moths to the rotating mechanism in the room. Then guide the other moth to the pedestal located in the lower area, to the left side of the Moth Door. After doing so, stand on the rising platform and hit the rotating mechanism with Depulso. You will notice that when you cast Depulso on the rotating mechanism, the moth pedestal on the lower level also rises up. Once you reach the top, quickly get to the side of the lower pedestal and cast Lumos to attract the moth to you.
On the upper level, you will find the two other moths you require. One moth can be found directly next to the door, and another one on the other side of the rising platform. Guide all three of these moths to the door to unlock it.
Retrieving the Helmet from Thieves

Upon solving the final Moth Door puzzle and entering the witch's tomb, you find out that the Ashwinders have looted the tomb and taken the Helmet Lodgok sent you for. After interacting with the body in this room, you can finally exit the dungeon.

Outside, you will meet Lodgok, who tasks you with retrieving the Helmet from the Ashwinders. Once you reach the location marked on your map, you will see a group of thieves being attacked by a Troll. Defeat all the enemies, then loot the Chests inside the camps. Once you find the Helmet, Ashwinder Assassins will show up. Defeat them, and head back to Lodgok to complete the mission.
How to collect all chests in The Helm of Urtkot (Collectors Cave) in Hogwarts Legacy
The following is how you can find all the chests in The Helm of Urtkot quest in Hogwarts Legacy:
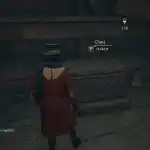
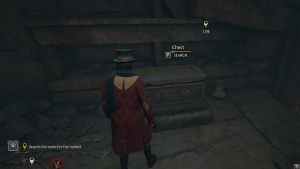
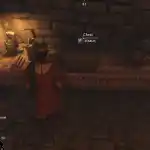
Chest #1

The first Chest can be found in the room you enter after opening the first Moth Door. Enter the small corridor on your left-hand side to find it. Make sure to head to the corridor on the opposite side to collect a Bag of loot as well.
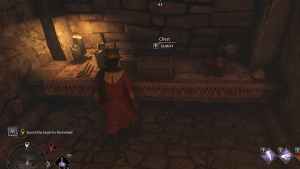
Chest #2
The second Chest is found in the room beyond the second Moth Door puzzle where your first encounter with the Inferius take place. On the left side of the room is a raised platform you can climb up on where you can find the Chest. Opposite to where you find the Chest, you will notice some rocks. Remove them using Depulso to reveal a Bag of loot.
Chest #3 - Skeleton Bridge Puzzle

After opening the third Moth Door, instead of turning left toward the quest marker, turn right. Follow the path until you come in front of a ledge with a Chest on the other side. The trick here is to use the Accio spell to pull the stacks of skeletal remains to form a bridge over the two platforms.
Chest #4, #5, #6
A total of three Chests can be found in the room with the large object hanging above it. One is found in the shelves in the room, and two more are found beyond the cracked door. Use Depulso to open the cracked door, and then use Accio to pull the wooden platform and use it to climb up to the Chests.
Chest #7, #8

Near the final Moth Door puzzle, you will find a path on the right side of the rising platform. Here, you will find one Chest outside, and another Chest inside a room at the end of the path.
Chest #9

The final Chest is found in the witch's tomb, situated on the right-hand side of the room.
Looking for more guides on puzzles in Hogwarts Legacy? Check out Hogwarts Legacy Bell Puzzle – How To Solve, right here on Pro Game Guides.