Lost Lands is a popular series of point-and-click puzzle adventures following our heroine, Susan, as she saves the world. This is part 4 of my Lost Lands 4, The Wanderer, walkthrough.
Lost Lands 4: The Wanderer Full Walkthrough, part 4
This part of the guide takes you from when you restore the Water of Life near the Pangonian’s home to the conclusion of the story. This part of the guide does not include the bonus chapter.
If you’re looking for an earlier part of the story, click through to my Lost Lands 4 Walkthrough hub page, where you can find links to all the earlier parts, which have full puzzle solutions and all the collectible locations you need.
The pantheon ritual

Get a close-up of the large rock (a1) to move it and take the Needles, then click the bag and take the Planet Model and Small Box from inside. Click the treestump (a2) next, and put the box on the floor by the insects in the hole. Click the box again to open it, then use the needles to grab some creepy crawlies. Finally, pick up the Thermite Casket.

Move to the crypt and use the Water of Life in a pot on the clover (b1) patch to start a memory puzzle. You need to find all nine four-leaf clovers to complete the task.

To make it easier, I’ve put an image of the clover above. Once done, you’ll receive a Handful of Clover.
Move to the Pantheon and put the thermite casket and clover on the altar (the rum and mammoth brain too, if you haven’t done so already). You’re now ready to prepare the ritual:
- Put the clover in the hole (bottom right)
- Use the stone on the mammoth brain
- Click the mammoth brain once crushed to put it in the mouth
- Add the thermites to the clover in the hole
- Use the stone on the clover and thermites to crush them
- Add the rum to that mixture, turning it into a green paste
- Use the twig in the mixture
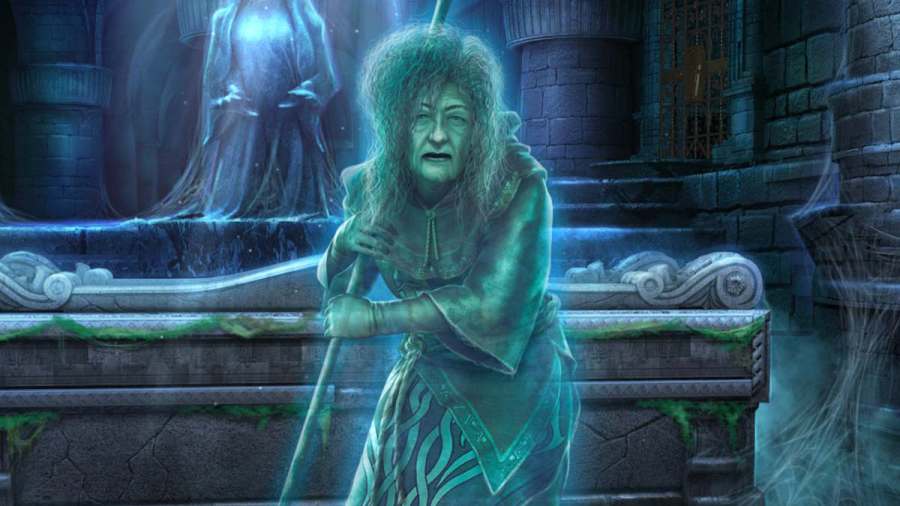
Once done, several spirits will appear around the altar. Go back to the crypt, and the witch’s spirit will be floating above the clover patch (b1). Click the witch Fahira for a cut scene, after which you can click the crypt itself (b2), which is now open. Take Fahira’s Hand from the coffin, along with a Rung.
The Oblivion Stone

Head to the Earl’s castle hall, use Fahira’s hand to open the door on the left (c1), and head inside.

The Collectible is on the shelf on the right (d1), while the Morphing Object is on the floor on the left of the desk (d2), where you also need to pick up a second Rung. Select the case (d3) to get your final Manuscript, then click it again to open it. Take the Key and Snake Figurine from inside and read the note about the chest’s lock. Use the key on the door at the top of the stairs (d4) to start a missing objects puzzle.
If you’re struggling with the weighing section, you need to weigh each color until it balances, after which it will move into the box on the left of the scales (4 yellow, 7 green, 16 red). You need to wait for the scales to settle each time, then the stones will move automatically. Once complete, you’ll get the Glass.

Go to the secret passage, select the statue on the right (e1), and add any remaining figurines you have in your inventory (Snake, Owl, Elephant). Click the statue again afterward to get the Prism of Spells and the Oblivion Stone.

Now go to the throne room and click the window (f1), adding the glass to start a jigsaw puzzle (see the solution below). Once complete, use the Prism of Spells on the window and note the highlighted sections (they get marked in your diary for easy access).

Return to the lab, select the chest (d5), click the copy of the window, and press the five sections you saw in white on the window.

This begins a fragment restoration puzzle, where you need to move the sections to create the image below. Once complete, click the now open chest, take the Unusual Key and Vile, and read the note.

The Earl’s ship

Go to the main sanctuary and use the vial in the fountain (f2) to get the Water of Death. Now move back to Pangonian Island cliff descent and use the water of death on the fountain (g1) to receive the Water Vial. You can now go to the energy reservoir for a cutscene with Maaron, after which you can use the unusual key on the pillar (f3) to open a compartment. Take the Hand Figurine and a third Rung.
Head up to the Pangonian’s house and use the hand figurine to open the trunk (f4), taking the Tracing Paper, Skull Pieces, and a fourth Rung. Use the paper in your inventory to get a Wrench.

Now go to the corridor of trials, select the skull statue (h1), pick up your final Map Piece in the close-up, and add the skull pieces to begin a jigsaw-style puzzle (completed puzzle below).

Once complete, pick up the Man Figurine that drops from its mouth.

Move up to the lighthouse, select the mounted telescope (i1), and use the wrench on the lens to get the Broken Lens. Back in the lab, select the chalkboard (d6), use the hammer on the chalk to crush it, and then click it again to transfer it to the board. Now, you can use the tracing paper on the chalkboard, then click the charcoal stick on the tracing paper to get the Punch Card.
Head to the secret passage and use the punchcard on the book in the close-up of the right statue (e1), which marks the runes you need to know in your diary.

Go to the wall next and use the man figurine on the blocked cave entrance (j1). Take the Oar. You can now go to the cliff descent and use the oar on the boat (g2). You can now select the boat to head out to the Earl’s ship.
Firing the cannon

Select the cabin door (k1) for a close-up, taking the Key Ring, and then clicking the board on the right in the same close-up to bar the door. The Morphing Object can be found on the handrail (k2) and the Collectible behind the bucket (k3).
Now choose the trunk (k4), take the fifth and final Rung, and then add the keyring. Use the fourth key to open the trunk and take the Wire Cutters. Select the hold (k5), use the wirecutters on the chains, take the Gloves, then click the lift to open the barrel here and take the Flint. Select the cannon (k6) and use the flint to light the torch in the close-up.
Return to the cliff descent and use the gloves to collect the Weed (g3). You can now go back to the wall and add the weed to the fire (j2), creating smoke to mark the wall’s position. Now, you can return to the ship and take out the wall with the cannon (k6). You’ll need to do the following:
- Click the cannon.
- Add the powder (to the left of the cannon).
- Add a cannonball (to the right of the cannon).
- Push the cannonball down (use the brush on the left of the cannon).
- Click the red target that appears to fire.
You need to hit the wall three times to take it down (you’ll see your progress on the left of the screen, with green ticks denoting hits). To fire again, simply repeat this five-step process. I found I always hit if you click the target as it is in its downward track from its top right position, moving down toward the bottom left. Once complete, you’ll get a cutscene.
Awakening the captain

Go back to the energy reservoir and click the raised cube (l1) for a close-up, taking the green Tile. Add the tile to the pillar (l2) to start a tile-movement puzzle. If you need a hand with this one, use the image below as a reference:

- Move 3 left and then down
- Move 1 left, then down, then right
- Move 2 right and down
- Move 4 right and down and left
- Move 3 up
- Move 2 up
The doors to the cube are now open, so select it (l2) and use the water vial on the captain and then the oblivion stone. Nine glowing dots appear. Trace the shapes of the three runes you got by using the punchcard (they’re in your diary). You need to do them in order, as marked in the image below. Once done, you’ll get a cutscene. Click the captain afterward, and he’ll give you a Key.

The potion and the sword

Return to the captain’s house and use the key on the desk (m1), opening it to get the Knob, also noting the time (10.10) carved inside the desk drawer. Set the clock (m2) to 10-past 10 and the face will open, giving you a new Key. Use the rungs (and the hammer) to repair the ladder (m3), then click the trapdoor above for a close-up. Use the knob to unlock the loft door, starting a simple object-finding game. Once complete, take the Small Box.

Move to the shipwreck, use the key to open the cabin door (n1), and head inside. The final Morphing Object is on the ground (o1) and the last Collectible is on the windowsill (o2). Select the table (o3), take the Music Schematics, and move the glass to find a Key. Use the key on the small box in your inventory to get a Component and a Dog Figurine.

Open the chest (o4) and take the Clothes and the Deer Figurine. Add the component to the globe (o5) to open it and take the Lion Figurine. Next, select the organ (o6), adding the music schematics in the close-up. Play the notes in the correct order (the click the play button on the organ) and you’ll get the Stone Piece and a Planet model.

Go to the secret passage, select the statue on the left (e2), add the three figurines, and take the Half Moon and the Sword. Move to the castle entrance and add the stone piece to the fountain (p1) to create a boiling pool of lava. Return to Maaron and the captain (at l2) next, and give the clothes and the sword to the captain.
The last request
Go to the Pangonian’s house, talk to her, and she’ll give you a brush. Move to the cliff descent, use the brush on the gravestone (g4), and make a note of the symbols you uncover. Return to the Pangonian and she’ll give you her Fishing Net.

Head over to the ferry and use the net in the pool (q1) to get Fish and a Snowflake. Now you can go to the shipwreck, give the fish to the seagulls (q2), then use the knife to dig out a Mollusk. Use the knife on the mollusk in your inventory to also get a Shell. Back in the lab, use the snowflake on the column (d7) and take the Sting of Frost (also noting the symbols carved on the column).
Go back and give the mollusk to Maaron (l2), who will give you a Skull. Take this to the archmage's tomb, use it to open the iron gates (b3), and take the Whale Oil. Also, click the burner in the close-up, which will illuminate the wooden box. Add the half-moon to it and the box will open, allowing you to take the Pick Axe.
Move to the wall, use the pick axe on the slope (j3), and take some Clay. Select the clay in your inventory and add the broken lens. Once you’ve added all the pieces, you’ll receive the Glass in the Clay.
Return to the lava fountain at the castle entrance (p1), add the glass in the clay, then use the sting of frost on it. You now need to trace the runes you saw when you picked it up (d7) exactly as you did when you opened the cube. Once done, use the hammer on the mold and take the Lens.

Go to the Pangonian’s house once more, use the whale oil on the lock (f5), and then enter the code to reveal a final missing objects puzzle. Once complete, take the Planet Model. Go to the portal and add any remaining planet models to the display (r1) there. Move the planets to the correct positions (see below), and take the Light.

Now go to the lighthouse, add the shell to the ring (i2), add the lens to the telescope (i1), and add the light to the central mechanism (i3). Click the telescope (i1) to start a light puzzle. First, rotate the three discs until they look like the image below. Next, click the directional arrows to fire up the machine.

- Top left (up) 4 times
- Bottom right (right) 8 times
This will center the Earl’s ship in your sights, triggering the final cut scene.
Congratulations! You’ve completed Lost Lands 4. If you want to continue with Pro Game Guides, you can click through to my Lost Lands 4 Bonus Chapter Walkthrough!