


Updated September 19, 2026: Expanded the launch progression path, added all eight Breathing trainer entries, and broken Final Selection into individual objectives. I’ve also clarified what to do after passing. Level 60 is my solo preparation recommendation, not the exam’s entry requirement. Missing costs and later progression details are marked TBA.
Becoming a Demon Slayer in Slayers 2 takes more than buying a katana and picking your favorite anime character's Breathing Style. You need to build your character, complete your training, and survive Final Selection before settling into the longer grind. This Slayers 2 Demon Slayer progression guide walks you through that route, including what to prioritize and where you can save yourself some unnecessary running around.
Slayers 2 Demon Slayer Progression Order
The main route is Windy Peak quests → Breathing training at level 25 → Final Selection from level 45 → Crow quests, Slayer Progress, and equipment upgrades. I recommend aiming for around level 60 before a first solo exam attempt, but you can enter earlier. Use these milestones to plan your progression:
| Stage | Your next objective |
|---|---|
| Before leaving Windy Peak | Complete Kona’s Lost Pages quest, claim the Book of Guidance, and buy a katana from Raze. |
| Levels 1–6 | Repeat Krue's quest to defeat three Bandits. |
| Level 7 | Take Krue's Mini Boss Zuko quest. |
| Starter weapon | Visit Raze: - Regular Katana costs 500 Wen; - Fancy Katana costs 1,500 Wen. |
| Level 13 | Move to Tom's bear-hunting quest. |
| Level 18 | Take Tom's Mother Bear quest. |
| Level 25 | Start your chosen Breathing trainer's questline. |
| Level 26 | Talk to Chaka and repeat the Kaiden’s Subordinates quest. If his chain is locked, finish the earlier village quest handoffs. |
| Level 34 | Take the Kaiden quest and grind to Level 40. |
| Level 40 | Find Wagwan below the bear area’s waterfall and repeat the available guard quests. Keep going toward level 60 if you want more room for mistakes in Final Selection. |
| Level 45 minimum; around 60 recommended solo | Complete Final Selection, defeat the Hand Demon, and return to The Sisters. |
| After Final Selection | Equip your Crow, unlock Ren and Ginzo, develop Slayer Progress, and check weapon crafting before spending your materials. |
PRO TIP: Busier servers can boost EXP, but the exact population multiplier is TBA. Judge your grind by completed quests per minute as well: a bonus is less useful when everyone is waiting for the same target.
Start With a Useful Clan, Then Get Moving
Your clan can make a meaningful difference, but don't turn character creation into your entire first session. A rare surname won't teach you when to stop swinging. Look at what your clan actually contributes to the build you want. Useful pairings include Agatsuma with Thunder, Kocho with Insect, Iguro with Serpent, and Rengoku with Flame. If you already have Urokodaki or Sabito, their Water support is worth considering, but a matching surname is not a reason to force yourself into a moveset you dislike.
RELATED: Slayers 2 Clans Tier List
Those are reasons to keep a useful roll, not requirements for becoming a Slayer. My recommendation is to start playing with a workable clan and revisit optimization once you know which style you enjoy. Spending all your resources chasing a build you haven't tried is a very expensive way to discover you prefer something else.
PRO TIP: Set your spawn at an available spawn point near your current grind. Look for the purple crystal when you reach a new settlement. A short run back is an upgrade you will appreciate the moment a bear disagrees with you.
Levels 1–45 Grind - Build Your Combat Fundamentals
This is the part of the game where you'll mostly do your usual bandit-beater stuff. A quest in the starting village has you deal with fake civilians who are actually spies for the bandits outside. You'll find some notes on them, which, when translated, will point you to where to move next. There are also a couple of other quest-givers inside the village; make sure to do every one of their quests at least once.
Before leaving, talk to Kona and complete Recover the Lost Pages. All five pages are in Windy Peak; return them to him to claim the Book of Guidance. It points you toward recommended progression quests and their NPCs. The game is already chaotic enough with the book, let alone without it. Use our Lost Pages locations guide if the last scrap of paper is somehow winning.
If you reach the right level but cannot start Chaka’s quests, check your earlier handoffs. Kazu’s notes go to Noote before the route continues to Chaka. Lucy’s village quest also points you toward Tom. Leveling and finishing the introductory quest chain are not always the same thing.
Use these opening fights to practice a repeatable attack pattern: wait for an opening, land a short sequence, then defend or reposition. If you keep getting interrupted halfway through a combo, shorten it. Landing three hits safely is better than planning seven and eating the other four yourself.
For boss quests, judge efficiency by successful clears. If a fight repeatedly sends you back to spawn, spend a little longer on content you can handle or find someone to tackle it with. Unlocking a quest doesn't automatically make it your best grind.
RELATED: Slayers 2 Breathing Styles Tier List – Best Breathing Styles Ranked
Spend Skill Points With Your Next Unlock in Mind
Your build draws on Body, Weapons, Clan, and Breathing progression. Mastery is separate from your general level, so gaining levels alone won't finish your moveset. I recommend spending your hard-earned points around the problem you're currently facing:
- Can't reach a trainer? Check movement unlocks such as Wall Climb before buying another combat upgrade.
- Keep dying before you can finish a fight? Invest in HP and block branches.
- Struggle to keep attacking or repositioning? Review your stamina options and how aggressively you're spending it.
- Just unlocked Breathing? Check the requirements for your first useful techniques before spending your remaining points elsewhere.
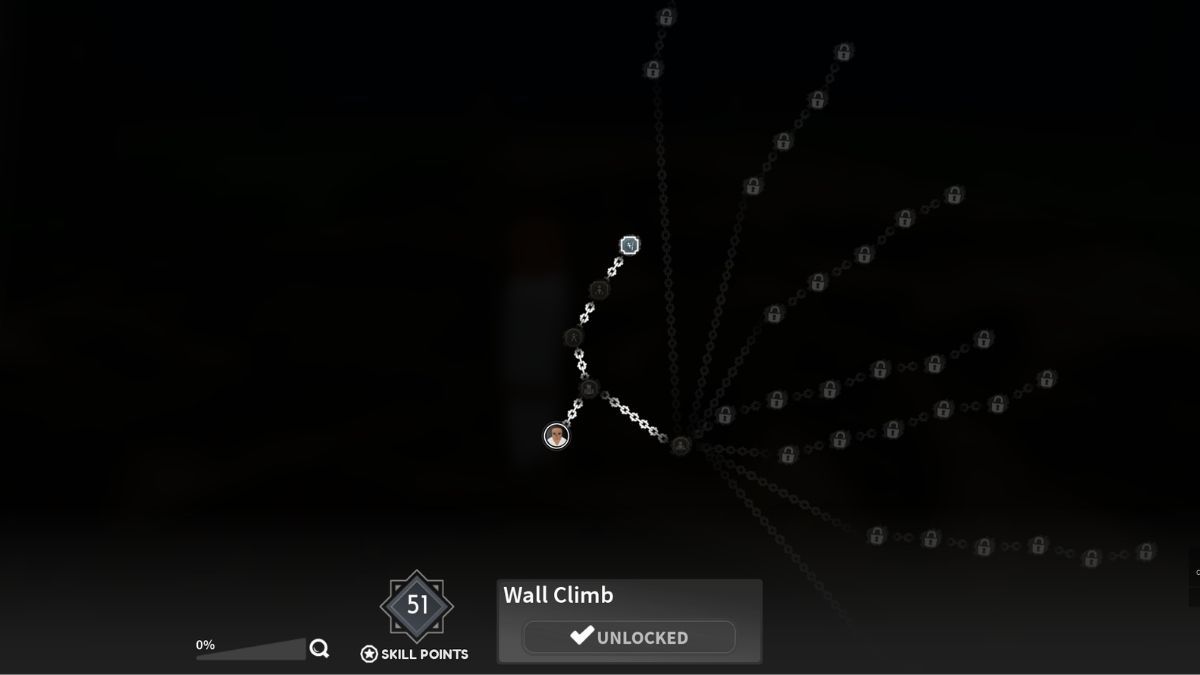
My first priorities are Wall Climb and Double Jump. They help with trainer routes and the exam’s traversal sections. After that, buy the next useful node for your actual weapon and style instead of spreading points across everything that looks interesting. Exact node costs and a universal point-by-point build are TBA.
RELATED: Ultimate Slayers 2 Tier List
Level 25: Unlock Your Breathing Style
Breathing Styles come from trainer questlines, and they become available at level 25. Reach the level requirement, bring the requested resources, complete the training tasks, and beat the trainee encounter for your chosen route.
The current roster includes Water, Thunder, Flame, Wind, Stone, Insect, Sound, and Serpent. My current first picks are Thunder for mobility and quick pressure or Sound for control, with Flame worth considering for a more direct offensive approach. Water is still playable, but it is no longer my default beginner recommendation. You do not need to reset a working build just to follow the rankings; learn the kit you have before paying to replace it.
All eight styles start with their own trainer. Here is the preparation list; use the trainer locations guide for the longer routes.
| Style | Trainer route and preparation |
|---|---|
| Water | Urokodaki: Underwater route near Bamboo Grove and the island house. Bring 5,000 Wen and 30 Demon Horns. |
| Flame | Rengu: House near the long red bridge out of Mistfall Village. Bring 10 Demon Horns. Additional cost and exact position at the house: TBA. |
| Serpent | Obari: Cliff north above Windy Peak. Bring 20 Demon Horns and five Beast Cores. Additional cost: TBA. |
| Sound | Tengai: Snowy Iceveil Valley. Unlock Wall Climb. Exact final approach and material/currency cost: TBA. |
| Insect | Shinora: Butterfly Estate, approached from Mistfall Harbor. Exact trainer position within the estate and cost: TBA. |
| Thunder | Zentaro: Mountain route beyond the bear area. Unlock Wall Climb. Material/currency cost: TBA. |
| Stone | Gyorei: Lower route from the bear area. The style needs the Axe and Mace. Full acquisition cost: TBA. |
| Wind | Saneri: Snowy route from the bear area, on a platform in the water. Bring 50 Demon Horns. Additional cost: TBA. |
Read your trainer’s dialogue before committing to a long material grind. A known horn requirement does not necessarily cover every fee or task in the questline, and the remaining costs above are TBA. Pick your style before farming its materials. You want a shopping list, not an inventory full of things a different trainer asked for.
Where to Farm Breathing Materials
Demon Horns: Check the cave beneath the Mother Bear area for low-tier demons. Start with manageable pulls rather than dragging the entire cave into one fight. Beast Cores: Look for Beast Demons around Mistfall Harbor’s village gate at night. Exact drop rates are TBA, so plan around the items in your inventory rather than a guaranteed number of kills.
READ MORE: Slayers 2 Codes
Levels 26–60: Prepare Your Build for Final Selection
After training, your priority should be learning the moves you have and working toward the next useful unlock. Use your chosen weapon and style in combat to develop mastery alongside your character level.
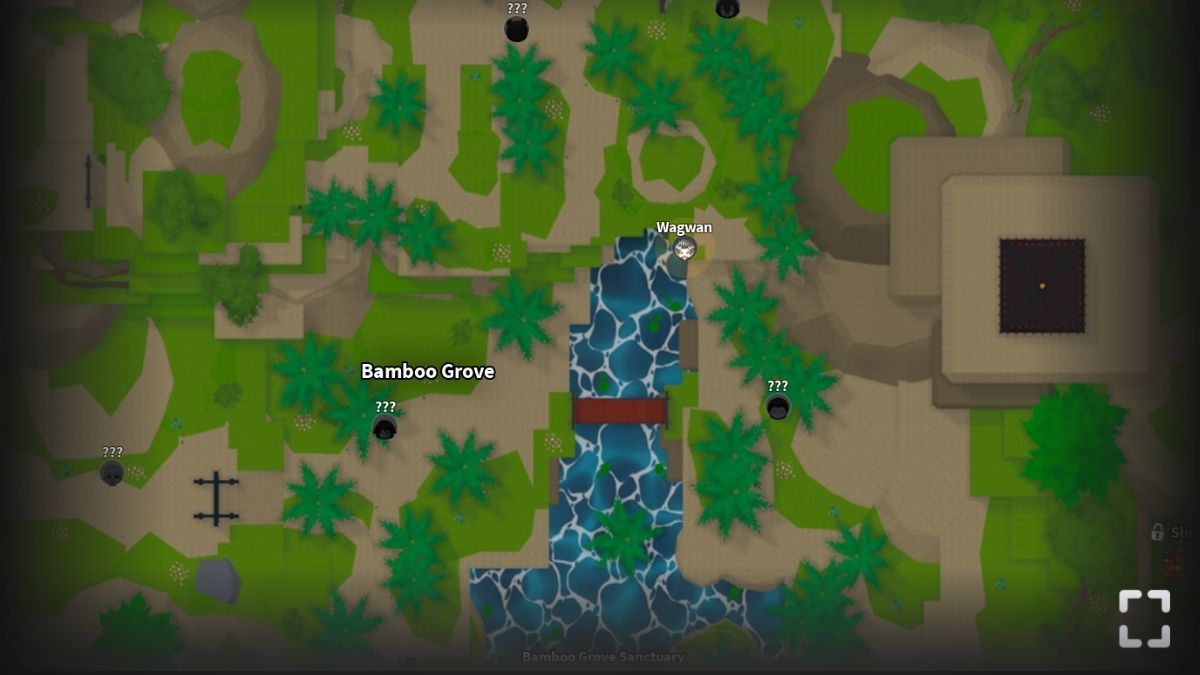
From level 26, work through Chaka’s subordinate quests, then his Kaiden quest from level 34. At level 40, move to Wagwan under the waterfall below the bear area. Repeat his available guard quests while developing your weapon and Breathing mastery. I recommend continuing toward level 60 for a first solo Final Selection run. That is extra preparation, not a hard requirement: entry opens at level 45, and your gear, moveset, and teammates also matter.
Before Selection, aim to understand three things about your kit:
- Your safe damage option: something you can reliably land during a short opening.
- Your approach or spacing tool: how you enter range or keep a comfortable distance.
- Your defensive answer: how you respond when the enemy gets the first hit or your attack misses.
Test longer combinations against ordinary enemies first. A move that launches or locks down a normal target may not control a boss the same way. Don't build your entire strategy around the Hand Demon politely cooperating.
RELATED: Slayers 2 Blood Demon Arts Tier List
Level 45: Complete Final Selection
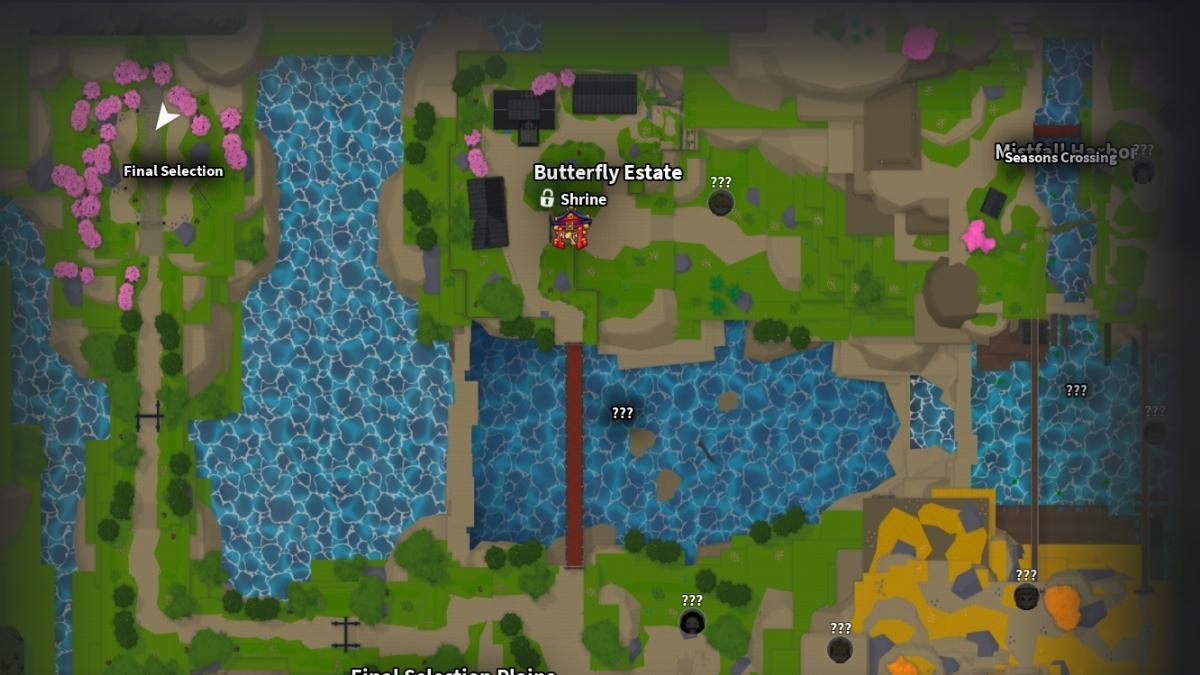
First, you'll need to reach an area called Final Selection, located in the far west of the world map. Use the map marker feature to guide you, and first make your way to Mistfall Harbor. From there, cross the bridge and head toward the Butterfly Estate. Once there, you'll see a very long bridge to the south that leads toward the Final Selection Plains. From there, follow the path northeast, and you'll eventually reach Final Selection.
Check the gate’s countdown and be in the waiting area before entry closes. The exact repeat schedule is TBA, so use the timer in your server rather than planning around an hourly claim. Once inside, follow the quest chain. The current route is The Sisters → Rem → Vael → Klien → Mizuto → Lavato → Levi → Steve, ending with the Hand Demon. After defeating it, return to The Sisters to finish. Completion awards Mizunoto rank, a Slayer Uniform, Ore, and a Kasugai Crow.
Before entering, check your equipped gear, spend any points you've been saving for an available upgrade, and make sure you can use your core moves without staring at the hotbar. Bring a friend if possible, but still read your own objectives and finish your turn-ins. Level 45 is the minimum; around level 60 is my recommendation for a first solo attempt. Also bring enough Wen for supplies such as Klien’s Bandages. Their exact price is TBA.
Final Selection Quest Order
| NPC / Stage | What to do |
|---|---|
| The Sisters | Begin the trial and return after the Hand Demon. Do not leave before your final turn-in. |
| Rem | Collect the requested fruit: apple, banana, and grapes. |
| Vael | Defeat the Lesser Demons for the active quest. |
| Klien and Rika | Recover Klien’s katana, buy Bandages from Rika, and treat his wounds. |
| Mizuto | Recover the Submerged Key through the pond/cave objective, then complete the dungeon tasks. |
| Parkour Dungeon | Three lives, timed obstacles, and levers. Check each landing before committing your next jump. |
| Lavato | Complete Mountain Survival’s four checkpoints. |
| Levi | Complete the capture/rescue objective. Pull enemies away from the zone if they keep interrupting you. |
| Steve | Start the Hand Demon encounter, defeat it, and return to The Sisters. |
During the parkour dungeon, the lever counts are one, three, then two across its sections. Give Double Jump time to recover instead of assuming you can chain it endlessly. The exact cooldown and timer duration are TBA.
How to Approach the Hand Demon
For the boss, start conservatively. Watch an attack sequence, identify the recovery window, and punish it without emptying every resource at once. Increase your aggression once you understand what you can safely get away with. Surviving with an unused skill is considerably more useful than dying with an impressive cooldown collection.
When the Hand Demon becomes invulnerable and summons smaller demons, clear the adds before returning to the boss. Save some stamina for repositioning. Bring help if you can, but keep checking your own quest progress and finish the final dialogue yourself.
What to Do After Becoming a Demon Slayer
In this stage of Slayers 2 Slayer Progression, you'll use your crow for quests, keep developing mastery, and start working on Slayer Progress. Talk to Ren at the Butterfly Estate (the gourd vendor): return his missing blade from near the waterfall to unlock his shop. Gourds raise Slayer Progress, whose levels grant permanent stat improvements. Gourd prices, progress per use, and the full stat table are TBA. Check your current progression bar before and after training so you can see what your purchase actually did.
For funding, unlock Ginzo at Mistfall Harbor by returning his Jewelry Box from his house in the Village Hidden in the Mist. He buys loot, including coin items, which helps fund further training.
Your First Upgrades After Final Selection
Equip your Kasugai Crow and follow its bounty quests alongside repeatable fights you can clear consistently. Keep using your main weapon and Breathing Style to build mastery. Character level, mastery, and Slayer Progress are separate goals; increasing one does not automatically finish the others.
Next, visit Hidden Mist Village’s smiths. Togane handles weapon upgrades and crafting, while Yagane’s armory offers Enryu, Shinkage, and Tengoku Katanas using Crude Iron Ingots. Inspect the recipe before committing your materials. Exact recipe totals and the best first craft are TBA.
Also check equipped gear and unlocked Titles. Use Equip for an item’s stats; Equip Vanity changes its appearance. Titles can provide bonuses too. A better-looking outfit is nice, but it will not help much if you only equipped the cosmetic version.
Raids and world bosses are later targets once your basic build is working. A complete route through higher Slayer ranks, Ouwigahara access, and endgame gear is coming soon. For now, avoid spending rare materials just because an upgrade button is available.
My recommendation here is to choose one upgrade goal at a time. Work toward a useful technique, a better piece of equipment, or another progression milestone. That gives each farming session a purpose and makes it easier to judge whether the activity is worth repeating.
You also don't need to rebuild your character the moment someone wins a duel against you. First ask whether the problem was your setup, an unfamiliar matchup, or the part where you dashed directly into their attack. All three happen. Only one necessarily needs a reset.
Common Slayer Progression Mistakes
These are mostly things I wish I knew before starting the game and my Slayers 2 Slayer Progression. Unfortunately, as is often the case with Roblox games, Slayers 2 can be a very unintuitive experience, with almost non-existent onboarding and player guidance. Hence, if you wish to avoid frustration and losing time unnecessarily, try not to repeat these mistakes:
- Reaching a trainer without the right resources or movement unlocks. Check the route and requirements first.
- Confusing character level with mastery. Develop the weapon and style you intend to use.
- Spending every point before checking your next technique. Plan around the unlock that improves your actual combat routine.
- Choosing difficult content purely because it is available. Reliable clears matter more than ambitious respawns (no matter how boring and repetitive they are).
- Treating Final Selection as the finish line. Keep improving your kit and Slayer Progress afterward.
Get a functional build together, learn its openings, and give yourself a specific goal each time you head out. The Hashira fantasy can wait until you've stopped losing arguments with the local wildlife.
Slayers 2 Demon Slayer Progression FAQ
The minimum level is 45. I recommend around level 60 for a first solo attempt, but that is preparation advice, not an entry requirement.
Breathing trainer questlines start at level 25. Meet your chosen trainer’s requirements, complete the training, and finish the relevant trainee encounter.
Complete Kona’s Recover the Lost Pages quest in Windy Peak. Find all five pages in the village and return them to Kona to claim the book.
The exact repeat schedule is TBA. Check the countdown at the entrance in your current server and arrive before the waiting period ends.
Equip your Crow, work on bounty quests and mastery, unlock Ren’s gourds and Ginzo’s loot-buying service, and check weapon crafting. Keep developing Slayer Progress alongside your character level.
No. A useful clan can strengthen your build, but it does not replace Breathing training or completing Final Selection. Start with a workable setup instead of spending every spin before playing.
That should get your Slayers 2 Demon Slayer progression moving, from the first village errands through Final Selection and your first upgrades afterward. I’ll expand the later progression steps and fill in the remaining TBA details as I work through them. Thanks for reading, and while you're here, be sure to check out our other Slayers 2 guides, tier lists, walkthroughs, and other useful content.


