
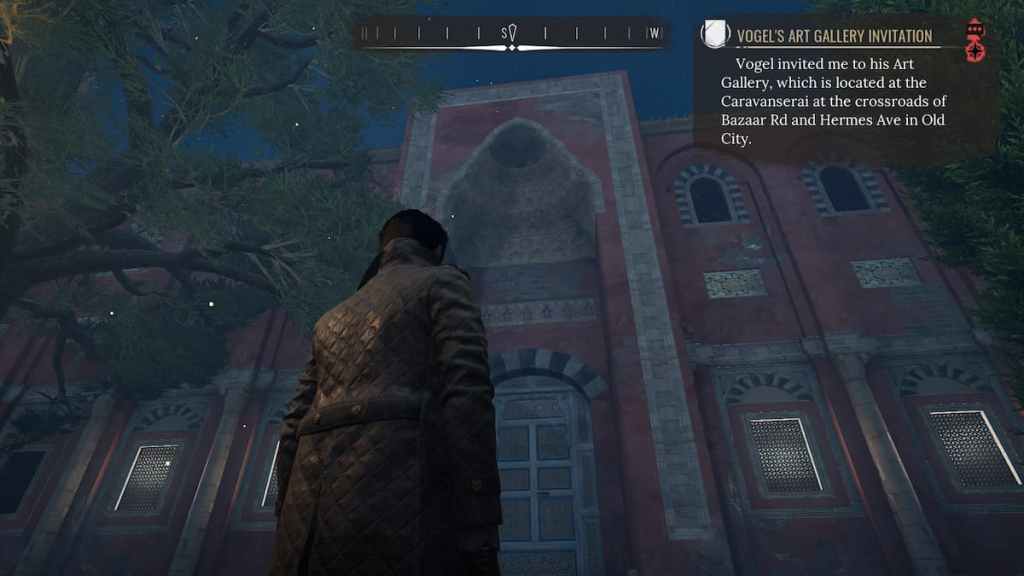
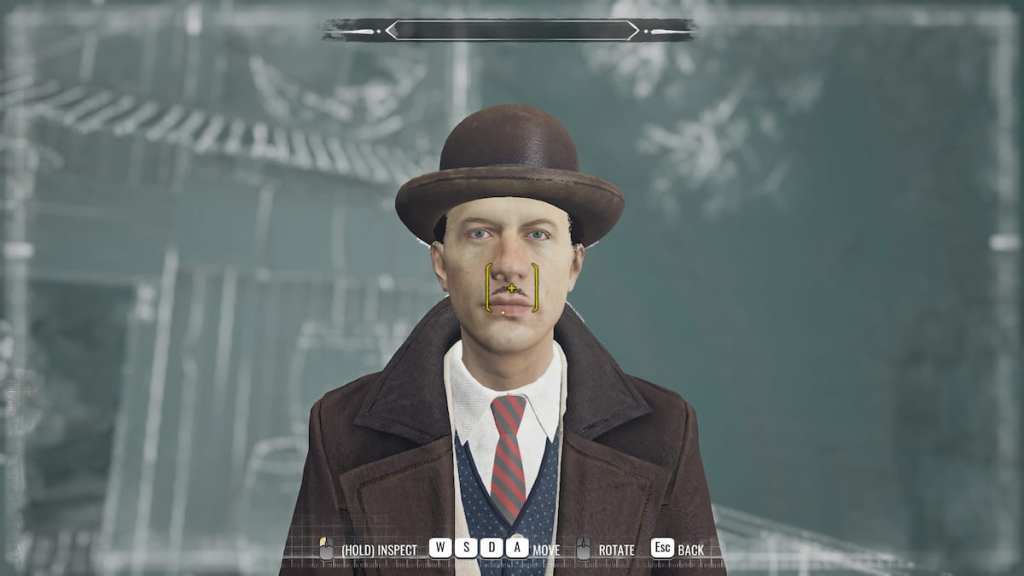
After you've unlocked and fully investigated Violet's room in Stonewood Manor, you can find a man dressed as a sailor just inside the front door downstairs to begin this harrowing case. Speak to him, and you'll be able to observe and profile him as a messenger from Vogel's Art Gallery, disguised to test Sherlock. After speaking to the fake sailor, he'll give you an invitation to the gallery—you'll find it at the intersection of Bazaar Rd and Hermes Ave in Old City.
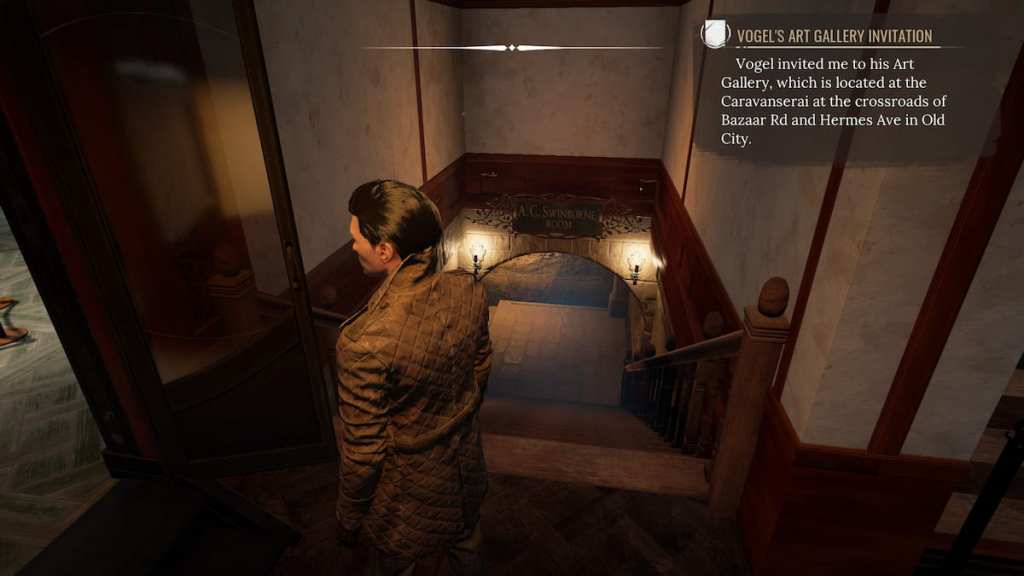
Enter, and you'll soon find Vogel. Speak to him to find out that there was a theft from his Undergallery, then head downstairs to the A.C. Swinburne Room to begin your investigation.
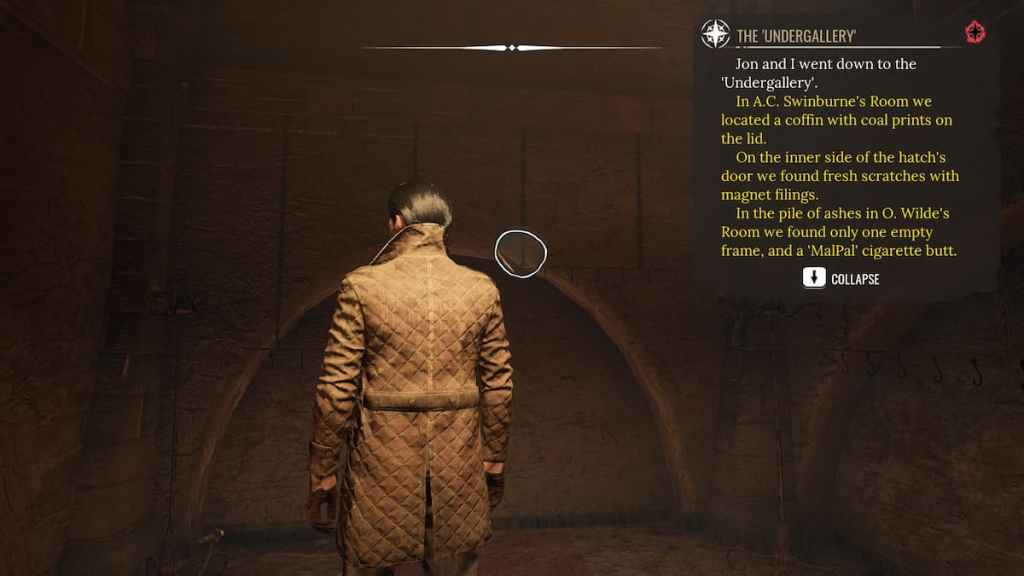
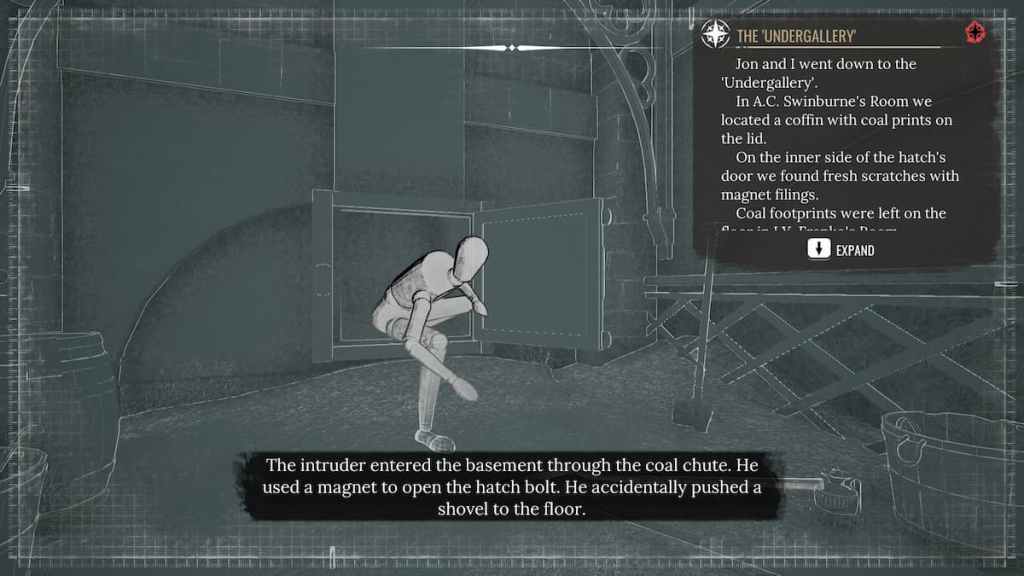
Round the left corner at the bottom of the stairs to investigate a shovel and a set of dirty footprints. Open the door to the coal chute to find more dirty footprints and scratches from a magnet.
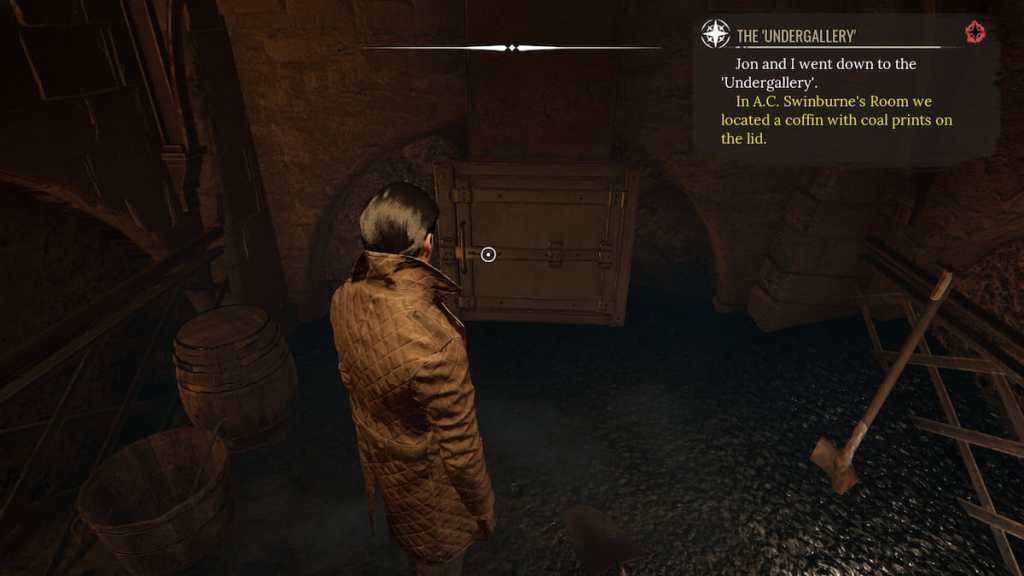
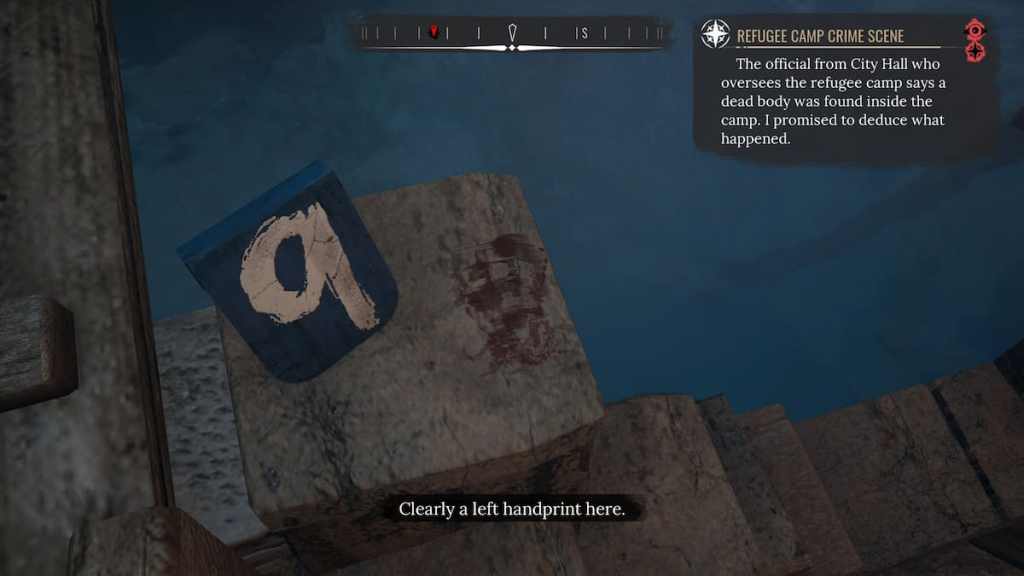
Exit this room, and you'll find a casket situated on the wall with a skeleton inside. Investigate it—you'll find a few interesting things, but the most important clue is the coal handprint on the inside of the casket lid.

Continue through the Undergallery until you come to a pile of burnt art. Scan it with your Concentration Mode, and you'll find remnants of a MalPal cigarette along with an Empty Frame. Be sure to rotate the cigarette until you find the coal print.

Head to the end of the hall now to find the final pieces of evidence down here. Scan the wall with your Concentration Mode for a glimpse at the wall before the paintings were taken down and burned.
You should have all the evidence you need to reconstruct the scene of the crime. Head back to the stairs to find the node and arrange the scene as follows:
- Unknown intruder exiting coal chute.
- Unknown intruder in the coffin.
- Vogel at the stairs.
- Unknown intruder taking down and burning paintings.
Once successful, return upstairs and share your findings with Vogel. He'll ask you a pretentious question about the art downstairs—your answer won't change anything. Exhaust your dialogue options as you see fit, and Vogel will give us a name to research—Boniface Mercurio.
Head to the Cordona Chronicle Archives, and be sure to have Mercurio's Address evidence pinned to search for the following:
- Period—Recent.
- People—Celebrities.
- Districts—Old City.
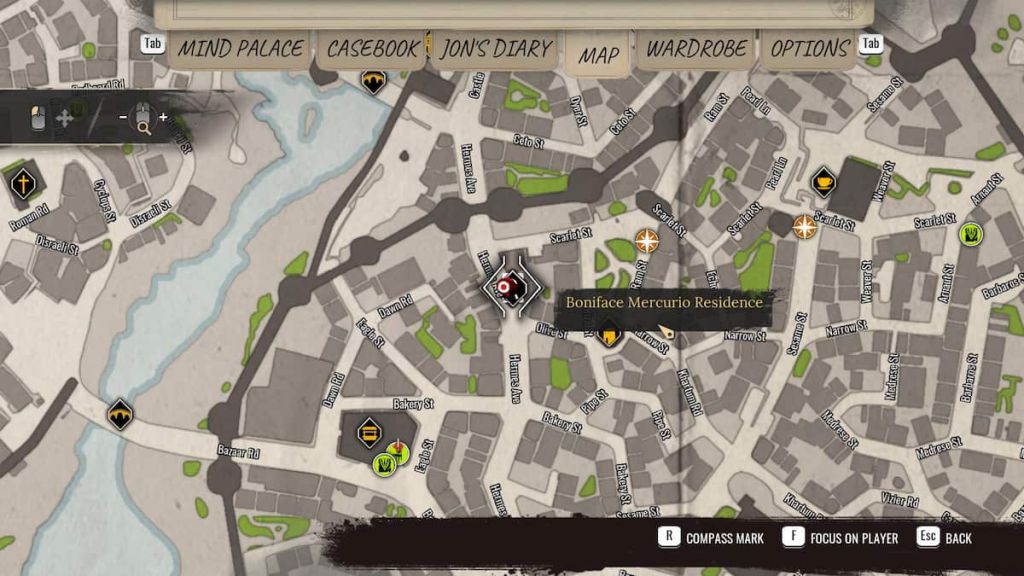
This will give us a picture of Mercurio and an address—an apartment on Hermes Ave, midway between Scarlet St and Olive St in Old City.

If you enter the apartment right away, you'll quickly find that the landlady isn't going to cooperate. Leave and head south to the nearby Old City Marketplace and find the clothing trader to buy and equip the following items:
- Bohemian Outfit.
- Messy Hair.
- Artist's Bristles.
- Artist's Tan Powder.

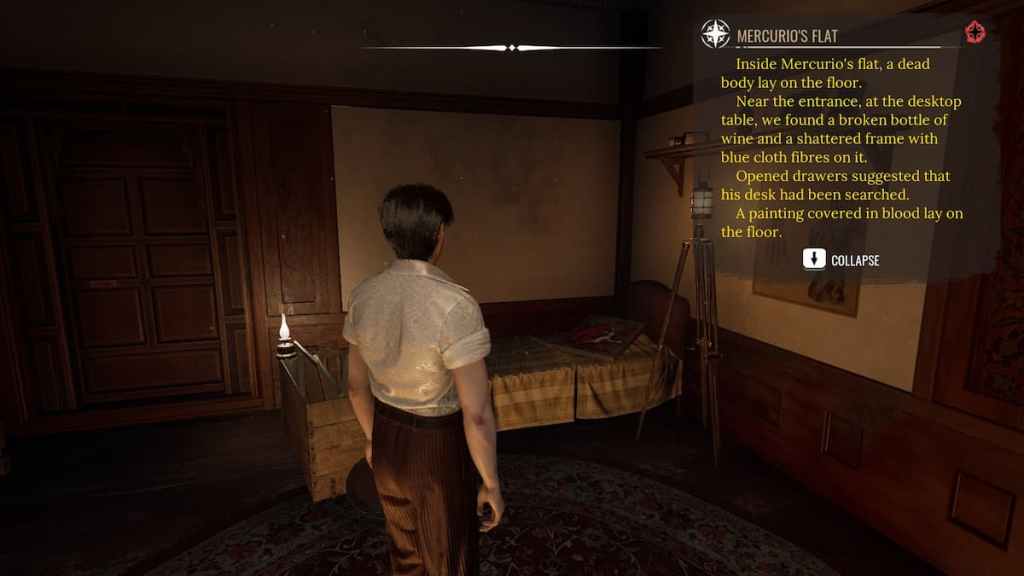
You should now be in full disguise as Mercurio. Head back to the apartment, and the landlady will now greet you warmly and allow you through to Mercurio's apartment—enter, and you'll find the dead body of Boniface Mercurio.
Related: How to Solve A Gilded Gage Case in Sherlock Holmes Chapter One
Start by investigating the body, and you'll find clues from scanning his neck wound, chest, hand, bloody rags, and the bloody knife right next to him. At his feet, you'll find a blood-stained painting.

Find the desk nearby and investigate it. You'll find Mercurio's Fancy Camera, a shattered mirror and wine bottle, a missing knife, and some news clippings in an open drawer. Move on to the bed area—examine the collection of wine bottles by the door, the chest of paintings, and the morbid painting on the bed.
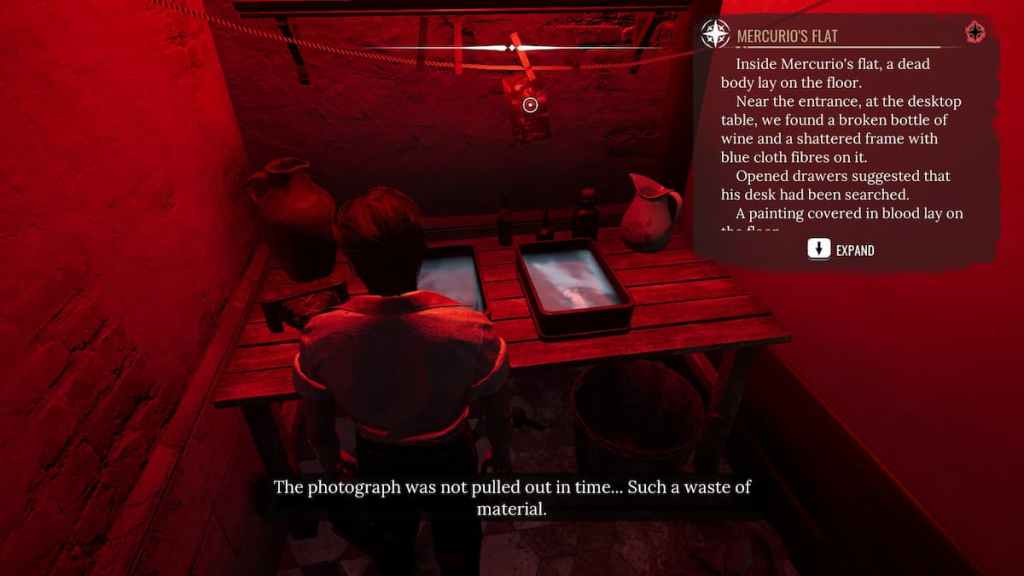
From here, head into Mercurio's darkroom, where you'll find a couple of photos that link to the painting on the bed.
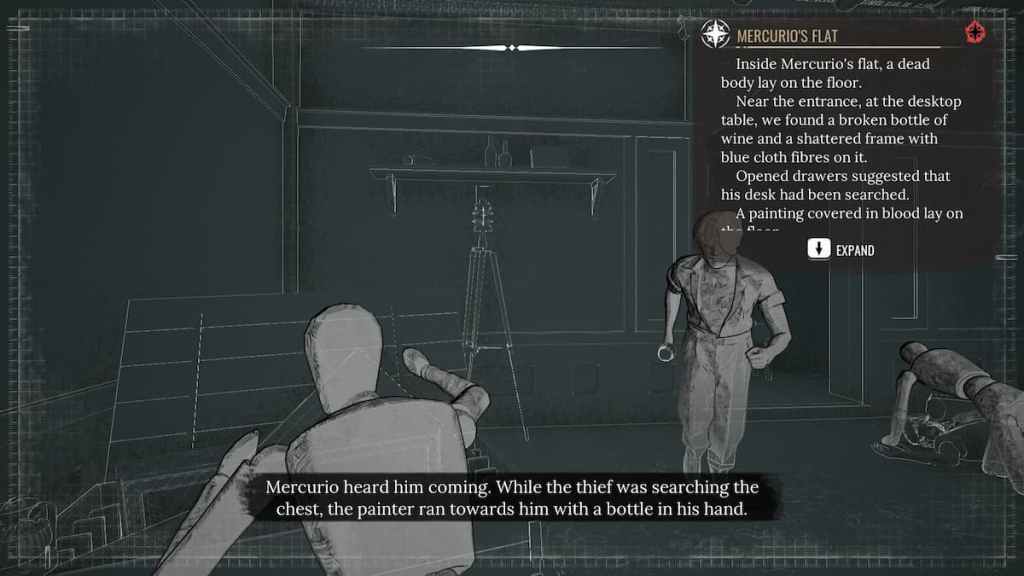
After you examine them, a node should appear in the bedroom—interact with it to reconstruct the scene of the crime as follows:
- Unknown Thief searching through paintings near bed.
- Mercurio smashing Unknown Thief with bottle.
- Mercurio grabbing painting, Unknown Thief stabbing with knife.
- Unknown Thief bandaging Mercurio on ground near door.
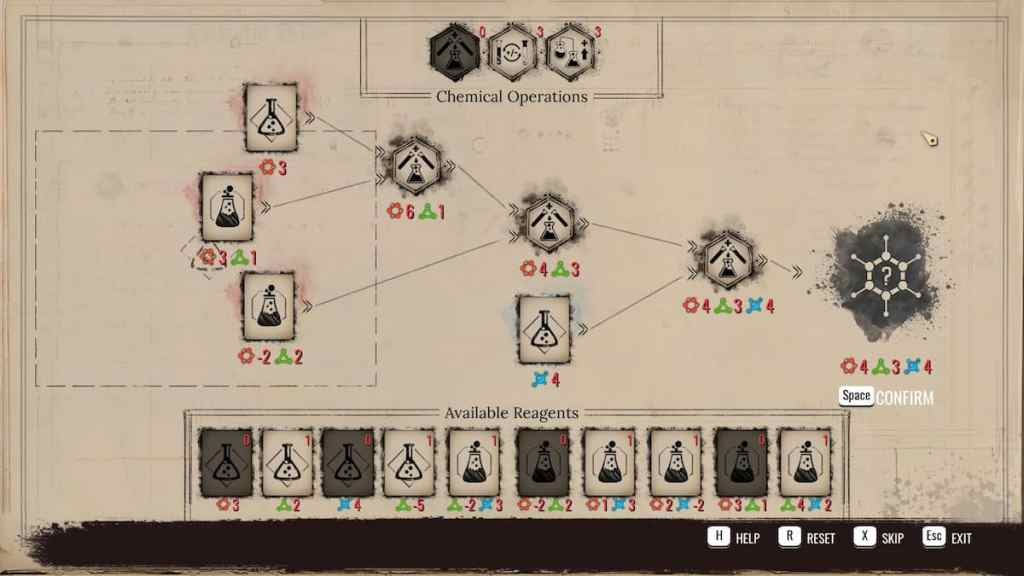
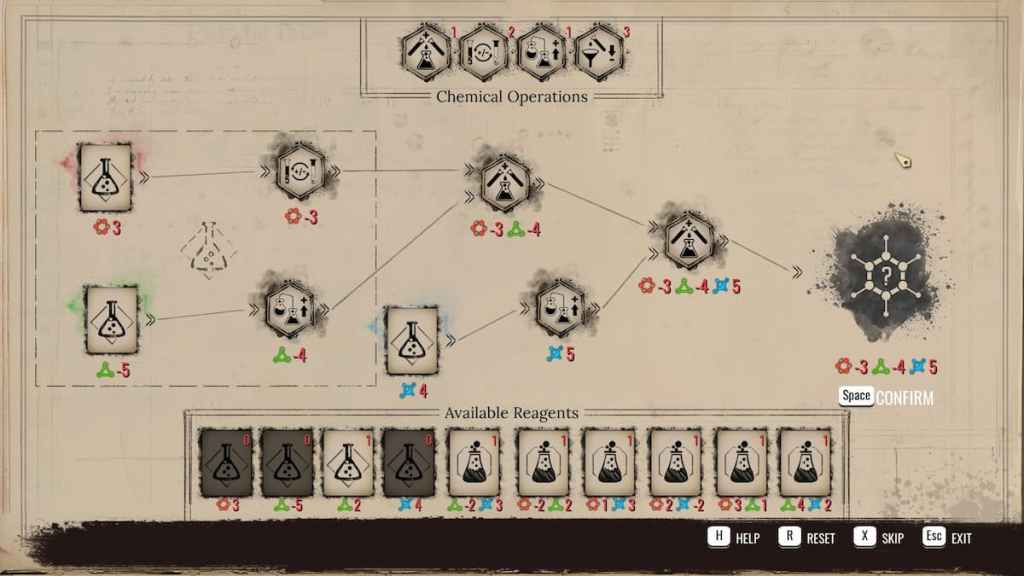
Now grab the blood-stained painting and choose to perform a chemical analysis on it from your casebook (see the screenshot below for the correct combination).
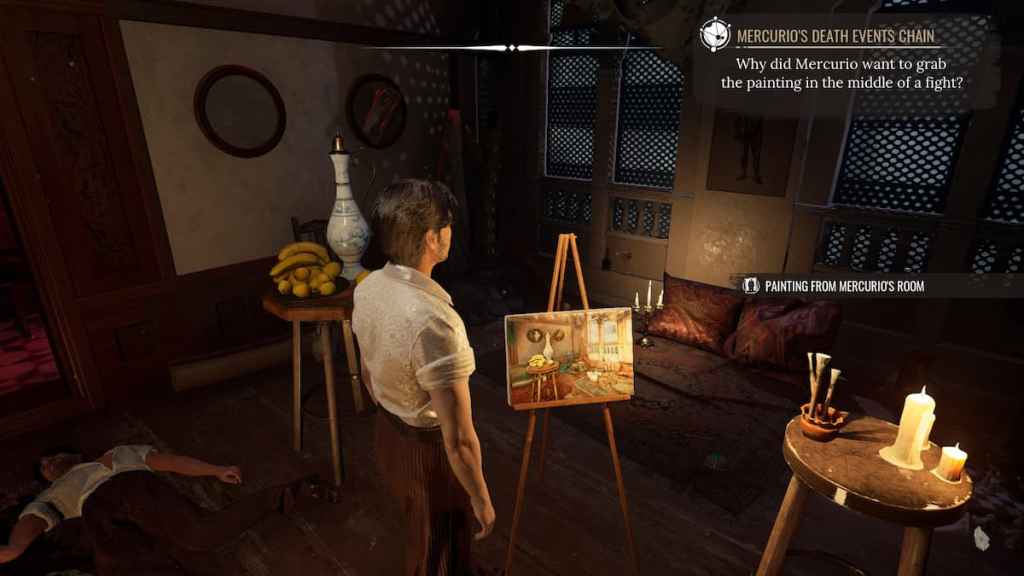
Place the restored painting on the easel and note the two differences in the room—a missing animal skull and a large log in the corner. Interact with the log and empty space on the wall where the skull once hung.
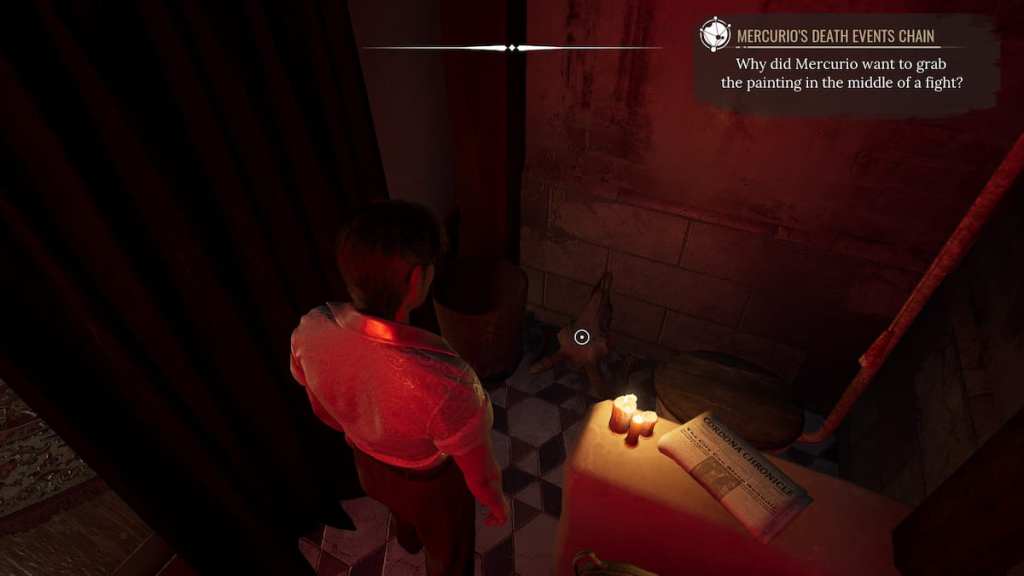
Go back into Mercurio's darkroom and look on the floor to your left—you'll find the missing skull along with a harrowing photograph, which is the final clue for the area. Jon will take it from you and only sketch the relevant pictures of a Female Refugee and the Devil Suspect upon finding it.
Jon Challenge 1: After learning the truth, Jon will implore you to stay in character when speaking to the landlady and to calmly ask her to call the police. For the best outcome, choose to stay calm and in character during your dialogue options with her—you will win the Jon Challenge Dead Man Walking and get better information about the murderer.
Speak with the landlady as you see fit and exit the apartment. From here:
- Pin the picture of the Female Refugee.
- Equip a local-friendly disguise.
- Find and speak to anyone of African descent.
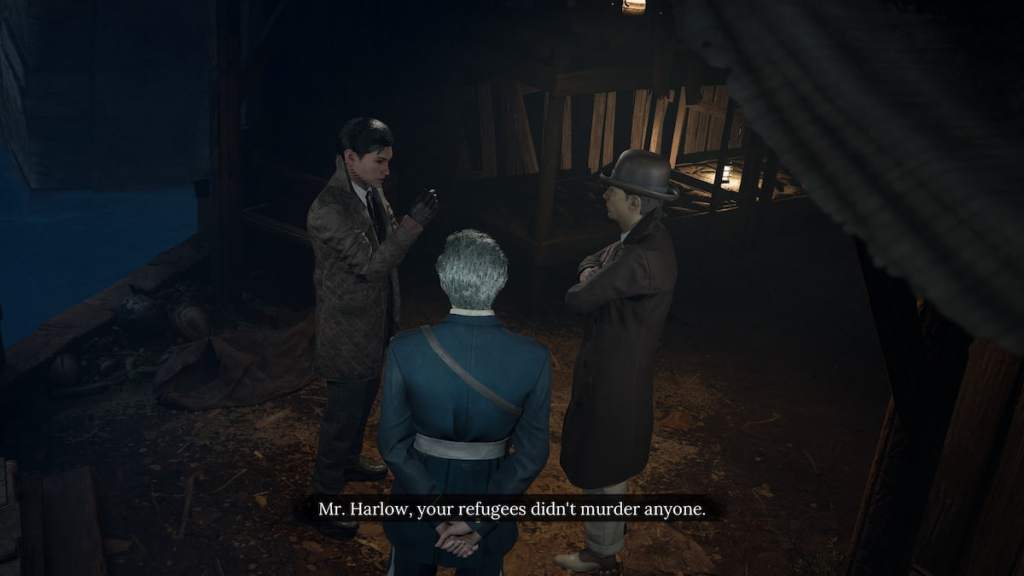
You'll be pointed to a Refugee Camp located below Victoria Bridge, which you'll find between Silverton and Scaladio. When crossing the bridge, look for an opening to the side which will lead you down a staircase and into a shouting mob and the police. Speak to Mr. Harlow (the man in the brown hat and coat) to progress.
After you observe and profile him, run through his dialogue options as you see fit and take the opportunity to offer your assistance when prompted. Eventually, he'll relent and allow you access to the Refugee Camp. Ask him about the situation and move into the camp to speak to a middle-aged officer just inside.
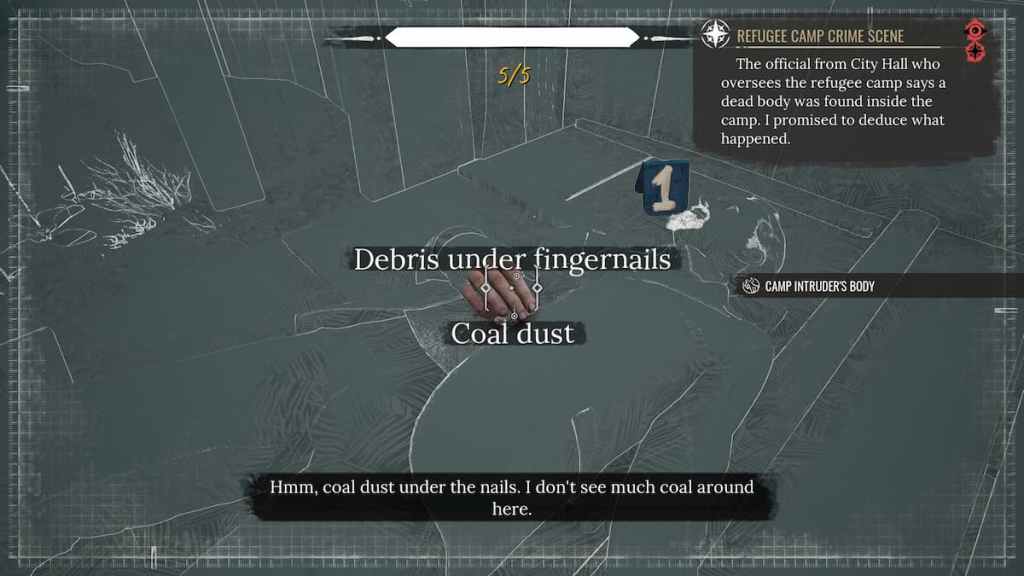
After you're up to speed on the situation, push deeper into the camp to investigate the dead body to your left to examine a bloody dagger, a neck tattoo, and boots. Enter Concentration Mode to examine the hand.
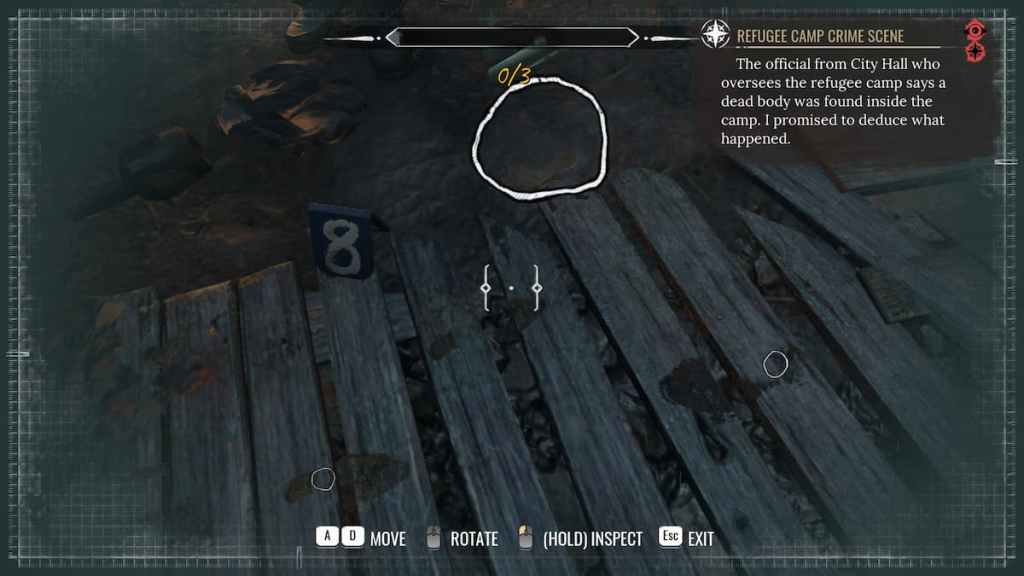
From here, follow the numbered trail that Cordona PD has conveniently left for you and you'll find one or two pieces of easily spotted evidence at each marker. The trail goes from 1 to 9, and you can find number 8-9 near the camp entrance, closer to where you found the body.
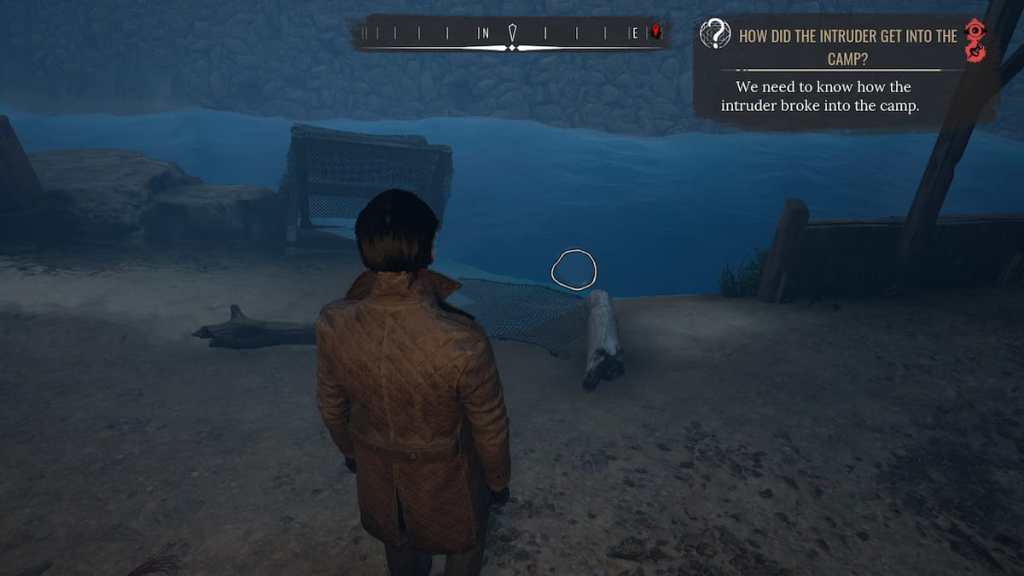
From here, pin the evidence how did the intruder get into the camp—examine the beach near the back of the camp and a ladder behind the middle-aged officer.

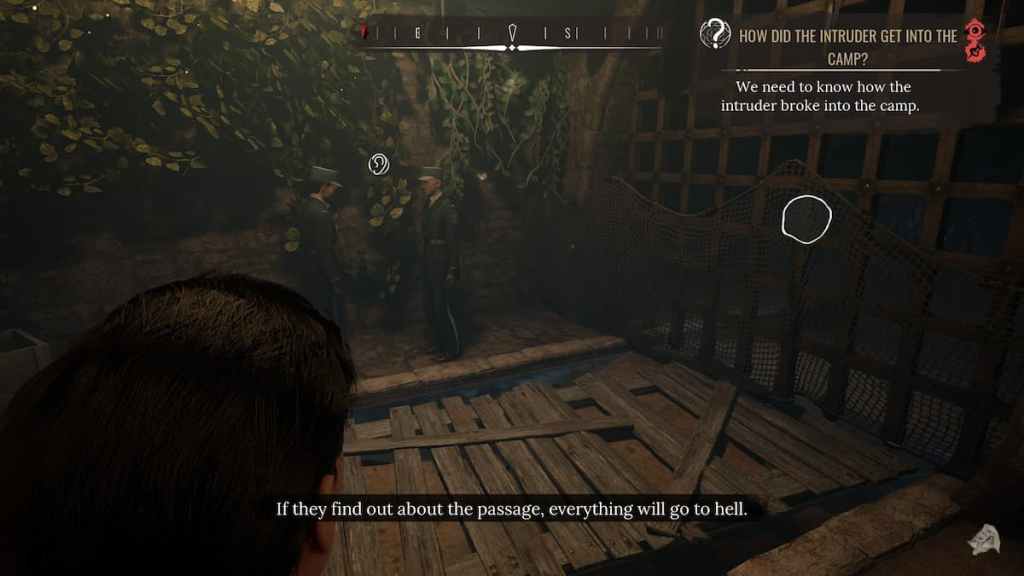
Now move into the tunnel close to where you found the body, you'll find a sewer entrance and two cops you can eavesdrop on.
To successfully eavesdrop on the two cops, choose to keep the following phrases:
- Money.
- Camp Lockdown.
- Take Refugees Out.
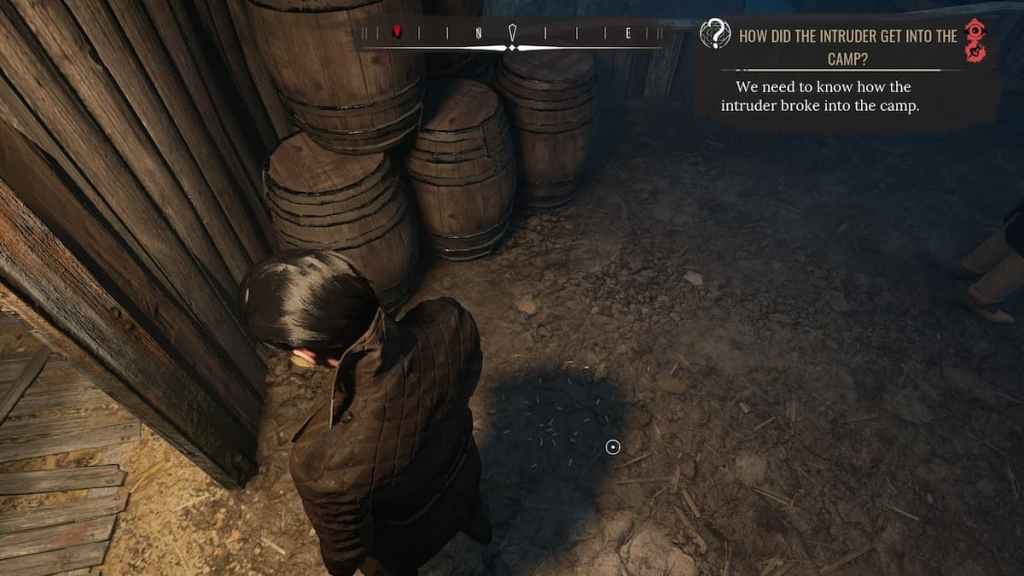
Now head to the main entrance and look down to find a pile of cigarettes. Investigate the pile—you'll find a MalPal cigarette butt which confirms that the Police just let the killer in the front door.
Head back into the camp to find a node, interact with it to reconstruct the events of the scene. To successfully do so, start at evidence marker 7 at the back of the camp and arrange the figures as follows:
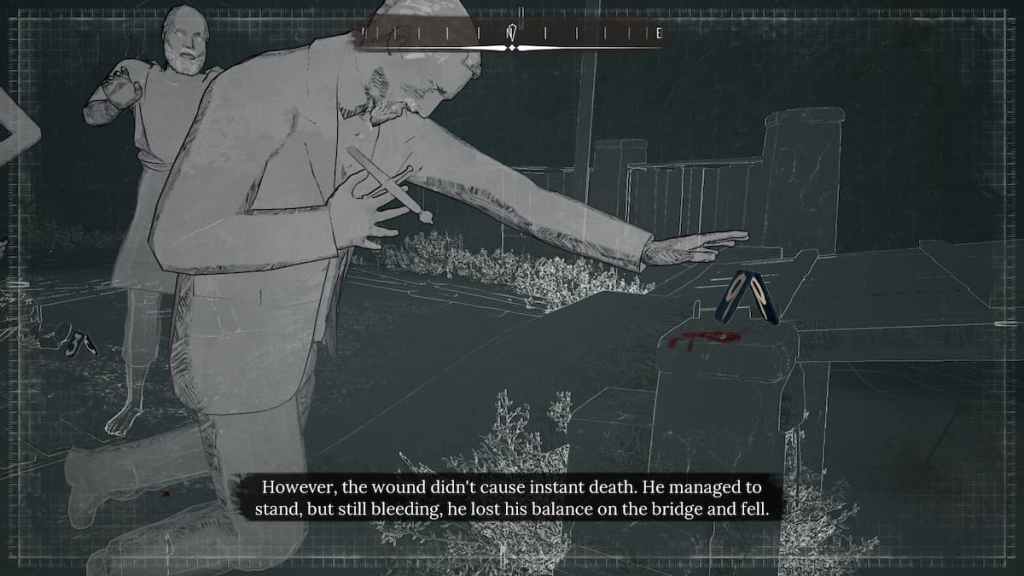
- Killer with knife dragging Woman.
- Refugee attacking Killer with stick, Killer dragging Woman.
- Woman falling back with bracelet breaking, Killer facing other refugees.
- Killer running from Refugees, near evidence marker 8.
- Refugee kicking crates, Killer falling over them.
- Killer kneeling at evidence marker 9, knife in chest.
Afterward, go back to speak with the middle-aged officer and Mr. Harlow to share your findings.
Jon Challenge 2: During your time in the refugee camp, Jon will ask you to go a step beyond and figure out what's going on behind the scenes. To complete the what's going on at the refugee camp challenge, speak to one of the refugees with the challenge pinned after you've absolved them of blame in the case and you will complete the challenge.
Now pin the photo of Neila, the female refugee in your photo, and go to the back of the camp to speak with the refugee guarding the shack. Run through his dialogue options and eventually you'll get the chance to speak with Neila.
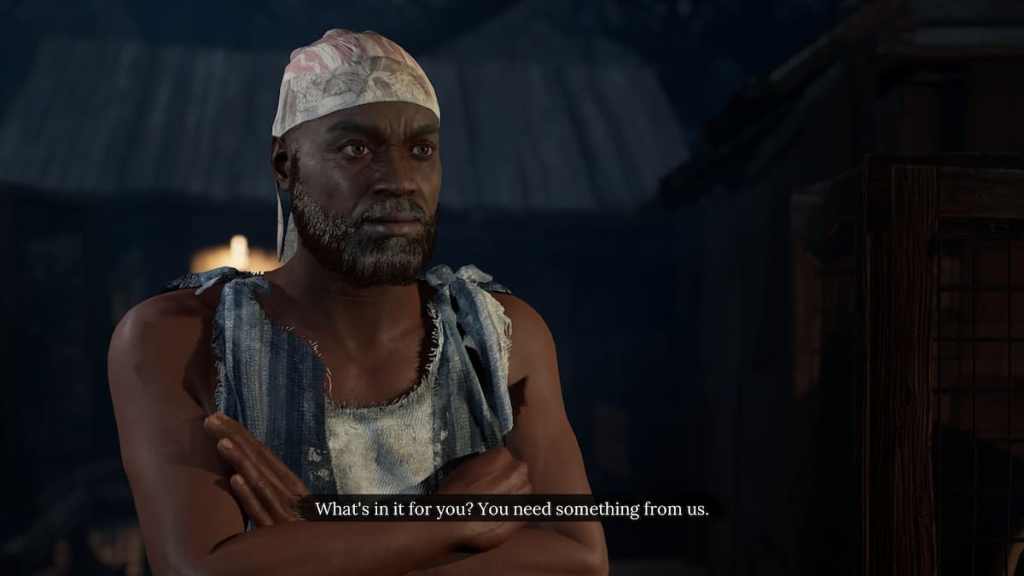
She's not exactly happy with your offer of help, but she provides an integral clue that will lead you to the people responsible for her trauma—a drawing of a badge on the photo of the Devil Suspect. Before you leave the camp, speak with the middle-aged officer about the tattoo you found on the dead body, and he'll point you in the right direction for the home stretch of this case.
Jon Challenge 3: Jon will suggest you help the dying refugee who was wounded while helping Neila. Pin the challenge, grab some hanging clothes on the right side of camp, some Aloe Vera in the sewer tunnel, and interact with the culdron at the center of camp.
In your casebook, go to the challenge and start chemical analysis (see screenshot below). After you succeed, interact with the wounded refugee to complete the challenge. If you leave camp after you've solved this portion of the case, you will fail the challenge.
Leave the camp and travel to the City Hall Archives. Pin the evidence sketch of the abuser and search the following criteria:
- Subjects—Occupation
- Registry—Officials
- Period—British (1800s)
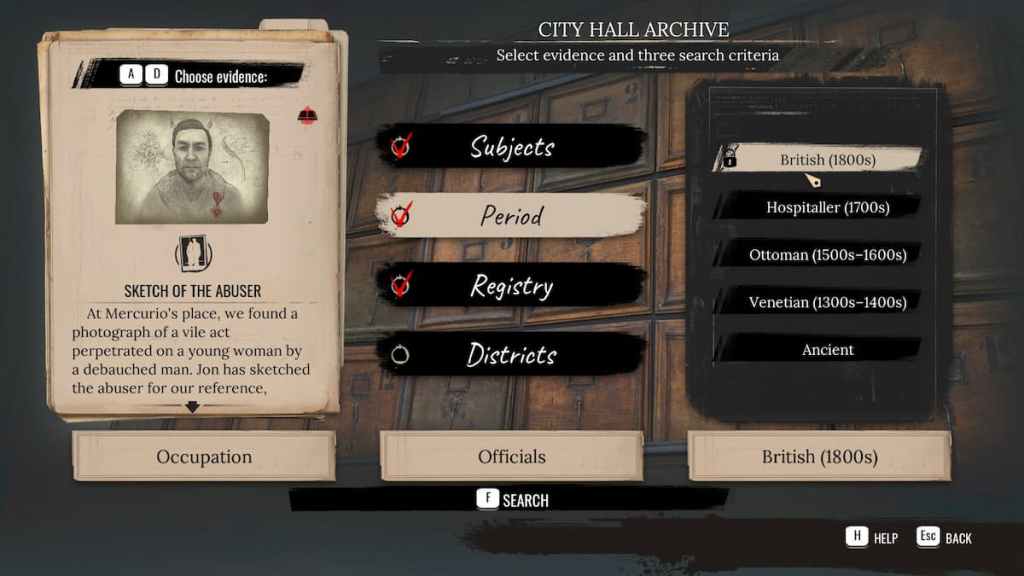
Doing so will point to a man named Thomas Norton, who you can find right down the hall through a big door with his name on it.
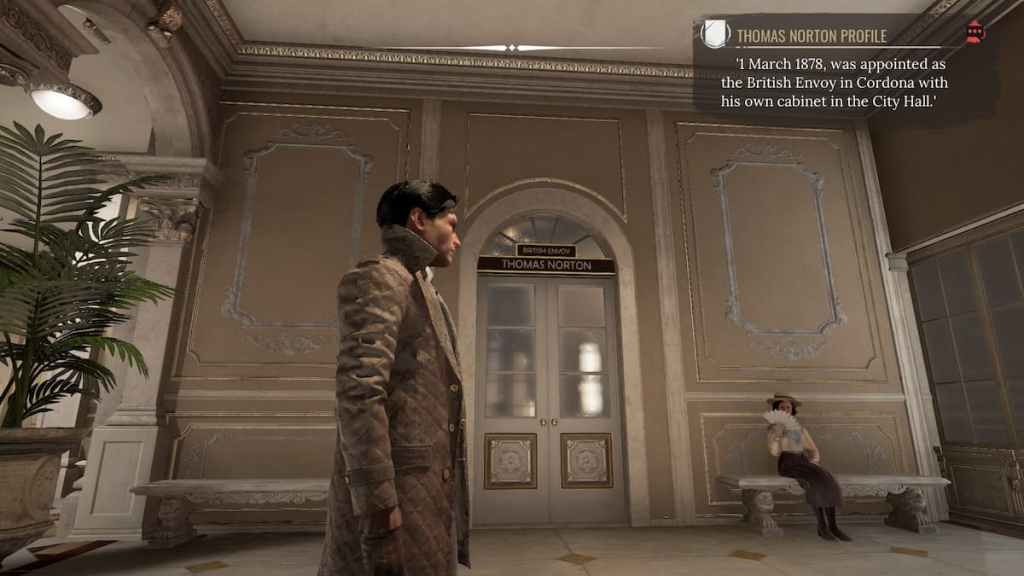
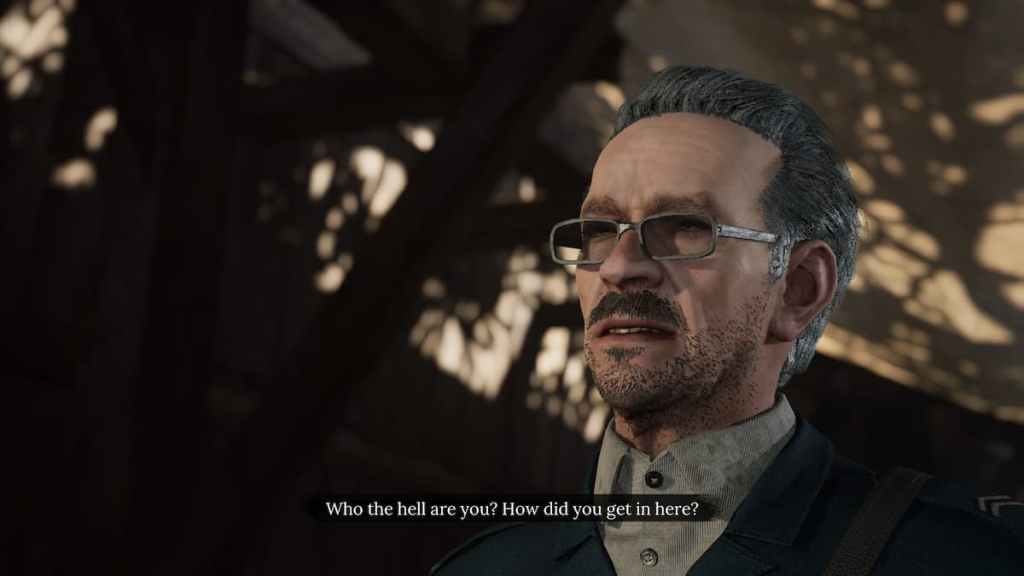
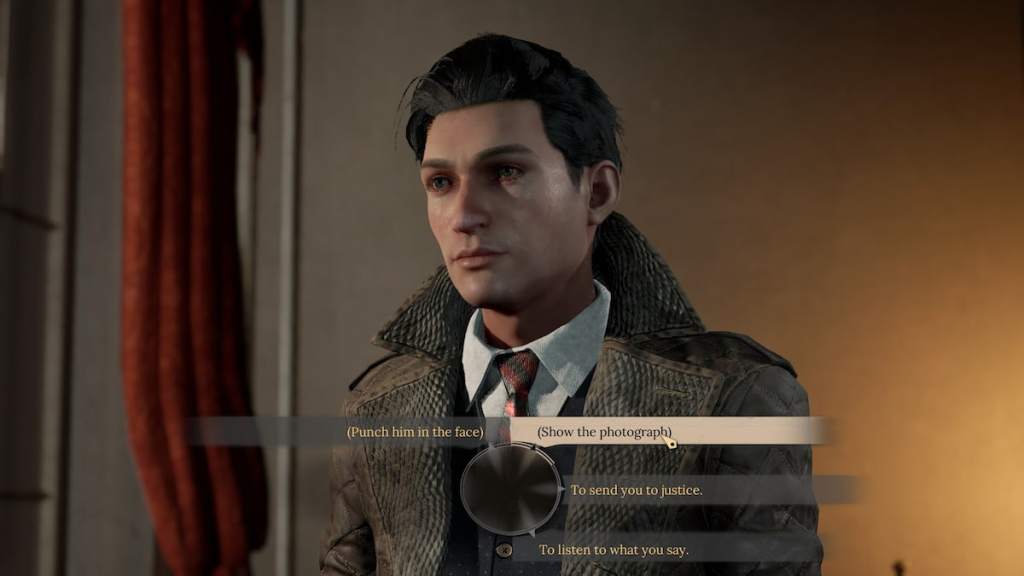
Enter the room and you'll find Norton. Speak to him and you'll be able to observe and profile him—your choice of the profile doesn't change much, only how irritated he will be with you. Although it may be tempting to punch him in the face, when you're prompted, choose to show him the incriminating photograph.
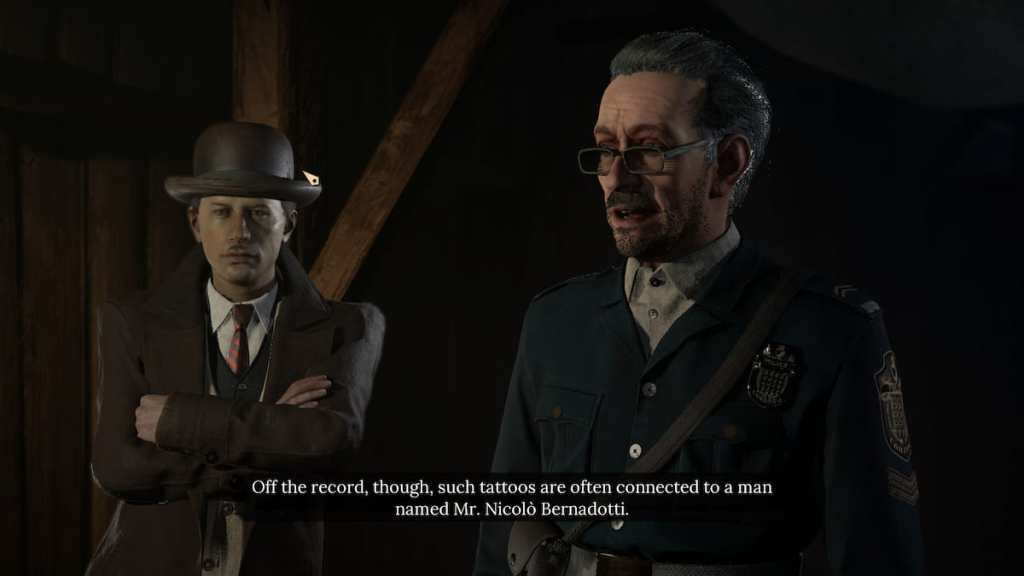
When you do this, he'll relent and try to justify his part as the abuser in these events. He'll also ask you for the photograph—keep it in your back pocket a little bit longer. To tie up all loose threads, head to the Police Archives, pin the camp intruder's tattoo, and enter the following criteria:
- Crimes—Smuggling.
- Subjects—Suspects.
- Districts—Scaladio.
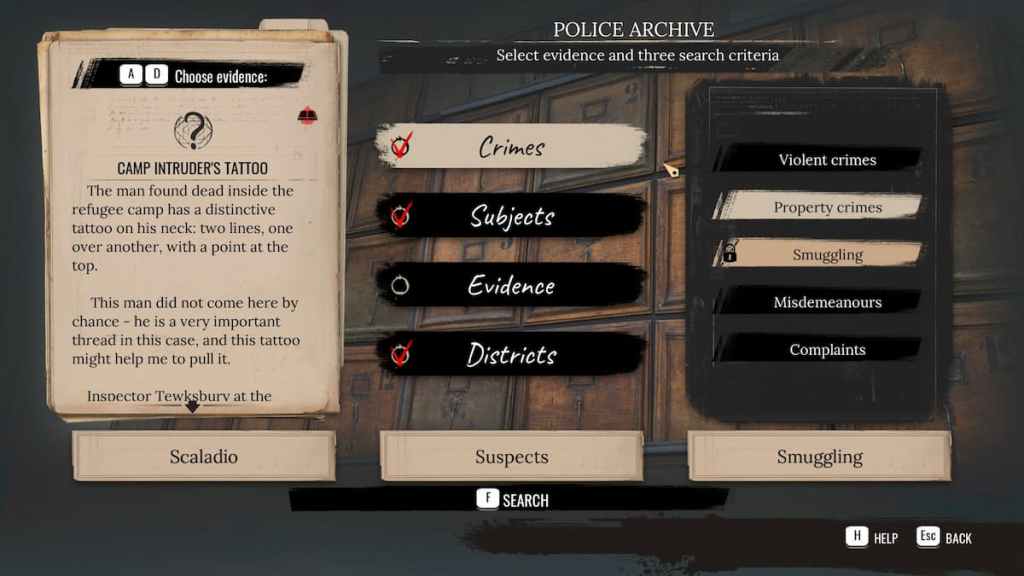
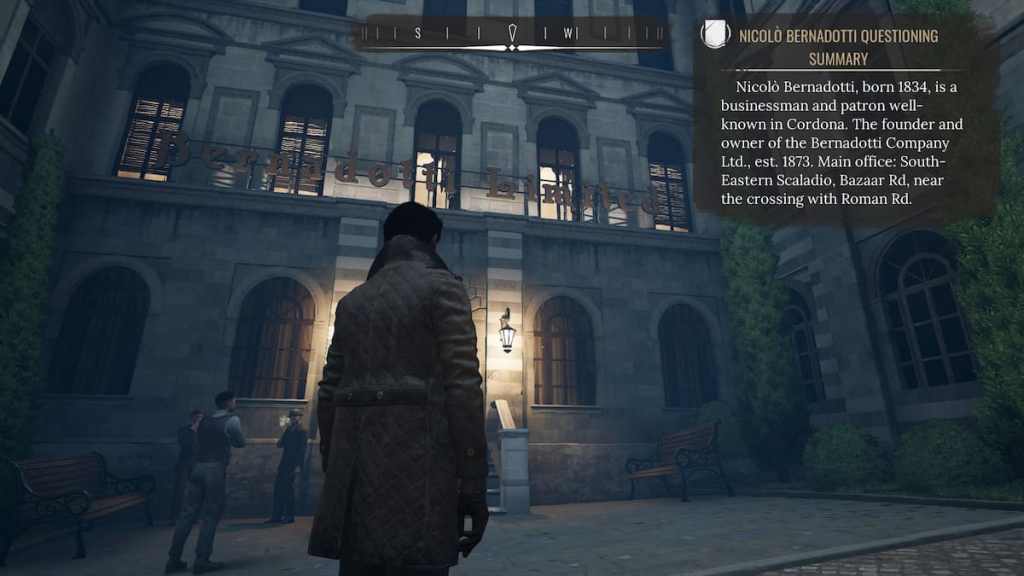
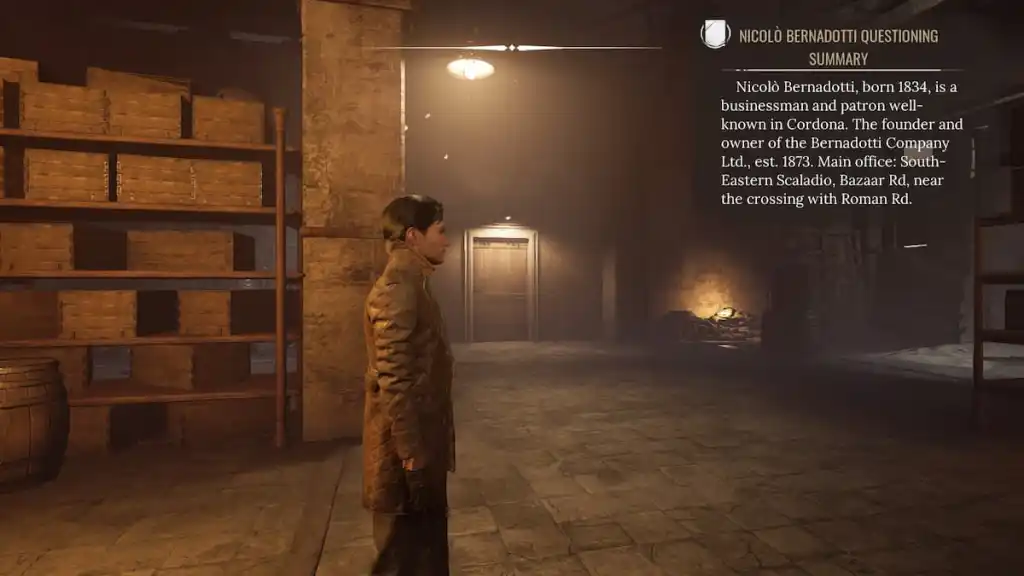
A successful search will point you to Bernadotti Limited which you can find near the intersection of Bazaar Rd and Roman Rd. Head there and get ready for a fight.
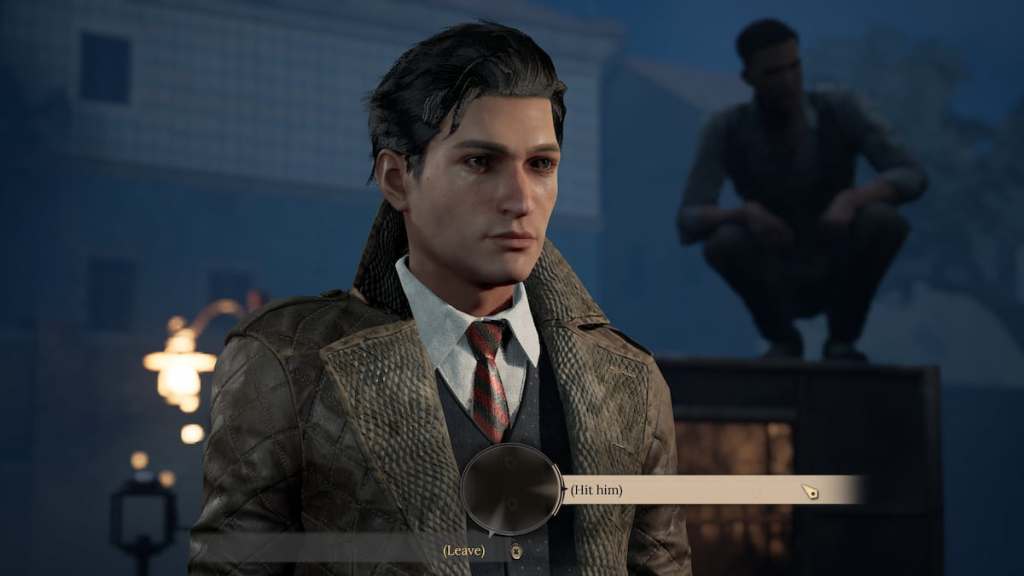
Don't bother with the locked front door. Instead, head around the right side of the building and to the back. Examine some crates on the right side and some dolls along the way and eventually, your progress will be blocked by a guard at the back entrance. You can choose other dialogue options, but you will have to hit him to progress.
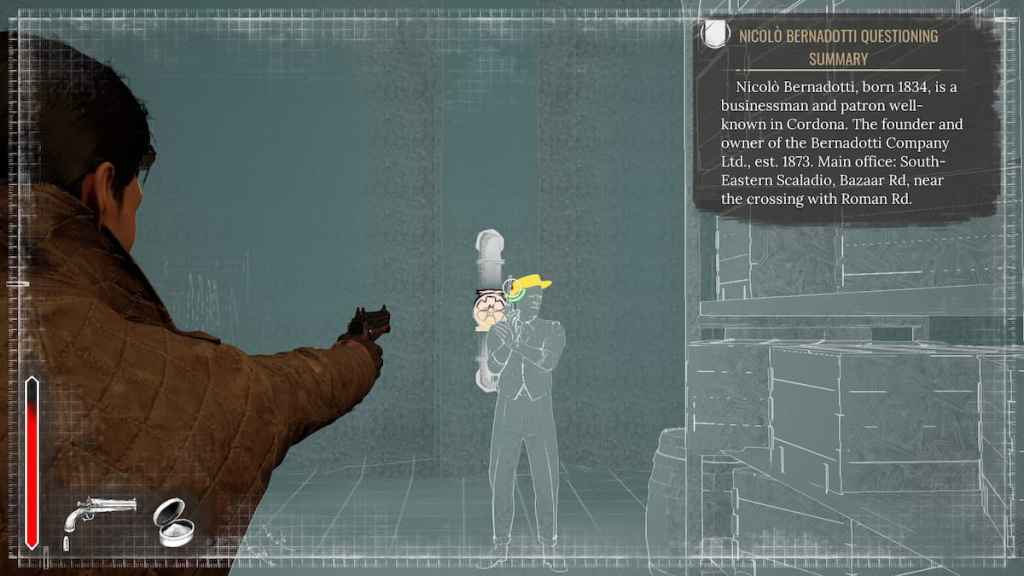
Once inside, you will be thrust into a battle that sends three waves of enemies at you. Stay on the move and deal with them accordingly—there are tons of environmental aids to help you in the room.
Once they are dealt with, locate the door to the left of where you originally entered (seen below).
Move through the door and investigate the room, where you will find the stolen painting. Continue through the next door to find a guard who quickly runs from you. Follow him through the hallway—you'll find a newspaper on a bench to the left, and some items on the reception desk. Examine all of them in Concentration mode.
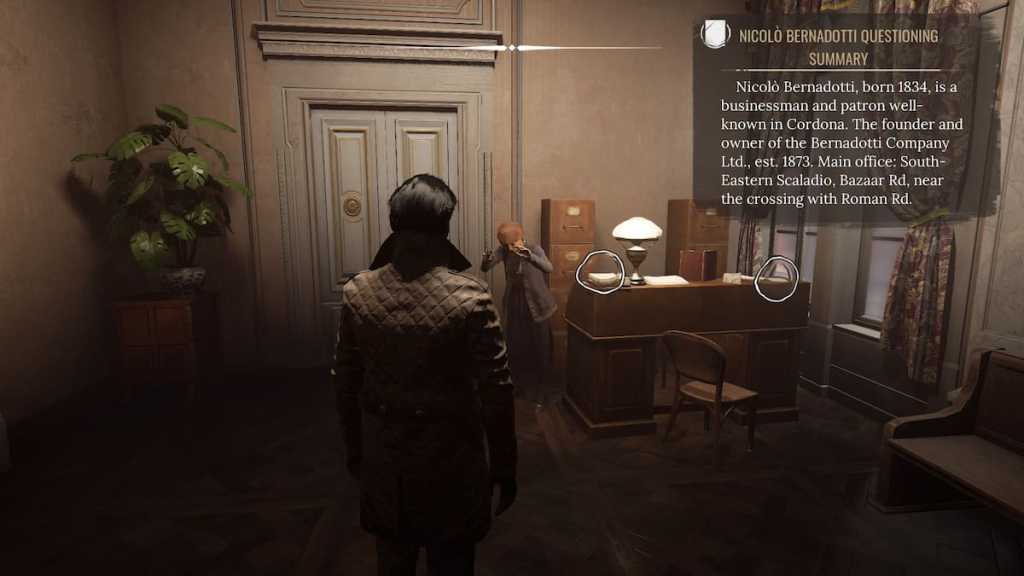
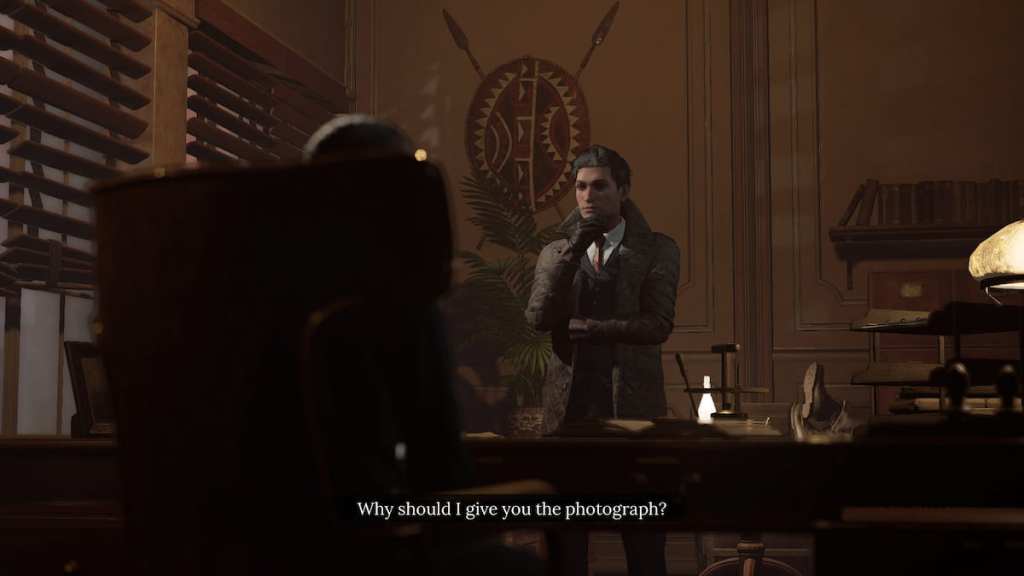
Now head through the door behind the reception desk to have a face-to-face with Bernadotti himself. There are a few items to investigate in his room, but they don't change the outcome at all. Speak with Bernadotti to observe and profile him—choosing to describe him as a criminal mastermind will result in a smoother conversation.
Related: How the Mind Palace works in Sherlock Holmes Chapter One
Exhaust his dialogue options and, like Thomas Norton before him, he will ask for the photograph.
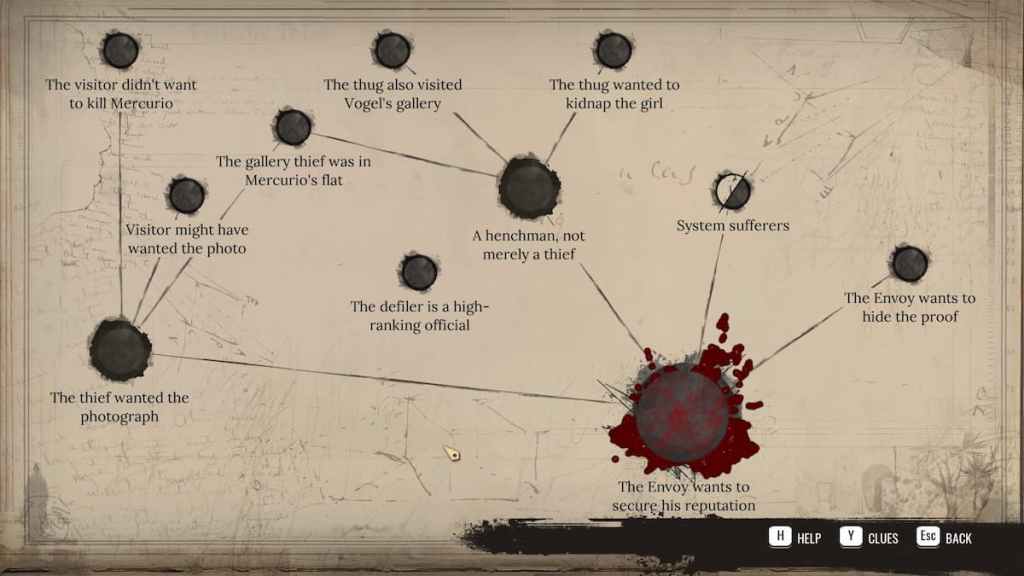
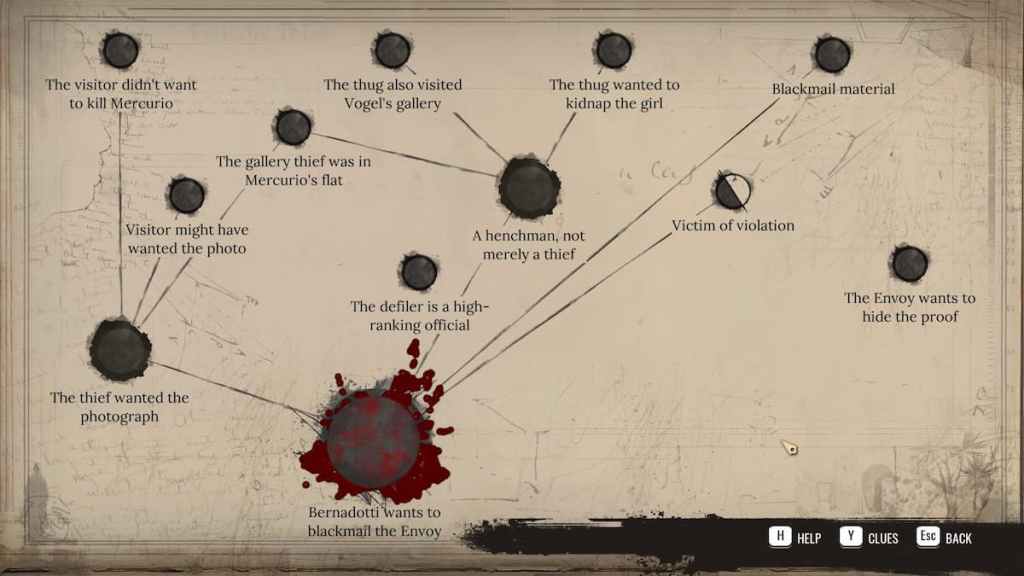
Now enter your Mind Palace to connect all of the clues as follows and let's finish this case:
- The Painter was killed in a fight—The Thief was caught by the painter.
- Limping Thief was a smoker—Mercurio's visitor smoked MalPal cigarettes.
- Photograph of violation—The Painters flat was searched.
- The thug tried to drag the girl away—The thug didn’t hurt the girl.
- Coal footprints—Coal under nails.
- The defiler has a cross—photograph of violation.
This will lead you to a board with only one split deduction, which changes the conclusion entirely depending on how you choose to see it. Both parties are guilty to some degree and it is left to your discretion whether to give the photo to Bernadotti, Norton, or Vogel.
- Choosing Bernadotti—He promises to use his wealth to help Nelia and her baby, as well as punish Norton for his terrible part in the crime, but will be absolved of blame.
- Choosing Norton—He promises to use his platform to help the entire refugee camp, but will never experience justice for his crimes.
- Choosing Vogel—He will reveal the true nature of Norton and Bernadotti to the public, exposing both of their crimes.
There is no right or wrong answer in this case. Each choice comes with its pros and cons, but the choice is entirely up to you. Give the photo to the person of your choosing and then return to Vogel. Speaking to him will end this dark mystery for now.

For more guides and secrets in Sherlock Holmes Chapter One, check out All Bandit Lair Locations in Sherlock Holmes Chapter One, or Who is Jon in Sherlock Holmes Chapter One? and stay tuned to Pro Game Guides for continued coverage on all of your favorite games!