
Boxes Lost Fragments provides players with a unique point-and-click escape room adventure with a variety of puzzles and an interesting story. In this part of the walkthrough, I'll guide you through the first two levels of Chapter 5 in Boxes Lost Fragments.
Boxes Lost Fragments Chapter 5 Aurora part 1 walkthrough
This guide covers the first and second levels of Chapter 5 of Boxes Lost Fragments. For help with any of the previous chapters or the end of the game, I've linked the other parts of the walkthrough below.
- Chapter 1 part 1
- Chapter 1 part 2
- Chapter 2 part 1
- Chapter 2 part 2
- Chapter 3 part 1
- Chapter 3 part 2
- Chapter 4 part 1
- Chapter 4 part 2
- Chapter 5 part 1
- Chapter 5 part 2
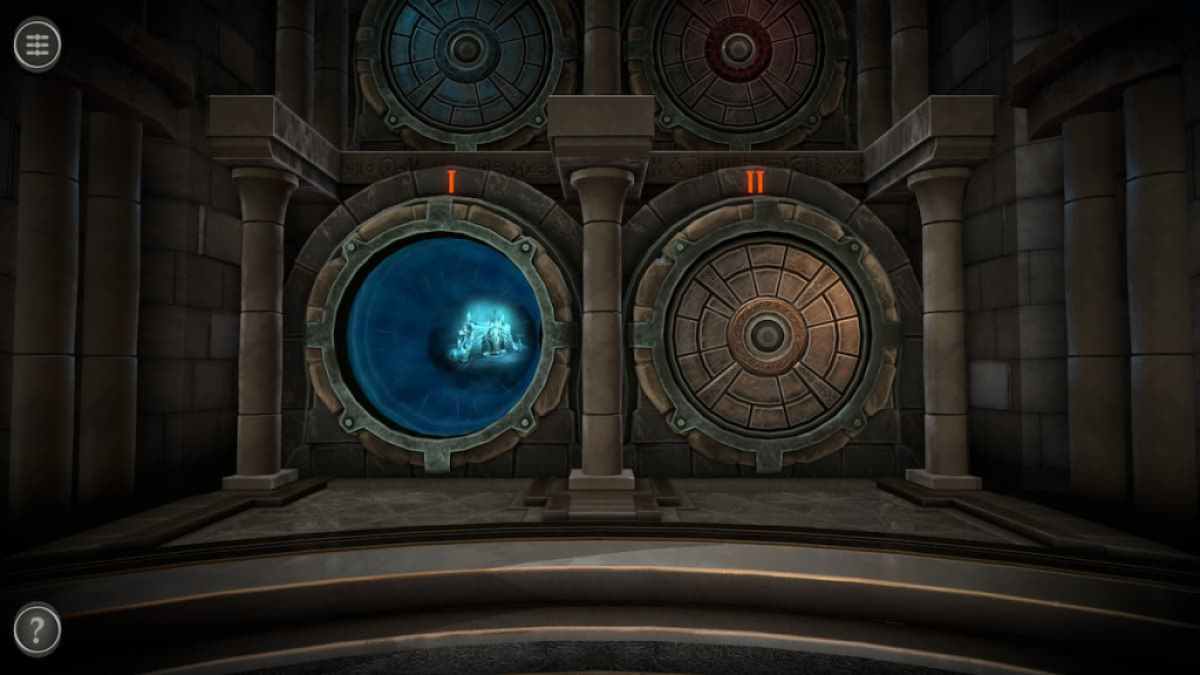
Room one puzzles
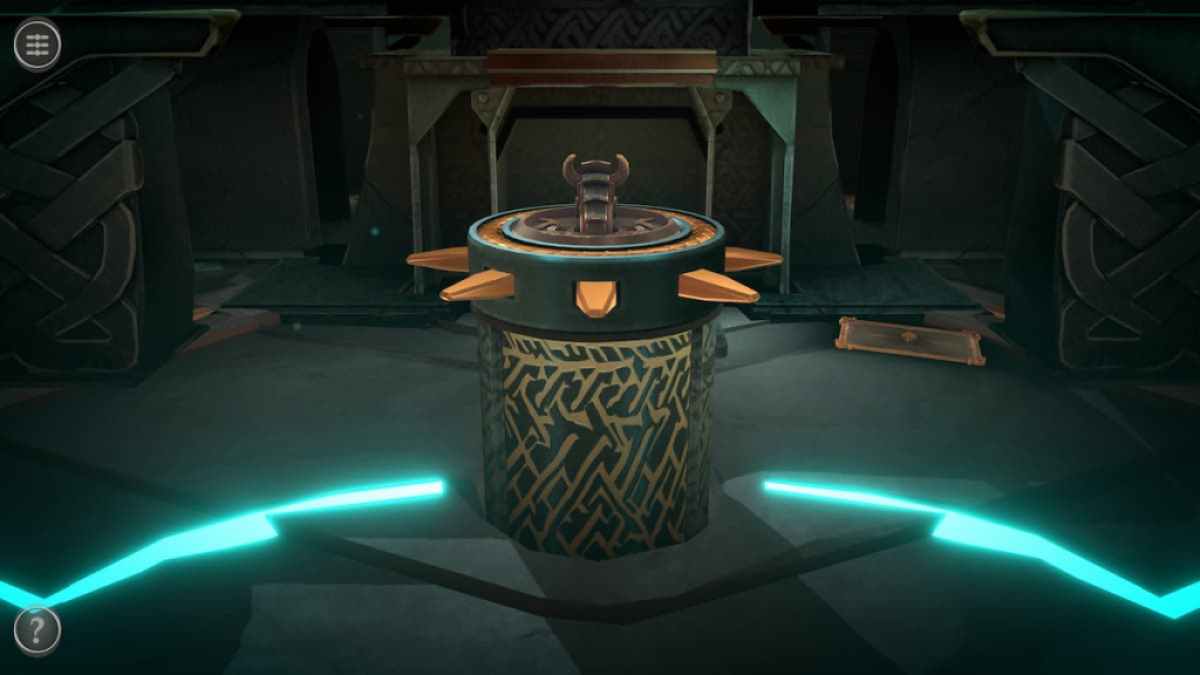
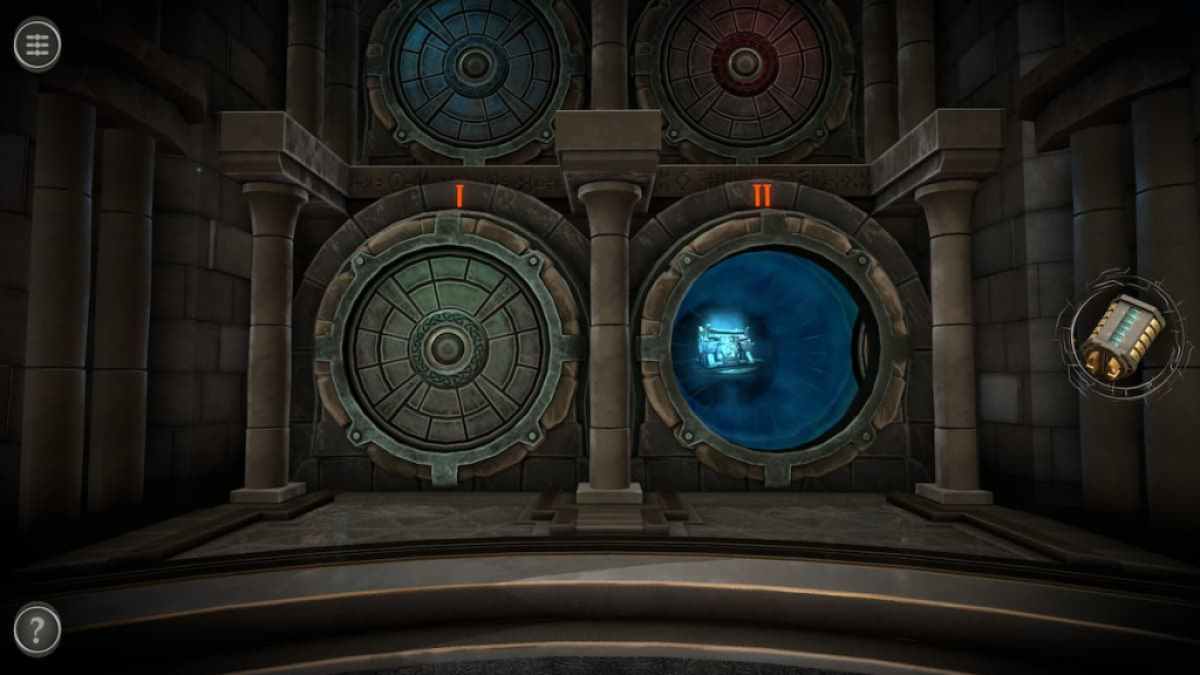
Unlike the last few chapters, you remain on the same floor as the fourth chapter. A new section is revealed containing all four doors for the chapter. Enter the first one.
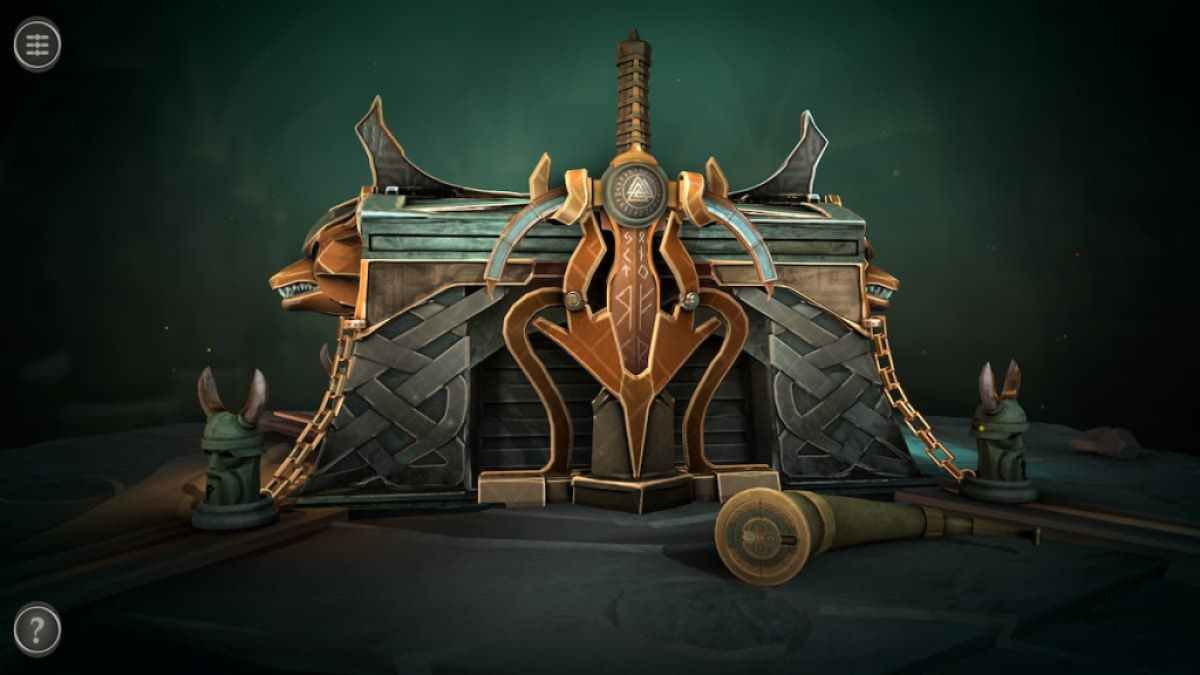
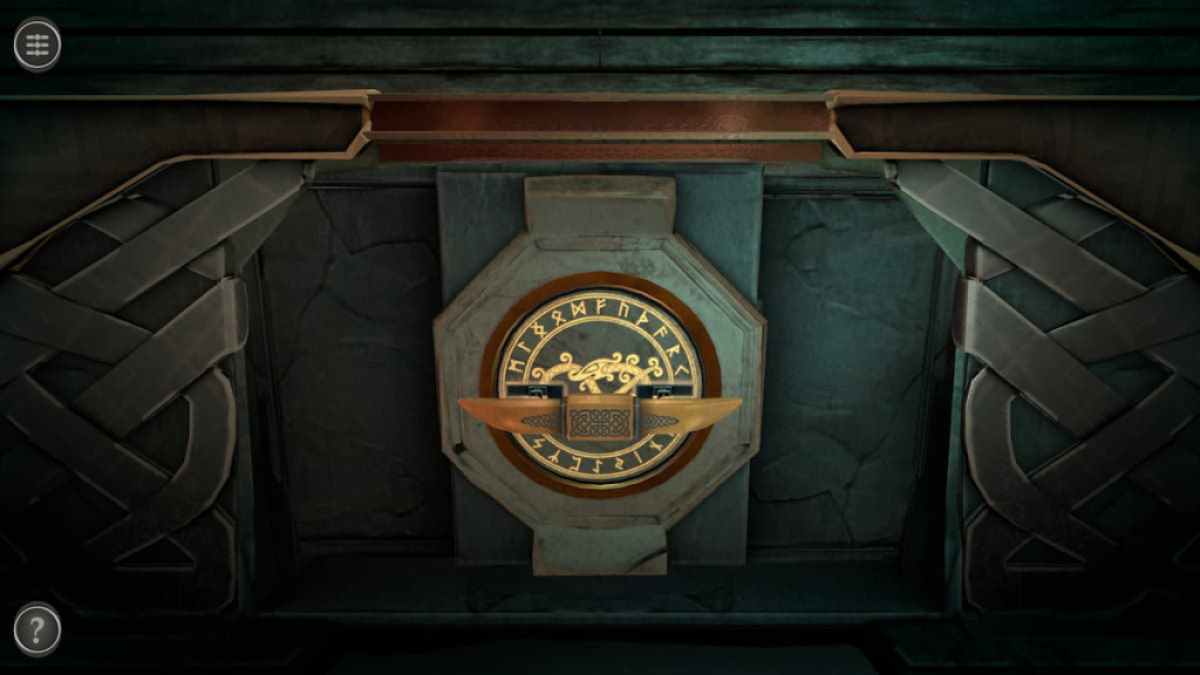
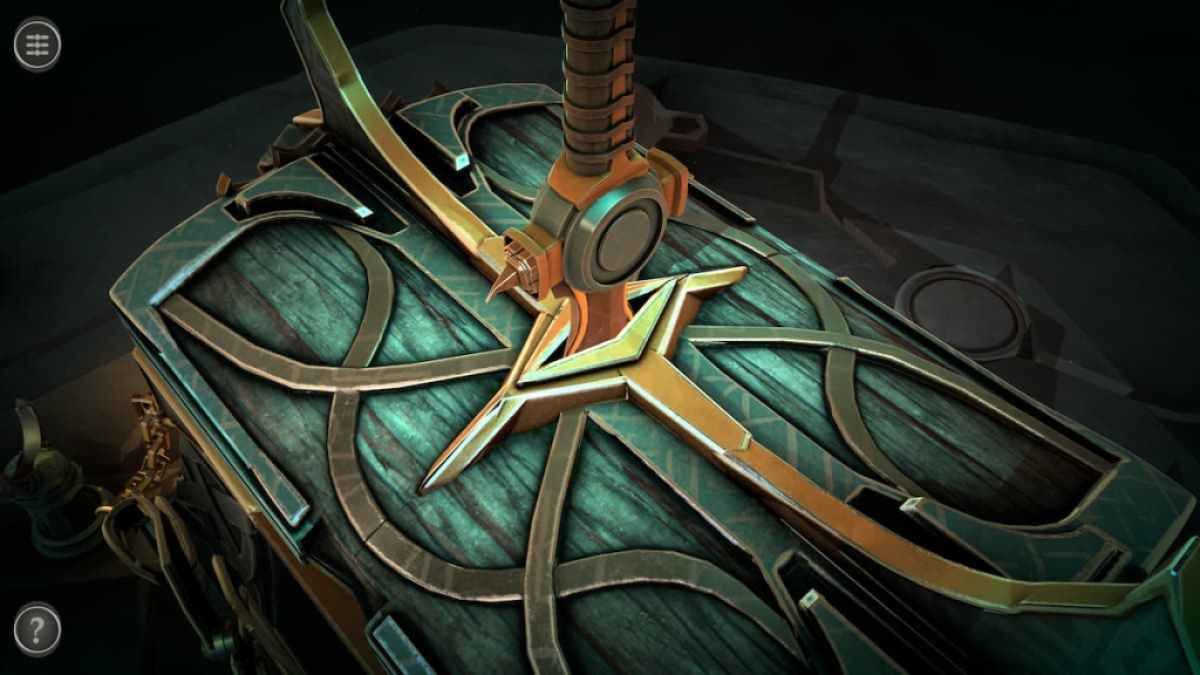
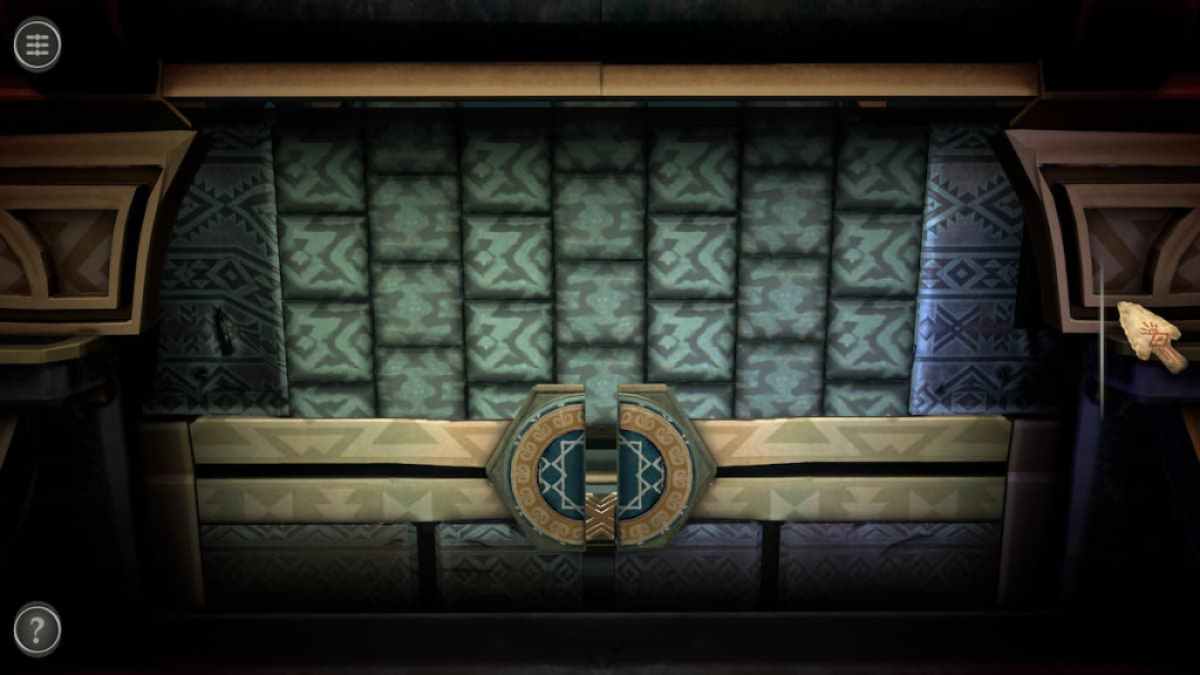
This box has a Viking theme complete with weapons, Viking heads, and wolf heads on the sides. A letter containing lore can be found on the backside of the box.
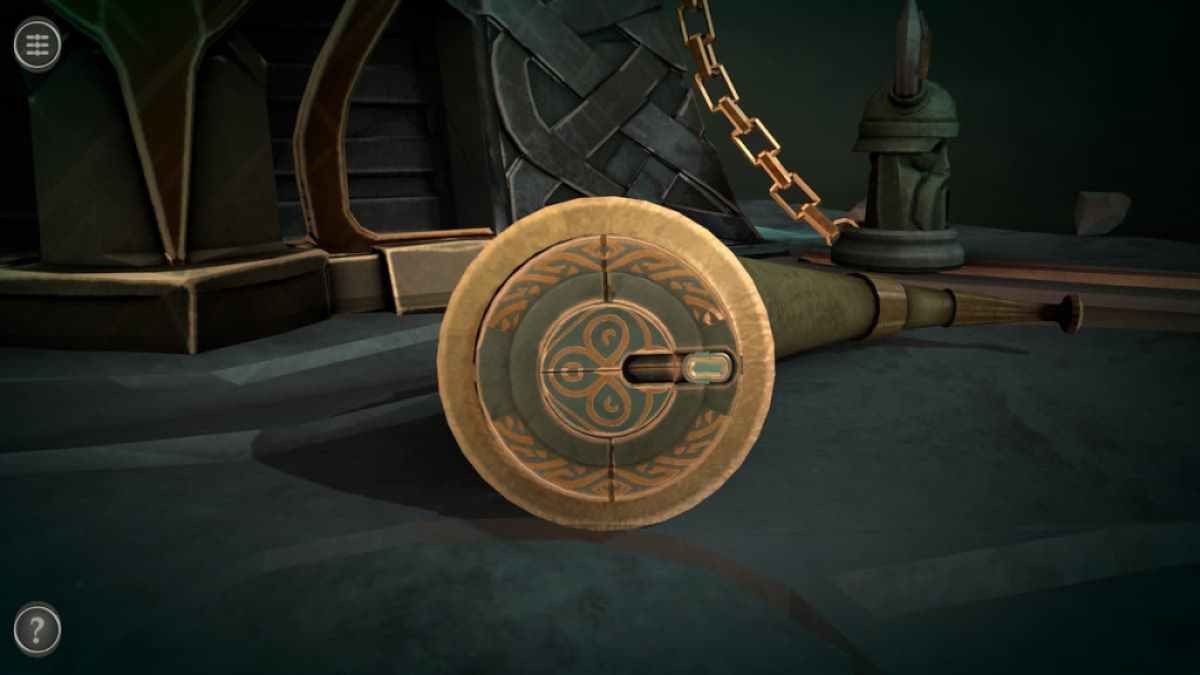
Horn puzzle
Focus on the horn in front of the chest.

Rotate the center until the slider can be moved to the gap on the right. Then rotate the center once more so that the gap faces the bottom of the puzzle to unlock it and get a Handle.
Ouroboros puzzle
The back of the box has an Ouroboros-shaped lock.
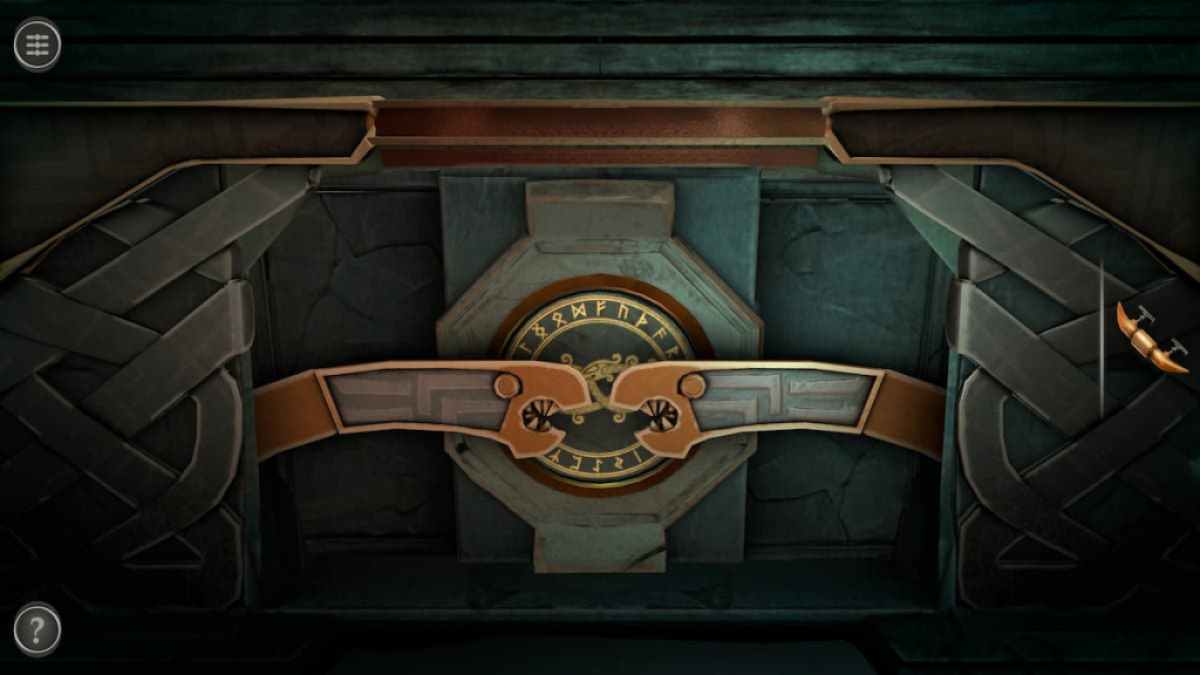
Slide each head to the side closest to it and add the Handle to the center. Rotate it to unlock the pathway puzzle.
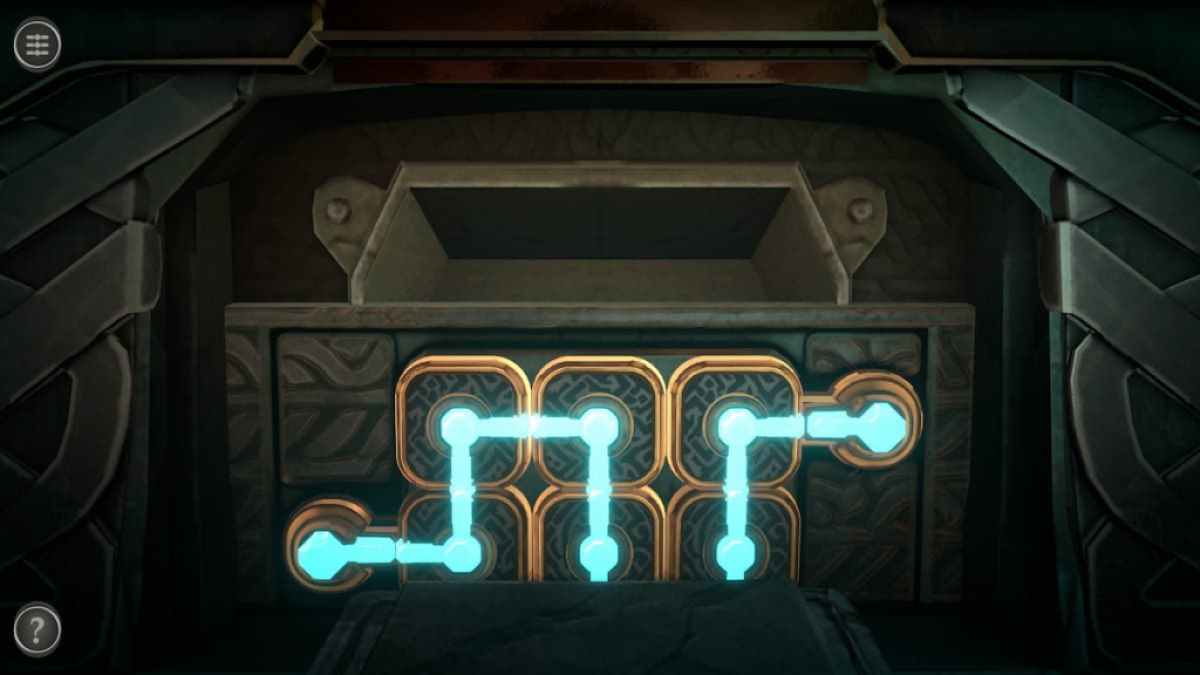
Blue pathway puzzle
This puzzle requires you to move the puzzle pieces around until they make a complete path from the top right square to the center-left square.
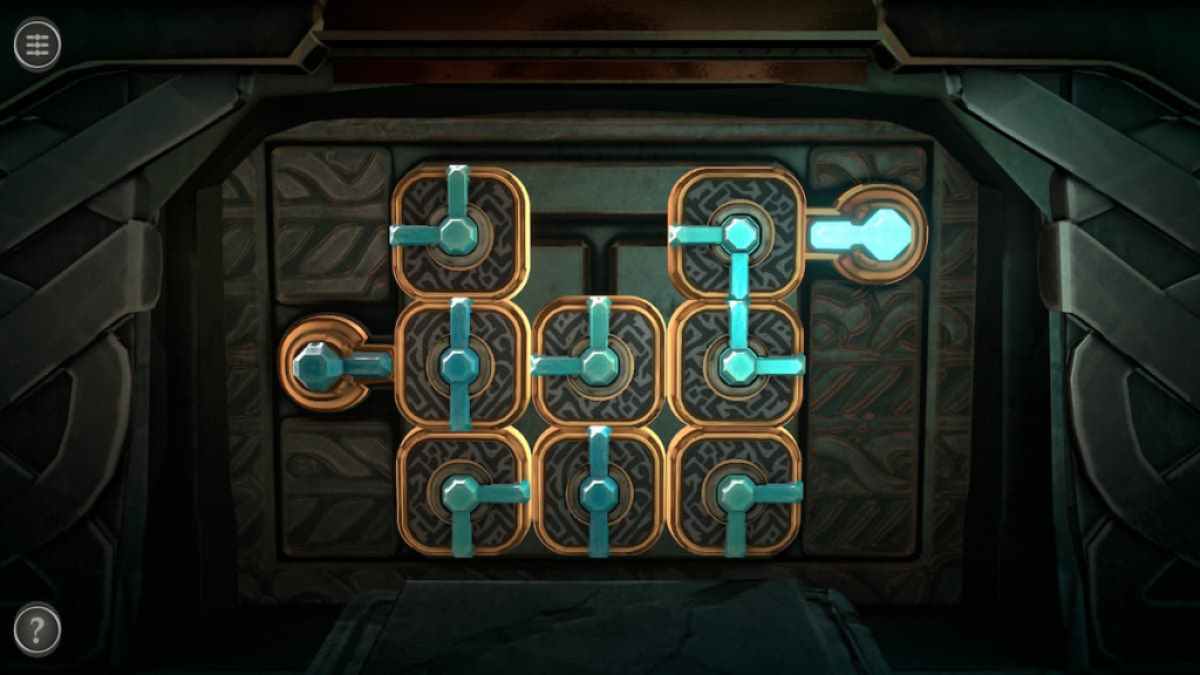
Once the path is complete, the puzzle will sink into the box and give you a Puzzle Box.
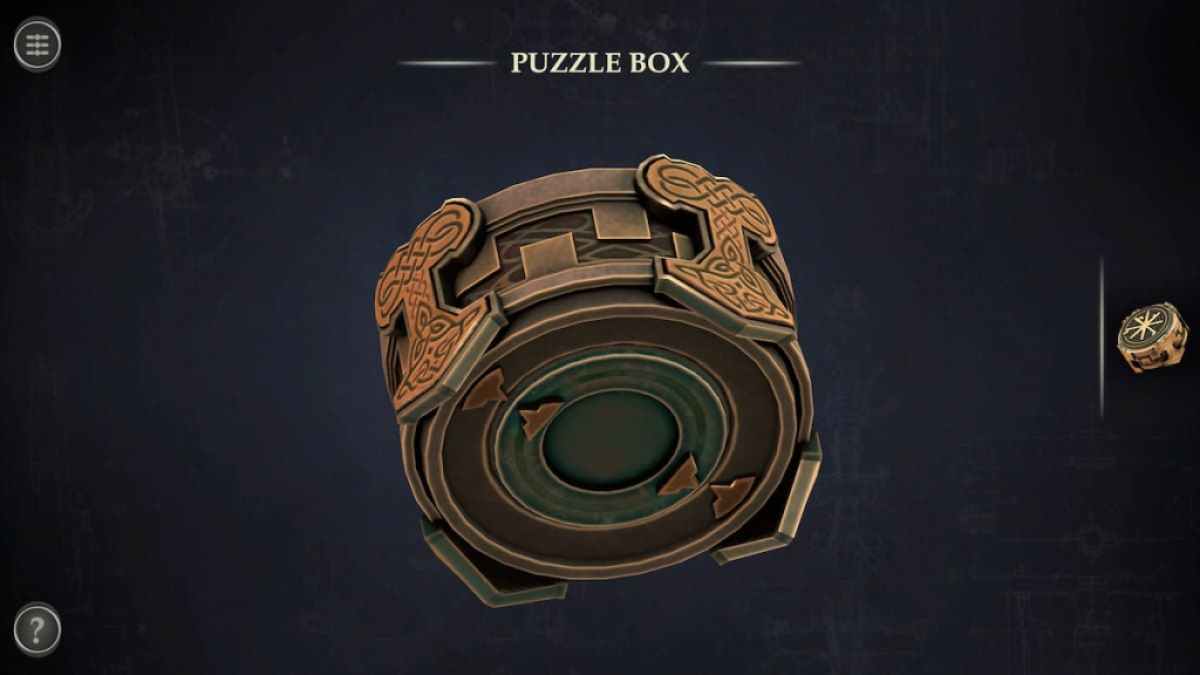
Puzzle Box puzzle
Tap the Puzzle Box in your inventory and rotate it to view the bottom.
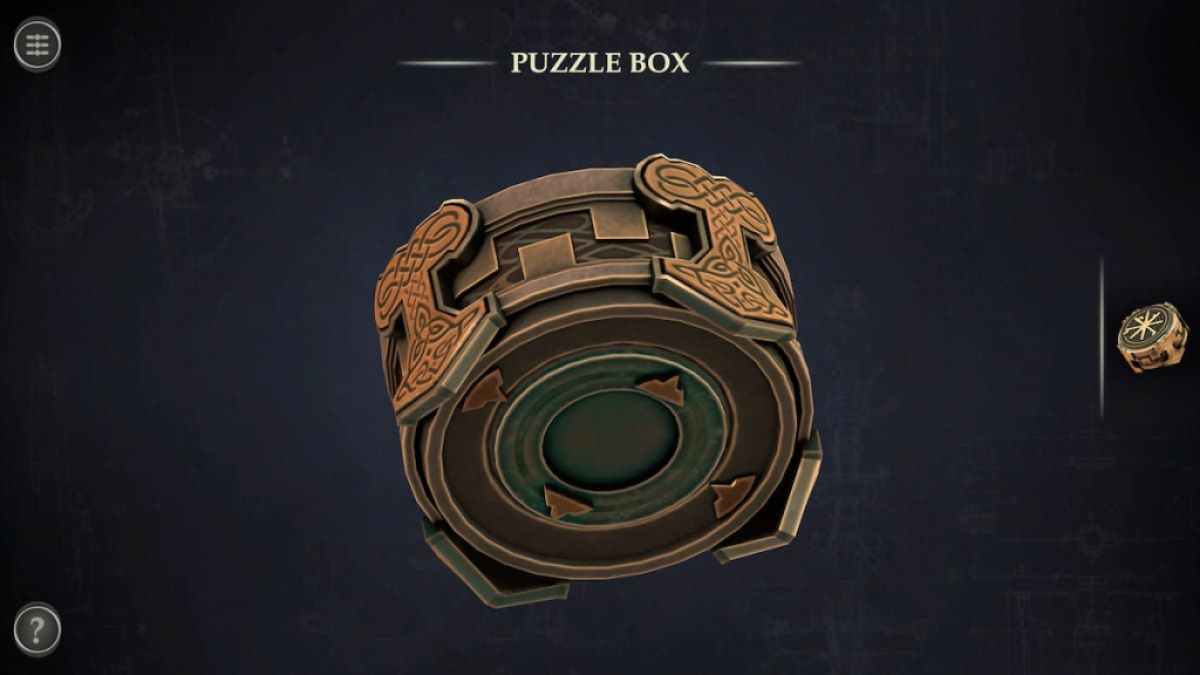
Rotate the inner ring to align the arrows to open the box and get a Celtic Knot.
Short sword puzzle
The ball on the handle of the short sword can be rotated.
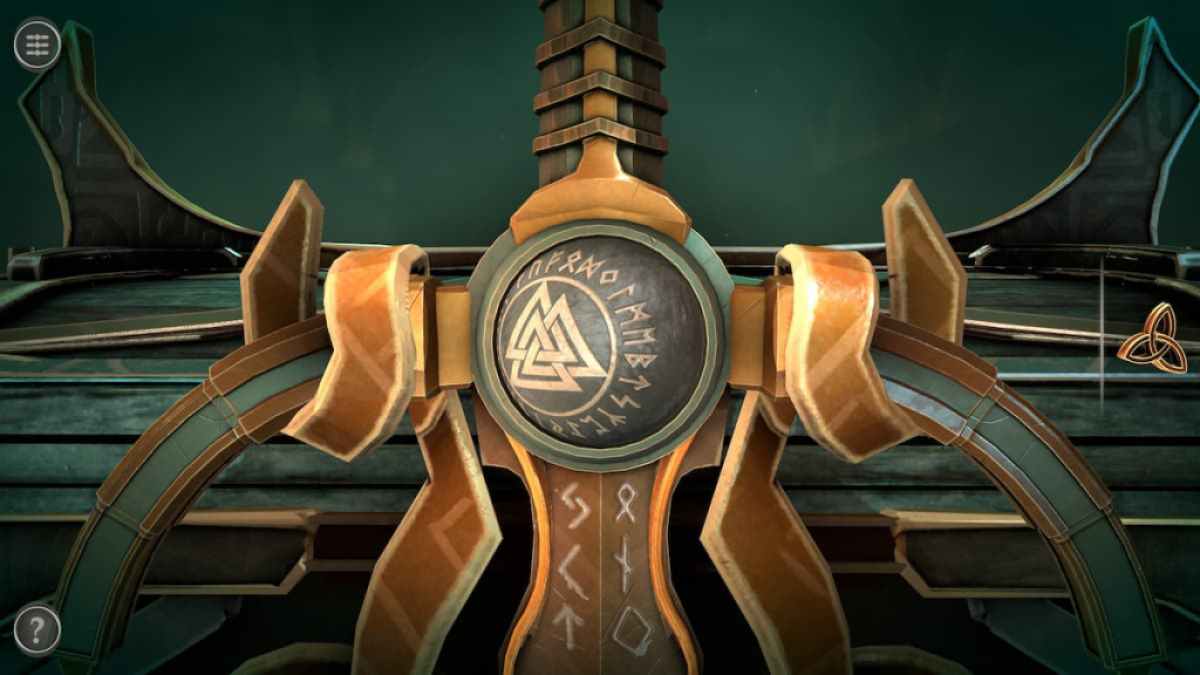
Completely rotating it reveals a hidden slot matching the Celtic Knot.
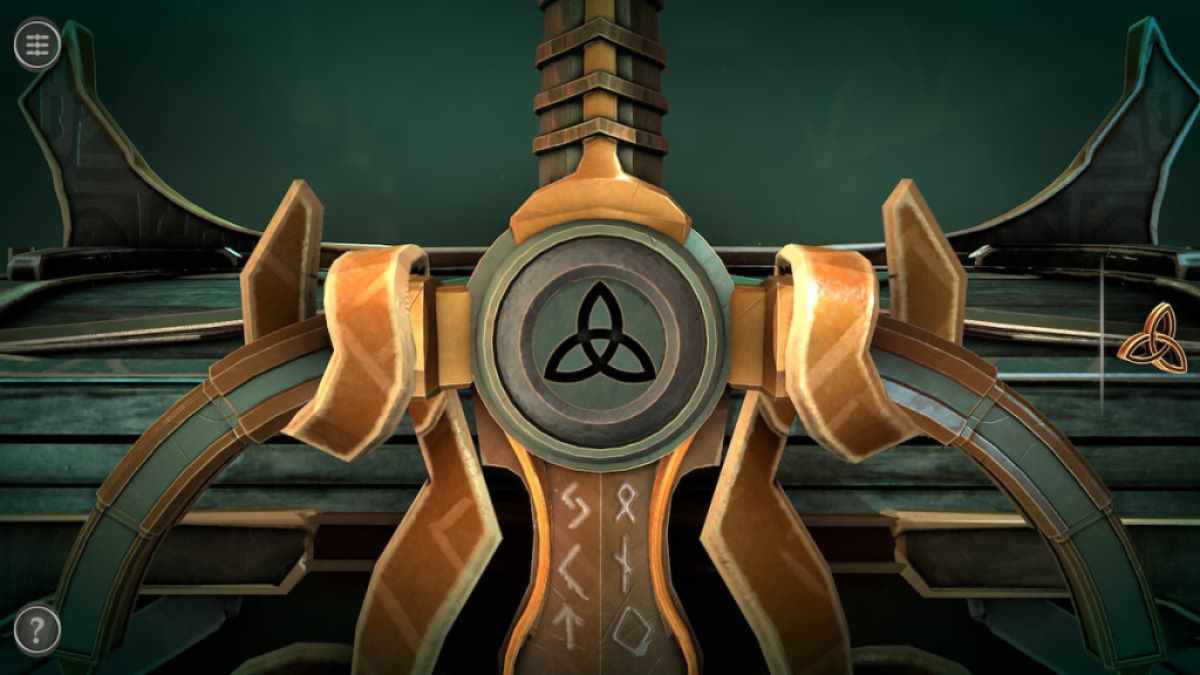
Place the Celtic Knot into the slot.
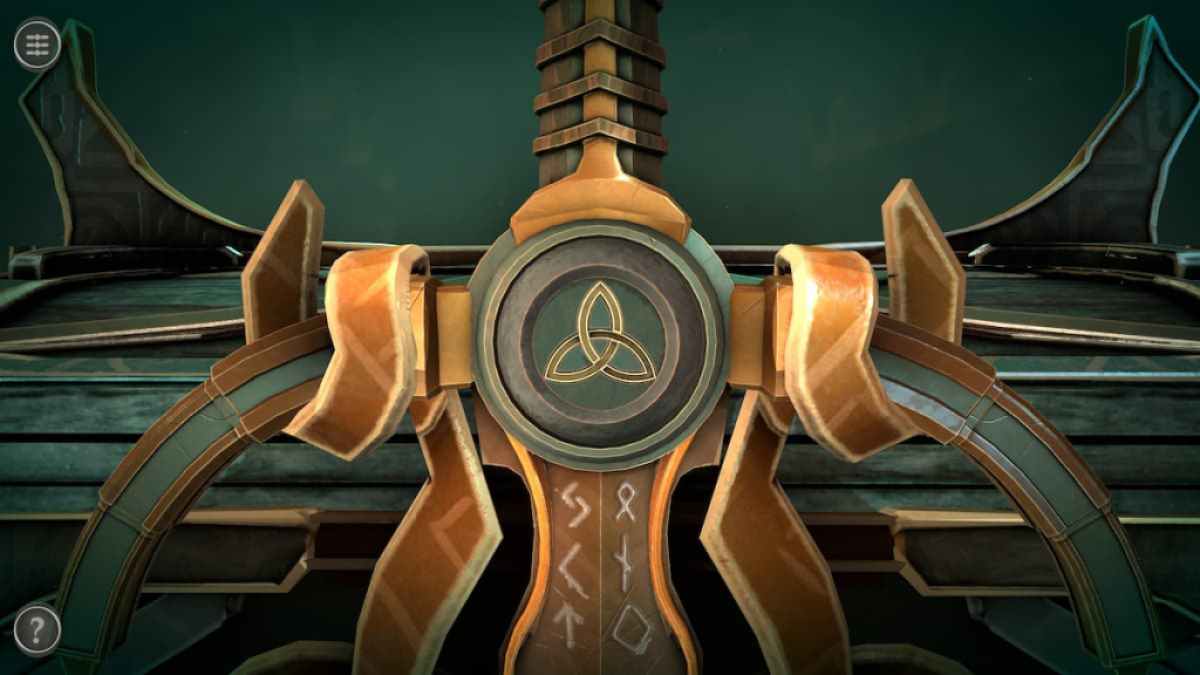
Afterward, each of the handles on either side of the sword can be moved down. Pull the sword up to place the Short Sword in your inventory.

Place the Short Sword into the slot at the top of the box to unlock a puzzle beneath each of the wolf heads on the box's sides.
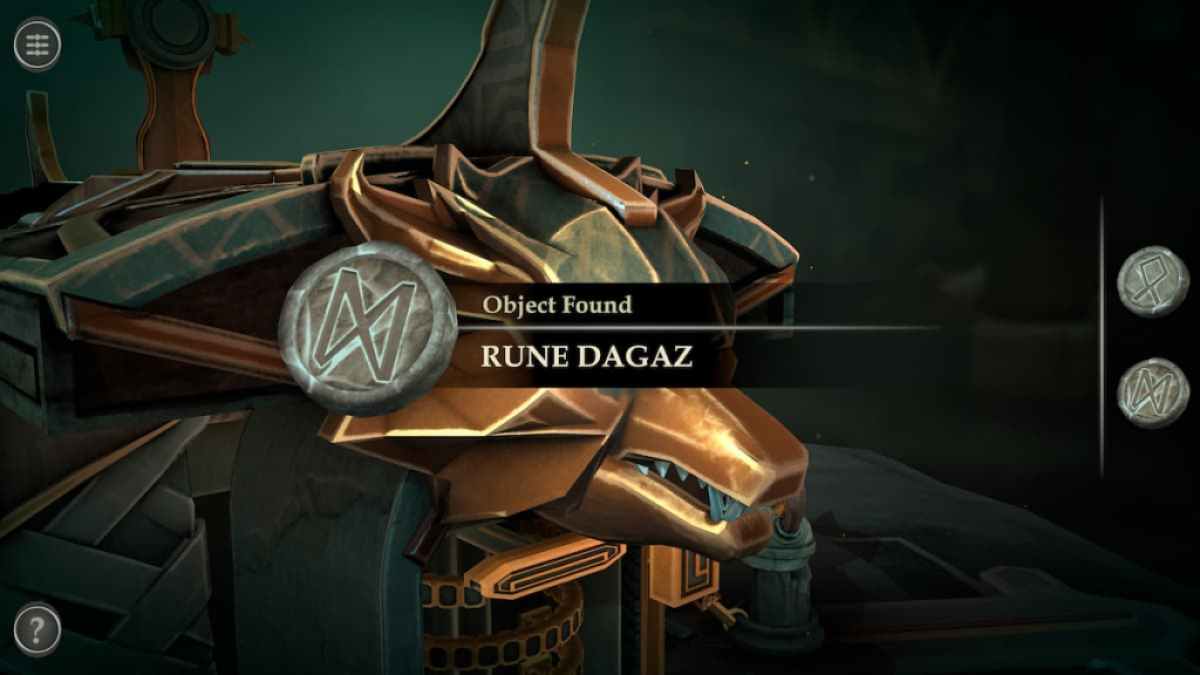
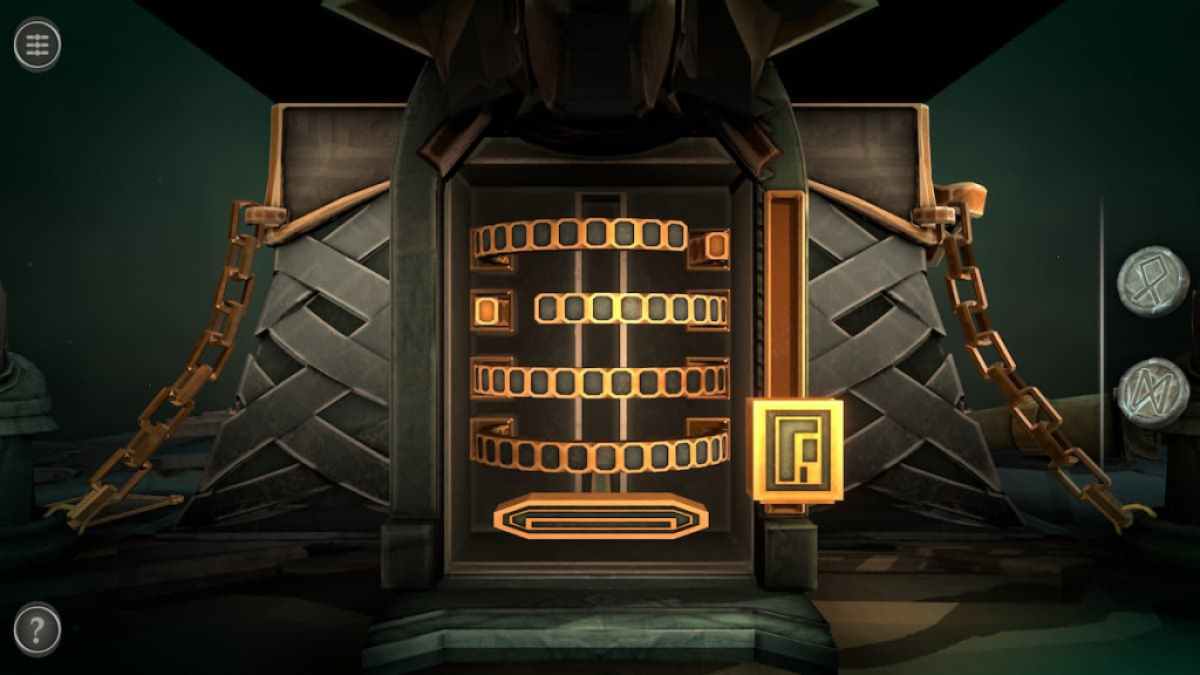
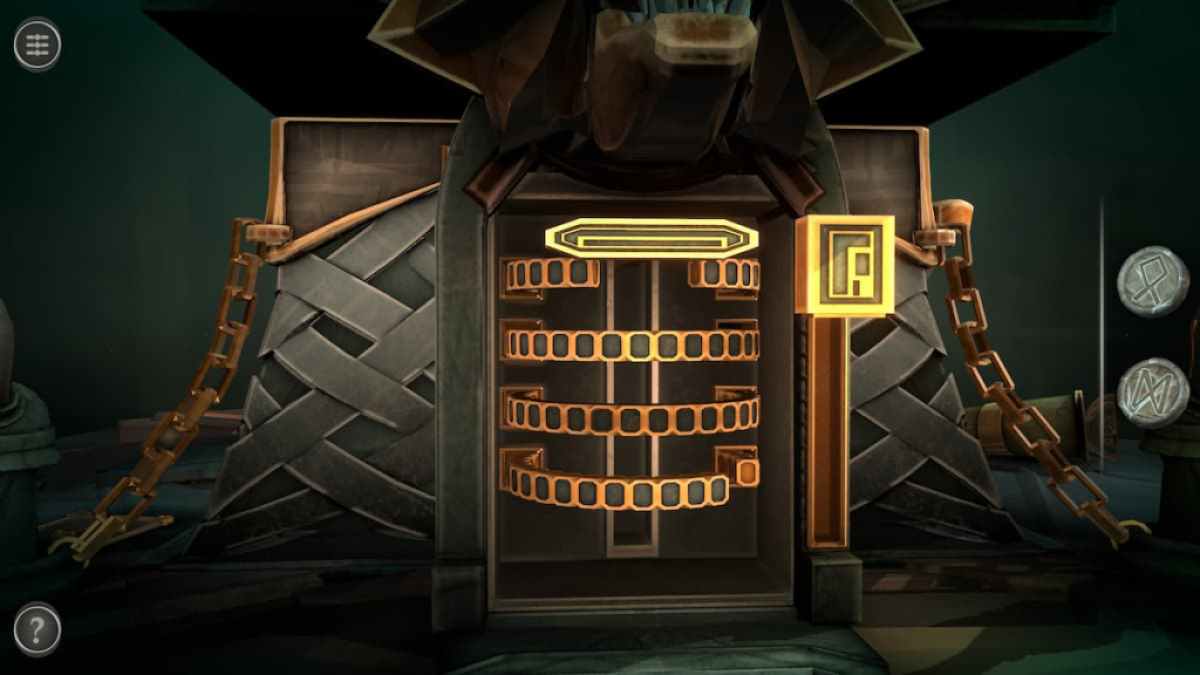
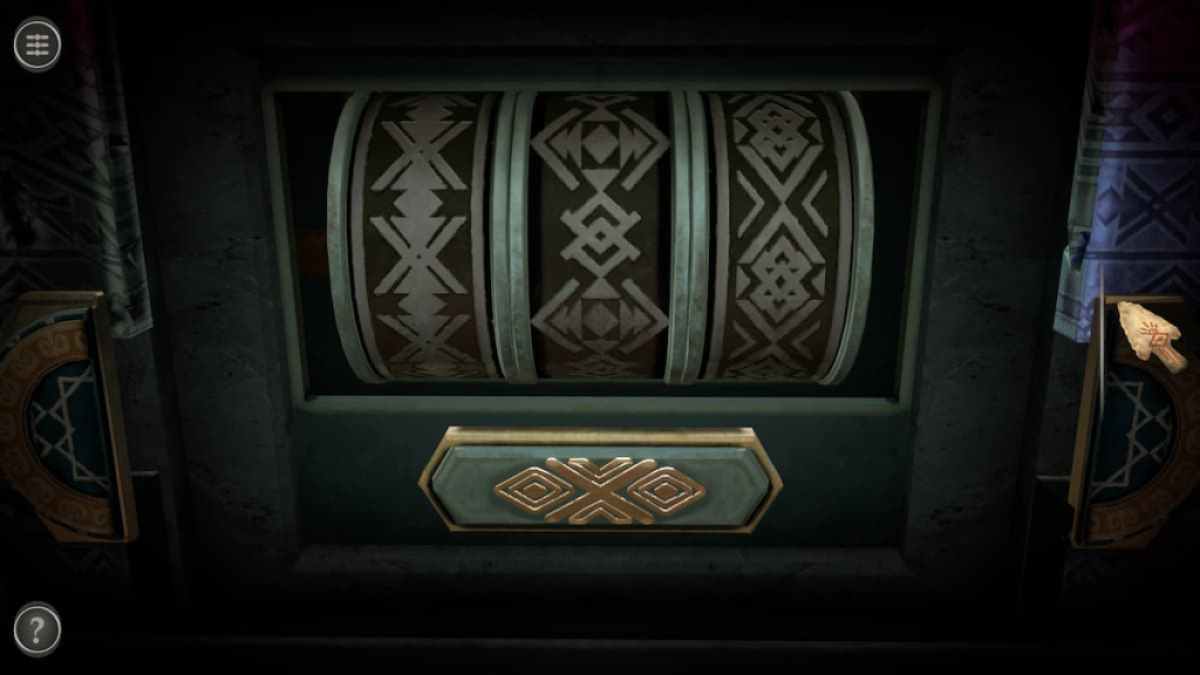
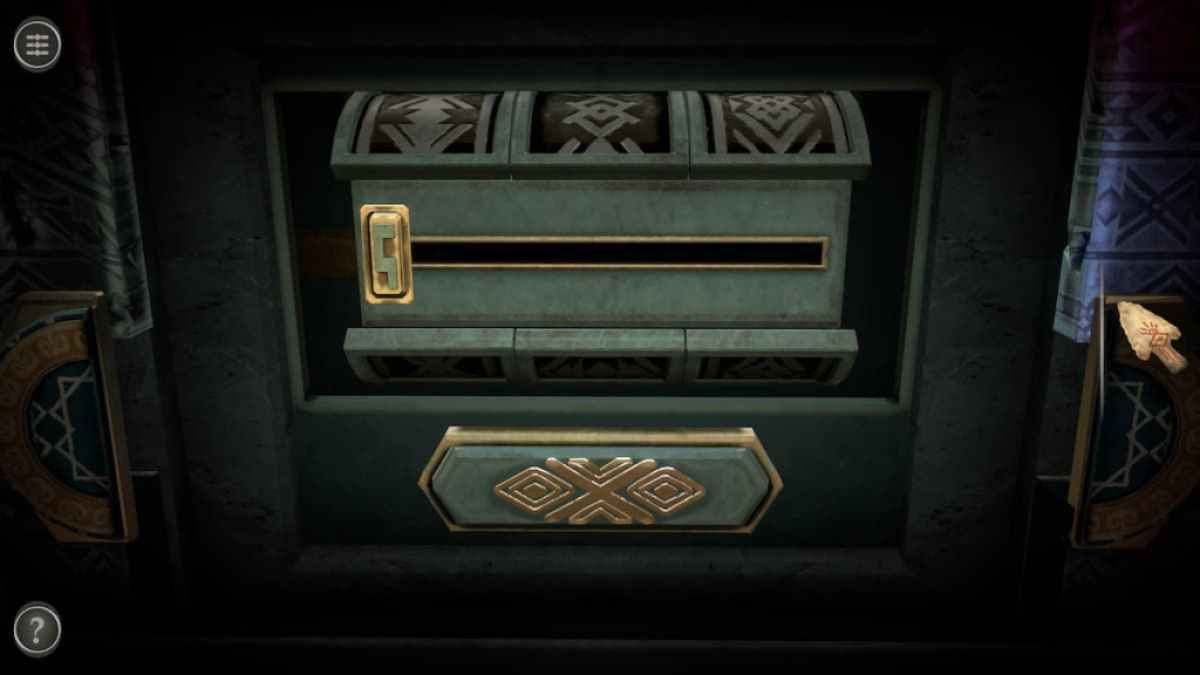
Right wolf head puzzle
This puzzle features a slider on the right and a handle at the bottom.
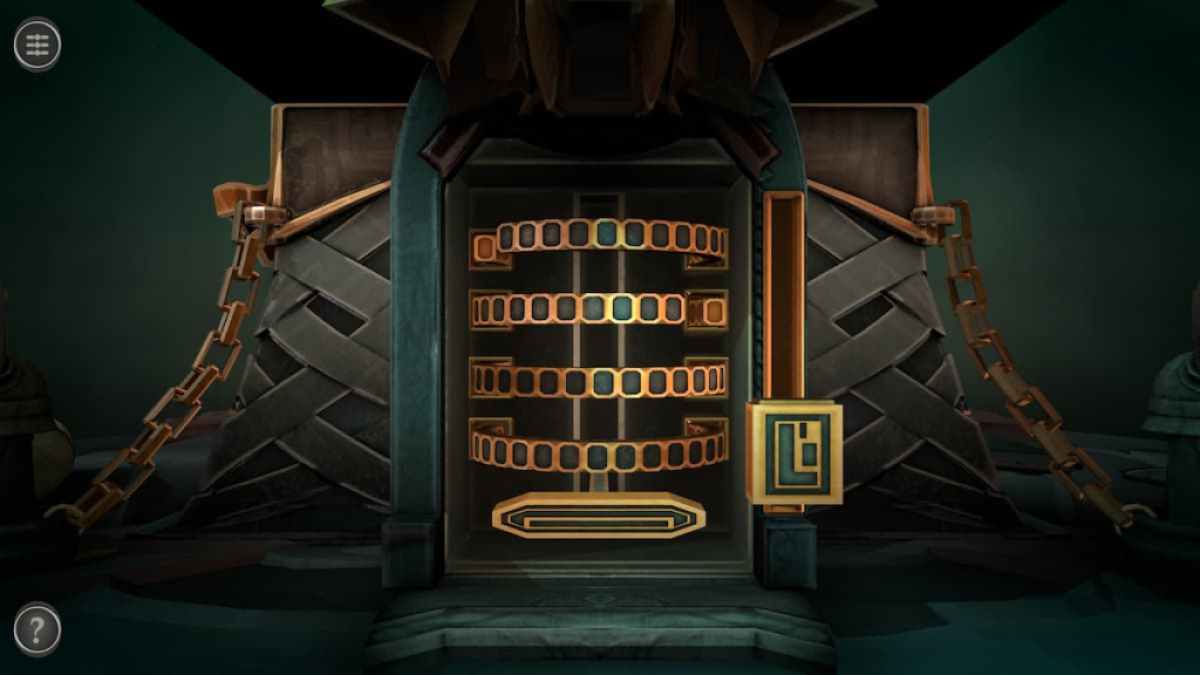
Move the slider until the row above the handle has a gap. The handle can then be moved above that row and below the next one.
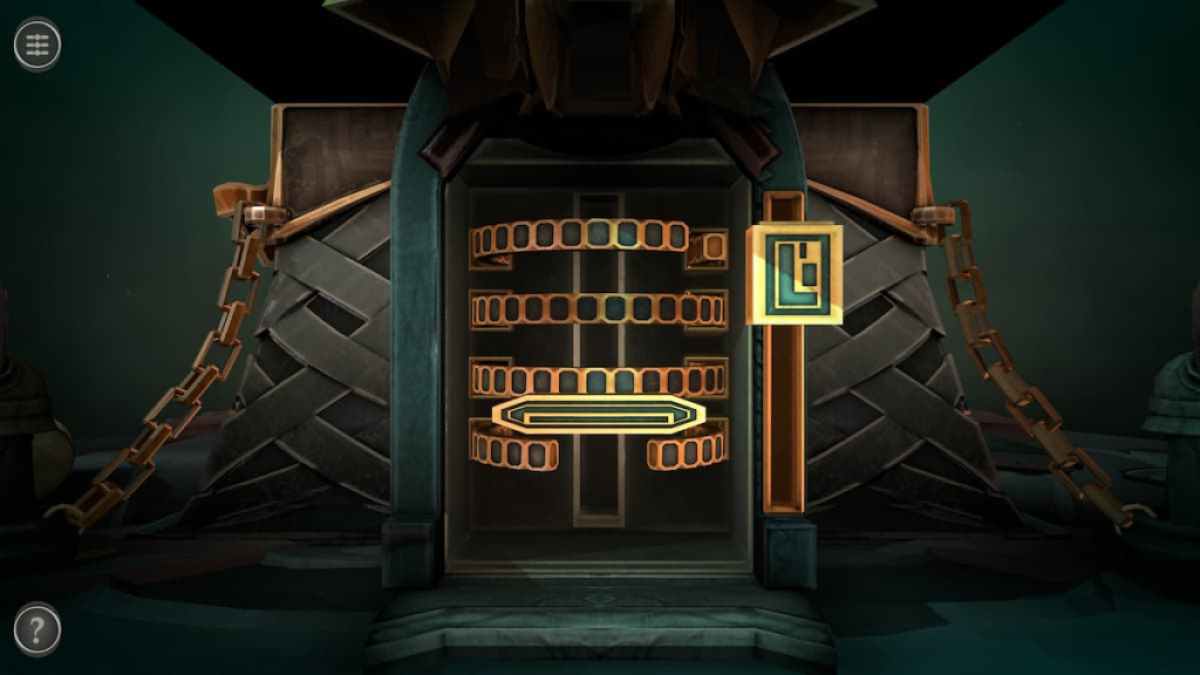
Repeat this process with every row in the puzzle.
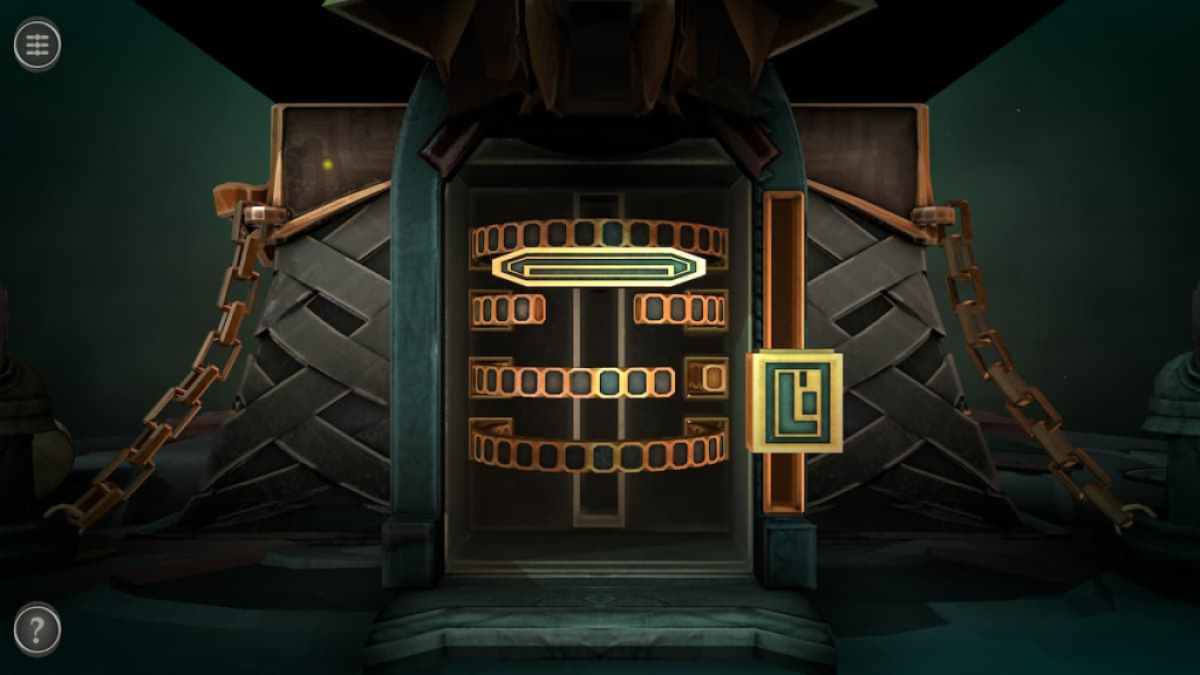
When you reach the end, the wolf head will give you the Rune Othala and the Rune Dagaz.
Left wolf head puzzle
The wolf head on the left side of the box is done in the same way as the right wolf head.
Once the handle is at the top of the puzzle, the wolf's mouth will open.
The wolf's mouth contains the Rune Wunjo and the Rune Jera.

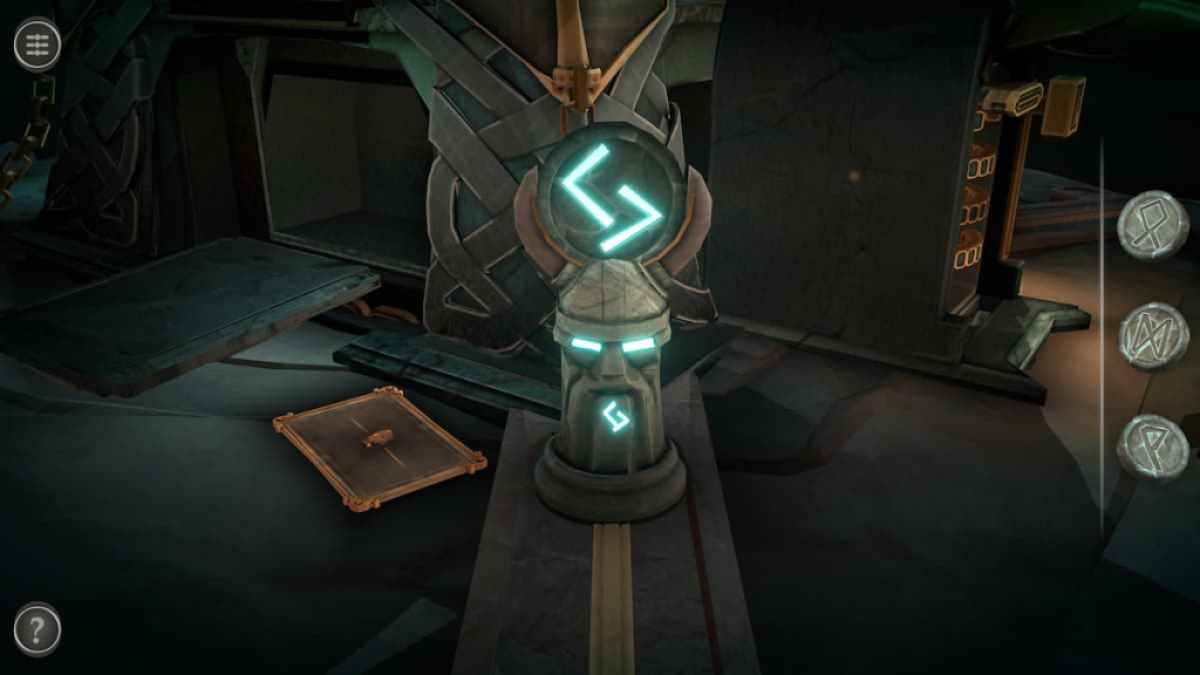
Viking head puzzle
First, look at the Viking head behind the left wolf head.
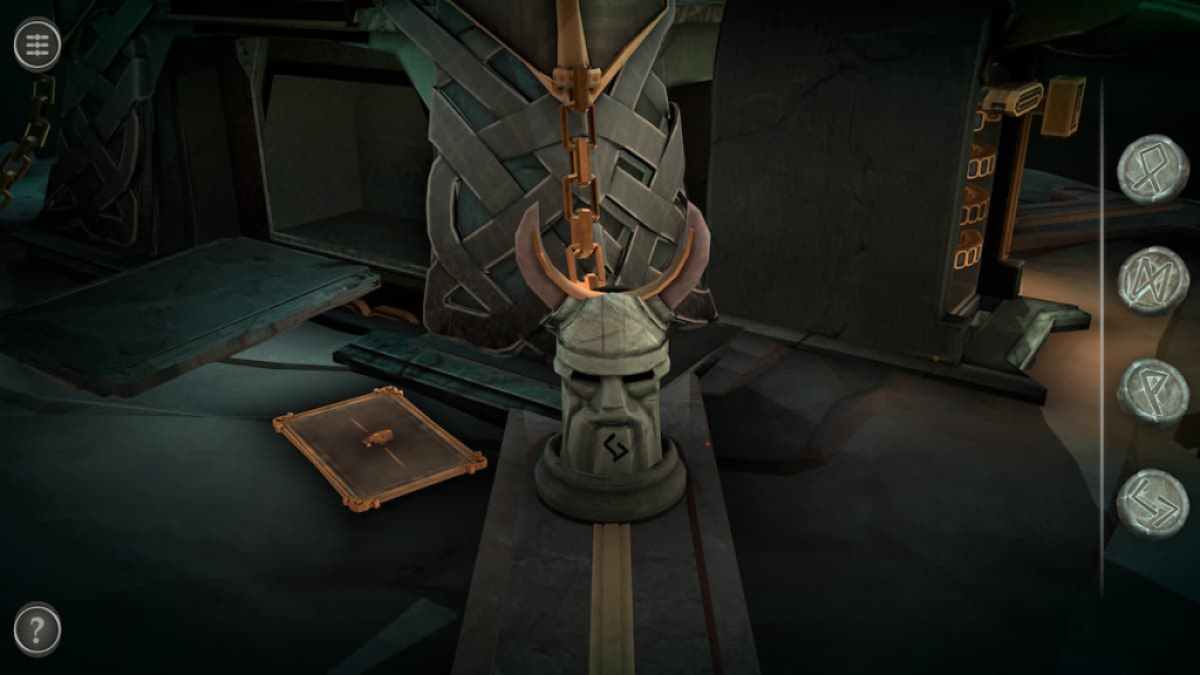
The symbol on it matches the symbol on the Rune Jera. Place the Rune Jera on its head to activate the head.
Rotate to view the Viking head in front of the left wolf head.

Placed the Rune Wunjo on top of it to activate it.
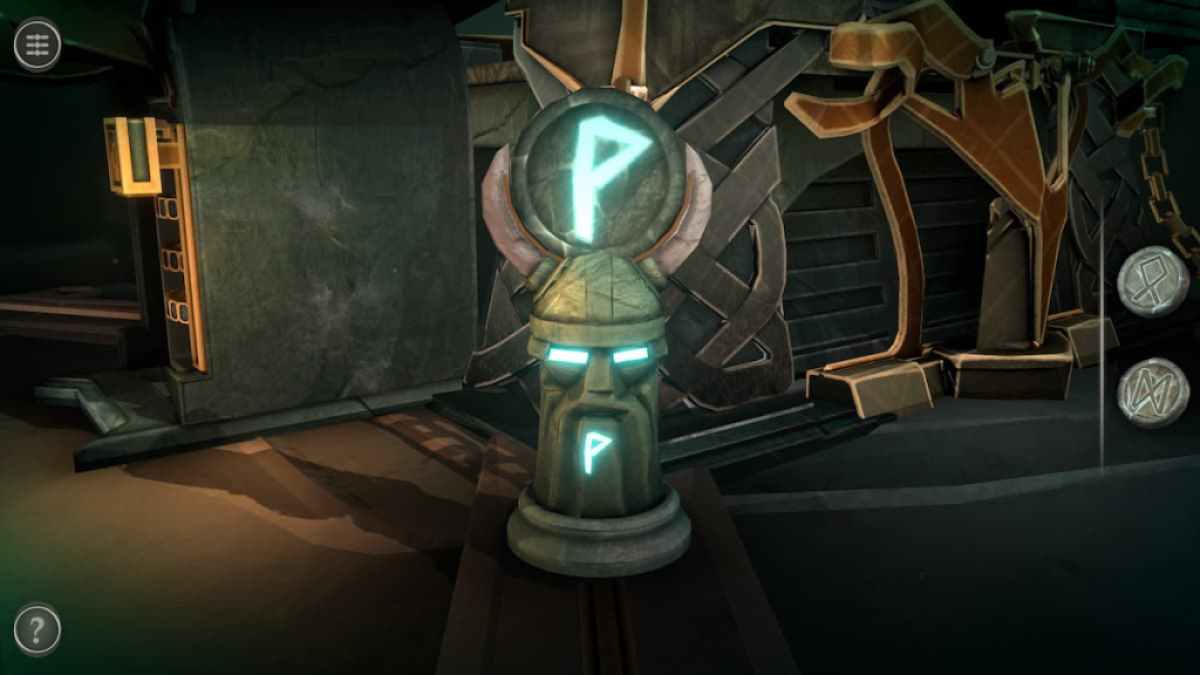
Move the camera to view the Viking head in front of the right wolf head.
Place the Rune Othala on top of it to activate the head.
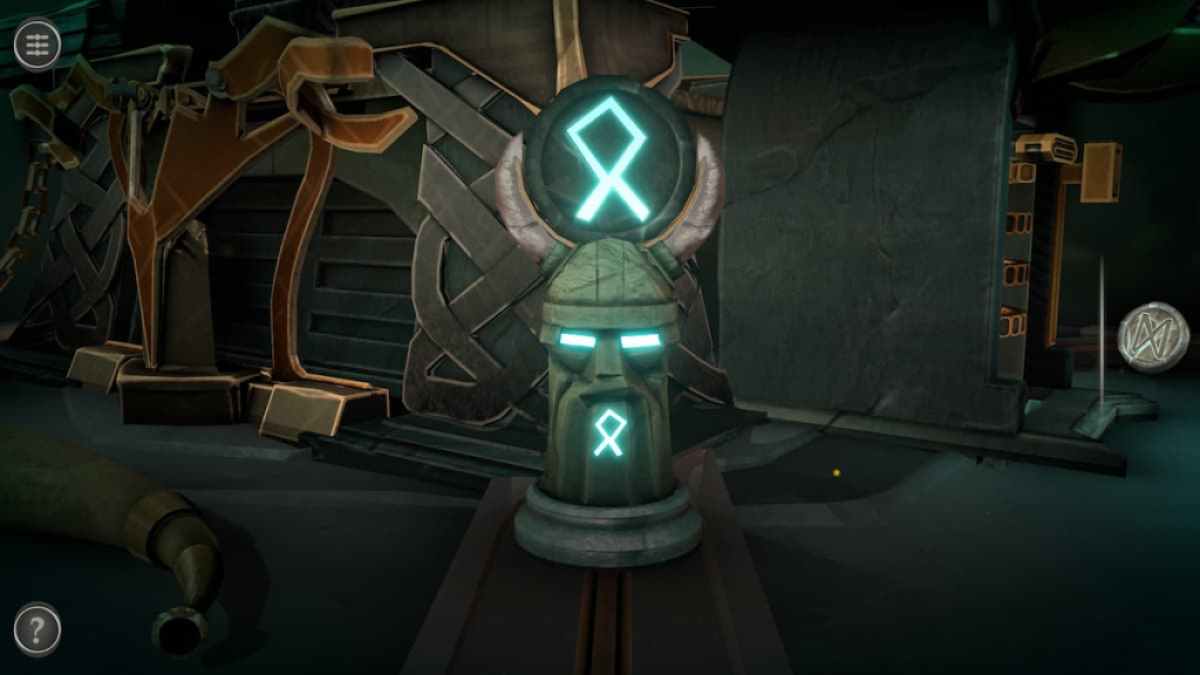
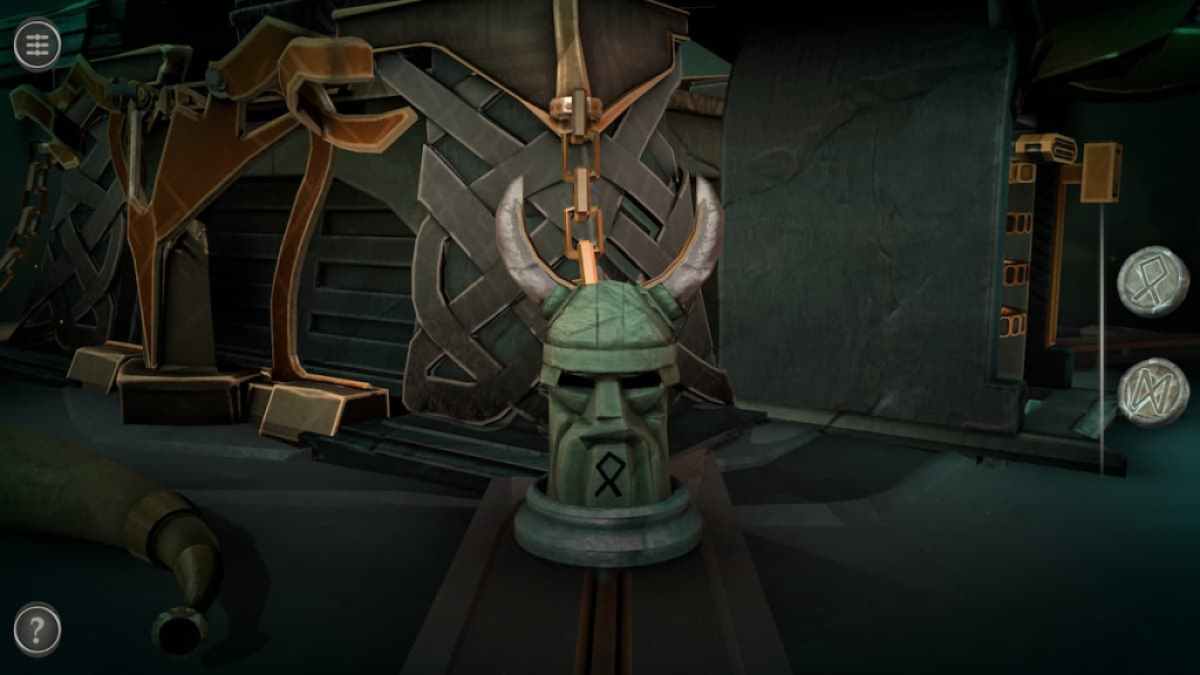
View the final Viking head.
Place the Rune Dagaz onto it to activate it.
This will transform the box by pulling all of the chained sections out.
Dragon Token puzzle
The Dragon Token can be found on top of the removed piece near the horn at the front of the box.
Place the Dragon Token on the pillar at the back and rotate it until the dragon's head is facing the box.
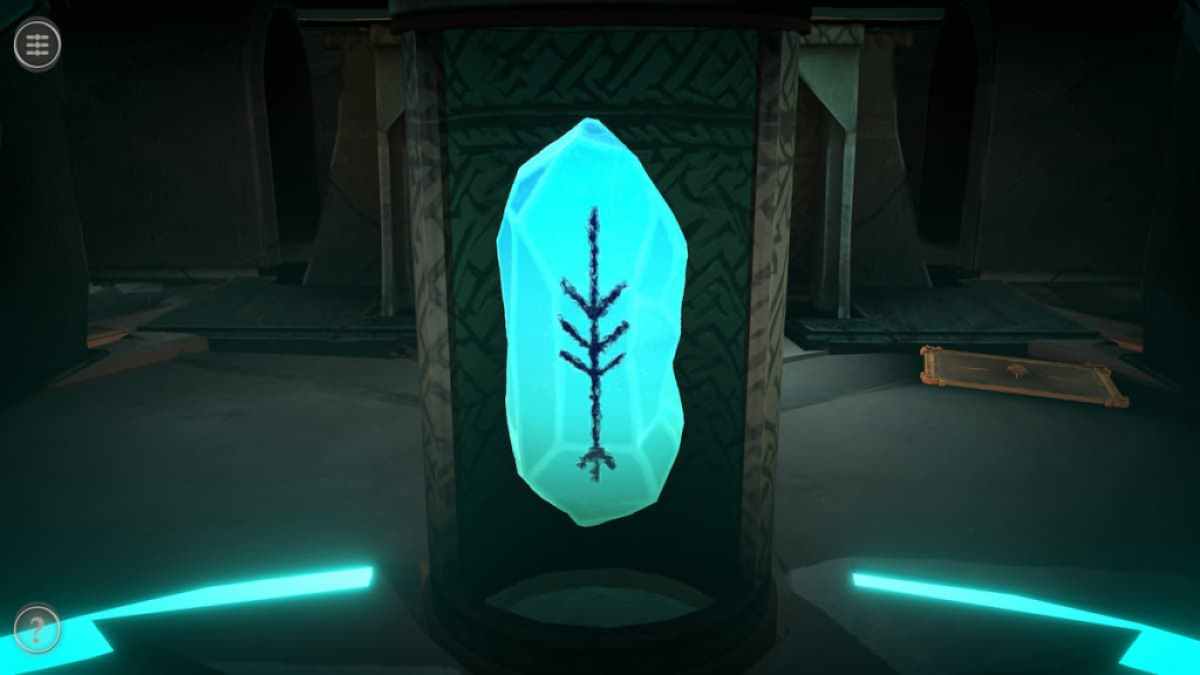
Crystal puzzle
This will reveal a crystal split into three separate pieces.
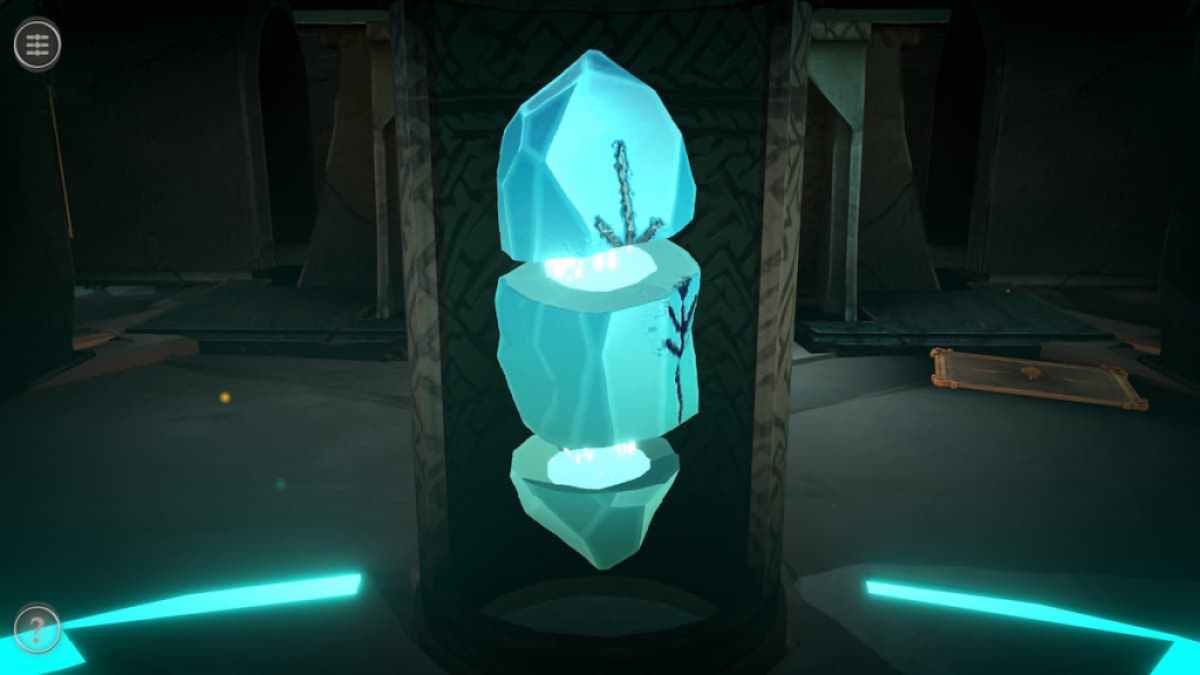
Rotate each piece until the black symbol on the front is complete. The pieces will connect and summon a mystical dragon to destroy the box.
You'll be able to grab a Cryptex. Doing so will return you to the main room.
Room two puzzles
Enter the second room.
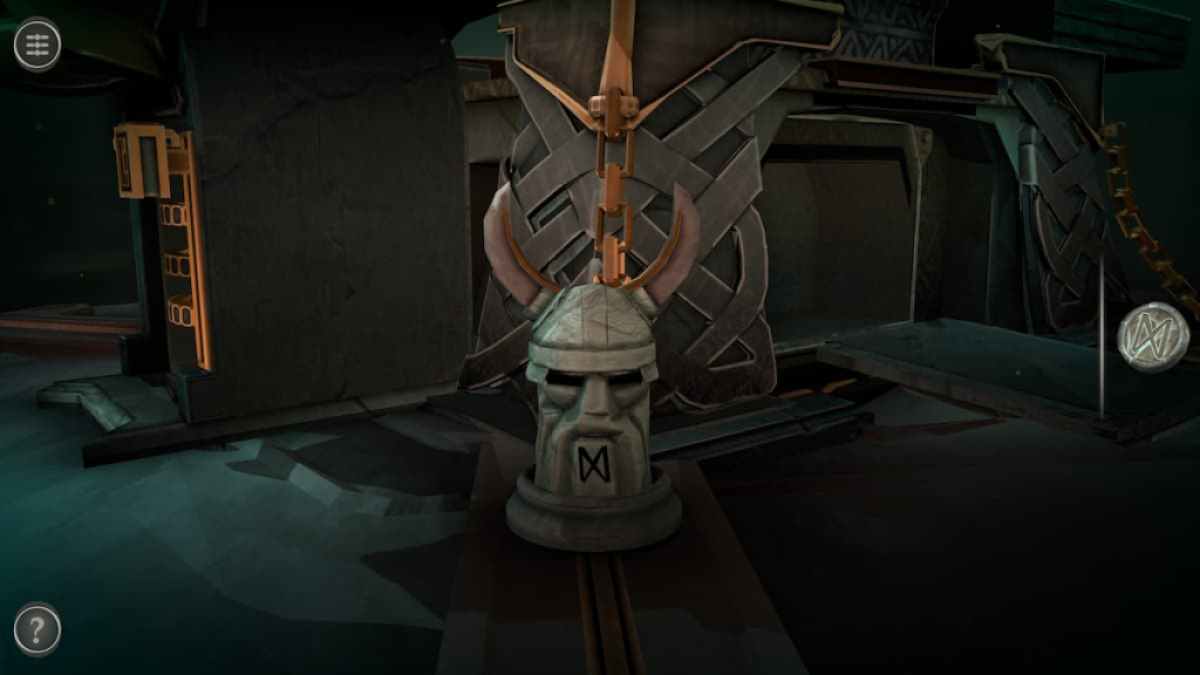
The front of the box in this room is reminiscent of a Tiki statue.

Behind the box, grab the Aztec Mug on the table. There will be a lore letter next to it.
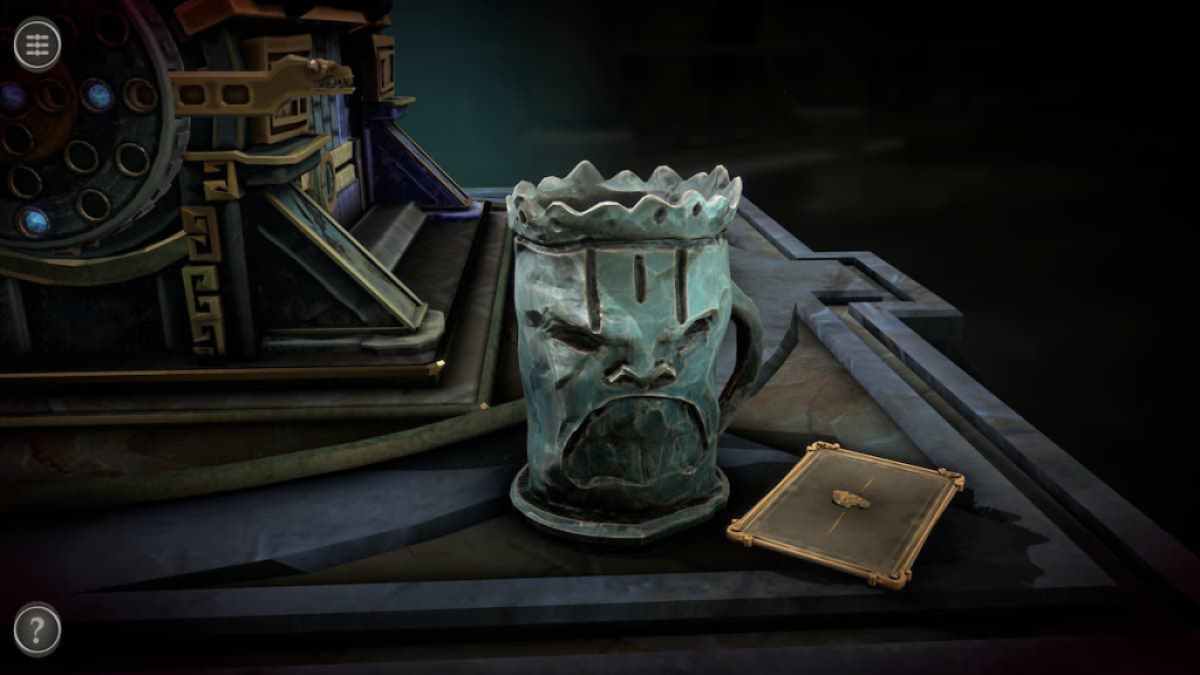
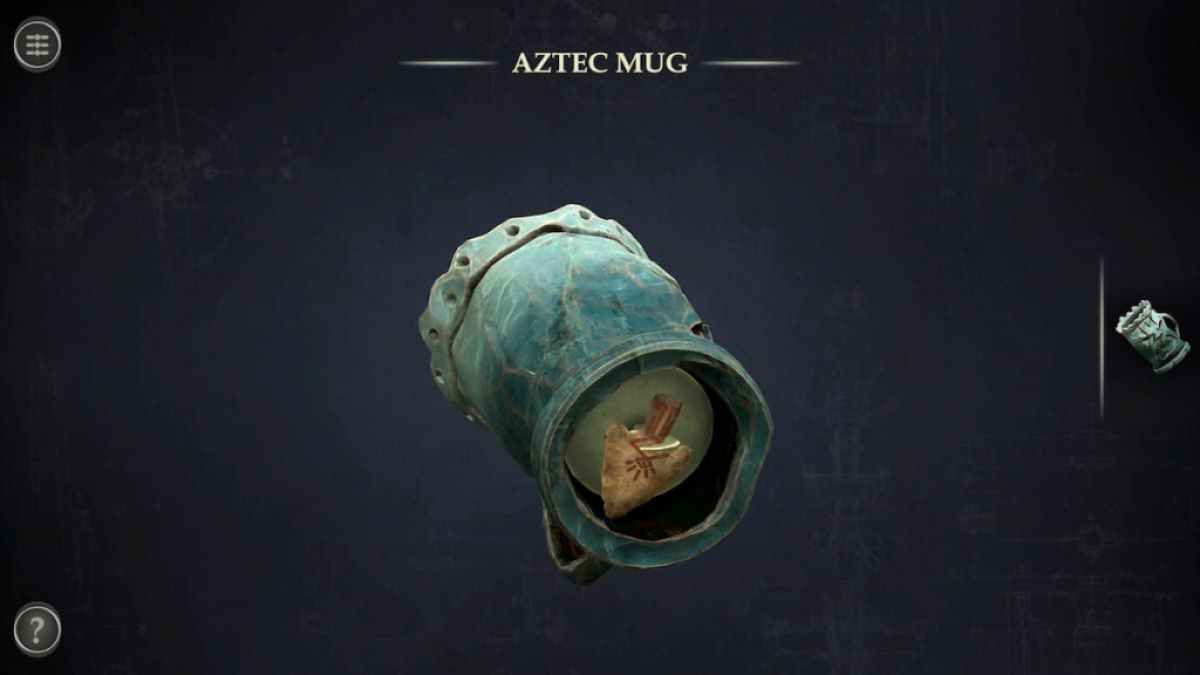
Select the Aztec Mug in your inventory. Rotate it to view the bottom and grab an Old Arrow Head.
Slider puzzle at the back of the box
View the slider puzzle with the circular lock at the back of the box.
Rotate the gold ring until the two lines in it are at the top and the bottom. This will allow you to pull them to the side, revealing the puzzle behind the lock.
This puzzle involves pressing the button to rotate the panels until the gap in each one is at the front.
Rotating the circles until all of their gaps are at the front allows a slider to be pulled.
Pull the slider to get a Small Figure.

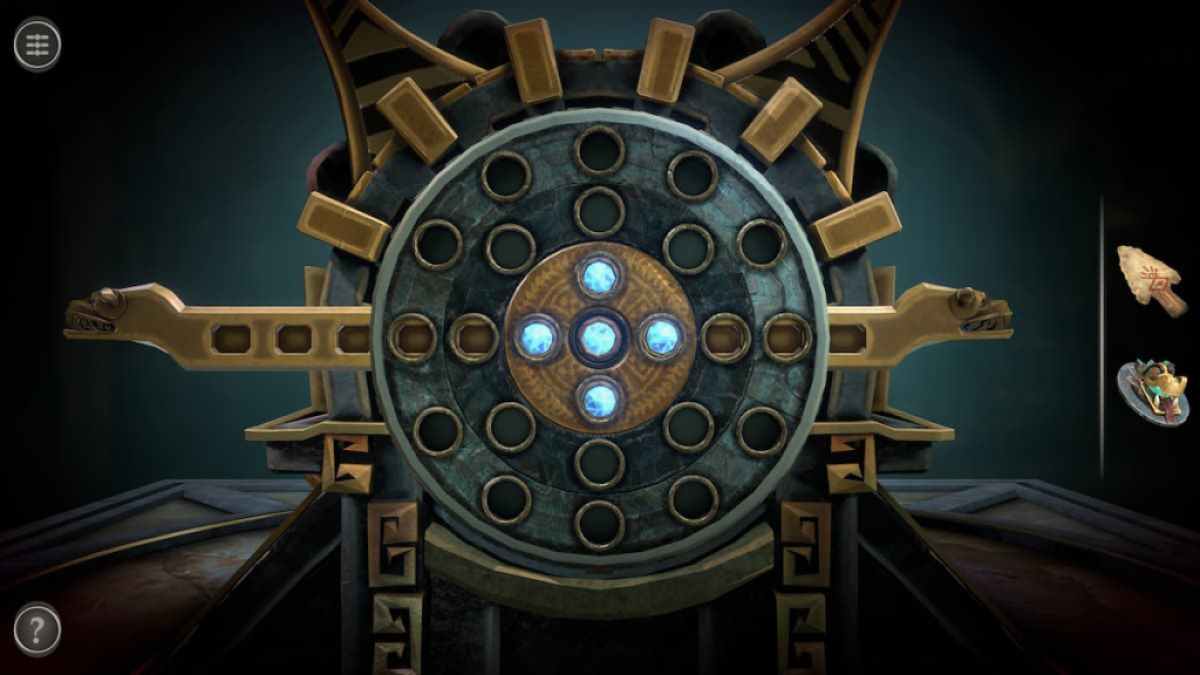
Right side rotating puzzle
This puzzle has four components, including three rotating rings and one golden slider in the center. The rings can all be rotated independently and the slider can be moved back and forth through the center of the puzzle.
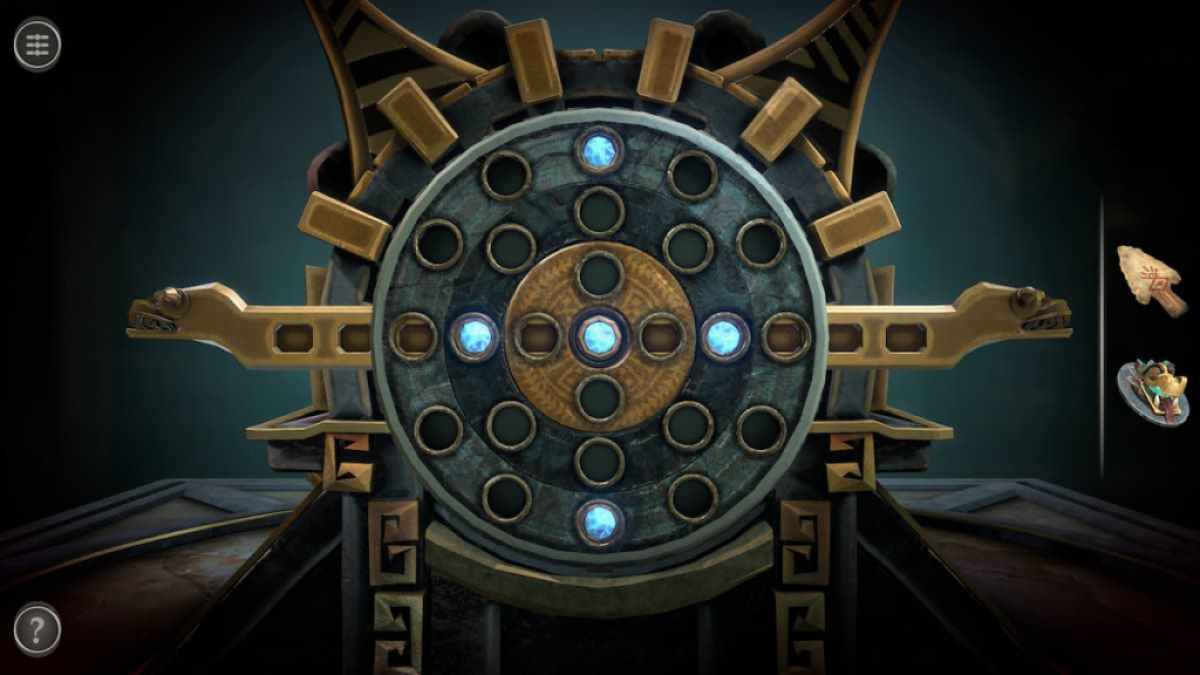
The goal of the puzzle is to get all of the blue gems in the center ring. I found it easiest to place the gems at the top and bottom of the ring, then use the other two rings to line up the remaining three gems in the center, pushing them into place with the slider once they are aligned.
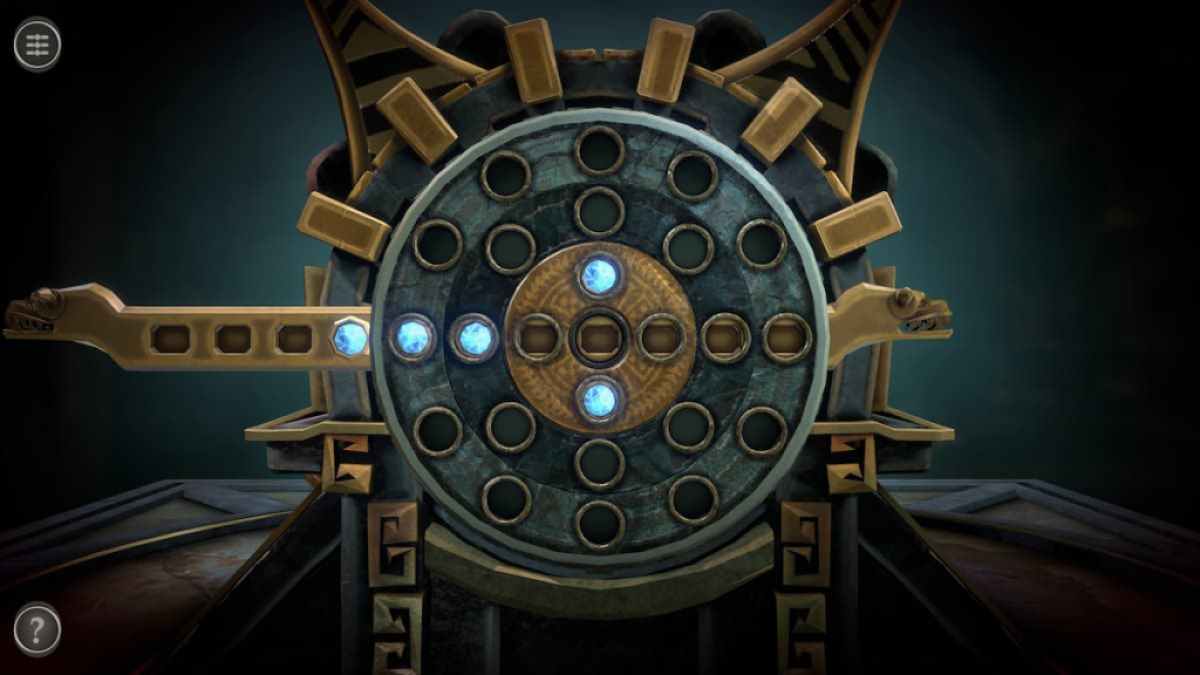
Completing this puzzle gives you a Crystal Skull.
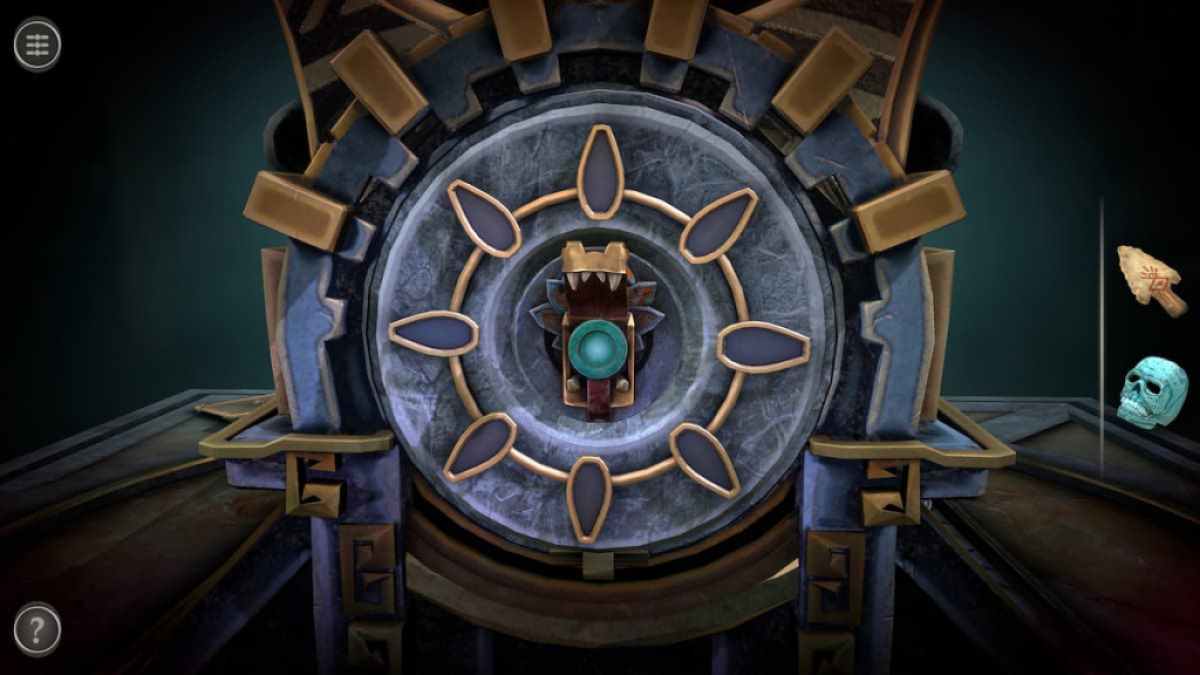
Left side Small Figure puzzle
The left side of the box has a circular space surrounded by eight petal shapes.
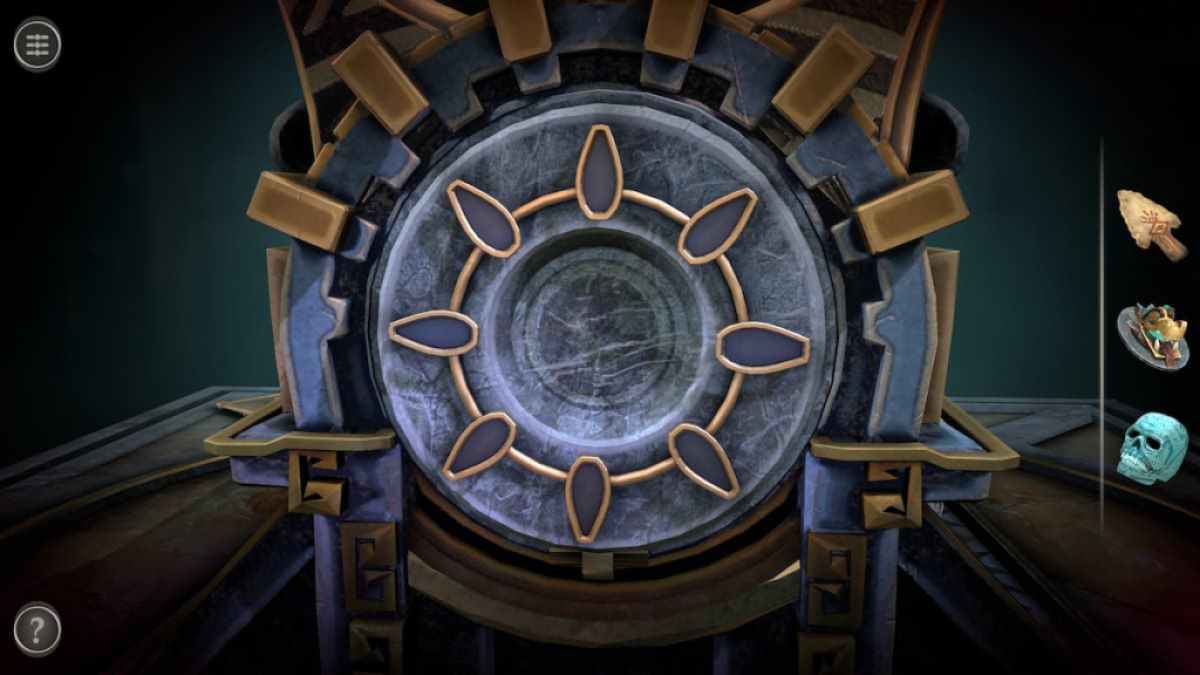
Place the Small Figure into the space and press the button on its mouth to enter the next puzzle.
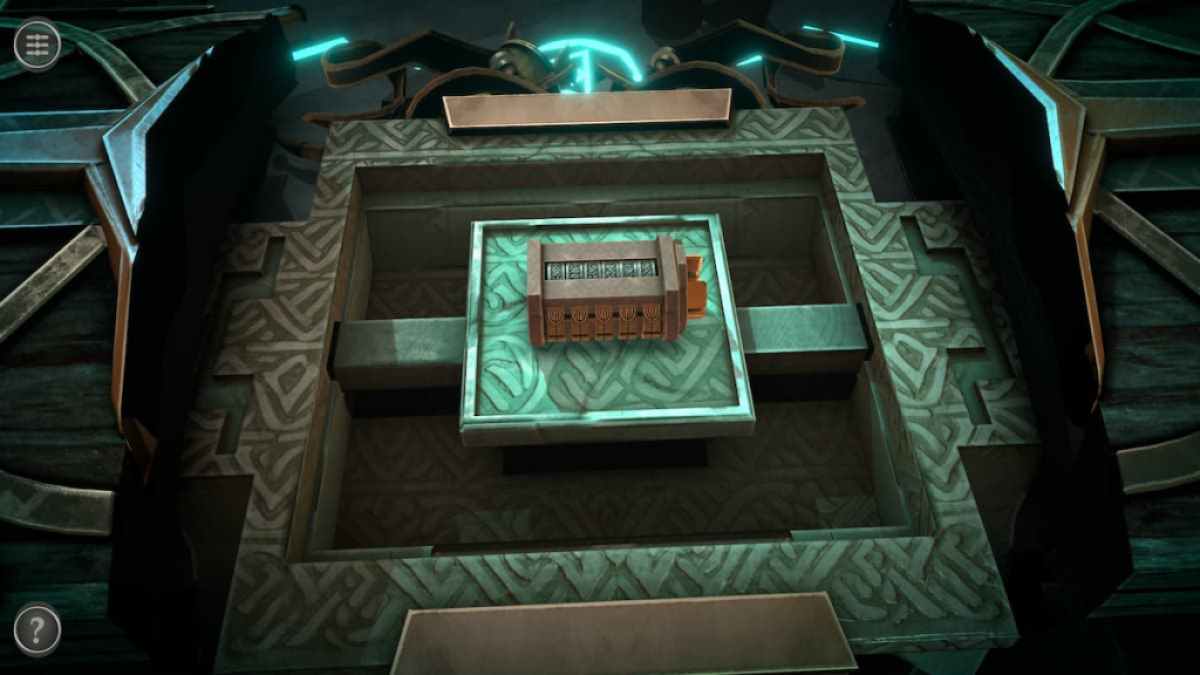
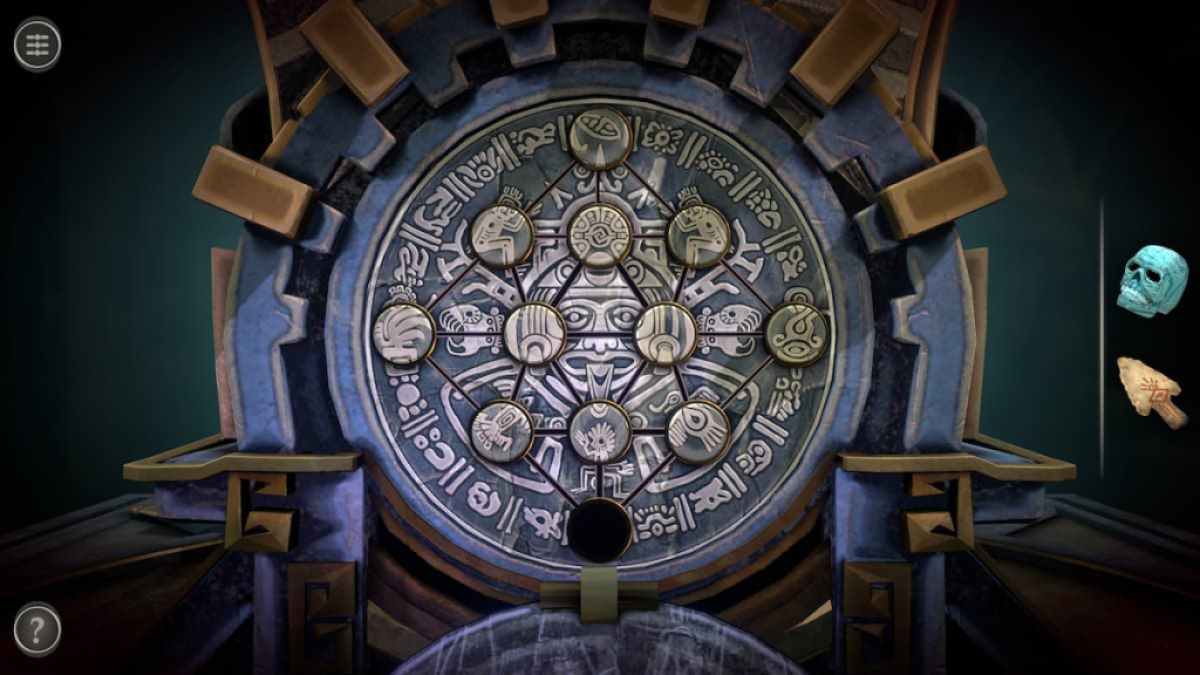
Moving symbol puzzle
This puzzle involves moving symbols around to complete the image behind them.
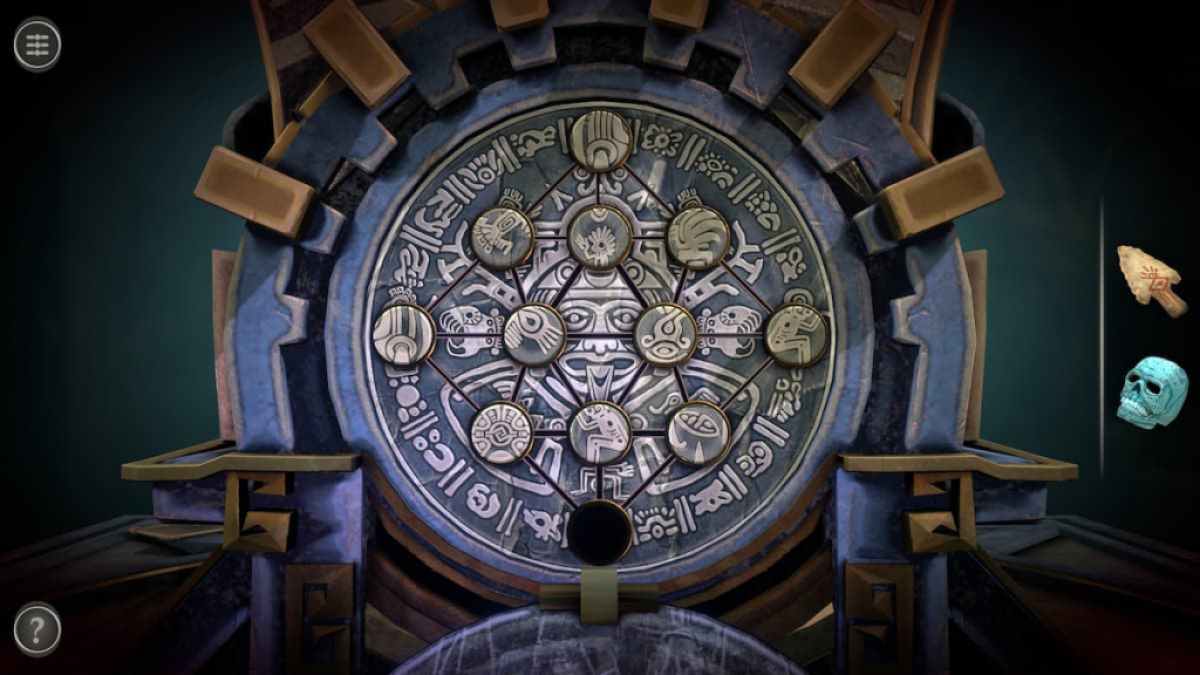
Tap an object adjacent to the empty space to move it to that space.
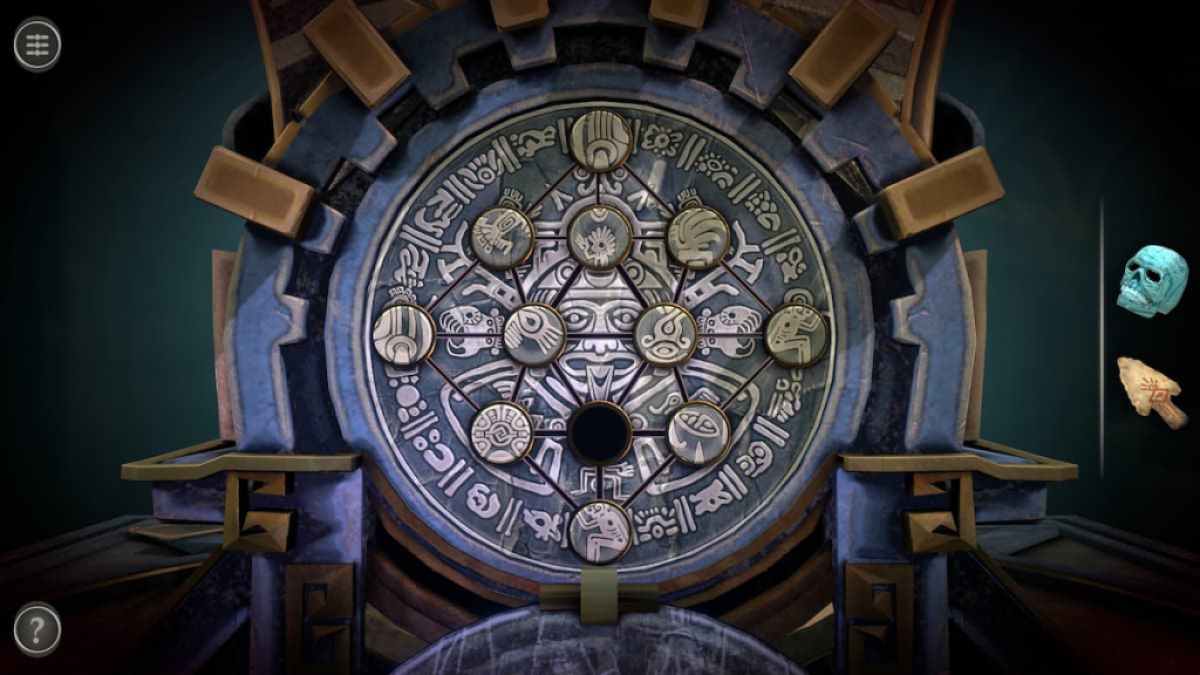
When the puzzle is completed, the space at the bottom should be empty. The mechanism will open, giving you an Aztec Artifact.
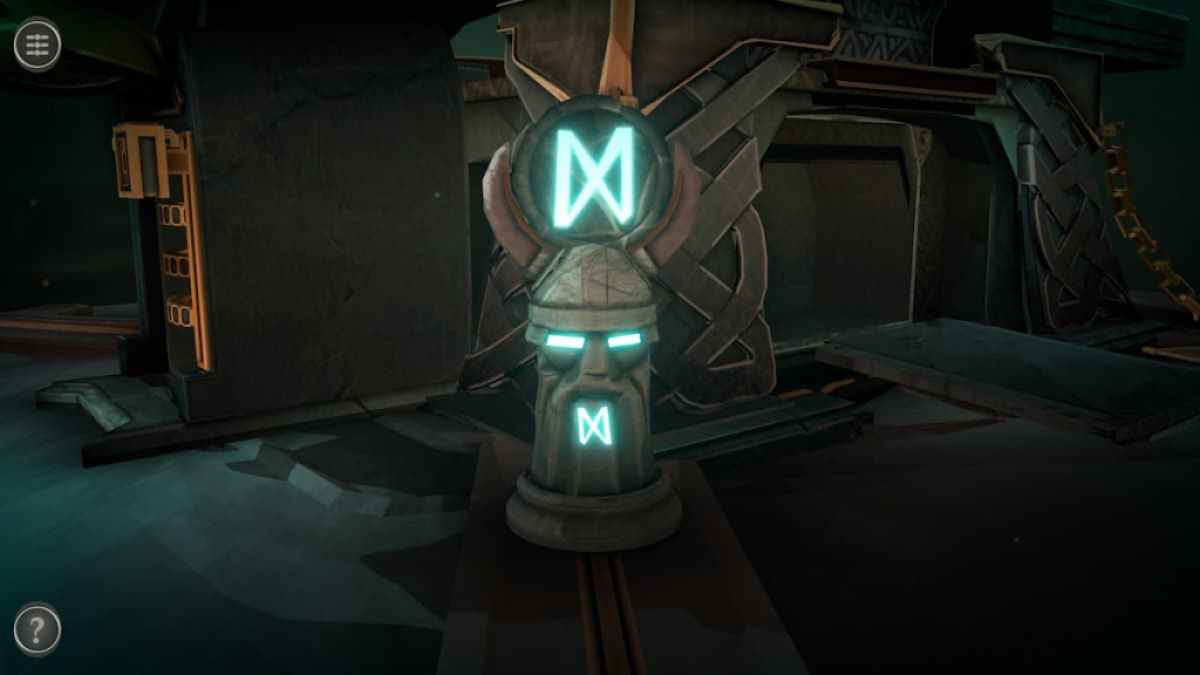
Tiki head puzzle
Focus on the Tiki Head at the front of the box.
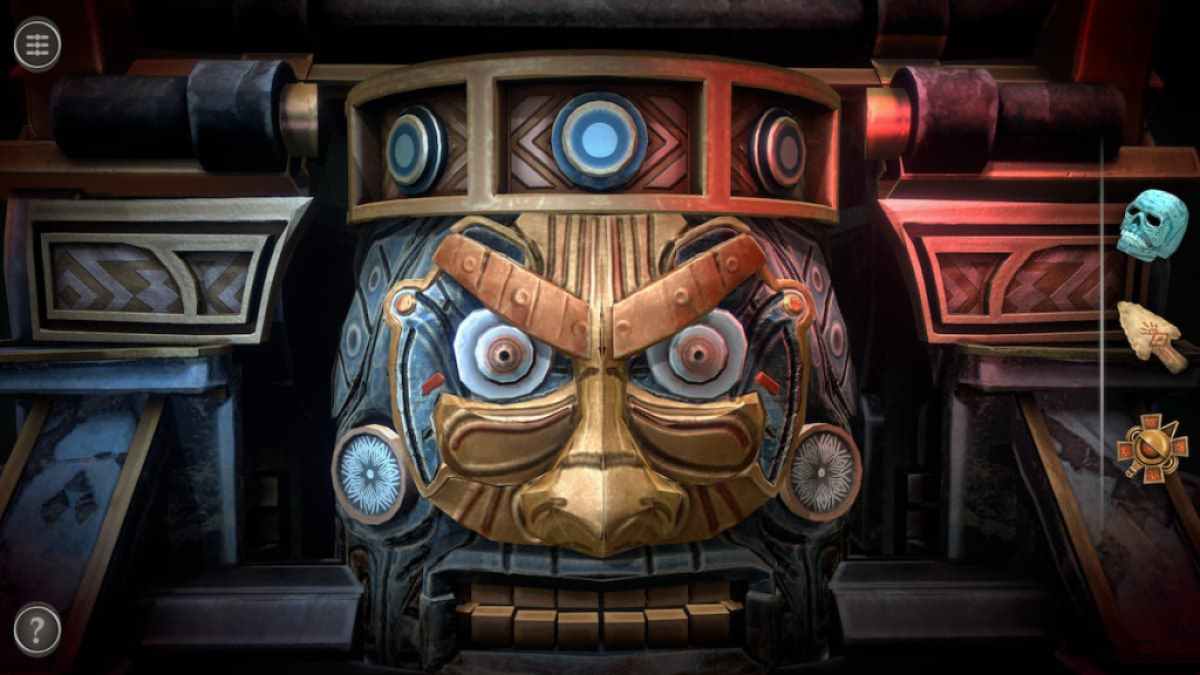
Rotate the mechanism at the top of the head until the eye-shape is at the top.

Place the Aztec Artifact onto the eye.
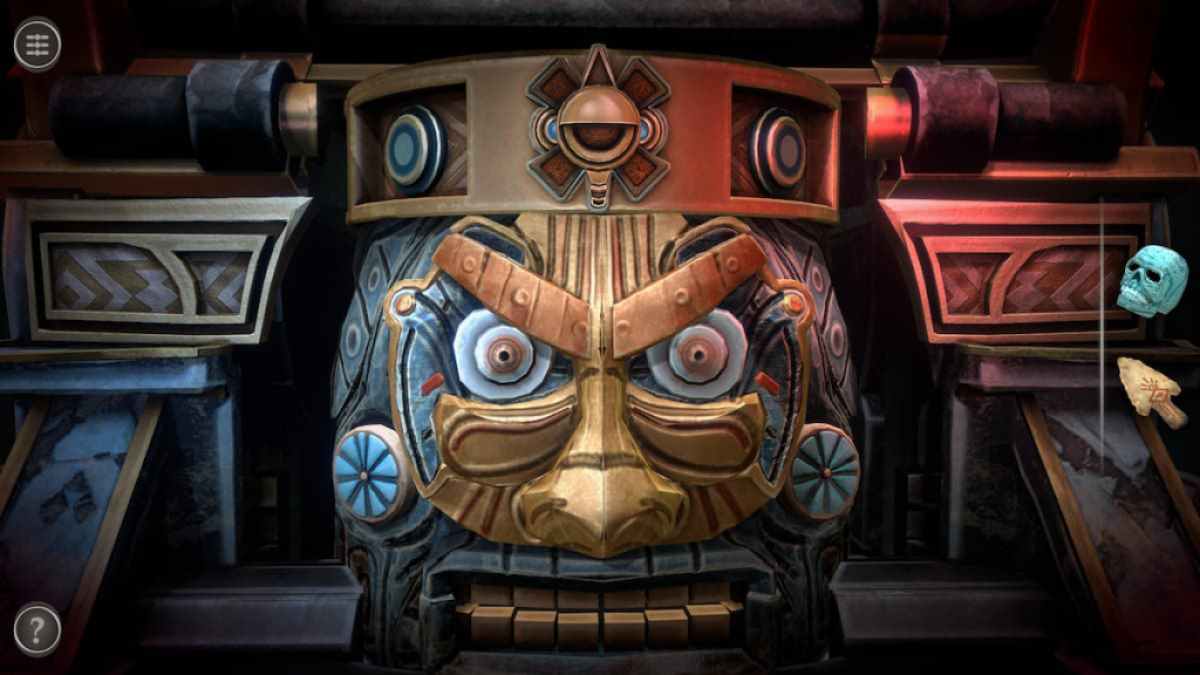
Rotate the earrings until the red marks on the eyes line up with the red marks on the cheeks.
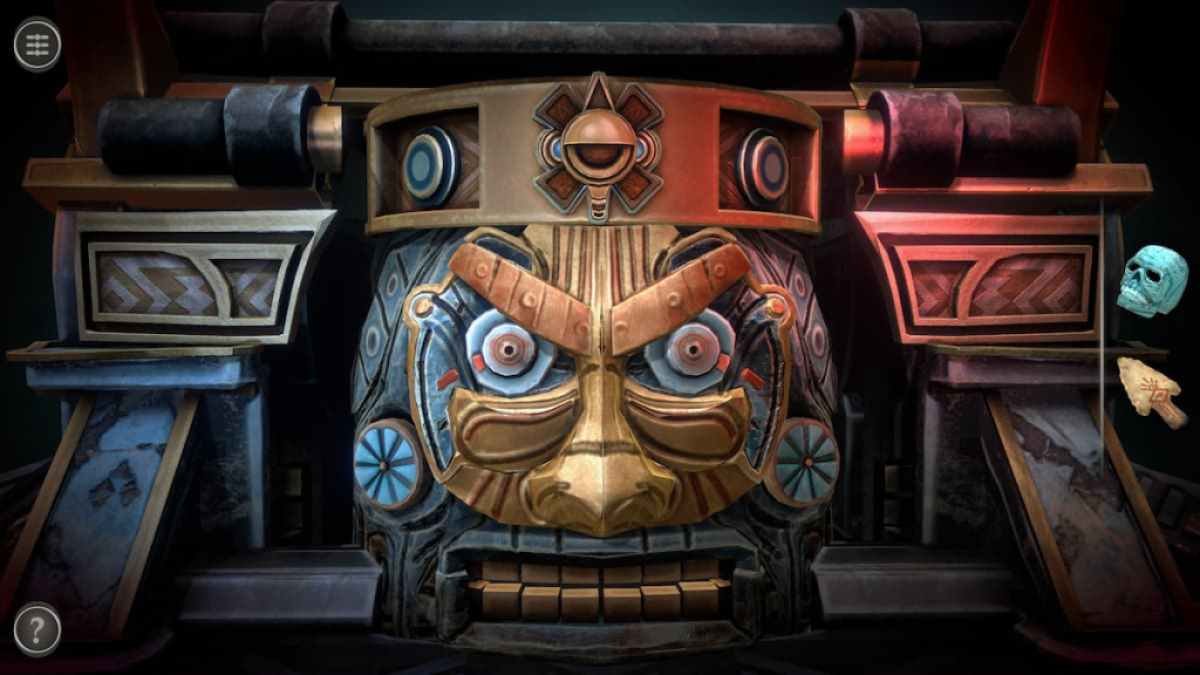
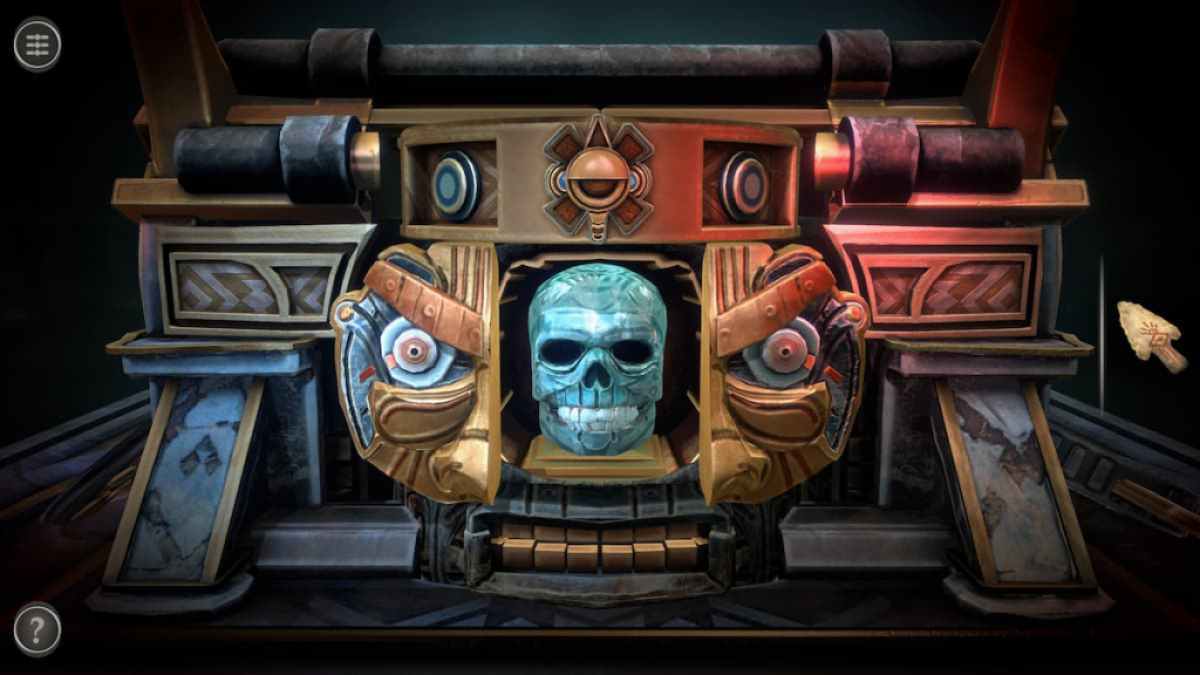
Place the Crystal Skull into the opening of the Tiki head to make the box transform.
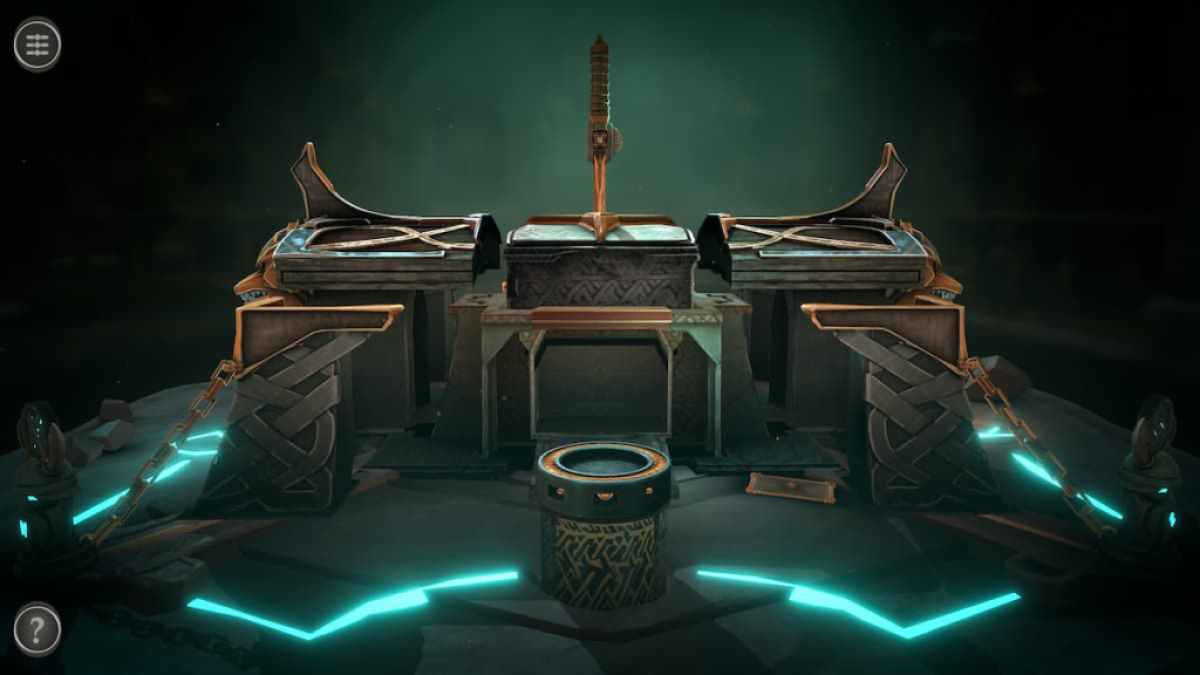
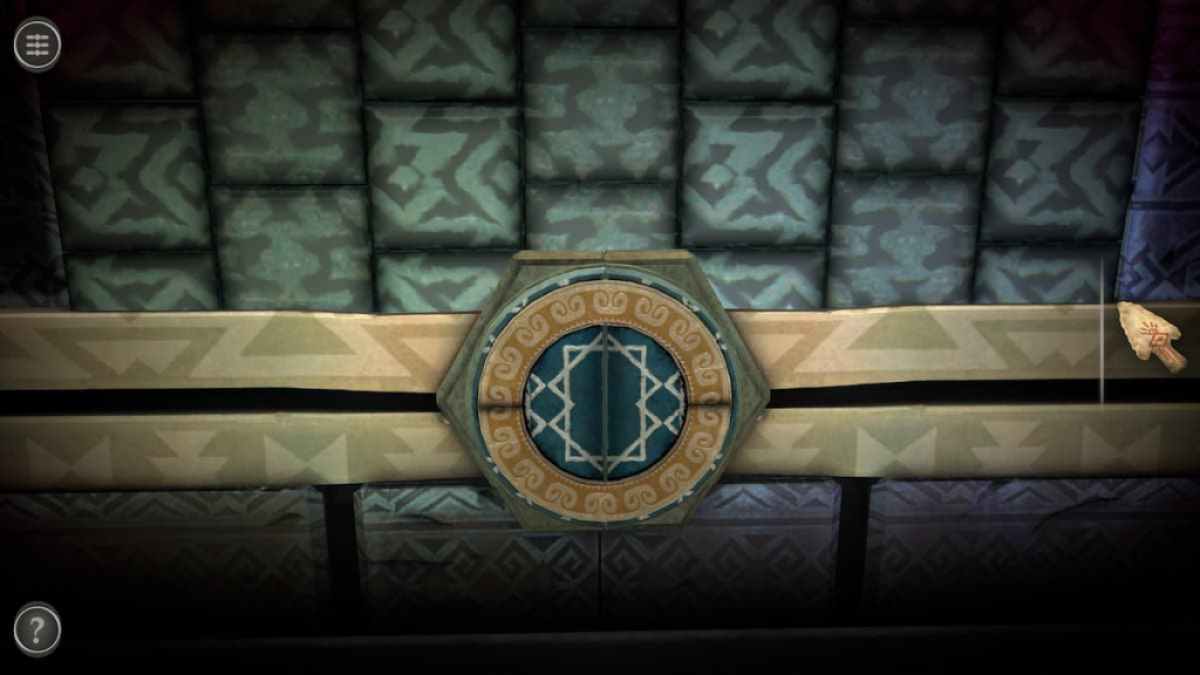
Tiki Tower puzzles
After placing the Crystal Skull, the Tiki statue turns into a tower.
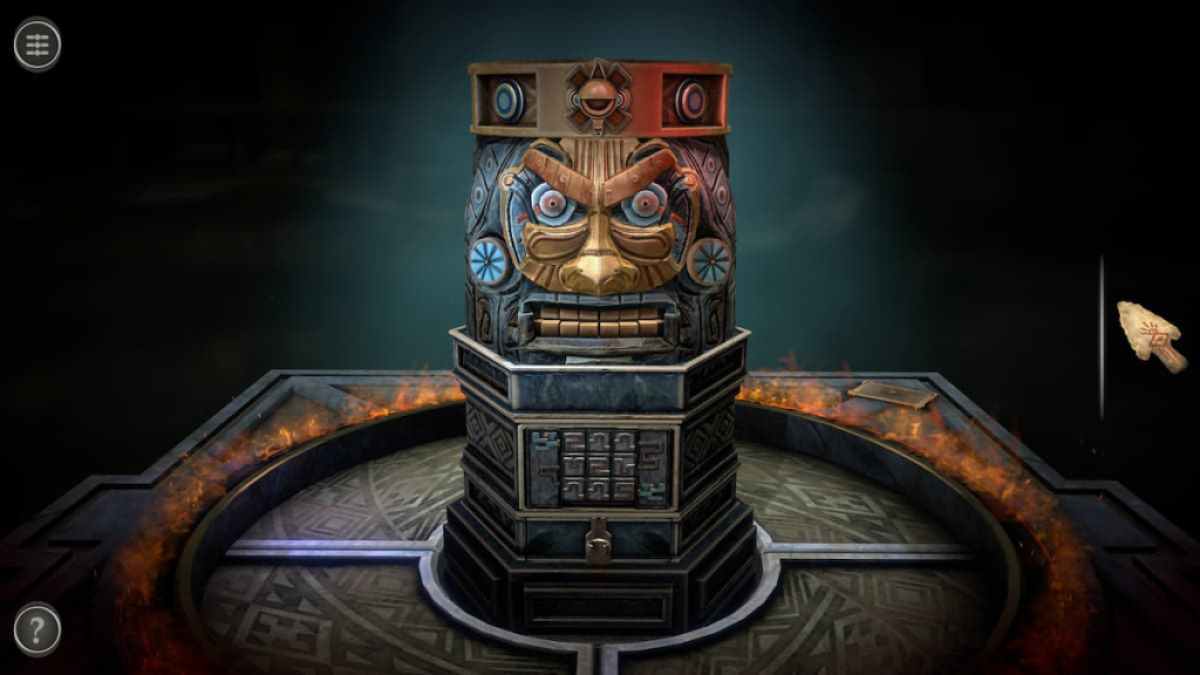
This Ouroboros puzzle requires you to flip the tiles to connect the two heads.

I found it easiest to match the pieces to the outer sides first and fill in the center. A few pieces have two potential matches, but it is easy to check which is correct.
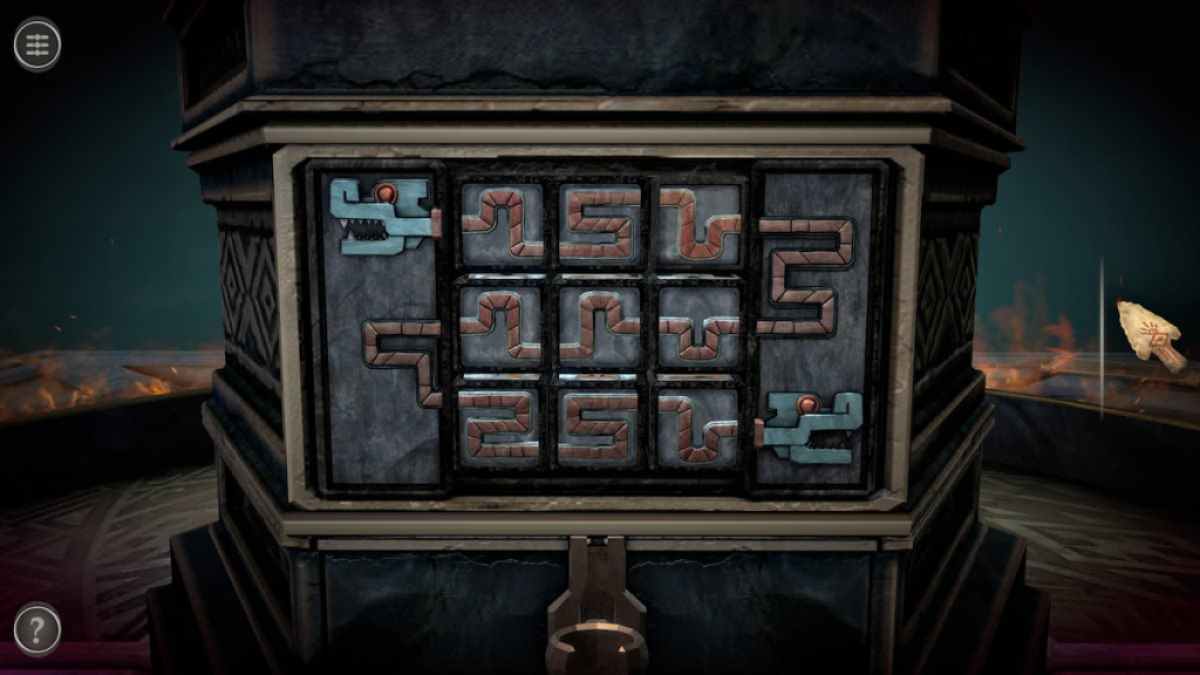
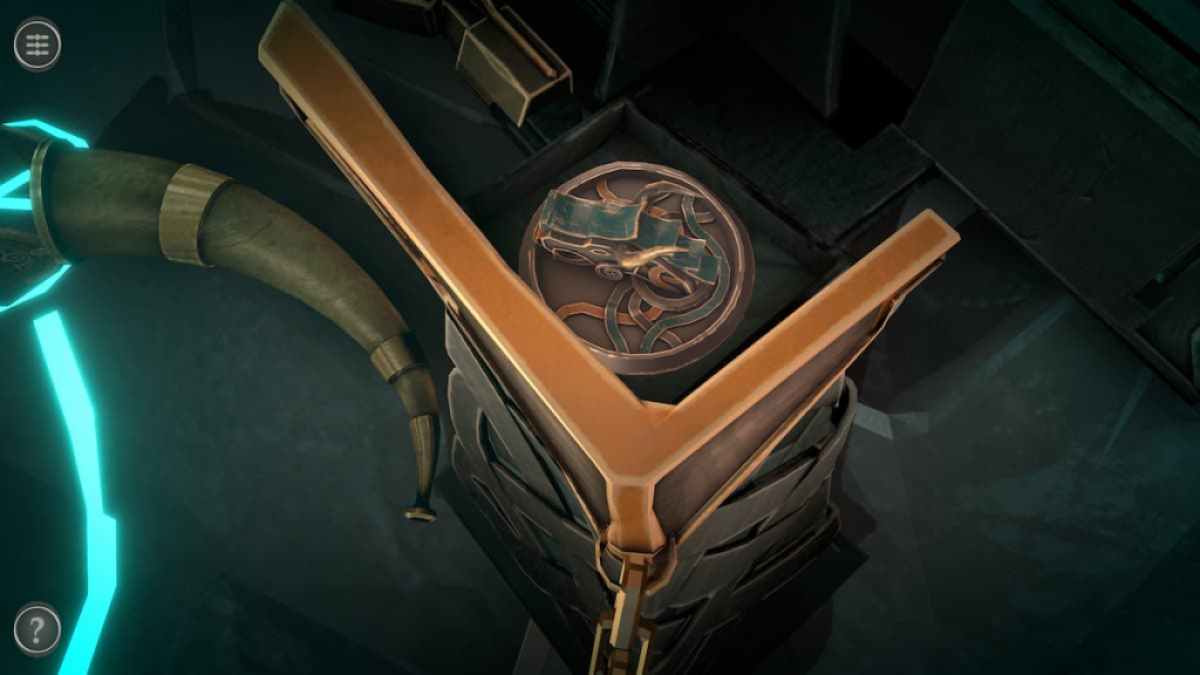
Completing the puzzle unlocks a long slider.

Place the Old Arrow Head into the slider slot.
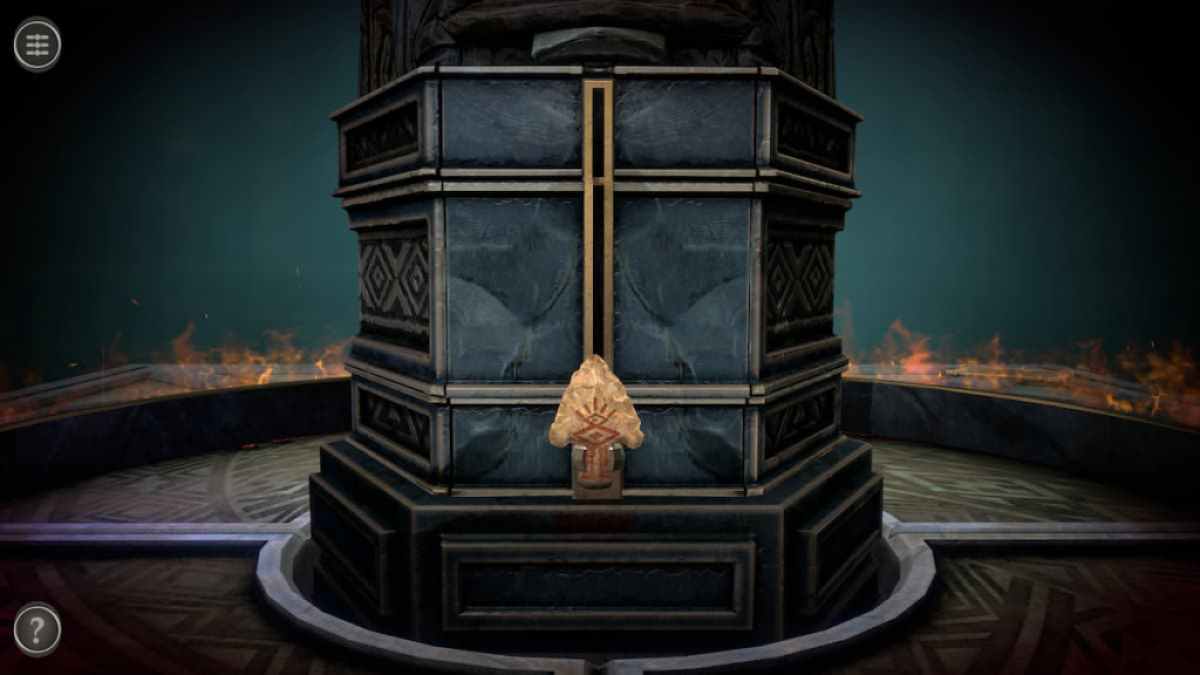
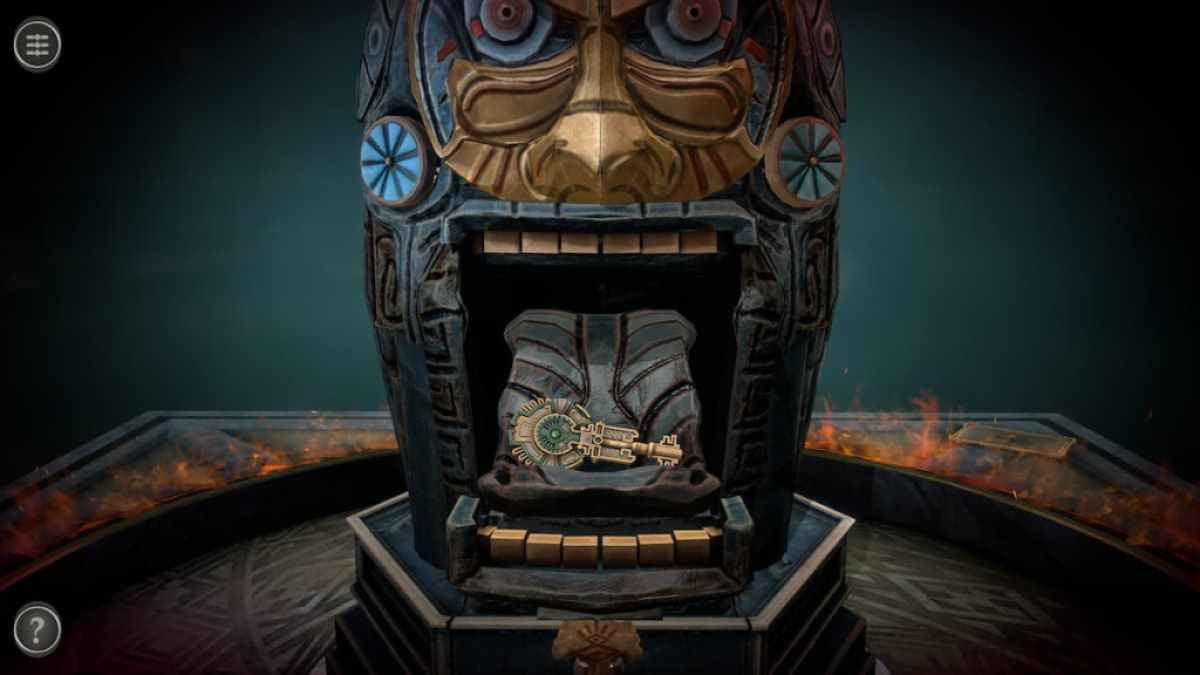
Push the Old Arrow Head into the Tiki's chin to open its mouth and get an Ancient Key. This completes the second room and sends you back to the main one.
For more escape room fun, check out our Sweet Dreams walkthrough – Adventure Escape Mysteries and other Adventure Escape Mysteries guides here on Pro Game Guides.


Published: Feb 17, 2024 08:22 pm