Lost Lands is a series of free detective-style mobile games that combine puzzle solving and mini-games with hidden object finding (similar to the Adventure Escape Mysteries) in a mysterious world where reality and fantasy combine. In Chapter Eight, Sand Captivity, our hero Susan needs to find an artifact that is hidden somewhere in the Lost Lands.
Once she finds it and returns home, however, that isn’t the end of the story. Completing the main game opens up a Bonus Chapter, in which young Kiana heads back to the Lost world to save the water people. If you’re having trouble with any puzzles or objects in this part of the game, read on for a full Lost Lands 8 Bonus Chapter walkthrough.
How to complete Lost Lands 8 Sand Captivity Bonus Chapter

The bonus Chapter has 13 locations set across three areas, starting in The Forest. Don't be surprised to find markings on the images you don't use straight away, as you'll often come back to locations later.
On the opening screen in the forest, click the fruit bush in the left-center (1a) of the screen for a close-up and pick up the Detail on the stone below it. Then click the bush to the left of the tree on the right to reveal a smoker (1b), go close up on it, and get a second Detail next to the chimney. Now click the bushes below the revealed smoker (1c) to reveal a door, which will need a key.

Continue by clicking the path in the middle distance, briefly examine the bag hanging on the tree (2a), then move forward again to the next screen with the fork in the road. Click the wooden sign on the tree in the center of the screen at the T-junction (3a) and grab the Colored Detail from the close-up, then click the fence to the left of the tree (3b) for a close-up and collect the Stick.
Go back to the previous screen and use the stick to get the box out of the tree, then click it on the ground for a close-up. Use the three details on the front of the box to begin a puzzle. There is no trick or timing to it. Simply move the pieces until they align as per the instructions. Once open, read the note, then take the Unfinished Totem, Knife, and Bread from the box.
The stone altar

Next, click on the roofed stone altar on the opposite side of the road (2b) for a close-up and place the bread on the altar. Try to use the knife on the Unfinished Totem in your inventory to get a message suggesting you might be able to complete it with a sharper knife. Go back down the path to the T-junction and click the stone wall blocking the path to the right (3c). Use the knife on the sharpening stone in the wall to gain a Sharp Knife, then use it in your inventory to gain the Wolf Totem.
Place the wolf totem on the altar back on the previous screen, and the main image on it will glow blue and start a mini-game. Place and remove items so that only the Nail, Horseshoe, Candle, Bread, Scroll, Walnut, Feather, Water Bowl, Wolf Totem, and Leaf are on the central stones. With the puzzle solved, take the Storm Whirligig and Road Sign from inside the altar.

Go back to the T-junction and attach the road sign to the tree, then click the left pathway to move to a cave entrance. Click the chain’s pulley (4a) for a close-up and take the Detail on the ground by its handle, then click the dark cave entrance to go inside. Remove the cloth from the wooden chest (5a) and click it for a close-up, then use the detail on the front panel of the chest to start the next puzzle.
Rotate the circle by clicking the buttons on its left and right. To complete the puzzle, click: left, right, left, right, left, right, right, left. Take the Trowel from the now-open chest.
The Bucket in the hole

Click on the straw piled on the right of the cave (5b), then click on the rope on the hay until you reveal, and then open, an entrance to a hole in the ground. Click on the hole to find that you need a light source. Click back to the wooden chest and get a Mirror Shard from inside. Use the shard on the dark hole in the straw to see a bucket at the bottom.
Get a close-up of the large cauldron in the middle of the cave (5c), and get the Scoop on the bottom right of it. Examine the light coming from the back of the cave, and use the scoop to collect the Prosthesis with Hook that is just through the gap. Use the hook on the rope in the close-up of the dark hole, then click the rope again to raise the bucket. Get the Key and Guide Disc from inside the bucket, then take the Bucket itself. Use the bucket in the cauldron to get water, which gets you captured by Toto the troll.
Related: How to play Escape Simulator
Complete the simple matching items puzzle to escape from the cage and also find the two Correct Plates for the road sign. Take the bucket, which is on the floor next to the cauldron, and this time use it successfully to get a Bucket of Water. Go back outside the cave and use the bucket of water on the Pulley System (4a) to clean it. Use the pulley to drop the cage, which you can unlock with your key.
Take the Traveller’s Diary Page and the Pick from the corpse in the cage, then go back to the signpost at the T-junction. Replace the troll’s signs with the correct ones to open a cache in the tree, from which you can take a Weathervane. Now, use the pick on the wall to the right of the T-junction (3c) and head that way over the bridge.
Gateway to Pumpkinton

Take the Stained Glass Piece from the Pumpkinton sign (6a), then click on the ladder on the floor (6b). Use the knife on the rope on the ladder, grab a second Stained Glass Piece from the floor in the close-up, then click on the ladder once more to stand it up against the wall. Click the top of the pillar next to the ladder (6c) and get another Guide Disc, before adding the weathervane to the pillar.

Select the storm whirligig in your inventory and click on the weathervane you just placed to activate the two pillars. To direct the energy from the pillars into the gate, you need to use one of the Guide Discs on each pillar. Once placed, click the direction arrows: right, right, right, left (it is the same for both pillars). Now you can complete the light puzzle (see above) on the gate to open it.

Go through the gate and watch the cut scene. Now collect three Stained Glass Pieces (7a, b, and c) from the screen with the wells and carthorse. Click the gate at the back of the area (7d) and go through.

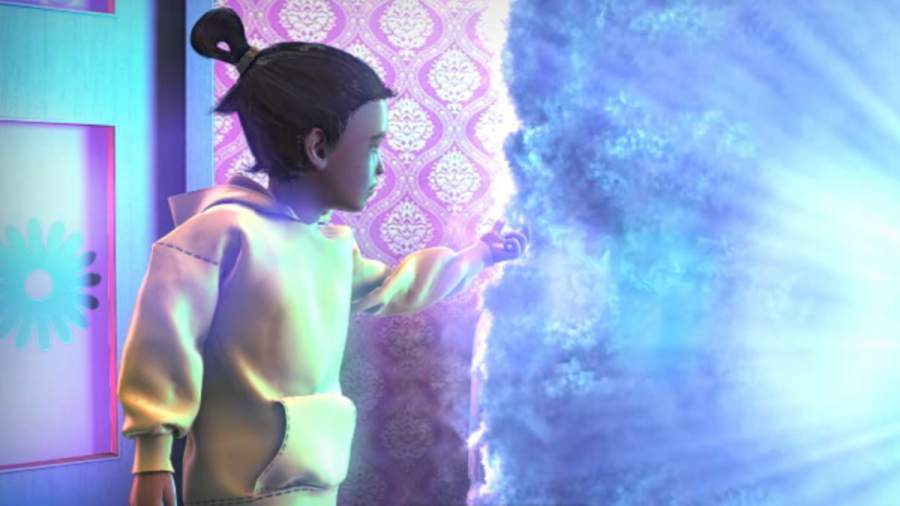
After talking to the boy and looking at the window (8a) he will give you a Stained Glass Piece, but you need four more to complete the window. Click the pumpkin patch (8b) until you find one (and also Part of the Pattern), plus the woodpile (8c) and the wheelbarrow (8d). The final piece is on the chair (8e). Use the pieces on the window and complete the jigsaw to gain the Key to open the front door (there's a picture of the completed jigsaw at the very bottom of this guide if you're struggling with it).
Inside the secretary’s house

Click the green carpet to roll it back and reveal a trap door. Click the trapdoor to see the hamster hole and see something inside you need. Now click the cabinet (9a) to open it. And the door inside it, to get the Sunflower. Head back to the wells and carthorse screen, take some Grain from the cart (7c), then add the Sunflower disc to the cover of the well (7b) to reveal a puzzle. To complete it, use the image below and click the following cogs the exact number of times in this sequence: 3xB, 3xH, 3xF, 3xE, 3xD, 3xC, 3xA, 2xB, 3xE, 3xA. When the lid opens, take the second Part of the Pattern.

Back inside the Secretary’s house, click on the fireplace (9b), and in the close-up, use the grain on the hamster hole. Once the hamster is eating it, go back to the other hamster hole by the trap door and take a third Part of the Pattern. Get a close-up of the cabinet on the right of the room (9c) and use the three parts of the pattern to complete the circle and open it.
Once open, take the Workpiece, Paper, and Key, then click the pile of papers so one is ready to draw on. The key opens the trapdoor into the cellar, which amounts to another simple item-matching puzzle. Once completed, you’ll come out with the Axe. Go outside and use the axe on the stump (8c) to get Firewood and place it (along with the paper) in the fireplace (9b).
The hobbit’s home

Go right back to the first screen in the forest and use the trowel by the tree stump (1d). You’ll find a Magic Lighter buried here. Use it to light the fire in the Secretary’s House, use the workpiece in the fire to make then collect a Drawing Coal, then use the coal on the paper in the cabinet (9c) to draw the image you need. After a long cut scene, you receive another Key.
Go back once more to the opening screen in the forest and use the key to open the door to the hobbit home (1c). Get the Potion Recipe from the box at the back of the room (10a) and open the box to get the Tube and Empty Flask. Then click the longer box next to it (10b) for your next puzzle (solution below, note the central space is clicked twice). With the box open, find the 15 board game Chips inside.

While in the hobbit hole, click the skin on the bed twice (10c) to reveal the game box and add the 15 chips to claim the Board Game. In the same close-up, click the purple cloth under the bed to reveal the Jigsaw. Now click the cooking area on the other side of the room (10d). Grab the Screwdriver from inside the stove, click the Wood next to the stove to put it inside, and use your Magic Lighter to start the fire in the stove.
Making the potion
Use the Jigsaw on the Tube to get a Sharp Tube then head outside and use the screwdriver on the chimney to remove the lid. Click the top of the chimney to find it blocked. Click back to the fruit tree (1a) and get some Leprechaun Eyes berries from it, then go north to the altar (2b) and collect the Shell. Go north to the T-junction and use the sharp stick on the conifer tree (3d), then use the axe on the pipe, and the flask on the pipe, to gain the Coniferous Juice. At the cave entrance, grab the Bucket (4a) and use the knife to get some Pyramid Mushrooms (4b).
Related: Best Switch puzzle games
Now head outside the Secretary’s House and use the knife on the plants in the wheelbarrow (8d) to get Bellflowers. Head south to the well and get a Dry Fish from the line (7e), and some water from the well (7b) to earn a Bucket with Water. Open the potion recipe book, and use the items pictured on it: bucket, bellflower, mushrooms, fish, berries, shell, and juice, to get the Ingredients item.
Go back to the hobbit’s fireplace (10d), grab the Fireplace Poker by the oven door, then go outside and use it on the chimney to clear it. Back inside, put the ingredients on the cooking counter (10d) and follow the recipe by clicking the book on the worktop. You now have the Potion.
Beating Toto the troll

Go back to the troll’s cave and talk to Toto, beat him at the mini-game (you can’t lose), then leave the cave through the big new hole in the back wall to the funicular. Click the entrance to the car twice to get a close-up (11a), click the pulley to find it isn’t working, and grab the Lid and a Wheel from the floor inside. Pick up a Wheel from the rocks (11b), and another from the box holding the car on the wire (11c). Use your magic lighter on the stuck mechanism (11d), which burns away the grass.
Click the stuck mechanism which releases your fourth Wheel, then search the now burnt grass (11e) for two more. Use the Axe on the wooden crate (11f) to get the seventh Wheel, and your knife on the satchel in the car (11a) to get the final Wheel, the Chain, and the Scheme.
Use the wheels and the scheme on the metal box (11c) to start a very simple puzzle, where you simply follow the diagram’s instructions. Now use the chain and the lid on the metal box, go into the car (11a), click the brake handle on the right, then the pulley lever to go down in the funicular.

On the next screen, use the potion on the water (to the left of the boat) to get to the final cut scene. Congratulations!
Do you love mystery puzzle games? Then don't miss our Abandoned Walkthrough & Puzzle Solutions and Abandoned 2 Walkthrough and Puzzle Solutions here at Pro Game Guides!