


Updated on November 14, 2026 for Update 1 and V1.01: The normal level cap is now 400, with Hinokami Embers extending progression beyond it. I have added the new Base Stats tree, Duskweb and expanded Iceveil route, Beast and Flower Breathing, Daily Quests, Spider World Boss, Spider Raids, Raid Runes, Boss Rush, Ouwigahara Climb Tree, bounty activities, and the V1.01 quest EXP and boss adjustments.
Becoming a Demon Slayer in Slayers 2 takes more than buying a katana and picking your favorite anime character's Breathing Style. You need to build your character, complete your training, and survive Final Selection before settling into the longer grind. This Slayers 2 Demon Slayer progression guide walks you through that route, including what to prioritize and where you can save yourself some unnecessary running around.
Slayers 2 Demon Slayer Progression Order
The main route is Windy Peak quests → Breathing training at level 25 → Final Selection from level 45 → Crow quests and Slayer Progress → the Forge at level 65 → Iceveil and Crow leveling → Duskweb and Update 1 bosses from level 225 → raids, Runes, Boss Rush, and the level-400 endgame. I recommend aiming for around level 60 before a first solo exam attempt, but you can enter earlier. Use these milestones to plan your progression:
| Stage | Your next objective |
|---|---|
| Before leaving Windy Peak | Complete Kona’s Lost Pages quest, claim the Book of Guidance, and buy a katana from Raze. |
| Levels 1–6 | Repeat Krue's quest to defeat three Bandits. |
| Level 7 | Take Krue's Mini Boss Zuko quest. |
| Starter weapon | Visit Raze: - Regular Katana costs 500 Wen; - Fancy Katana costs 1,500 Wen. |
| Level 10 | Move to Tom's bear-hunting quest. |
| Level 18 | Take Tom's Mother Bear quest. |
| Level 25 | Start your chosen Breathing trainer's questline. |
| Level 26 | Talk to Chaka and repeat the Kaiden’s Subordinates quest. If his chain is locked, finish the earlier village quest handoffs. |
| Level 34 | Take the Kaiden quest and grind to Level 40. |
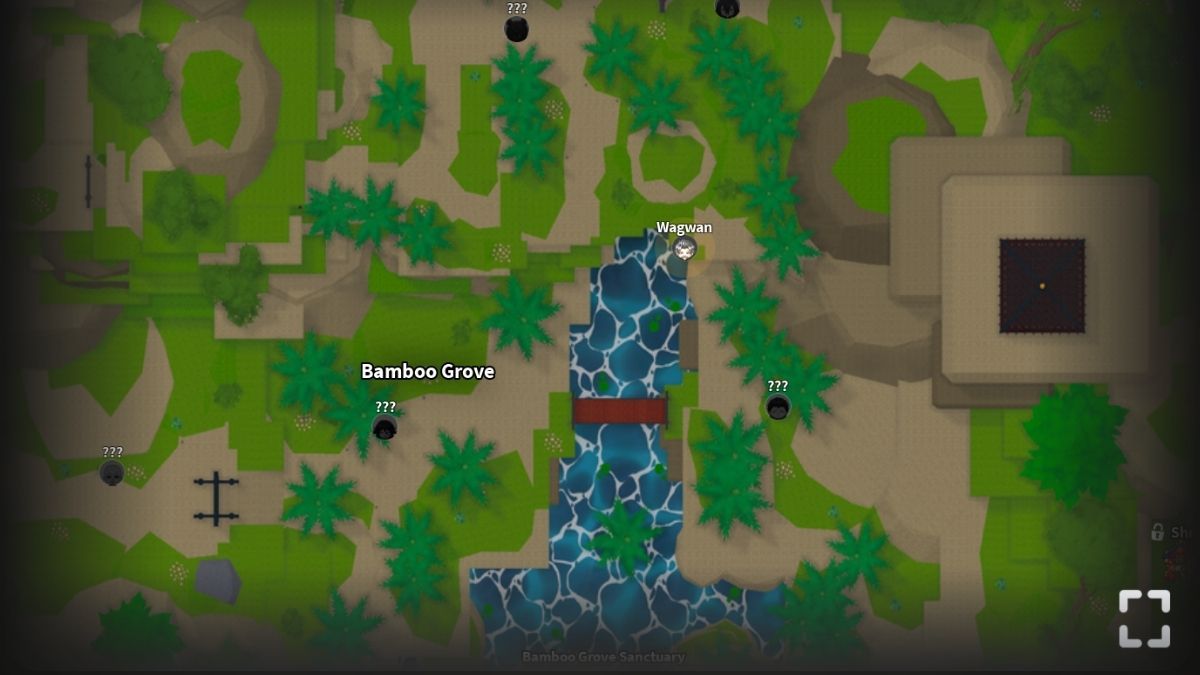
| Level 40 | Find Wagwan below the bear area’s waterfall and repeat the available guard quests. Keep going toward level 60 if you want more room for mistakes in Final Selection. |
| Level 45 minimum; around 60 recommended solo | Complete Final Selection, defeat the Hand Demon, and return to The Sisters. |
| After Final Selection | Equip your Crow, unlock Ren and Ginzo, develop Slayer Progress, and check weapon crafting before spending your materials. |
| Level 62 | After passing Final Selection, use Jugg's Slayer quest at Dreamfall Hollow for the 62–75 stretch. |
| Level 65 | Start The Forge quest with Blacksmith Togane in Hidden Mist Village, then work toward Ouwigahara crafting and your next weapon upgrade. |
| Level 75–225 | Follow the Goro → Tomoi → Shiro → Mitsu → Crow quest route while developing mastery and working toward endgame gear. |
| Levels 225–400 | Move into the Update 1 route across Duskweb Hollow and the expanded Iceveil content. Use the Book of Guidance and the level shown in each quest prompt because the most efficient handoff between the new bosses still needs more live testing. |
| Level 400 and beyond | Use Hinokami Embers to extend the cap toward 450+, then prioritize Spider Raids, Raid Runes, Boss Rush, Hairo, the Spider World Boss, Ouwigahara Climber Rank, and build completion. |
PRO TIP: V1.01 doubles quest EXP up to level 400, so repeatable quests are much more competitive than they were on Update 1 launch day. Busier servers can still change the practical pace through target competition. Judge the grind by completed quests per minute, not by the largest reward number on the screen.
Start With a Useful Clan, Then Get Moving
Your clan can make a meaningful difference, but don't turn character creation into your entire first session. A rare surname won't teach you when to stop swinging. Look at what your clan actually contributes to the build you want. Useful pairings include Agatsuma with Thunder, Kocho with Insect, Iguro with Serpent, Rengoku with Flame, and Shinazugawa with Wind. If you already have Urokodaki or Sabito, their Water support is worth considering, but a matching surname is not a reason to force yourself into a moveset you dislike.
RELATED: Slayers 2 Clans Tier List
Those are reasons to keep a useful roll, not requirements for becoming a Slayer. My recommendation is to start playing with a workable clan and revisit optimization once you know which style you enjoy. Spending all your resources chasing a build you haven't tried is a very expensive way to discover you prefer something else.
There is also less risk in changing direction later than there was at launch. Rolling or buying a new clan now preserves your Clan skill-tree progress. That does not make early rerolls free, but it does mean the points you already earned are no longer a reason to stay locked into a clan that does nothing for your final build.
PRO TIP: Set your spawn at an available spawn point near your current grind. Look for the purple crystal when you reach a new settlement. A short run back is an upgrade you will appreciate the moment a bear disagrees with you.
Unlock useful fast-travel shrines as you explore. Interact with a shrine and pay its unlock fee, then select the purchased destination on your map. Save your training money first and prioritize places you actually revisit. For trips between shrines, a Horse Mount is another option: look around Bamboo Grove, finish the taming minigame, and pay 15,000 Wen. It is a travel upgrade, not a requirement for becoming a Slayer.
Levels 1–45 Grind - Build Your Combat Fundamentals
This is the part of the game where you'll mostly do your usual bandit-beater stuff. A quest in the starting village has you deal with fake civilians who are actually spies for the bandits outside. You'll find some notes on them, which, when translated, will point you to where to move next. There are also a couple of other quest-givers inside the village; make sure to do every one of their quests at least once.
Before leaving, talk to Kona and complete Recover the Lost Pages. All five pages are in Windy Peak; return them to him to claim the Book of Guidance. It points you toward recommended progression quests and their NPCs. The game is already chaotic enough with the book, let alone without it. Use our Lost Pages locations guide if the last scrap of paper is somehow winning.
If you reach the right level but cannot start Chaka’s quests, check your earlier handoffs. Kazu’s notes go to Noote before the route continues to Chaka. Lucy’s village quest also points you toward Tom. Leveling and finishing the introductory quest chain are not always the same thing.
Use these opening fights to practice a repeatable attack pattern: wait for an opening, land a short sequence, then defend or reposition. If you keep getting interrupted halfway through a combo, shorten it. Landing three hits safely is better than planning seven and eating the other four yourself.
For boss quests, judge efficiency by successful clears. If a fight repeatedly sends you back to spawn, spend a little longer on content you can handle or find someone to tackle it with. Unlocking a quest doesn't automatically make it your best grind.
How to Level Up Fast in Slayers 2
The fastest route in my experience is still the least glamorous one: repeat the highest quest you can clear quickly, pick up every nearby handoff once, and move zones as soon as the next repeatable becomes consistent. A harder boss is not better EXP if half the session is spent running back. Busier servers can raise quest EXP, but only stay if target competition does not erase the bonus.
Once Arena is available to you, it becomes a useful second track rather than a replacement for questing. Arena wins award 1,000 mastery, while the EXP and Wen reward scale with your level. I use it when a weapon or Breathing bar is lagging behind my character level, then return to the normal quest route for reliable progression. If you are not winning consistently, ordinary enemies remain the steadier mastery farm.
Use Daily Quests and the Daily Wheel
Daily Quests unlock at level 10, with three available each day and an additional reward for clearing the full set. They can pay EXP, Spins, refinement items, and other progression resources, so I check the Progression menu before settling into a repetitive grind. At level 35, the Daily Wheel adds one free main-menu spin per day. Neither system replaces the normal route, but ignoring them is leaving useful account progress on the table.
RELATED: Slayers 2 Breathing Styles Tier List – Best Breathing Styles Ranked
Spend Skill Points With Your Next Unlock in Mind
Your build now draws on the new Base Stats tree alongside Weapons, Clan, and Breathing progression. Update 1 refunded previously spent stat points, so returning characters should open the tree before fighting anything serious. Mastery is still separate from character level, meaning a level-400 character can reach the cap with an unfinished moveset if the weapon and Breathing Style were neglected.
The new tree also adds Critical Damage, while equipment and Runes can supply Crit Chance and Crit Resistance. A critical hit deals 50% additional damage, but I would still solve basic survivability, stamina, and movement before chasing a glass-cannon crit setup. Spend around the problem you are currently facing:
- Can't reach a trainer? Check movement unlocks such as Wall Climb before buying another combat upgrade.
- Keep dying before you can finish a fight? Invest in HP and block branches.
- Struggle to keep attacking or repositioning? Review your stamina options and how aggressively you're spending it.
- Just unlocked Breathing? Check the requirements for your first useful techniques before spending your remaining points elsewhere.
- Building around critical hits? Add Crit Damage only after your rotation, health, stamina, and equipment supply enough consistency to make the investment worthwhile.
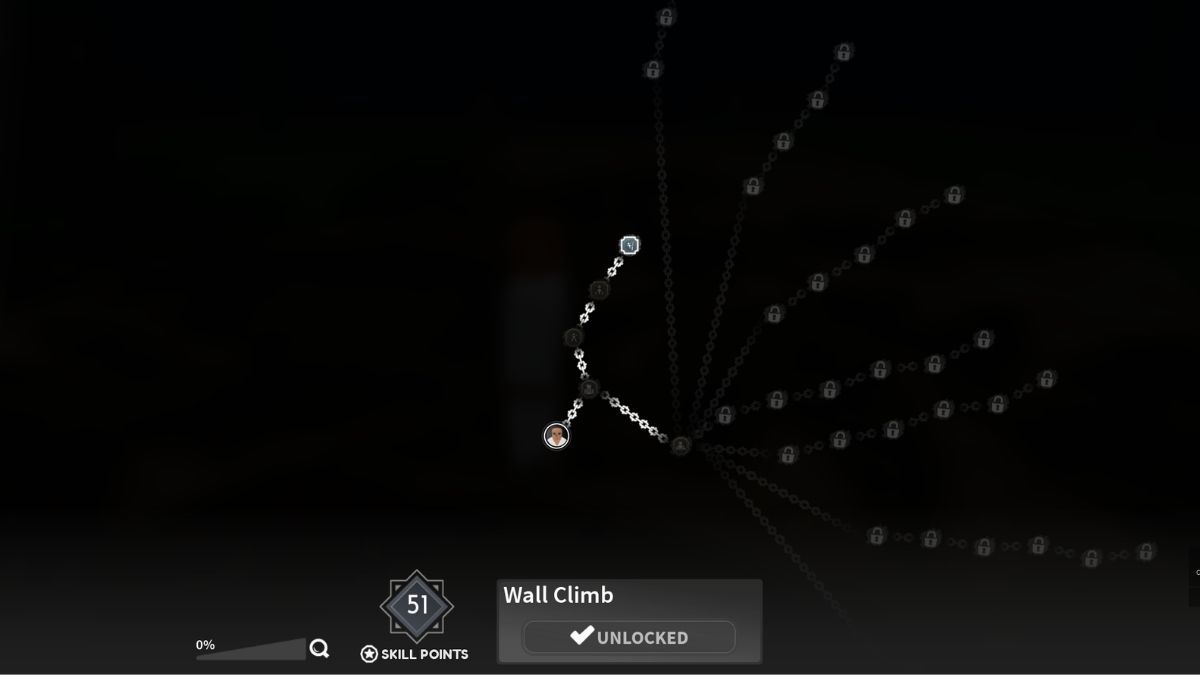
My first priorities are Wall Climb and Double Jump. They help with trainer routes and the exam’s traversal sections. After that, buy the next useful node for your actual weapon and style instead of spreading points across everything that looks interesting. Keep enough points for your next Breathing unlock; a movement upgrade is useful, but so is having an actual attack when you arrive.
Resetting or swapping your Breathing Style refunds its skill-tree points. The same refund rule applies to Evil Arts and Fighting Styles, and missing points return the next time that character joins. Once you have completed a Breathing trainer’s course, that trainer can reteach the style for free without making you repeat the tasks. A different style still requires its first-time trainer route and resources.
RELATED: Ultimate Slayers 2 Tier List
Level 25: Unlock Your Breathing Style
Breathing Styles come from trainer questlines, and they become available at level 25. Reach the level requirement, bring the requested resources, complete the training tasks, and beat the trainee encounter for your chosen route.
The current roster contains ten Breathing Styles: Water, Thunder, Flame, Wind, Stone, Insect, Sound, Serpent, Beast, and Flower. Wind remains my best proven all-round recommendation, while Flower enters S tier through i-frames, suppression, slow, counter pressure, and a steerable guardbreak. Flame is still the cleanest beginner and farming pick because its attack roles are obvious and dependable. Beast leads A for aggressive close-range players, but its committed entries and camera-heavy routes demand more practice.
All ten styles start with their own trainer. Here is the preparation list; use the trainer locations guide for the longer routes. The exact Beast and Flower payment requirements still need verification, so those entries remain TBA.
| Style | Trainer route and preparation |
|---|---|
| Water | Urokodaki: Underwater route near Bamboo Grove and the island house. Bring 5,000 Wen and 30 Demon Horns. |
| Flame | Rengu: Check the roof behind the house near the long red bridge out of Mistfall Village. Bring 10 Demon Horns. |
| Serpent | Obari: Cliff north above Windy Peak. Bring 20 Demon Horns and five Beast Cores. |
| Sound | Tengai: Atop the small island north of the Iceveil Valley shrine. Unlock Wall Climb and bring 10 Demon Horns. Watch your health in the cold. |
| Insect | Shinora: On a white house’s roof inside Butterfly Estate, approached from Mistfall Harbor. Bring 3,500 Wen, 15 Demon Horns, and three Beast Cores. |
| Thunder | Zentaro: Highest peak in Hidden Mist Village, reached by climbing beyond the bear area and nearby boss. Unlock Wall Climb and bring 10 Demon Horns. |
| Stone | Gyorei: Lower route from the bear area. Bring the Axe and Mace, 4,000 Wen, and four Beast Cores. The Axe and Mace currently has a 15% trainee drop chance. |
| Wind | Saneri: Platform in the water in Iceveil Valley. Follow the fallen tree from the shrine toward it. Bring 50 Demon Horns. |
| Beast | Beast Trainer: Duskweb Hollow. The exact Wen and material requirements are TBA. Inozu is tied to the Ultimate and Beast equipment route. |
| Flower | Flower Trainer: Duskweb Hollow. The exact Wen and material requirements are TBA. Kanao is tied to the Ultimate and Flower Katana route. |
Read your trainer’s dialogue before committing to a long material grind. The table reflects the current asks I could verify, but some trainers split their requirements across multiple dialogue stages. Pick your style before farming its materials. You want a shopping list, not an inventory full of things a different trainer asked for.
Where to Farm Breathing Materials
Demon Horns: Check the waterfall cave beneath the Mother Bear area. Hoyuzo's Subordinates have a 30% chance to drop one horn, while Hoyuzo has a 50% chance to drop three. Start with manageable pulls rather than dragging the entire cave into one fight. Beast Cores: Beast Born Demons appear at night around open village areas, including the road toward Mistfall Harbor. They have a 50% chance to drop one core. Our Demon Horn farming guide shows the cave route.
READ MORE: Slayers 2 Codes
Levels 26–60: Prepare Your Build for Final Selection
After training, your priority should be learning the moves you have and working toward the next useful unlock. Use your chosen weapon and style in combat to develop mastery alongside your character level. Check your Titles during this stretch too: quest EXP and combat bonuses are useful now, not just after the exam.
From level 26, work through Chaka’s subordinate quests, then his Kaiden quest from level 34. At level 40, move to Wagwan under the waterfall below the bear area. Repeat his available guard quests while developing your weapon and Breathing mastery. I recommend continuing toward level 60 for a first solo Final Selection run. That is extra preparation, not a hard requirement: entry opens at level 45, and your gear, moveset, and teammates also matter.
Before Selection, aim to understand three things about your kit:
- Your safe damage option: something you can reliably land during a short opening.
- Your approach or spacing tool: how you enter range or keep a comfortable distance.
- Your defensive answer: how you respond when the enemy gets the first hit or your attack misses.
Test longer combinations against ordinary enemies first. A move that launches or locks down a normal target may not control a boss the same way. Don't build your entire strategy around the Hand Demon politely cooperating.
RELATED: Slayers 2 Blood Demon Arts Tier List
Level 45: Complete Final Selection
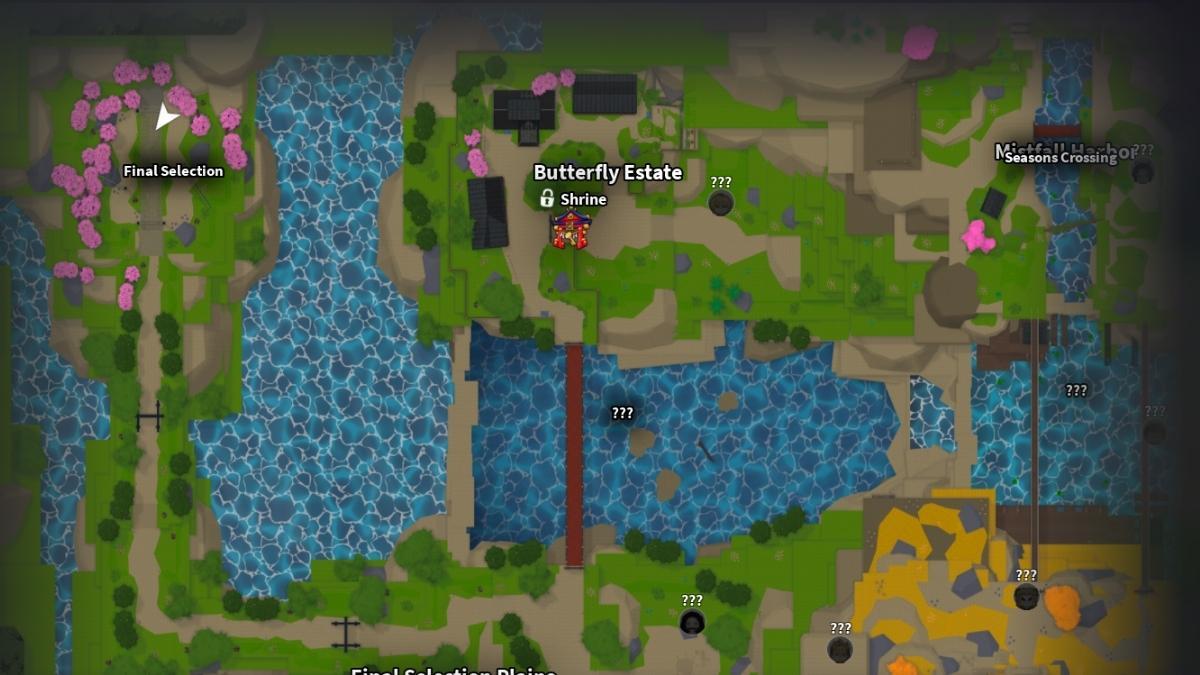
First, you'll need to reach an area called Final Selection, located in the far west of the world map. Use the map marker feature to guide you, and first make your way to Mistfall Harbor. From there, cross the bridge and head toward the Butterfly Estate. Once there, you'll see a very long bridge to the south that leads toward the Final Selection Plains. From there, follow the path northeast, and you'll eventually reach Final Selection.
Final Selection opens about every two hours. Check the countdown over the gate in your current server and be in the waiting area before entry closes; missing it by a few seconds is a very long way to learn punctuality. Once inside, follow the quest chain. The current route is The Sisters → Rem → Vael → Klien and Rika → Mizuto → Parkour Dungeon → Lavato → Levi → Steve, ending with the Hand Demon. After defeating it, return to The Sisters to finish. Completion awards Mizunoto rank, a Slayer Uniform, Ore, and a Kasugai Crow.
Before entering, check your equipped gear, spend any points you've been saving for an available upgrade, and make sure you can use your core moves without staring at the hotbar. Bring a friend if possible, but still read your own objectives and finish your turn-ins. Level 45 is the minimum; around level 60 is my recommendation for a first solo attempt. Bring healing supplies and keep 25 Wen for the Bandages needed during Klien’s objective.
Final Selection Quest Order
| NPC / Stage | What to do |
|---|---|
| The Sisters | Begin the trial and return after the Hand Demon. Do not leave before your final turn-in. |
| Rem | Collect the requested fruit: apple, banana, and grapes. |
| Vael | Defeat five Lesser Demons, then return to Vael. |
| Klien and Rika | Recover Klien’s katana from the nearby cliffside, buy Bandages from Rika, and complete the treatment skill check. |
| Mizuto | Dive into the pond’s underwater cave, deal with the enemies, and collect the Submerged Key. Use it for the dungeon, then report back to Mizuto afterward. |
| Parkour Dungeon | Three lives, timed obstacles, and levers. Check each landing before committing your next jump. |
| Lavato | Follow Mountain Survival’s four blue checkpoints before time runs out. Ignore unrelated fights along the route. |
| Levi | Capture the marked camp, deal with the Rogue Demons, then carry the civilian back to Levi. Clearing enemies alone does not finish the rescue. |
| Steve | Start the Hand Demon encounter, defeat it, and return to The Sisters. |
During the parkour dungeon, the lever counts are one, three, then two across its sections. Give Double Jump time to recover instead of assuming you can chain it endlessly. Watch your remaining lives and the timer before attempting the next section.
Mobile and console traversal is much less temperamental after the parkour fixes. Mobile players currently receive 1.4 times more time to finish the dungeon, and mobile can dash while blocking. I would still separate Run from Dash in the control settings before queueing and practice the movement outside the exam first. Final Selection is a poor place to discover that your thumb and the dash button are not on speaking terms.
How to Approach the Hand Demon
For the boss, start conservatively. Watch an attack sequence, identify the recovery window, and punish it without emptying every resource at once. Increase your aggression once you understand what you can safely get away with. Surviving with an unused skill is considerably more useful than dying with an impressive cooldown collection.
When the Hand Demon becomes invulnerable and summons smaller demons, clear the adds before returning to the boss. Save some stamina for repositioning. Bring help if you can, but keep checking your own quest progress and finish the final dialogue yourself. Collect the boss-area rewards, then speak to The Sisters. Check that your rank changes to Mizunoto and you receive your Crow before leaving. A dead boss and a completed quest are not always the same thing.
What to Do After Becoming a Demon Slayer
In this stage of Slayers 2 Slayer Progression, you'll use your crow for quests, keep developing mastery, and start working on Slayer Progress. Talk to Ren at the Butterfly Estate (the gourd vendor): return his missing blade from near the waterfall to unlock his shop. Gourds raise Slayer Progress, whose levels grant permanent stat improvements. Equip and use the gourd after buying it; leaving it in your inventory does nothing for your progression. The Large Gourd costs 8,800 Wen; the remaining gourd prices and exact progress values are still TBA here, so check the shop and your own bar before buying a stack.
For funding, unlock Ginzo at Mistfall Harbor by returning his Jewelry Box from his house in the Village Hidden in the Mist. Sell expendable coin items to fund training, but keep crafting materials, spare Mythic gear, and weapons until you have checked whether you need them for an upgrade. An inventory clear-out should not become tomorrow’s farming session.
Where to Level After Final Selection
Passing the exam does not mean you have outgrown your current quest. Keep using Wagwan while his quests give you reliable clears, then follow these next stops alongside your Crow quests. Use the Book of Guidance to check your next objective before relocating.
| Level range | Next quest stop |
|---|---|
| 40–62 | Wagwan and Hoyuzo: Keep running the waterfall cave quests and boss while preparing for and completing Final Selection. |
| 62–75 | Jugg: Find him at the mouth of Dreamfall Hollow. His Slayer quest stays locked until you pass Final Selection. |
| 75–90 | Demon Slayer Goro: Drop into the cavern from Mistfall Harbor and start with his level 75 floor quest. His harder Greater Demon option opens at 83, but the first quest remains a perfectly serviceable grind to 90. |
| 90–105 | Wounded Slayer Tomoi: Move into Iceveil Valley for the level 90 Slayer quest. At level 100, complete Iceveil Guard Shiro's Supply the Settlement quest for its large one-time EXP, Wen, and Ore reward. |
| 105–115 | Demon Slayer Mitsu: Cross the bridge in Iceveil Valley for the level 105 frost quest, then take the level 115 burning-demon job from the same NPC. |
| 115–225 | Shift toward Crow boss missions, mastery, Ouwigahara, and equipment farming. V1.01’s doubled quest EXP makes Crow and repeatable quest progress much faster than it was at launch. |
| 225–400 | Move between the new Duskweb Hollow and expanded Iceveil quest chains. Duskweb adds Dokuro and Kaganu, while Iceveil adds Kibaro, Kumado, and Utsushi. Follow each NPC’s displayed level requirement and your Book of Guidance; the exact fastest handoff is still TBA. |
| 400–450+ | The normal cap is 400. Hinokami Embers extend it toward 450 and beyond, so reaching 400 is no longer the absolute end of character progression. |
Private-server Crow hunt rewards now scale with party size the same way as public-server hunts: 50% solo, 75% with two players, and the full reward with three or more. A private server is still useful for uncontested bosses, but solo farming no longer means full hunt rewards.
Prepare for cold damage before settling into Iceveil. The Emberheart Lantern has a 25% chance to drop from the Yeti Demon, which is awakened with a Frozen Heart. Equip the lantern for its stats, then stand beside a campfire to charge up to 10 minutes of Cold Immunity. Return to a fire before the timer runs out. Owning the lantern alone is not permanent protection, and losing health while looking for the quest giver is a miserable start to a grind.
Levels 225–400: Follow the Update 1 Route
Duskweb Hollow and the expanded Iceveil Valley carry the new high-level grind. Duskweb introduces Dokuro, Kaganu, Hairo, the new Breathing trainers, and the Spider content hub. Iceveil adds Kibaro, Kumado, and Utsushi. V1.01 doubles quest EXP through level 400, so I prioritize whichever current quest chain I can clear repeatedly without waiting on a crowded boss spawn.
The normal level cap is 400. Hinokami Embers can raise it toward 450+, but this extension is not automatic just because you hit 400. The exact Ember source, quantity per cap increase, and fastest 400–450 route still need more controlled verification, so those details remain TBA.
Your First Upgrades After Final Selection
Equip your Kasugai Crow and follow its bounty quests alongside repeatable fights you can clear consistently. Keep using your main weapon and Breathing Style to build mastery. Character level, mastery, and Slayer Progress are separate goals; increasing one does not automatically finish the others.
Next, visit Hidden Mist Village’s smiths. Togane handles weapon upgrades and crafting, while Yagane’s armory offers Enryu, Shinkage, and Tengoku Katanas using Crude Iron Ingots. Inspect the recipe before committing your materials. Pick a craft that fits your weapon and Breathing setup; you do not need to buy every intermediate katana.
Also check your equipped gear. Use Equip for an item’s stats; Equip Vanity changes its appearance. A better-looking outfit is nice, but it will not help much if you only equipped the cosmetic version.
Useful Titles for Slayer Progression
You can equip up to three Titles for their equipped buffs. Their separate passive bonuses apply when unlocked. Check these early targets while following the normal quest route:
| Title and unlock | Equipped buff / unlocked passive |
|---|---|
| Odd-Jobber Complete 25 quests. | Equipped: 1.03× Quest EXP Factor. Passive: +5 Max Stamina. |
| Challenger Defeat 10 bosses. | Equipped: +10 Max Health. Passive: +5 Max Health. |
| Hard Hitter Deal 50,000 total damage. | Equipped: +0.75 Additional Damage. Passive: +0.1 Additional Damage. |
| Village Pillar Complete 150 quests. | Equipped: 1.04× Quest EXP Factor. Passive: +7 Max Stamina. |
Use quest EXP bonuses while leveling and swap toward combat stats when a boss is the problem. These are convenient goals to work toward alongside your existing grind, not a reason to abandon the next progression quest. Loadouts now save both your vanity and boost Titles, so resave older loadouts if you want them to restore the correct title setup. Our Slayers 2 Titles guide covers the longer list.
Level 65: Unlock the Forge and Plan Your Next Weapon
At level 65, return to Blacksmith Togane in Hidden Mist Village and choose The Forge dialogue to start his quest. Follow the objective toward the Ouwigahara portal beyond Mistfall Harbor. This opens the next crafting stage; reaching the level alone does not unlock your new weapon.
Check the Nichirin Forge recipe for the weapon you actually want before farming. A V2 weapon conversion currently costs the base weapon, 90,000 Ouwigahara points, 500 Metal Scraps, 10 Mythic Refinement Ore, and 300 Silk Thread. That is the cost of each craft, not a permanent unlock. The points come from one climb and do not carry into your next queue, so reach the total, craft or spend what you need, and only then start another run.
Use Ouwigahara runs to build toward that recipe, and choose bonuses that help you survive consistently. A boss appears every 10 floors, and each 10-floor milestone banks a cache. If you crash or leave mid-climb, those banked milestone chests now return when you come back. I still prioritize reliable damage, sustain, and defense while learning. A points multiplier is not impressive if the next floor collects it from your corpse.
Once you start refining, remember that a failed refine can lower the weapon by one level. Refinement Guards prevent that loss, so save them for the expensive upper levels. Hagane's Transfer tab can move refine levels between two items for the same fee as a refine; a failed transfer costs the fee but does not delete the levels. Togane can also transfer Firstlight or Nightfall tiers for 25% of the normal upgrade cost. Unequip both pieces first, and keep the category rules in mind: weapons and armor transfer within their group, while accessories transfer to accessories.
Current Firstlight and Nightfall T1 Crafting Costs
Series crafting became considerably cheaper in V0.195. You still need the relevant schematic and prerequisite item where the recipe asks for one, but these are the current shared T1 material costs:
| Series item type | Current T1 cost |
|---|---|
| Weapon | 500,000 Wen, 500 Metal Scraps, and 500 Silk Thread, plus the required weapon and schematic. |
| Outfit | 400,000 Wen, 400 Metal Scraps, 400 Silk Thread, three matching set materials, and the schematic. |
| Accessory | 200,000 Wen, 200 Metal Scraps, 200 Silk Thread, two matching set materials, and the schematic. |
Accessory tier-ups now cost 450,000 Wen for T2 and 750,000 Wen for T3. Weapon and outfit tier-up prices did not receive the same reduction. If you already crafted Series equipment before the price cut, the difference in Wen, Metal Scraps, Silk Thread, and set materials is refunded automatically when you load that character.
For the eventual set decision, First Light is the safer progression bonus: wearing the T3 Firstlight Top and Bottom heals 8% and reduces incoming damage by 30% for four seconds when you drop below 30% health, with a 90-second cooldown. Nightfall Hunt is the aggressive alternative, adding 15% damage against enemies below 30% health. One helps prevent a failed run; the other shortens the last part of a boss fight. Pick the job you actually need.
RELATED: Slayers 2 Weapon Tier List | All Slayers 2 Items
My recommendation here is to choose one upgrade goal at a time. Work toward a useful technique, a better piece of equipment, or another progression milestone. That gives each farming session a purpose and makes it easier to judge whether the activity is worth repeating.
You also don't need to rebuild your character the moment someone wins a duel against you. First ask whether the problem was your setup, an unfamiliar matchup, or the part where you dashed directly into their attack. All three happen. Only one necessarily needs a reset.
Update 1 Endgame: Raids, Runes, Boss Rush, and More
Reaching the level cap is now only one part of endgame progression. Update 1 adds several parallel systems, and each improves a different part of your character. I prioritize them in this order: secure a functional build, earn Raid Tickets, collect usable Runes, finish the daily limited activities, then optimize equipment and secondary progression trees.
Spider World Boss and Spider Raids
The Spider World Boss appears every three hours and supports up to 20 players. V1.01 reduces its damage by 50%, lowers its health scaling by 5,000 per additional player, and raises the participation reward to three Raid Tickets. The chest can contain equipment up to Mythic quality, making the boss useful even after you have enough tickets.
The Spider Raid Portal opens during the first 10 minutes of each hour and consumes one Raid Ticket. Easy, Medium, and Hard difficulties run through Mother Spider, Brother Spider, Father Spider, Fighter Spider, and Rui. Hard offers the best reward chances, but a failed clear pays less than a repeatable lower difficulty. V1.01 also reduces Father Spider’s damage, so make sure you are playing on a current server before judging the encounter.
Raid Runes and Critical Builds
You can equip up to three Runes. Raid and Mythic Runes add stats and, at the higher end, passive effects. Bring unwanted drops to the Rune Keeper to reroll or break them down. Early on, I value a coherent three-Rune setup over one flashy Mythic effect surrounded by dead stats. Crit Chance, Crit Damage, Crit Resistance, survivability, and cooldown value all depend on the rest of the build.
Boss Rush, Hairo, and Repeatable Endgame
- Boss Rush: A solo sequence of returning bosses that can be entered twice per day. Treat both attempts as limited resources rather than practice runs.
- Hairo: Complete the wolf and TNT objectives in Duskweb Hollow to summon him. V1.01 lowers his health scaling to 10,000 per player. His pool includes a critical-hit equipment set and numerous accessories.
- Crow and Nizen hunts: Rewards are personal, and some assignments can ask for two bosses or an enemy group in exchange for a larger payout.
- Bounty Hunting: The Mercenary supplies opposing-reputation targets, Bounty Medals, Hunter Rank, and a separate skill tree. Medal rewards include EXP, Wen, Mastery, Ore, and Rune Dust.
- Nushi fishing: Three boss fish rotate every two hours. Angler Rank 20 unlocks the Bloodmoon and Tidecaller Mythic rod crafts, while Fish Log pages and fishing gear add titles and account progression.
Ouwigahara Climber Rank and Climb Tree
A complete Ouwigahara climb now awards approximately 30% more total value and 107 Tokens instead of 82. Climber Rank grants points for a new five-path Climb Tree, including upgrades that let future runs start deeper in the tower. This is permanent account progression layered over the existing one-run card build, so do not confuse Climb Tree points with the Ouwigahara points that must be spent before starting another climb.
Common Slayer Progression Mistakes
These are mostly things I wish I knew before starting the game and my Slayers 2 Slayer Progression. Unfortunately, as is often the case with Roblox games, Slayers 2 can be a very unintuitive experience, with almost non-existent onboarding and player guidance. Hence, if you wish to avoid frustration and losing time unnecessarily, try not to repeat these mistakes:
- Reaching a trainer without the right resources or movement unlocks. Check the route and requirements first.
- Confusing character level with mastery. Develop the weapon and style you intend to use.
- Spending every point before checking your next technique. Plan around the unlock that improves your actual combat routine.
- Choosing difficult content purely because it is available. Reliable clears matter more than ambitious respawns (no matter how boring and repetitive they are).
- Treating Final Selection as the finish line. Keep improving your kit and Slayer Progress afterward.
- Queueing for another Ouwigahara climb before spending your points. The current run's point total does not bank into the next one.
- Dismantling a weapon or Mythic accessory before checking its upgrade and exchange uses. The small payout is rarely worth having to farm the item again.
Get a functional build together, learn its openings, and give yourself a specific goal each time you head out. The Hashira fantasy can wait until you've stopped losing arguments with the local wildlife.
Slayers 2 Demon Slayer Progression FAQ
The normal level cap is 400 after Update 1. Hinokami Embers can extend progression toward level 450 and beyond. The exact Ember route and quantity requirements still need more verification.
The minimum level is 45. I recommend around level 60 for a first solo attempt, but that is preparation advice rather than an entry requirement.
Breathing trainer questlines start at level 25. Meet the trainer’s first-time requirements, complete the course, and defeat the relevant trainee. A completed trainer can later reteach that style for free without repeating the tasks.
Flame remains the easiest farming and beginner recommendation, while Wind is the best proven all-rounder. Flower has an S-tier control kit, and Beast is a high-skill close-range option with excellent combo potential.
Repeat the highest quest you can clear quickly and move zones when the next quest becomes consistent. V1.01 doubles quest EXP through level 400. Complete your three Daily Quests, use Crow missions after Final Selection, and supplement character levels with mastery activities.
Use the Update 1 quest chains in Duskweb Hollow and the expanded Iceveil Valley. Duskweb adds Dokuro and Kaganu, while Iceveil adds Kibaro, Kumado, and Utsushi. Exact optimal level handoffs remain TBA, so follow the displayed quest requirements.
Help defeat the Spider World Boss to earn three Raid Tickets in V1.01. The Spider Raid Portal opens during the first 10 minutes of each hour, and one ticket is consumed per entry.
You can equip up to three Runes. Raid and Mythic Runes provide stats and possible passive effects, while unwanted Runes can be rerolled or dismantled through the Rune Keeper.
Boss Rush can be entered twice per day. Because the attempts are limited, use a completed combat setup rather than treating the first run as a training dummy.
Equip your Crow, develop mastery and Slayer Progress, unlock Ren and Ginzo, complete the Forge quest at level 65, and begin Ouwigahara. At higher levels, add Duskweb quests, raids, Runes, Boss Rush, Hairo, and Climber Rank.
Yes. Resetting or swapping Breathing, an Evil Art, or a Fighting Style refunds the points spent in that tree. Update 1 also refunded previously allocated stat points for the new Base Stats tree, while changing clans preserves Clan skill-tree progress.
A full climb now awards 107 Tokens instead of 82, and Climber Rank supplies points for a new five-path Climb Tree. Permanent Climb Tree progression is separate from the points earned and spent inside an individual run.
That should carry your Slayers 2 Slayer progression from the first Windy Peak errands through Final Selection, the level-400 route, and Update 1’s raid endgame. The exact fastest 225–400 quest handoffs, Hinokami Ember requirements, and some new trainer costs still need more live verification, so those details remain TBA. Thanks for reading, and while you're here, be sure to check out our other Slayers 2 guides, tier lists, walkthroughs, and other useful content.


