
In the previous sections of this guide, we covered How to Find the Rum Bottle Spyglass,
the Trapmaker's Gunpowder Key, and the Sailor's Bounty Traps and Battle Guide. In this section of the guide, we will walk you through what to do with the newly obtained Totem. Since this is a very straightforward mission, this entire section of the guide will contain spoilers. If you want to solve the rest of the adventure yourself, do not continue reading.
Sea of Thieves | Art of the Trickster Tall Tale | Vault Locations and Battle Guide
Before we begin, you will need to obtain the Totem to complete this section of the guide. If you have not obtained that, you can follow the links below to the appropriate section of the guide. Alternatively, if you were looking for the Hidden Journals, you can also find the link to that section below.
- Sea of Thieves | Art of the Trickster Tall Tale | How to Find the Rum Bottle Spyglass
- Sea of Thieves | Art of the Trickster Tall Tale | Trapmaker's Gunpowder Key Riddle Guide and Locations
- Sea of Thieves | Art of the Trickster Tall Tale | Sailor's Bounty Traps and Battle Guide
- Sea of Thieves | Art of the Trickster Tall Tale | Hidden Journal Locations
If you have found the Totem and are trying to figure out where to bring it, you can follow the list of the possible locations below. They are in alphabetical order of the possible Totems you might receive. When you reach the Vault for your Totem, place the Totem on the mechanism nearby to open the Vault's door.
Related: Sea of Thieves Fishing Guide: How to Catch and Sell Fish - Pro Game Guides
Step One: Finding the Vault
Boar Totem - Devil's Ridge
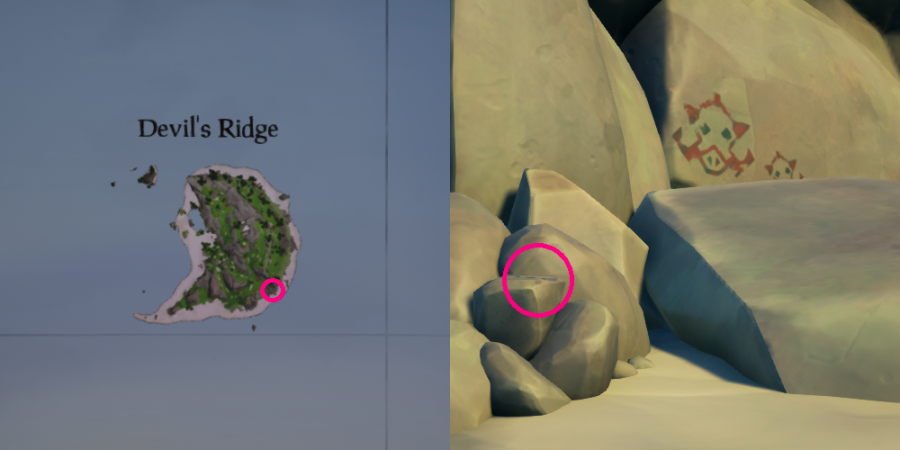
The Boar Totem will take you to almost the opposite end of the map on Devil's Ridge. You will need to circle the island to the Southeast corner. On the beach there, you will find the Vault door and mechanism with some Boar rock paintings.
Crab Totem - N13 Island
The Crab Totem leads to everyone's favorite uncharted island: N13 Island. It is referred to as N13 Island because it is uncharted, doesn't have an official name, and is located on the map's N13 block. When you make it here, dive below the surface to find the shipwreck below. Near the front half of this shipwreck is the tunnel that leads to the underwater temple. It's a long swim, so be sure your character has plenty of breath!
Moon Totem - Crescent Isle
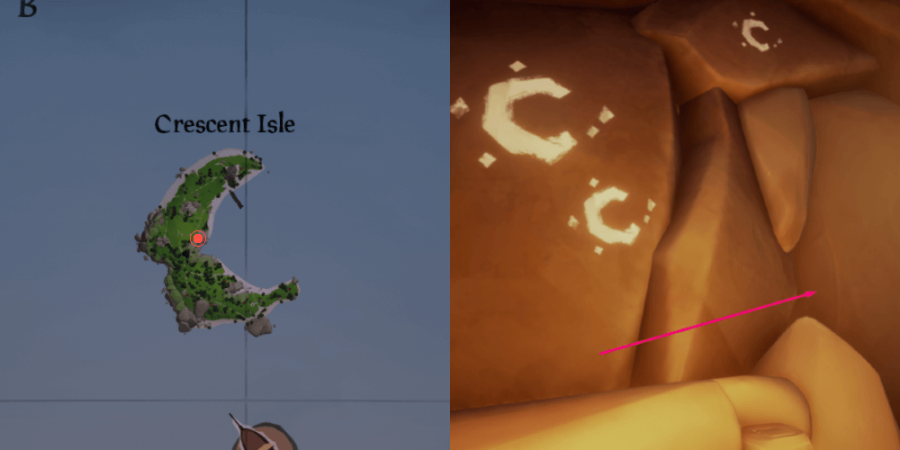
The Moon Totem will take you not far away to Crescent Isle. The easiest way to find the Vault on this island is to approach the eastern side and park at the dock. Enter the central cave system from this side, then turn right to go north into the cave. Take your first right, and you will see the Moon rock paintings with the Vault door.
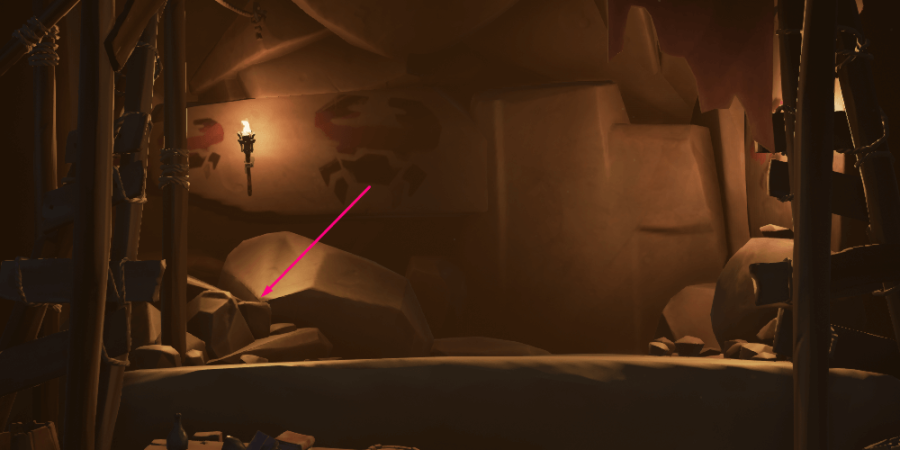
Scarab Totem - Crook's Hollow
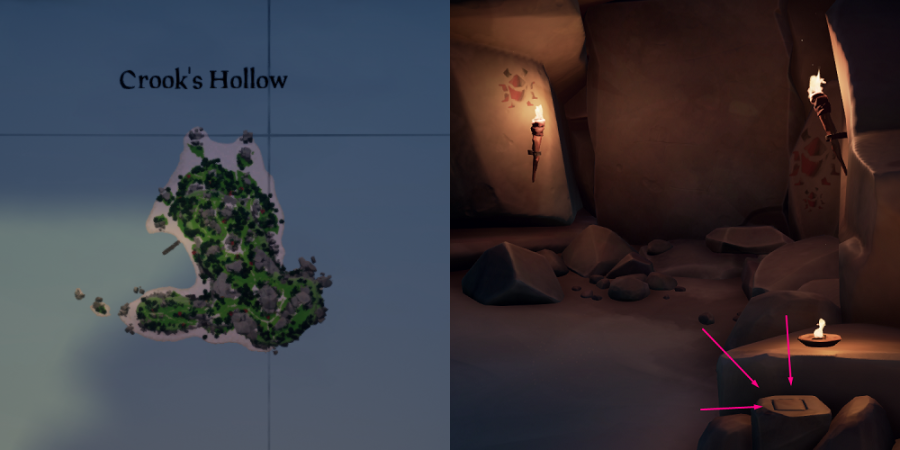
The Scarab Totem will take you to the most popular Vault location: Crook's Hollow. Approach this island from either side and enter the central cave system. On the south side of the cave wall, you will find some Scarab rock paintings. The Vault door is next to these paintings, and the mechanism to open it is a few feet away.
Shark Totem - Kraken's Fall
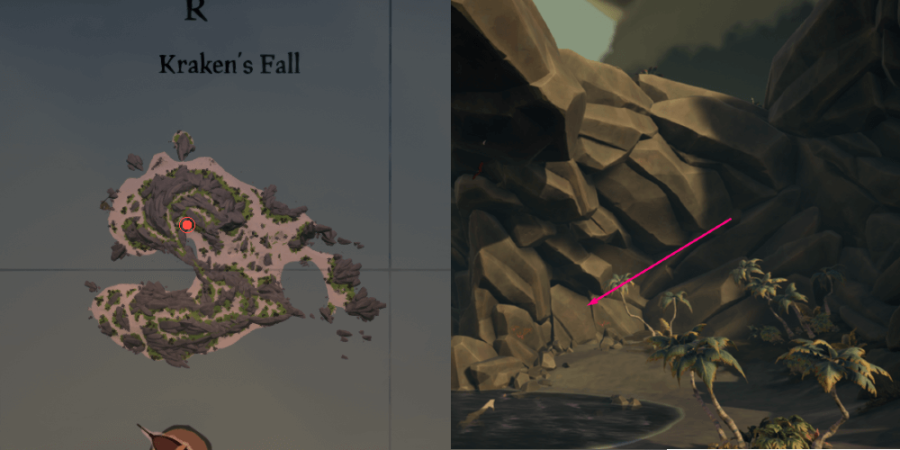
The Shark Totem will take you to almost the other side of the map to Kraken's Fall. You will see a large archway in the center of the island that connects the North and South sides. Walk along the base of this archway, and you will see some Shark rock paintings on the northern wall. This Vault is the most difficult to spot since the rocks are all dark, so keep your eyes peeled. You will find the mechanism to open it a few steps away on some small rocks by the water.
Snake Totem - Mermaid's Hideaway
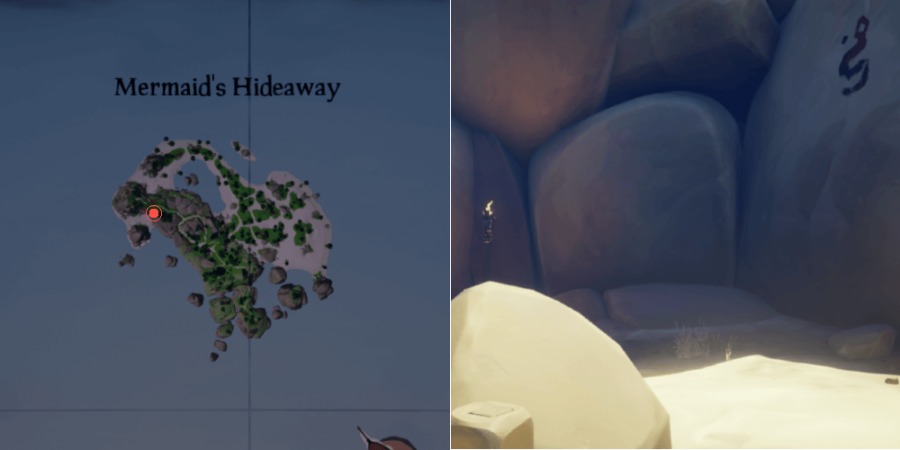
The Snake Totem will take you to Mermaid's Hideaway, mostly South of Sailor's Bounty. On Mermaid's Hideaway you will see the large archway on the West side of the island. On the eastern wall of this arch is the Vault door, and on the western side of this arch is the mechanism on which you must place the Totem to open it.
Step Two: The Second Horde Battle
When you enter the Vault, you will see that the secret area housing the Shroudbreaker Stone is the same area that housed the Shroudbreaker itself! Light the braziers to open this hidden spot and grab the Stone. Once you do this, the Vault door will slam shut, and you'll hear battle music once again! Drop the Shroudbreaker Stone, and get ready to fight.
Related: Where to Sell the Reapers Chest in Sea of Thieves - Pro Game Guides
Unlike the previous horde battle, this one is not all that difficult. Ultimately, surviving this battle depends on your skill level, but the tips below will help you.
- Use your Sword! While you can use a gun, it's generally not needed. You will find these skeletons are easy to kill and don't take more than a few hits with the sword. Power strikes are your friend and will allow you to clear several skeletons at once, so long as you herd them together.
- The Skeleton Captains are Holding the Medallions. Throughout this battle, you will need to collect three Medallions to place on the Altar. They are being held by Skeleton Captains, whose names are red.
- This Battle is Easy. Don't panic, and just slay the skeletons as you see them. Once you defeat about three groups of them, you'll have collected all the Medallions, and the hordes will stop.
Once you complete this part, don't forget the Shroudbreaker Stone! Pick it up and take it back to your ship. Set sail to Plunder Valley, and let's complete this quest!
Step Three: Return to Salty
Salty, as you remember, is the skeleton parrot on the eastern beach of Plunder Valley. When you make it to the island, grab the Shroudbreaker Stone, and bring it to him. Hand it over to Salty, and you will have completed this explosive Tall Tale!
What's Next
This completes this main questline for the Wild Rose Tall Tale. For completing it, you will receive the Art of the Trickster Commendation. From here, you have several options. You can do the quest again, find the Hidden Journals, or move on to the next Tall Tale: The Fate of the Morningstar!
Want to perform a Ritual Event? Use our guide to see How to Get a Ritual Skull!