
The Golden Apple Archipelago is back for Genshin Impact's Summertime Odyssey event, which runs from July 15, 2022, to August 24, 2022. Various characters will have personalized Domains that you can clear once to loot a ton of Chests and learn more about their lore. Kaedehara Kazuha's Domain is called As the Courtyard in Spring Once Appeared, which is divided into three parts. In this guide, we'll show you how to solve all puzzles and find all six Chests in Part 2 of the Domain.
How to unlock As the Courtyard in Spring Once Appeared Part 2 in Genshin Impact
After completing the first part of the Domain, you'll be asked to pick up materials for Kazuha's bonsai. Head to Pudding Isle and follow the quest marker to the top of the mountain, where you need to defeat a few Hilichurls and Abyss Mages to unlock an Exquisite Chest that contains quest items. Once that's done, head back to the small island and place the materials on the bonsai to unlock the second part of the Domain.
All puzzle solutions and Chest locations in As the Courtyard in Spring Once Appeared Part 2
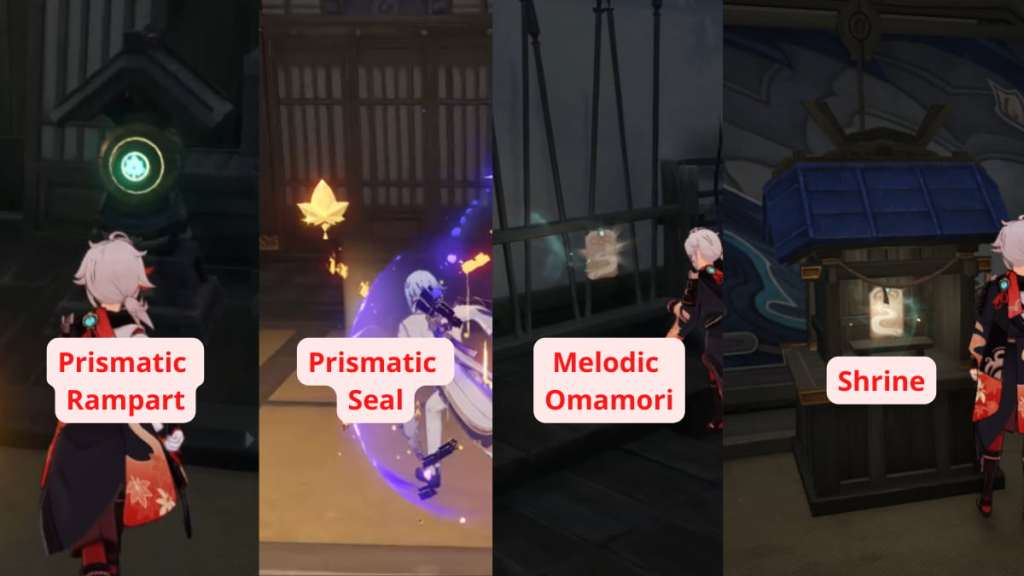
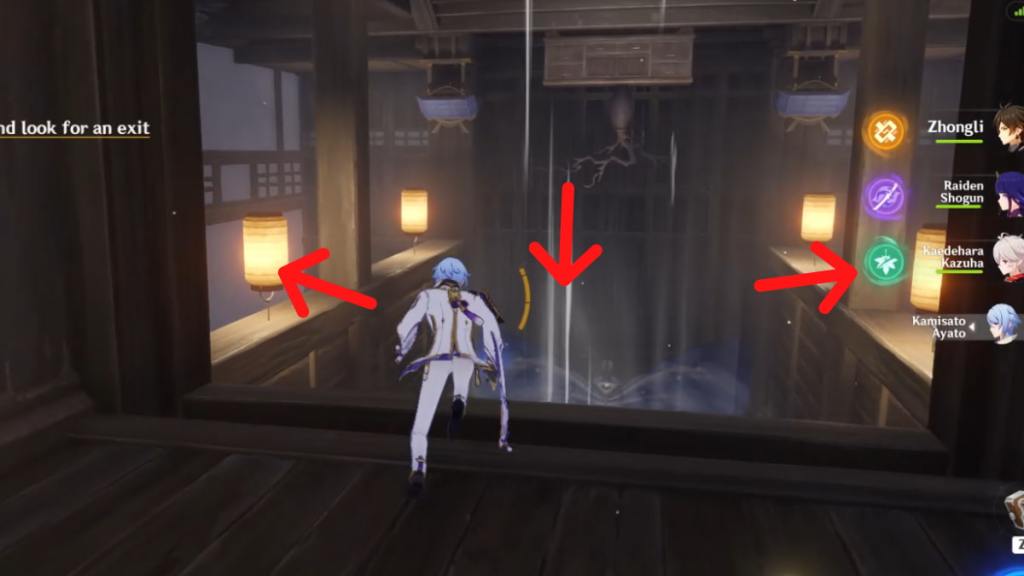
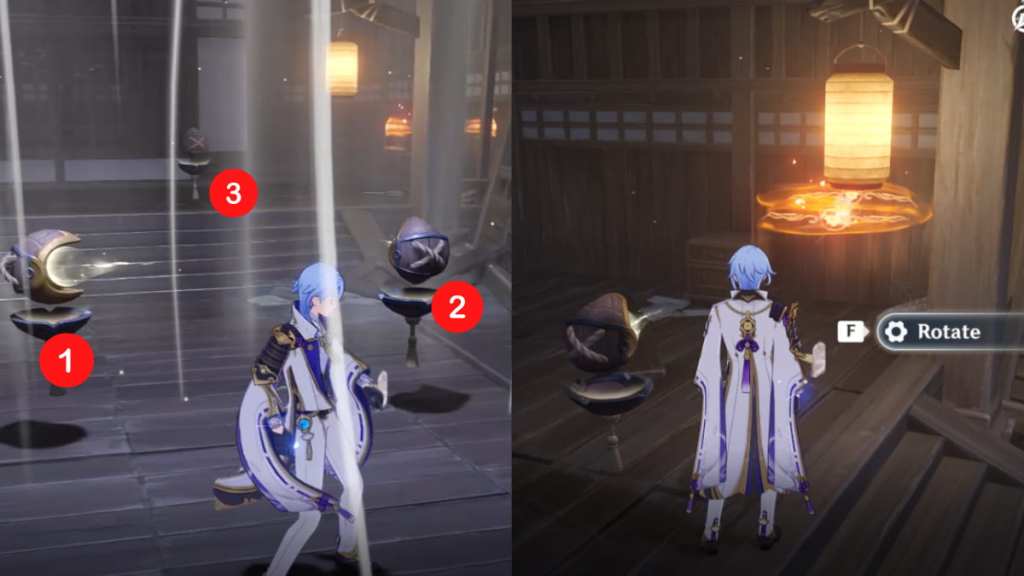
Before starting, reference the image above to understand the puzzle mechanics in this Domain. Prismatic Seals will change the color of the Prismatic Ramparts (green, yellow, red), while Melodic Omamori need to be placed inside Shrines.
Chest #1
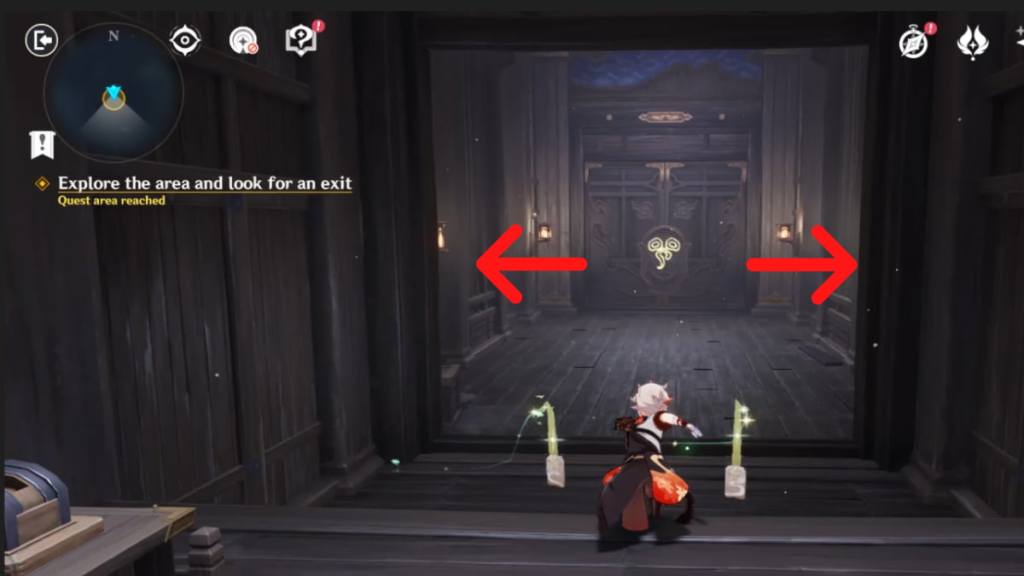
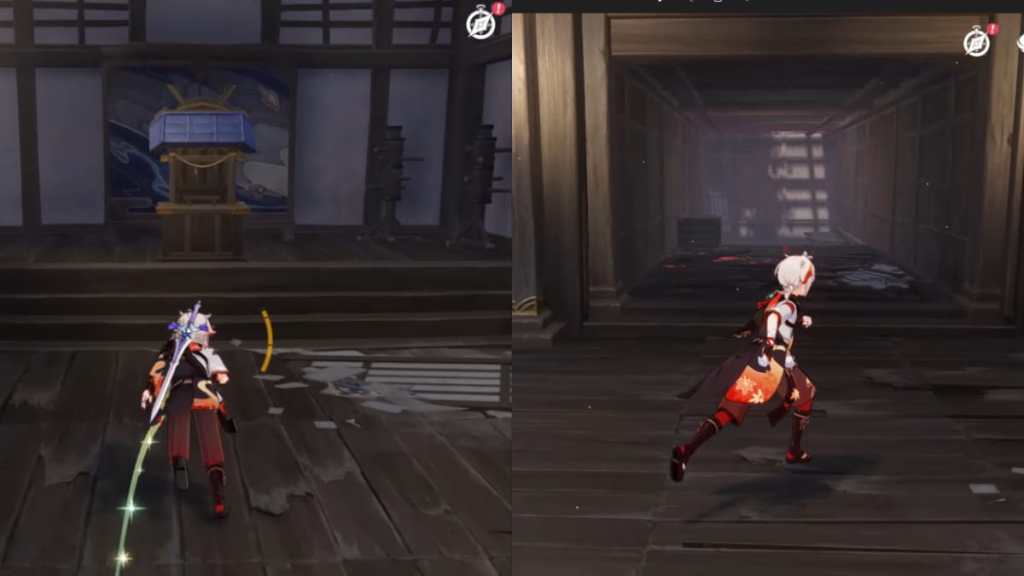
Upon entering the Domain, turn right and enter the room to start the puzzle and find the first Chest.
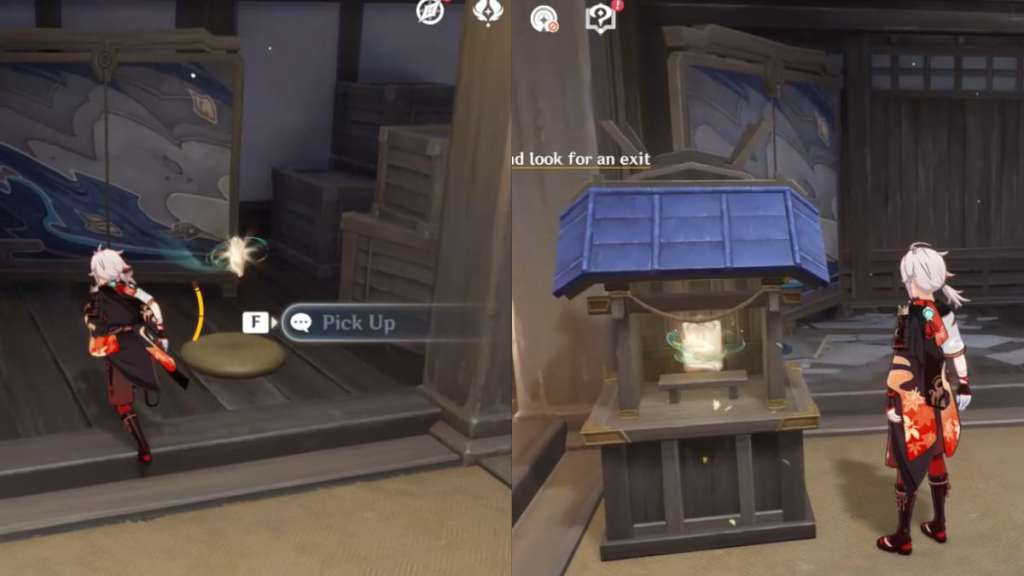
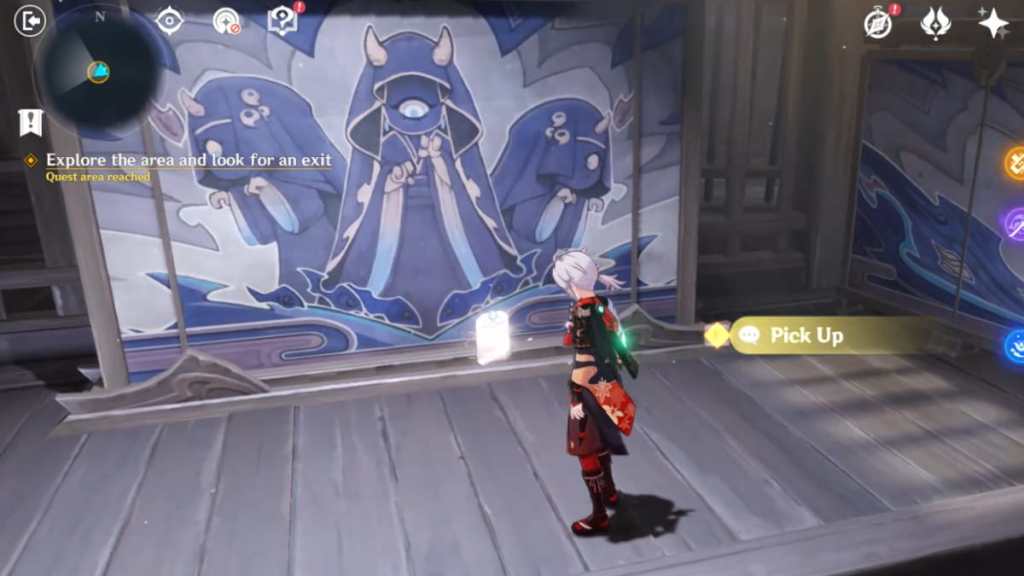
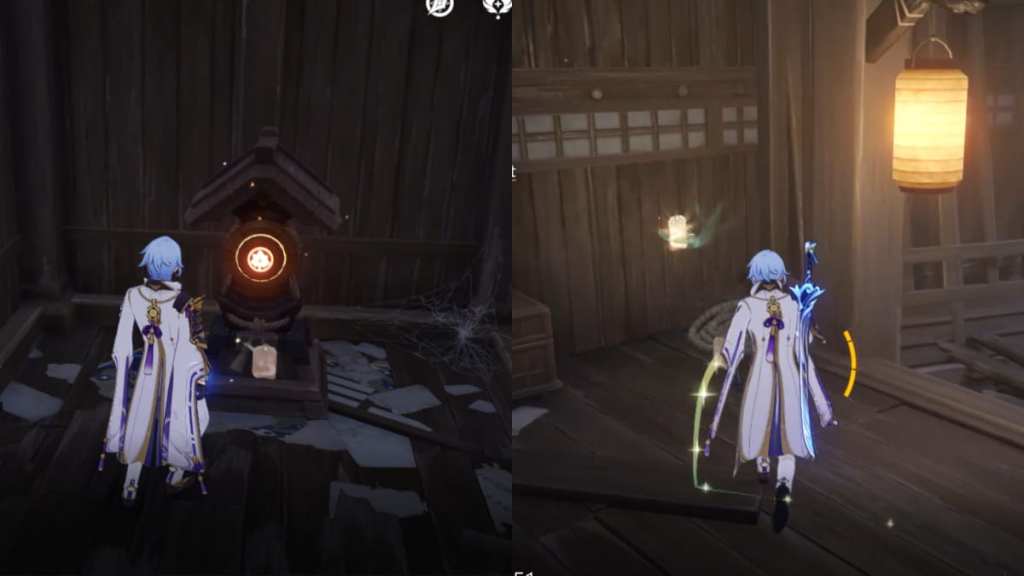
- Pick up the Melodic Omamori in the room.
- Place the Melodic Omamori in the Shrine.
- A wind current will appear. Use it to propel you upward to the second floor.
Next, you need to solve a rotating room puzzle.
- On the second floor, run forward until you see a switch on the left side of the room. Interact with the switch once to make the room in front of it turn upside down.
- Once the room has turned upside down, run forward and pick up the Melodic Omamori.
- There's an opening in front of the Omamori. Jump down, and you'll see the locked Shrine.
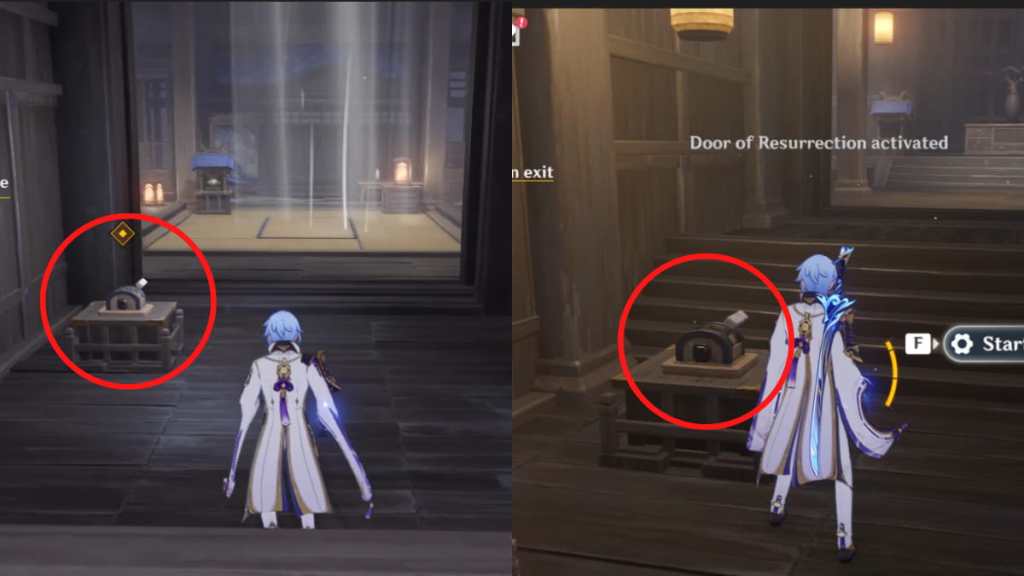
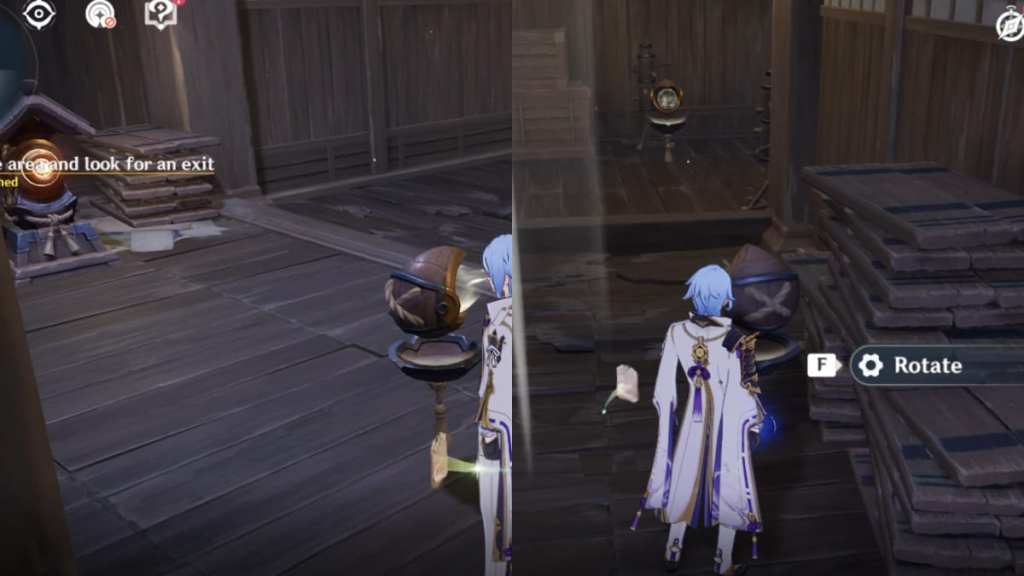
- There is a mechanism to the left of the locked Shrine. Rotate it three times until it's facing the Shrine.
- Ignore the second mechanism.
- The third mechanism is located in front of the Prismatic Rampart. Rotate it three times so that it's facing the second mechanism.
- Pick up the Melodic Omamori to the left of the Prismatic Rampart. You should have two hovering around you at this point.
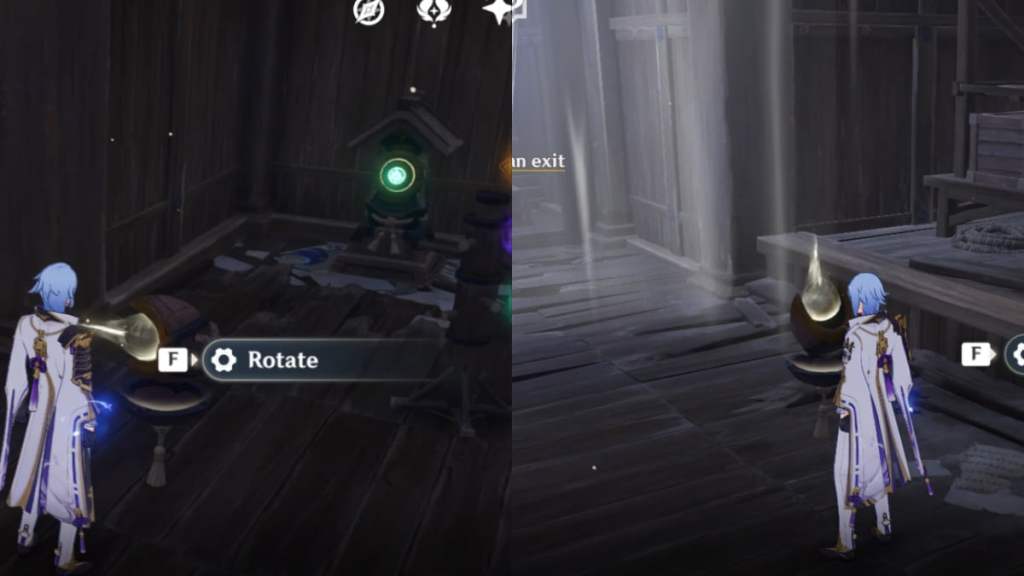
- Interact with the Prismatic Rampart—select Fire.
- The locked Shrine will unlock and a wind current will appear. Use it to propel you upward.
- Now that you're back up, interact with the switch once to rotate the room in front of it.
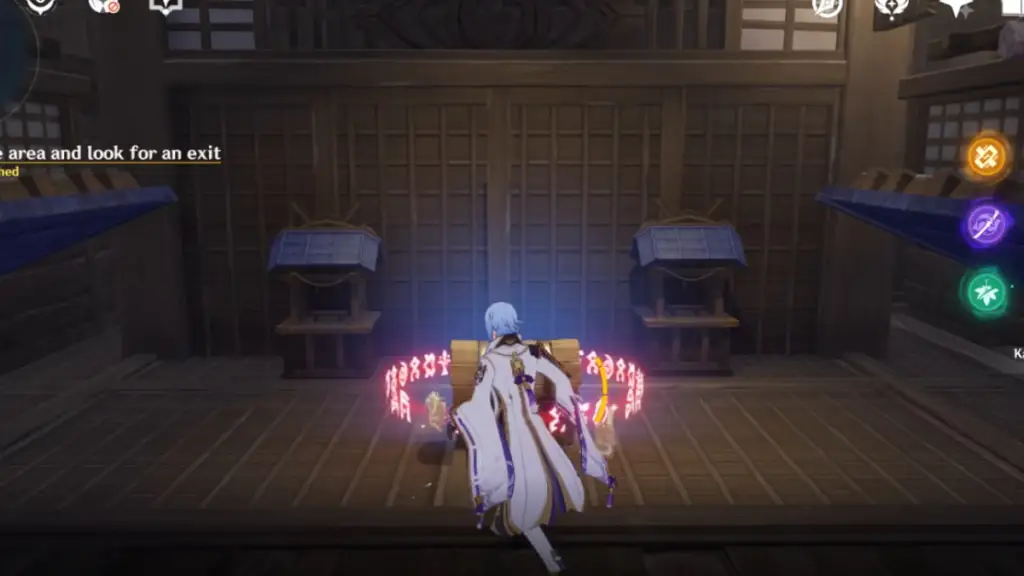
- Place the two Melodic Omamori in the two Shrines located on the left and right sides of the room.
The door will open—proceed forward. You'll encounter another switch and must solve the second rotating room puzzle.
- Interact with the new switch once to turn the room in front of it upside down.
- Proceed forward and turn right to find a wind current. Ignore it and jump down instead.
- Once you've jumped down, turn right to find a Prismatic Seal. Pick it up.
- Go back and let the wind current propel you upward.
- Interact with the switch once to turn the room upside down.
- Place the Prismatic Seal onto the Prismatic Rampart so that it changes from green to yellow.
Next, you need to rotate the three mechanisms to claim the Melodic Omamori.
- On the left of the Prismatic Rampart is a mechanism. Rotate it once so that it's facing the second mechanism.
- Next, rotate the second mechanism twice so that it's facing the third.
- Rotate the third mechanism three times so that it's facing the locked Melodic Omamori.
- Interact with the Prismatic Rampart and Fire.
- The Melodic Omamori will unlock, so pick it up.
Now, you need to take the Melodic Omamori to a Shrine.
- Go back to the switch and interact with it once to rotate the room.
- Like before, ignore the wind current and jump down to the bottom floor.
- Place the Melodic Omamori onto the only blank Shrine in the room.
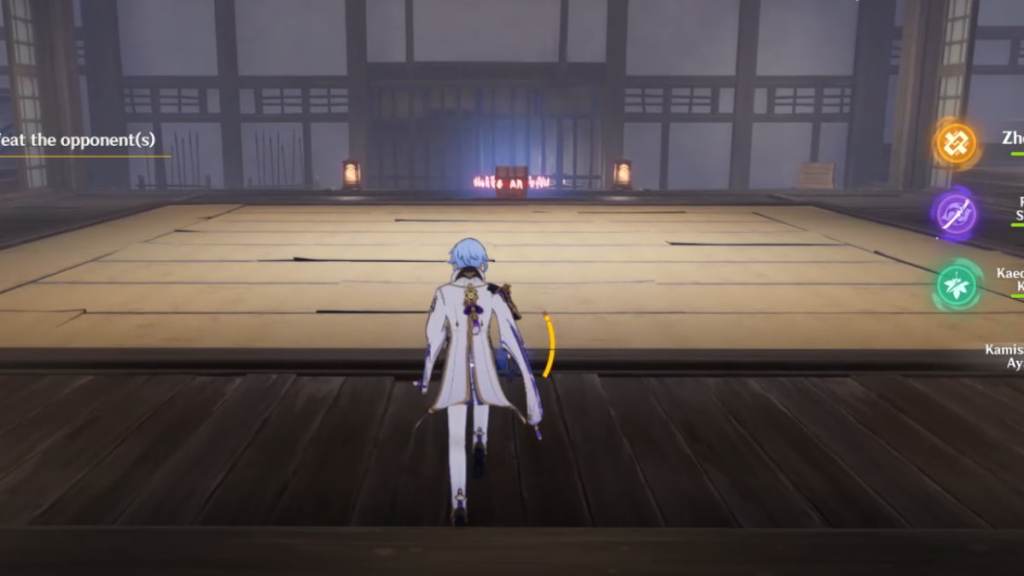
The door to the left of the Shrine will open. Follow the path to continue, until you reach a courtyard where dialogue will prompt.
- Once the dialogue is over, a room will open up. Enter the room and battle against Kairagi to unlock an Exquisite Chest.
Related: Which Anemo characters are worth leveling in Genshin Impact?
Chests #2, #3, #4
After completing the battle with the Kairagi, head back out until you reach the courtyard, and follow the quest marker to one of the rooms in the area.
- Interact with the switch once to turn the room in front of it upside down.
- Once the room has rotated, jump down and follow the path forward.
- You'll find another switch. Interact with it once to rotate the room in front of it.
You can pick up three Chests in succession.
- There are two Common Chests on the left and right sides of the room, which can be claimed in any order.
- Go to the wind current and carefully glide down to find an Exquisite Chest. Since the Chest is inside an Anemo barrier, carefully position yourself while gliding down so that you fall inside the barrier.
Chest #5
In this room, you need to solve two mechanism puzzles. You need to do them in the exact order prescribed below.
- Rotate the mechanism in front of the green Prismatic Rampart once so that it's facing right.
- Rotate the mechanism in the middle of the room once so that it's facing the door.
- Interact with the green Prismatic Rampart and select Fire.
- A Melodic Omamori will unlock. Pick it up.
This concludes the first mechanism puzzle.
Follow the steps below to solve the second mechanism puzzle.
- Rotate the mechanism between the Omamori you just picked up and the red Prismatic Rampart three times so that it's facing the center of the room.
- Rotate the mechanism at the center of the room twice so that it's facing the third mechanism.
- Rotate the third mechanism in front of the green Prismatic Rampart once so that it's facing left.
- Interact with the red Prismatic Rampart and select Fire.
- The second Melodic Omamori will unlock—pick it up.

At this point, you should have two Omamori hovering around you.
- Use the wind current to propel you upward.
- Interact with the switch once to turn the room upside down.
- The new room will have two Shrines. Place both Melodic Omamori in them to spawn another wind current.
- Use the new wind current to propel you upward.
- Follow the path until you find another switch. However, ignore the switch for now.
- Instead, enter the room and turn left to find a green Prismatic Rampart.
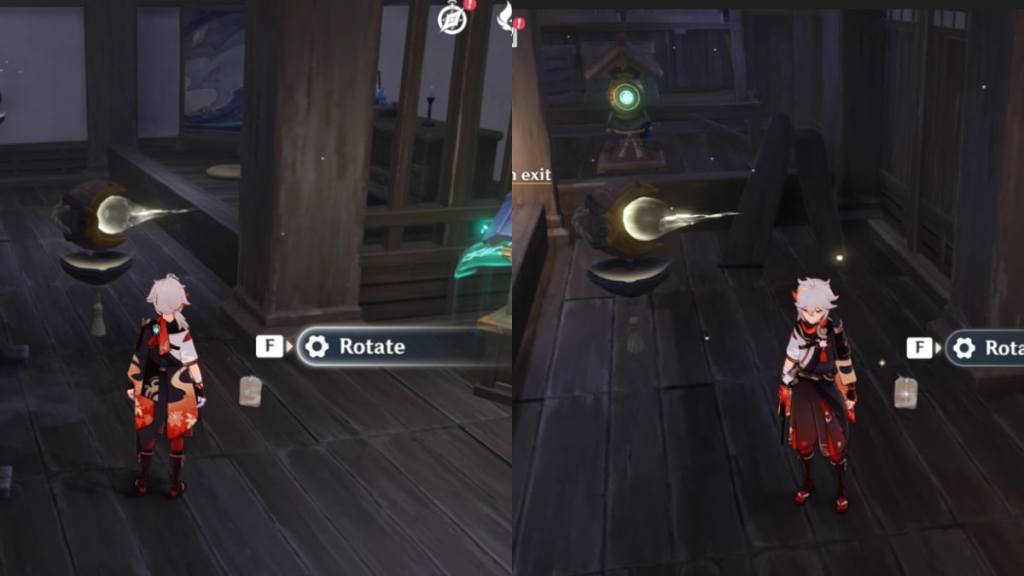
- Rotate the mechanism in front of it once so that it's facing the middle of the room.
- Adjust the elevation of the mechanism beside the wind current twice so that it's facing upward.
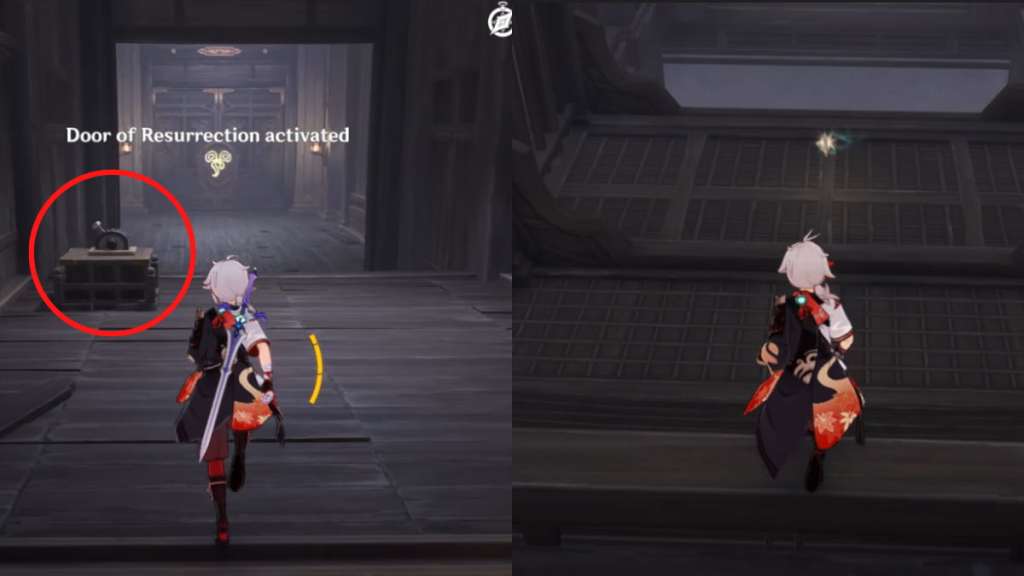
- Now, you can interact with the switch once to rotate the room.
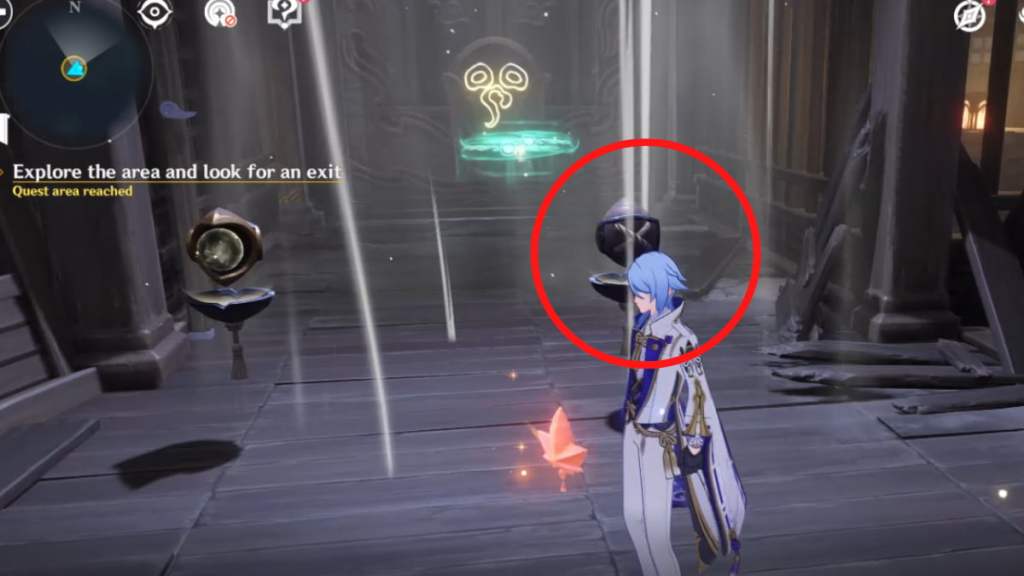
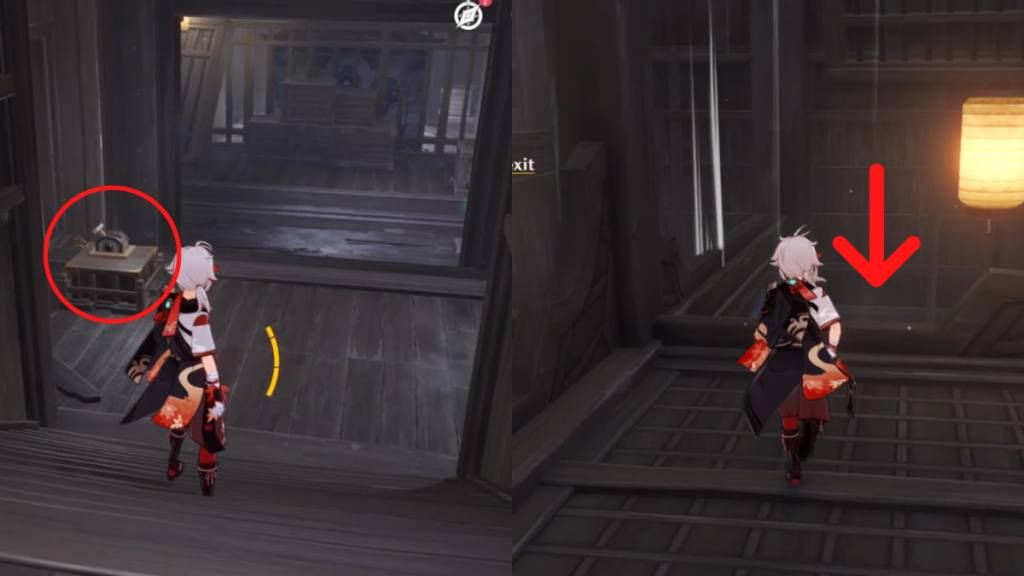
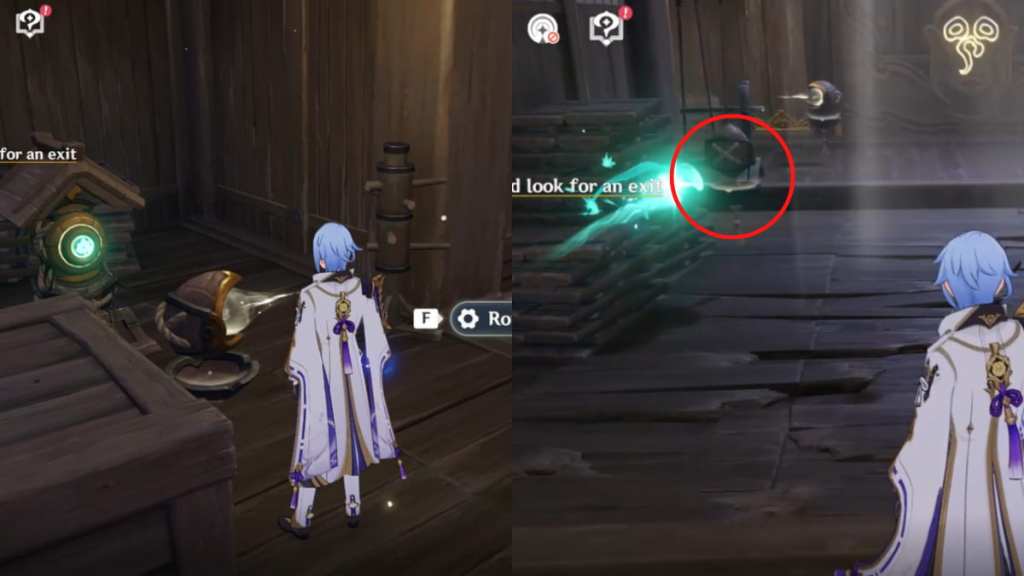
- Jump down, then interact with the mechanism circled above twice so that it's facing the Omamori with a green lock.
- Use the wind current to propel you back up.
- Pick up the red Prismatic Seal on your way up.
- Interact with the switch once to rotate the room.
- Once you approach the green Prismatic Rampart with the red Prismatic Seal, it will turn red.
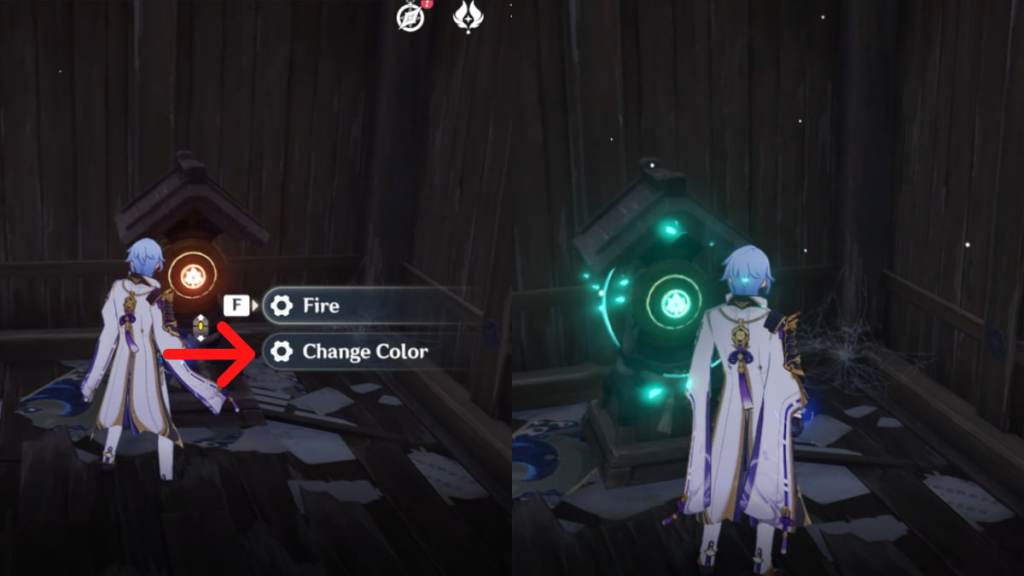
- Interact with the now red Prismatic Rampart and select Change Color so that it turns back to green. The red color will be for later.
- Next, interact with the green Prismatic Rampart and select Fire.
Both rotations of the room will contribute to the same puzzle. So if you look up the ceiling, you can see the Melodic Omamori unlocking.
- Return to the switch and switch once to rotate the room.
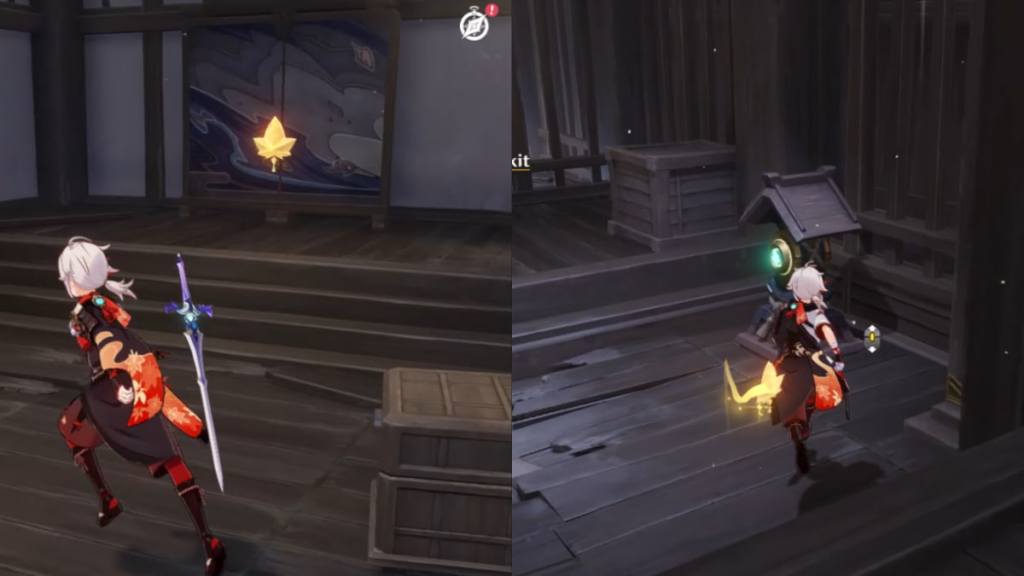
- Pick up the Melodic Omamori.
You need to change the setup of the mechanisms to unlock the second Melodic Omamori with a red lock in the room. The mechanisms are numbered in the image above for easy reference.
- Rotate mechanism #1 three times so that it's facing mechanism #2.
- Rotate mechanism #3 once so that it's facing the locked Omamori.
- Use the wind current to propel you upward.
- Interact with the switch once to rotate the room.
- Change the color of the Prismatic Rampart to red.
- Interact with the red Prismatic Rampart and click Fire.
- Go back to the switch and interact once to rotate the room.
- Pick up the now-unlocked Melodic Omamori.
You should have two Melodic Omamori hovering around you.
- Use the wind current to propel you upward.
- Interact with the switch once to rotate the room again.
- Use the wind current to propel you upward.
You'll now be in a room with two Shrines and a locked Common Chest.
- Place the two Melodic Omamori into each Shrine.
- The Common Chest will unlock, so make sure to loot it.
Chest #6
- From the two Shrines, look behind you to find a staircase leading further into the Domain.
- Keep following the path, and dialogue between Kazuha and his dad will prompt.
- Follow the quest marker to the Dojo and defeat Kairagi to unlock an Exquisite Chest.
After this segment, the rest of the Domain can be completed just by following the quest marker and reading the dialogue. If you forget to loot any of the Chests in the Domain, you can still go back after completing Part 3 of the Domain. Interact with the bonsai on Kazuha's island and choose Misty Hills, Foggy Vales, then check the Phantasmal Tales section and enter your preferred Mirage.
Other As the Courtyard in Spring Once Appeared guides
- As the Courtyard in Spring Once Appeared Part 1 walkthrough – Genshin Impact Summertime Odyssey Kazuha Domain Chest & puzzle guide
- As the Courtyard in Spring Once Appeared Part 3 walkthrough – Genshin Impact Summertime Odyssey Kazuha Domain Chest & puzzle guide
Check out our guide on All Chest locations in the Golden Apple Archipelago – Genshin Impact Summertime Odyssey event to collect even more Chests in the GAA.