
Some of the new challenges added to Horizon Forbidden West's map are called Relic Ruins. Relic Ruins can be found all over the map and will force players to complete puzzles and traverse obstacles to find the collectible held within each Ruin.
The Long Coast Relic Ruin is a confusing one. The dense overgrowth of the jungle and vegetation in the area can make it difficult to see objects and key points from a distance. Players will also need the Igniter upgrade on their spear before tackling this Relic Ruin. The steps that will need to be taken to complete the Relic Ruins: The Long Coast are listed below:
- Step 1: Players should enter the Relic Ruin from its western side. This will put them near some of the key areas. When entering the building, look right to see a blue glowing Energy Cell socket. This will be useful later. This will be useful later. There will also be an elevator behind the Energy Cell Socket used to obtain the Ornament.
- Step 2: Enter the elevator and use the Pullcaster to pull down a grate on the ceiling. You will use this hole later.
- Step 3: Now that this is done, players need to find the Energy Cell that powers the elevator. When first entering the building from the west entrance, players should have been able to spot a staircase leading to the building's second level. Take this staircase and at the top, turn left. Follow this path down until the Energy Cell charger is located.
- Step 4: Unplug the Energy Cell from the charger and get it to the Energy Cell socket by the elevator. The Energy Cell may run out of power, so players should quickly get it to the socket.
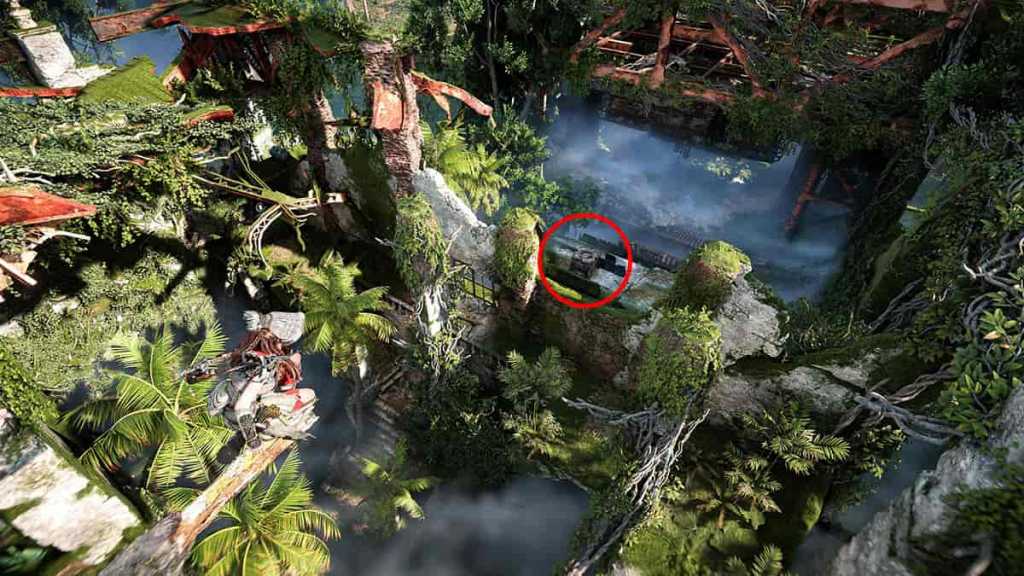
- Step 5: Once the Energy Cell is in the socket, the elevator should be powered. Before it can be used properly, a few things need to be set up. Ride the newly powered elevator up to the second level and travel around the elevator to find the grab points on the outside of the building. Travel up the grab points until you reach the top of the building and stand on the metal beam jutting out. From here, players should see a crate on the ground in the distance (pictured below).
- Step 6: Glide or jump down to the crate. When facing the crate, players should turn around to spot some Firegleam on the wall. Blow this Firegleam up and then push the crate through the hole and onto the lower level.
- Step 7: Recall the elevator to the ground floor and place the crate on the elevator. You will use this later.
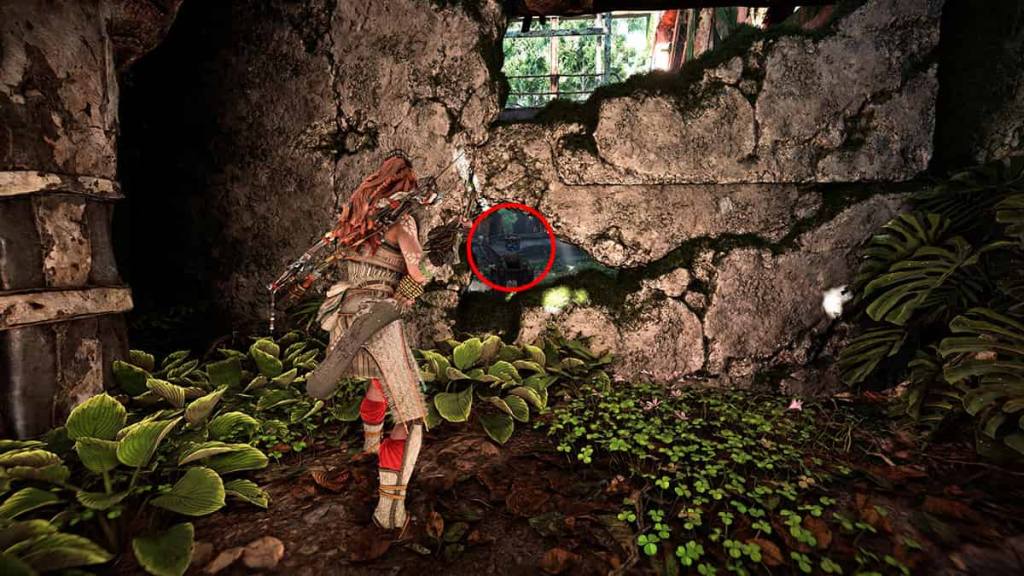
- Step 8: Travel back to the location where you found the crate. Looking forward and to the left, you should see some grab points in the distance that lead to a raised metal platform (pictured below). Jump onto this platform.
- Step 9: Follow this metal platform around the wall until you come to an area that contains another Firegleam. Ignite this Firegleam.
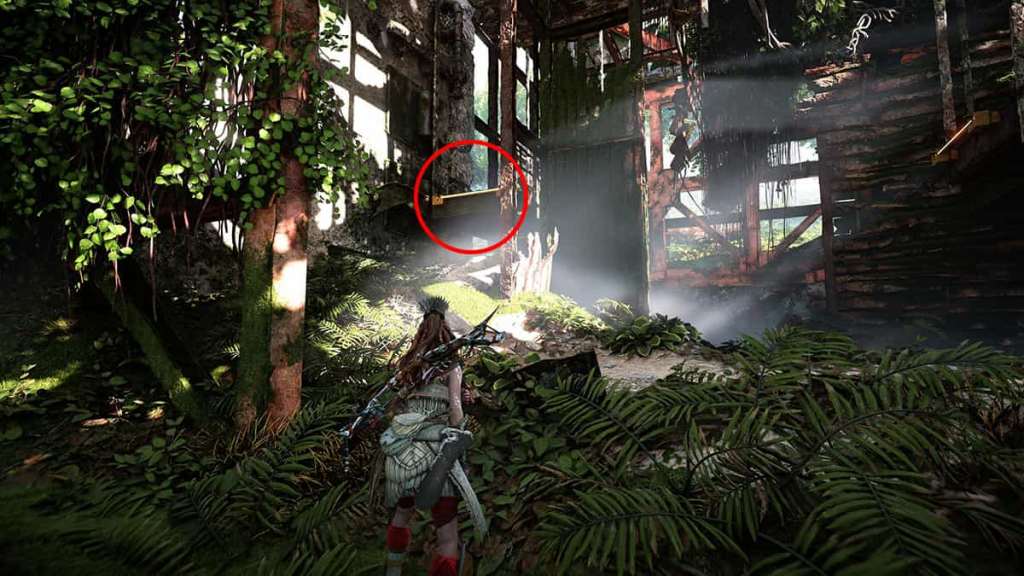
- Step 10: After the Firegleam is exploded, turn around and look for a hole in the wall. Through the hole will be a switch that Aloy can use her Pullcaster on (pictured below). When the switch is pulled with the Pullcaster, some lights will swivel around in front of Aloy. They are on a timer, so players must act quickly after activating the switch.
- Step 11: Use the Pullcaster and then run and grapple to the lights that have swiveled around. After this, jump from the lights onto another metal platform containing a second crate. Push the crate down onto the lower level and move it to the elevator all the way across the structure.
- Step 12: Put both crates in the elevator and lift them to the second floor. Remove one of the crates and leave the other placed below the grate in the elevator that you pulled down in Step 2.
- Step 13: Send the elevator back down and then travel on foot back up to the second floor. Push the crate left on the second floor onto the top of the elevator and then travel back down to the elevator's entrance.
- Step 14: Ride the elevator back up one final time, and use the crate below the hole to jump up to the top of the elevator. Use the other crate on top of the elevator to get even higher.
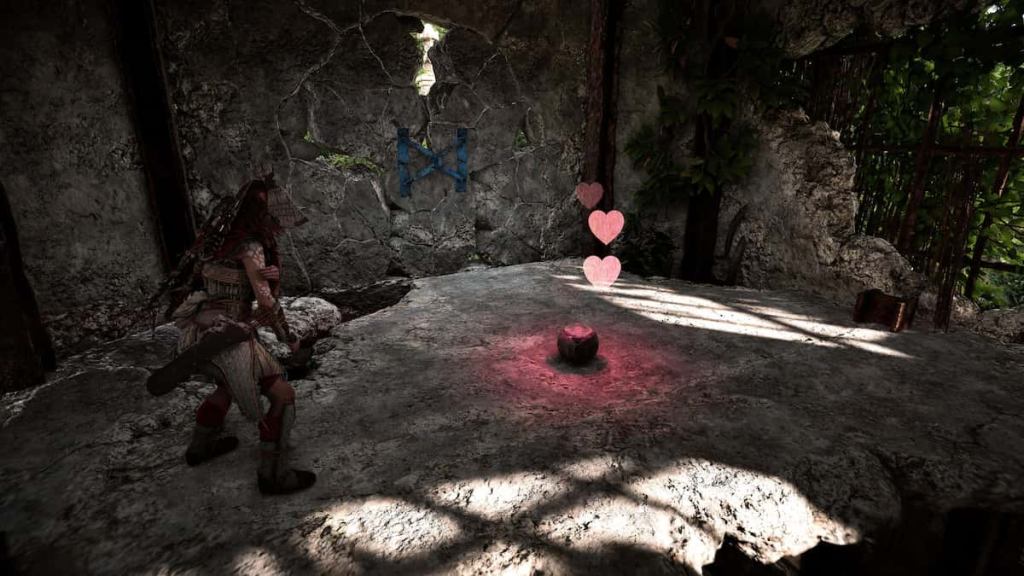
- Step 15: Continue climbing now, and you should end up at the top of the tower. This is where the Relic Ruin's collectible is found.
Where to the Relic Ruins: The Long Coast

You can find this Relic Ruin just northeast of the Thornmarsh settlement. It is also just west of Raintrace Rise. This Relic Ruin is one of the last ones players will encounter in the game following normal story progression.
Related: How to complete 'Restless Weald' Relic Ruins in Horizon Forbidden West?
What is the reward for Relic Ruins: The Long Coast?
All of the Relic Ruins in Horizon Forbidden West will result in players obtaining Ornaments. Which Ornament players get depends on the Relic Ruin completed. The Relic Ruins: The Long Coast will reward players with Ornament: The Long Coast.
Related: How to complete 'No Man's Land' Relic Ruins in Horizon Forbidden West?
These Ornaments are used later in the game once players reach the camp in Las Vegas and also complete the Nights of Lights quest. Players can redeem the Ornaments by talking to an NPC named Stemmur, who can turn the Ornaments into beautiful light shows. These collectibles are pretty cosmetic in nature and won't have a large effect on gameplay.
Interested in more Relic Ruins guides for Horizon Forbidden West? Check out How to complete 'The Dry Yearn' Relic Ruins in Horizon Forbidden West? on Pro Game Guides!