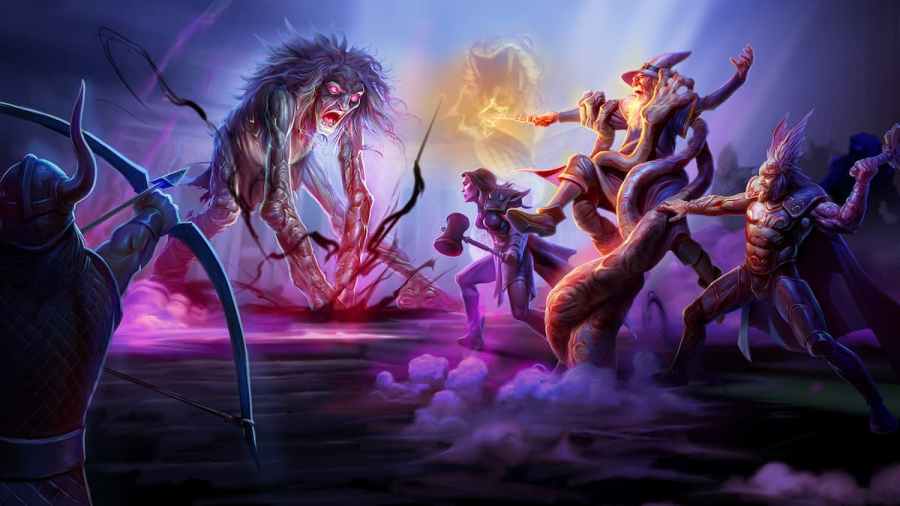
Those who are fans of Old School Runescape know that it is a game full of complicated and grind-intensive questing. This can be seen through many facets of the game, such as how to get Level 99 Thieving. Comparable to that grind is the Monkey Madness 2 quest line, which can be considered a sequel to the first Monkey Madness quest. For those who are having trouble with this quest or just now gearing up to start it, buckle up, as you're in for a very long journey.
How to complete the Monkey Madness 2 quest in OSRS
Requirements for beginning Monkey Madness 2
Before you can even begin this quest line, there are several requirements you must first complete. Many of these requirements deal with completing certain quests, but many others are certain Level requirements for skills. There are also required items that will not be obtainable on the island, so you can save a lot of time and travel if you bring them with you.
All required questlines
- Watchtower
- The Troll Stronghold quest line
- The Recipe for Disaster quest line
- Enlightened Journey
- The Eyes of Glouphire
- Monkey Madness
All required Skill Levels
- 55 Agility
- 55 Thieving
- 69 Slayer
- 60 Firemaking
- 70 Crafting
- 60 Hunter
- 90 Combat is highly recommended, but not required.
All required items
- A Monkeyspeak Amulet
- Pestle and Mortar
- Grapes
- One Light Source
- Logs
- One Lemon
- A Pickaxe
- A Ninja Monkey Greegree
- A Slashing weapon - Though it can be any Slashing weapon, any Wilderness Sword is highly recommended.
- Magic Logs - Not required but massively speeds up travel time.
Chapter One - Where is Glough?
Monkey Madness 2 begins in the Tree Gnome Stronghold by talking to King Narnode Shareen. When you talk to him, he will tell you that Glough, the dastardly Gnome responsible for the events of The Grand Tree questline, has escaped imprisonment. He tells you to go to Glough's house to search for clues.
Head southeast of The Grand Tree's position, as this is where you'll find Glough's House. Head up the ladder into the house and then find the climbable tree on the far side of the house. Head up this tree and find a tree branch that allows you to inspect it. This will give you a Handkerchief with A.A. embroidered into it.
From here, head to the Gnome Stronghold and take the Northwestern Staircase up to Anita's House. Within you need to speak to Anita, who will be crying when you reach her. When you ask her what's wrong, she will tell you that she fears Glough is having an affair with another woman and that she could hear whispering coming from the upper level of Glough's House. You promise to help and head back to Glough's House to investigate again.
Head up the climbable tree again, this time heading up two levels instead of one. On this level, there will be a Gnome Statue you need to investigate, as doing so will reveal a hidden switch on it. This will give you access to the Cupboard, which contains a Book of Spyology. Reading the book reveals to you methods for applying invisible text to paper to produce secret messages.
From here, investigate the crates in the left corner to pick up a brush before examining the fire remains on the floor, which will allow you to pick up the mysterious note. Next, you need to decrypt the note, and to do so follow these steps:
- Open your inventory and find the pestle and mortar you brought along.
- Use the pestle and mortar on the lemon. Make sure to click the pestle and mortar first so as to not eat the lemon accidentally.
- Use the pestle and mortar again, this time on the grapes, then apply the grape juice to the brush.
- Use the now juice-coated brush on the mysterious note, transforming it into a scrawled note.
- Use the translation book on the note. If you don't have one, head back to King Narnode and ask for one.
Head back to King Narnode to ask him if he can translate the scrawled note. He will tell you to go back to Anita for a translation, as he can see she is the one who wrote it. Head back to Anita's House and ask her to translate the note for you. She will do so, transforming it into a translated note and allowing you to once again head back to Narnode. Finally, the note will be readable, so hand it to him. He will tell you that Assistant Le Smith helped Glough escape, which checks out as Le Smith was a major antagonist in Monkey Madness One.
Next, you need to head directly south of Glough's House to speak to Assistant Lori. Lori wil claim he is Le Smith's replacement under Glough, but will also claim he has no idea on Le Smith's whereabouts. He then recommends you talk to Auguste to figure it out, but the problem is that Auguste is on Entrana. However, you can use a Log to travel there from your current position by Air Balloon. When you arrive and speak to Auguste, he will explain that Le Smith was lost on the way to Ape Atoll during an Air Balloon trip. Use a Magic Log to head back to King Narnode quickly, and speak to him. He will then give the very obvious direction of heading to Ape Atoll next.
Chapter Two - Taking Kruk's place
Using the Fairy Ring located in the area, teleport to Ape Atoll and immediately equip the Ninja Monkey Greegree before seeking out Garkor, who can be found on the Eastern side of the island outside of the Temple of Marimbo. He will tell you to speak to King Awowogei, so head inside of the temple to talk to him. Awowogei will very unhelpfully tell you that he will only speak to Kruk, requiring you to turn right back around and talk to Garkor again. Garkor will tell you that you should go kill Kruk as you can make a new Greegree from his body.
From here, head to the hill west of the Main Gate and find the Monkey Archer with a Talk option. Speaking to this Monkey Archer will give some clues on Kruk's whereabouts. Head back down the hill and you'll be able to see footprints that lead to a trapdoor hidden in grass. This is the entrance to Kruk's Dungeon. There are two ways to reach Kruk in the dungeon, those being the Agility Run and the Tank Run. As the names suggest, one of these routes is better for characters with high Agility and the other is better for tanky characters.
Agility Run
This run requires Agility Level 70 or higher, so if you are below this the Tank Run is highly recommended. With that in mind, head south until you come across a room to your east. Within, you will find Dodgy Ground. This floor can fall away to lower levels full of Maniacal Monkeys if you step incorrectly, so be sure to avoid ground marked with an X symbol.
Continue East until you reach a large room full of Dodgy Ground and a doorway on the east side. You need to reach this doorway and head inside to find a chest. This chest contains the Bronze Key, which unlocks the Northern Door in this room. Head back out of the doorway and navigate to the north end of the room, then use the Bronze Key on the door.
Head through the door to find another room full of Dodgy Ground and traps. You need to navigate your way to the north end of this room, and once you reach it walk through it and head West. In this corridor there will be falling rocks and Maniacal Monkeys that you need to avoid when possible. Close to the end of this room there will be a Strange Wall that you must investigate to open up a shortcut to the dungeon entrance. This will make returning easier in the event that you die. Past this shortcut, you will have finally reached Kruk's Room.
Tank Run
For the Tank Run, head directly East to the rooms with Webs and rocks. Use your Slashing weapon of choice to cut through the webs as well as your Pickaxe to mine through the rocks. Eventually you will reach a fork in the route. Ahead there will be a north route and a southeast route. Try the southeast route first, as it is easier assuming you can slash through the webs there.
Southeast route
Heading through the webs, you will find a room with two chests within it. Only one of the chests will be unlocked, so search both of them if required. Within the unlocked chest there will be a Combat Scratched Key. Take it and continue east and then north.
North route
The Northern route is pretty much the same as the Southeast one, only harder. Here, again you need to find the two chests, and one of them will be unlocked. Find the unlocked chest and take the Combat Damaged Key from within it, then head east and slash through the web.
Here, the southeast and north routes converge. Head North through the large room you run into until you reach another fork. This time, your option is east or west and will be determined by which route you took previously. If you took the southeast route, head east, and west if you took the north route. Both routes will end in the same place, but following the route you unlocked will cause the traps on it to deal negligible or no damage, so be sure to stay on the route.
From here, use whichever key you acquired earlier to unlock the route door that matches it, then head north and then west. Doing so will cause you to reach the same destination as the Agility route. Continue West from here until you see a hanging vine surrounded by three Maniacal Monkeys. Get past them, use the vine to progress, then reach the fork with two paths. Both of these paths are pretty much the same, so make your choice and continue forward. The end of these paths will be marked by a section of Dodgy Ground, and immediately after it you need to examine the walls. Right after the Dodgy Ground will be a Shortcut back to the entrance. After this, move past the last section of Dodgy Ground and enter Kruk's Room.
Kruk hits like a truck both in melee and at range, so your best strategy while fighting him is to kite him around the room and use ranged attacks to bring him down. While his ranged attacks hit harder, he will use them less often than melee attacks. Regardless, you should still use a Protect from Range prayer to help survivability.
Once you have killed Kruk, take Kruk's Paw and head West to find the Hanging Rope. This will allow you to finally exit the dungeon to safety. From here, you need to head to the Ape Atoll Dungeon, otherwise known as Zooknock's Tunnel. It can be found on the South side of Ape Atoll. Before proceeding, put on a Mokey Greegree of any kind if you have one, as it will cause the Spiders and Undead Monkeys inside to ignore you, making your trip through the tunnel much easier. Reach Zooknock and have him create the Kruk Monkey Greegree for you, then head back to King Awowogei. Remember that he can be found within the Temple of Marimbo.
Awowogei will reveal that the monkeys are going to team up with the Gu'Tanoth Ogres and the Troll Stronghold, which is a bit of a problem for the rest of the world. After this, head outside and talk to Garkor.
Chapter Three - Disturbing the peace
Garkor will tell you that you need to go kill the Troll general Kob and the Ogre general Keef in order to halt their support of Awowogei's assault.
First, head to Trollheim and enter the Troll Stronghold. You need to find Kob within and challenge him to a Deathmatch. Kob hits very hard in melee, so either use Protect from Melee and take him on or use ranged weaponry to kite him from afar. Once he is low enough Kob will surrender to you.
From here, exit the dungeon and head to the Ogre city of Gu'Tanoth and find Keef. He can be found past the series of bridges in the city near a bunch of City Guards. The strategy for Keef is the same as Kob, with you using Protect from Melee or ranged attacks to bring him to his knees. Once low enough, he will make the same agreement as Kob.
Head all the way back to Ape Atoll and find Garkor to finish the quest. He will tell you to go find Assistant Le Smith, but that can pose a challenge. For this quest, Le Smith can spawn in one of four possible locations:
- Between the main gate's two watchtowers on the bridge.
- The top floor of the disheveled building near the Monkey's Aunt and Monkey Child.
- The top floor of the Monkey Jail, accessible by using the ladder near Solihib's Food Stall, walking north, then using the ladder on the wall next to the bamboo bed room.
- The top floor of the building to the West of the Magic Stall. For this route, head to the south end of the Temple of Marimbo and climb the ladder. Find the ladder on the northwest corner and climb it, then head southwest to get into the building.
- You can also go to the building to the east of the Magic Stall and find the crate to its southeast. This will reveal a secret Cave Entrance. Head west through the cave until you find the Hanging Rope at the end and climb it.
When you finally find Le Smith, talk to him. He will tell you the Monkeys are constructing a fleet of ships on the West Coast of Ape Atoll. From here, head back to Garkor who will give you your next objective of getting on a ship. Head all the way to the Northwest coast of the island. Here, you will find a monkey with a rowboat. Put on the Kruk Monkey Greegree and ask the monkey to take you aboard the ship.
The next mission is a stealth challenge aboard an airship. You will have your Greegree removed, meaning you cannot simply walk among the guards on the ship. Instead, you need to navigate while avoiding their line of sight while finding six satchels and filling them with explosives. Note that if you are caught, you will be thrown off the ship.
Follow the main path until you reach a dead end with ladders. Head up the second floor ladder and head south until you find another ladder. Climb down this ladder and follow the path until you reach the satchels. Collect six of them before heading back up the ladder, then back to the First Floor using the first ladder you climbed.
On the way to the first ladder, you may have noticed another ladder that you walked past to the north. You need to head back to this ladder next. Climb up this ladder and follow the route until you find another ladder. Climb down it and follow the route north until you find a barrel of explosives. Use this barrel to fill all six satchels.
From here, head back down the ladder and head south until you reach a dead end with a floorboard. Place your first explosive here. Head back north past the gunpowder ladder, instead using the other ladder to go back to the First Floor. Here, there are two pillars that need explosives placed on them. From the ladder, one is back towards the entrance on the west side of the path, while the other is back towards the first ladder you used on the east side of the path.
Next, head up the first ladder and head west to the vine. Use it to swing across, then head north until you reach another dead end with a floorboard. Place an explosive here. Head back to the vine and swing across before heading back to the ladder. Here, use the Third Floor ladder to reach the gas canisters to the north and south. Plant explosives on both of these. Once you have planted all of the explosives, you can then let a Monkey Guard throw you overboard to quickly get off the ship.
Head back to Garkor, who will then tell you to go back to Kruk's Dungeon. Instead of using the shortcuts you unlocked earlier, use the main entrance and equip the Kruk Monkey Greegree. Head North until you run into the Monkey Bars and climb up them. Continue North until you run into a set of large doors, then continue through them. Here, climb onto a Stunted Demonic Gorilla, then head down the stairs nearby. At the bottom there will be three Tortured Gorillas and Glough will be inside of a cage as though he was locked in.
Speak to Glough and he will reveal he locked himself in to escape the gorillas, then orders you to beat them back into their cages. Once this is done, speak to Glough again. He will explain that he is trying to turn his mutagen into an airborne form to use on all of Ape Atoll, transforming its denizens into creatures like the Stunted Demonic Gorilla. He will then pull a lever that activates the Onyx Gem Device before teleporting out of the dungeon to find Assistant Le Smith.
From here, search the nearby crates for a hammer and chisel if you do not have them already. Dismount the gorilla by taking it to the nearby holding area and unequip your Greegree, then go to the Onyx Gem Device and take out the Charged Onyx. Use the chisel and hammer on the Charged Onyx, turning it into Deconstructed Onyx before placing it back in the device. Now, search one of the Incubation Chambers to see if the energy has been drained from it. Once confirming it is corrupted, head back to Garkor.
Garkor will tell you to speak to Awowogei and tell him that the Trolls and Ogres have decided to end the alliance with the monkeys. Also tell him that the secret weapon is having some issues and is not ready for battle yet. He will become angry, announcing he is pushing off the declaration of war before taking his anger out on Kruk, also known as you, stripping you of your rank.
Head back to Garkor to relay the details of what just happened. During this, the screen will shake before a cutscene showing Glough and his airship beginning the assault regardless.
Related: How to get to Ivan Strom in OSRS
Chapter Four - Glough's final stand
Head all the way back to the Gnome Stronghold to talk to King Narnode Shareen, explaining the situation and impending attack. He will tell you to go to the Stronghold Slayer Cave entrance to find Nieve, their strongest warrior.
With Nieve in tow, begin walking around and taking down Tortured Gorillas until you have killed four of them. Head back to Narnode, who will tell you to head to Glough's Crash Site where his airship hit the ground. The crash site is northwest of the Grand Tree, and here you will find Garkor near the Tortoise Enclosure. Talk to him before heading into the crash site. Either fight the Tortured Gorillas or run past them, heading into the Crash Site Cavern.
Within, you will have to fight two Tortured Gorillas and two Demonic Gorillas. Upon defeating them, continue through the cavern until you trigger a cutscene, revealing Glough is alive and has brought powerful gorillas with him.
After the cutscene, prepare to fight two stronger Tortured Gorillas and Demonic Gorillas. These gorillas will cast Protect spells that will negate whatever damage type you are currently using, so you need to use two different combat styles and alternate between them. They will have higher health and damage than those you fought previously. Also, when one is killed, a much stronger Demonic Gorilla will jump in to take its place. The best strategy is to kill one Tortured Gorilla and then focus down the Demonic Gorilla that takes its place, as fighting two Demonic Gorillas at once will be very difficult.
Once you have defeated them, Glough will drink his Mutagen, transforming him into a massive monster. Nieve will attempt to attack him, but he will swat her back into a cavern wall before a boulder falls on her, killing her. Glough will then flee the area.
Chapter Five - Bringing down a monstrosity
From here, you will now have to face Glough alone, and he is a very tough fight with three total phases. Phase One will have Glough using Melee attacks only, so it is recommended to attack using ranged or magic attacks from the nearby hallway, as he cannot reach you within it. At 75% Health, he will retreat to a second room.
Phase Two will see Glough using melee and ranged attacks along with a ground stomp that deals over 30 damage. The best strategy here is to kite Glough back towards the Phase One room while hitting him from range. He cannot enter the first room and therefore will be an easy target. However, he will still hit you with ranged attacks and the ground stomp, so be wary of how much damage you take.
In Phase Three, Glough will use ranged, melee, and magic attacks, and now his melee attacks will deal a ton of damage and knock you back. His new magic attack will be an ability that pulls you towards him, dealing massive magic damage. This phase is going to be the hardest by far. A very effective strategy is to alternate between Protect from Melee when Glough pulls you in and Protect from Missiles when he hits you away, eliminating as much damage as possible. While doing this, be sure to switch between your melee and ranged weapons to capitalize on your situation as much as possible.
Once you defeat Glough, the cavern will begin falling apart, but you will be teleported to safety by Zooknock. You will explain what happened and that Nieve is dead, Zooknock will tell you to report to Narnode and you can ask him to teleport you to him.
You will explain what happened again, this time to Narnode, who will tell you that King Awowogei is coming to the Gnome Stronghold personally to set up a peace treaty with Narnode. You will be allowed to witness this event before Monkey Madness Part Two is finally finished.
Monkey Madness Part Two quest rewards
The rewards for completing this quest are plentiful, as they should be for how long and hard it is. The game lets you know that for completing the quest you receive four Quest Points, 80,000 Slayer XP, 60,000 Agility XP, 50,000 Thieving XP, 50,000 Hunter XP, and access to the Crash Site Caverns where you fought Glough. However, what the quest doesn't tell you is all of the other rewards given for completing the quest:
- Ability to talk to all monkeys without the M'Speak Amulet.
- All NPCs on Ape Atoll will be non-aggressive (not counting dungeon NPCs).
- Access to Oobapohk's Javelin Store and Ape Atoll's bank.
- A glider spot that leads to Ape Atoll.
- 50,000 XP from Duke in two of the following: Magic, Ranged, Attack, Defence, Strength, or Hitpoints. Duke can be found on the East Hill of Ape Atoll.
- Ability to use the Heavy Ballista.
- A Royal Seed Pod that teleports you straight to the Grand Tree with unlimited uses.
- At the Glough Crash Site, there is a crate that contains a Monkey that can be equipped in the cloak slot as a cosmetic item.
- Bobawu will track your lap times in the Agility Course and allow you to transform your monkey into different variants.
- Restarting the Glough boss fight using Zooknock's Burning Brazier in his house.
- Zooknock will now give you Greegrees from his house.
- A new Maniacal Monkey Hunting Area replaces Glough's Laboratory in Kruk's Dungeon.
- Dragons can now drop Dragon Javelin Heads.
- Four new songs: Monkey Trouble, Monkey Business, Monkey Sadness, and Monkey Badness.
Want more information on Old School Runescape? Check out OSRS Black Mask guide – how to get, requirements, effects and What is a Mark of Grace in OSRS? How to use & get from Pro Game Guides!