Trials in Final Fantasy XIV are perfect for players wanting a quick group boss raid without the addition of a dungeon, mobs, and sub-bosses. They’re a one-shot arena-style battle with complex mechanics that test each role, offering powerful rewards to the victors. And for players wanting the ultimate trial challenge, they can take on a Duty in Extreme mode. If you’re having some issues working out the patterns in Final Fantasy XIV Storm’s Crown Extreme mode, read on below.
Storm's Crown Extreme Trial Guide - Final Fantasy 14
Storm’s Crown is a level 90 Duty Trial introduced as part of Endwalker in patch 6.2. It requires participants to have level 600 gear (if you do not have a full party), to have completed the story quest The Wind Rises, and to have beaten Storm’s Crown on normal difficulty. You can then get NPC Wandering Minstrel in Old Sharlayan to add the Extreme version to your Raid finder, but it should be noted that, as with other Extreme duties, you are not required to complete it on this difficulty to advance the main storyline.
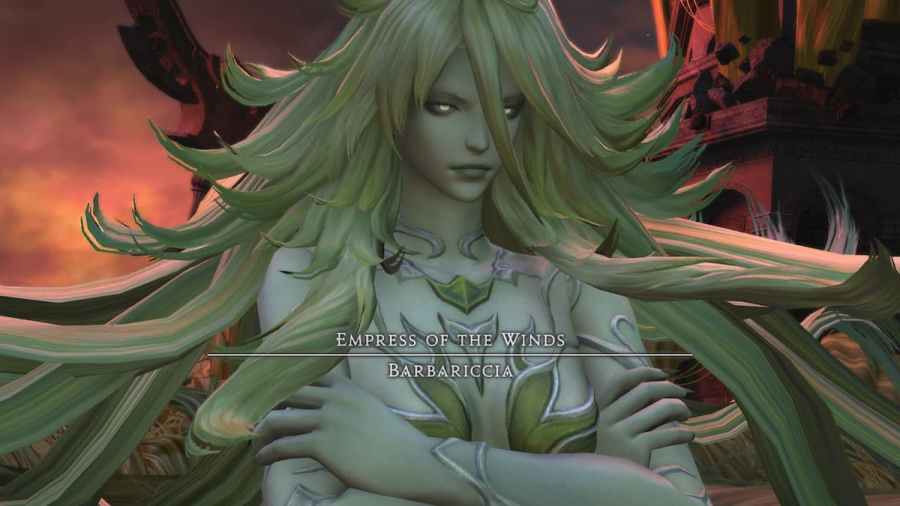
You’re facing Barbariccia, Empress of the Winds, first seen in FFIV. While this is an eight-player battle, you’ll need to split into two light parties of four, each consisting of a tank, a healer, and two DPSs. Each player will sometimes need to take a clock spot around the arena. Place tanks at 12 and 6, healers at 3 and 9, and DPSs interspersed evenly between them. Before you begin, mark each character’s given clock position so they’re easily identifiable throughout the battle.
Phase 1: Barbariccia
During the first phase, the main attacks to look out for are as follows:
- Void Aero 4 and Raging Storm: Two raid-wide AoEs.
- Savage Barbery: This can be one of two options, indicated by where the red arrows point. The first damage is from a half-circle AoE, so move away accordingly. If the sword was facing up on the cast, it would be followed by a line AoE across the center of the arena. If the sword was thrown at 12, damaging the top half of the arena, the line AoE would be from 9 to 3 (touching the top of the half circle of damage). If her sword faces down on cast, move to Barbariccia’s central spot to be safe from an arena-wide AoE.
- Hair Raid: Another two options. If she’s standing, stay near her to avoid an arena-wide AoE. If she’s kneeling, expect a cone AoE from her position, so stand to her left or right at the edge of the arena. In addition, there will either be AoE markers on each party member (spread out when you can to avoid multiple hits) or stack markers on both healers (split into your two teams and huddle up).
- Savage Barbery: Whichever option didn’t happen the first time.
- Hair Raid: Again, whichever option didn’t happen the first time.
- Void Aero 4 and 3: As before, but with an added tankbuster DoT that hits really hard, so save that Invulnerability for now. Get your tanks to swap via Provoke at this point.
- Teasing Tangles and Secret Breeze: Four large AoEs are followed by a stun (Teasing Tangles) that tethers all players into pairs. One person in each pair will have a red AoE marker, and the other either a blue stack marker or no marker. Have the stacked and clear player go opposite ways, with the AoE backing away to the arena wall and avoiding Secret Breeze, a large con AoE that goes through the middle of each to-player circle. Also, avoid touching the edge of the circle, as it draws you back to the middle. Once all of this triggers at once, heals up quickly.
- Void Aero 4 and Catabasis: As above, followed by Barbariccia’s ultimate raid-wide hit that doe massive magic damage.
Related: How to unlock the Mount Ordeals trial in Final Fantasy XIV Patch 6.3
Phase 2: Wind
Avoid the stormy edge of the arena during this phase, or you’ll pick up a nasty DoT. And be ready to act fast, as things happen quickly. Move to your clock position at this point.
- Brutal Rush and Boulder Break: Barbariccia tethers to the tanks and healers, hitting each with a line AOE. Stay in your area to avoid overlap and dodge if targeted. This is immediately followed by a tank buster with a massive DoT, so the marked tanks should hold Invulnerability back for this.
- Boulder attacks: When the black-red area around Barbariccia disappears, head straight into where it was close to her and wait. Then, when you see a circular AoE area emanating from the center (not the curved line one), run out to the edges to avoid both. You’ll also be targeted with your own AoE, so make sure you head back to your designated clock and avoid overlap.
- Brutal Rush, Knuckle Drum, and Blow Away: All DPSs will be hit with Brutal Rush before the unavoidable Knuckle Drum hits all players. This is followed by Blow Away, which targets all players with an AoE. If all players move clockwise from a grouped start point, you can all avoid the damage by running together. This is followed by another Brutal Rush, this time on the tanks and healers. Once this is resolved, get your tanks to move to one edge of the arena and get all other players to move to the opposite point.
- Bold Boulder and Trample: The Trample stack hits a random healer, so non-healers stay together to share the damage. Bold Boulder will hit both tanks and should avoid hitting anyone else. You’ll know this is over when Teasing Tangles returns.
- Teasing Tangles 2 and Knuckle Drum: As before, each player moves to their clock position, with tanks and healers heading left and DPSs right to form pairs. Move to avoid the AoEs, avoiding the edge of your pair’s circle. Be ready for another raid-wide Knuckle Drum afterward.
Related: How to get all Triple Triad cards added in Final Fantasy XIV patch 6.35
Phase 3: Barbariccia 2
As phase 1, with the following addition:
- After Raging Storm: Barbariccia uses Entanglement, which sees each DPS tethered to a support and dragged together. Avoid the incoming AoEs as described above.
Beyond this, you’ll recognize all the incoming attacks from Phase 1.
Phase 4: Wind 2
As the earlier Wind phase but more intense and in a different order, but with no new mechanics. However, everything is ramped up, so you’ll really need to be on your toes to avoid the AoEs.
- Brutal Rush
- Knuckle Drum
- Blow Away
- Boulders
- Brutal Rush
- Bold Boulder
- Brutal Rush
After this, chaos ensues. The enter arena explodes in color as you’re hit with a bewildering array of AoEs. Try to stay in safe spaces, with your best chance to avoid damage being as close to the edge of the arena as you dare go. On the plus side, you’re nearly there.
Phase 5: The End
Barbariccia will return to a loop of common mechanisms until her health is low enough to trigger the end game:
- Entanglement
- Savage Barbery
- Hair Raid
- Void Aero 4
Once enraged, she will cast Maelstrom, so hold back the big guns for this moment. You’re on a nine-second counter, so give her all the DPS you can muster for the win. Congratulations!
Looking for more on Final Fantasy XIV? Check out How to unlock Omega Protocol Ultimate raid in Final Fantasy XIV and All new MSQ quests in Final Fantasy XIV Patch 6.3 here at Pro Game Guides!