
Vimana Agama: Jazari's Chapter is a World Quest in the Vimana Agama questline, where you help an Akademiya researcher named Jazari activate the giant Ruin Grader in Devantaka Mountain.
How to unlock Vimana Agama: Jazari's Chapter Sumeru World Quest in Genshin Impact
To unlock Jazari's Chapter, you first need to complete the following prerequisites from the Vimana Agama World Questline:
Once they're done, you'll automatically unlock Vimana Agama: Jazari's Chapter.
How to complete Vimana Agama: Jazari's Chapter Sumeru World Quest in Genshin Impact
Activate the relays
Follow the quest marker to the underground cave in Devantaka Mountain and propel toward the location of the quest marker to find a glowing spot. Interact with it to Open the cabin door, revealing the entrance to the Ruin Grader's control center.
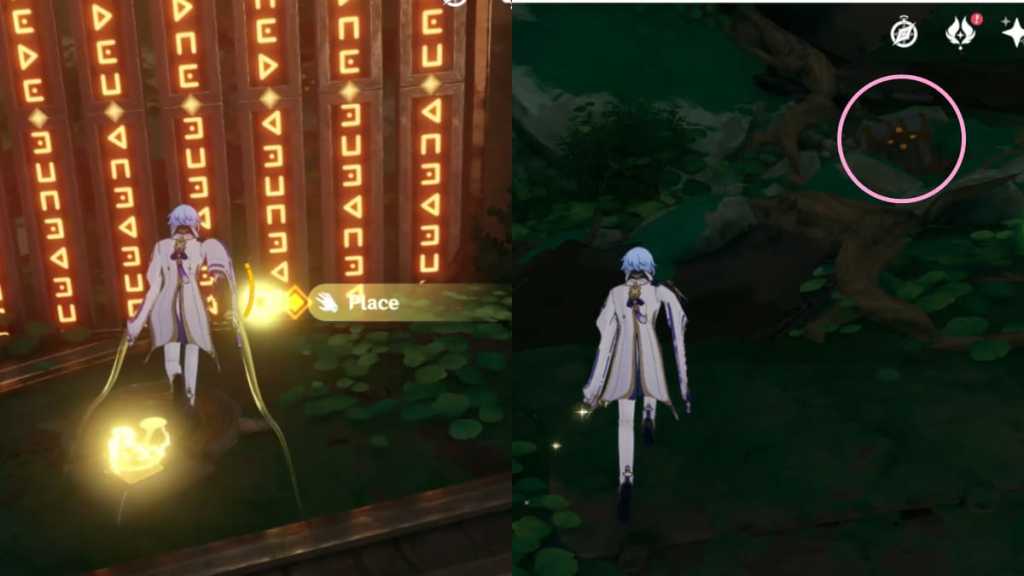
After speaking with Jazari, glide down to the bottom, where you'll find a Ruin Sentinel. Defeat it to get it out of the way. You will find orange items on the ground called energy cubes and machines called relays (circled in the image below).
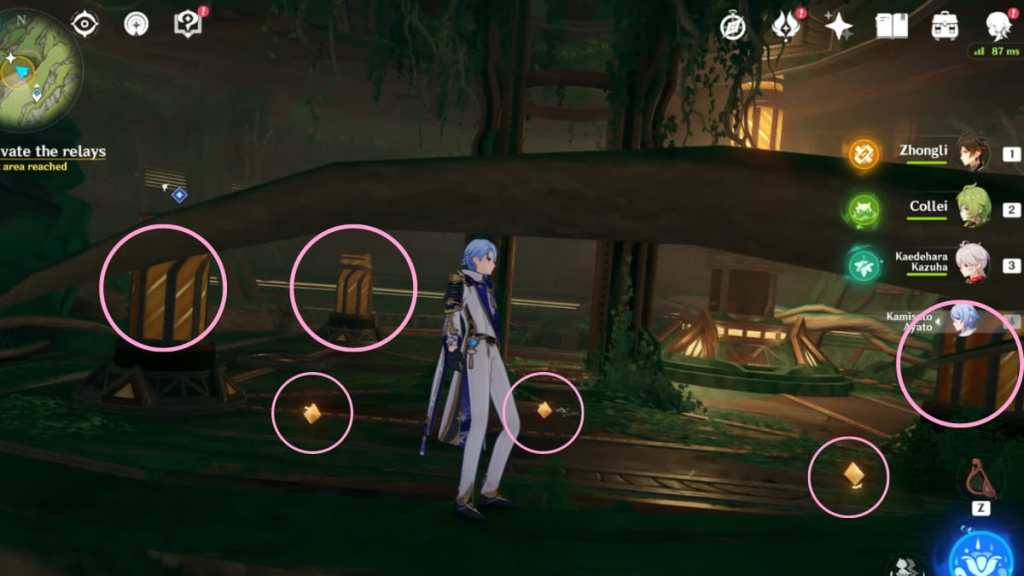
Your goal is to pick up the energy cubes on the ground and Place them onto the relays to activate them. Remember that you can pick up more than one energy cube at a time. After placing all three energy cubes in the area, interact with the platform in front of Jazari to go to the middle level.
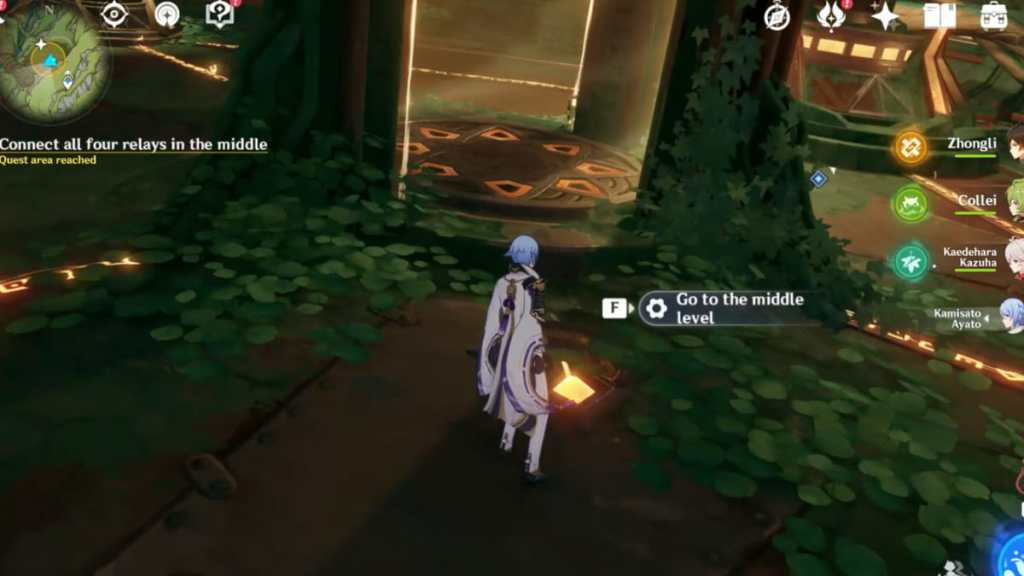
Once that's done, step onto the platform inside the elevator and wait for it to lift you to the next floor. On the second floor, you need to activate four relays.
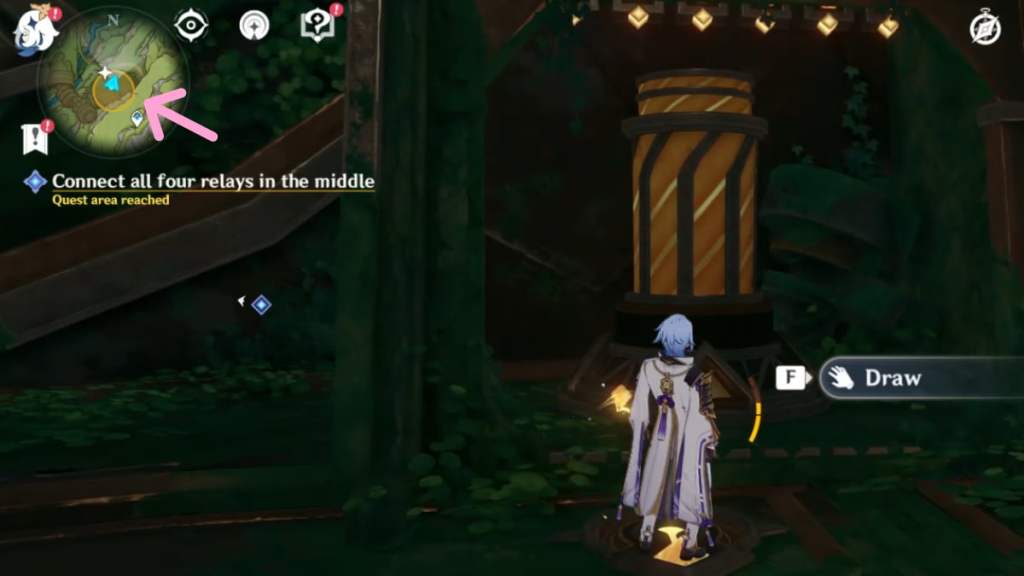
Connect all four relays in the middle
Below are the instructions to connect all four relays in the room. Please follow them in the exact order we list as you need to account for the number of energy cubes required to open gates and activate the relays. In this segment, please pay attention to the mini-maps in the succeeding images to help you find the location of each room.
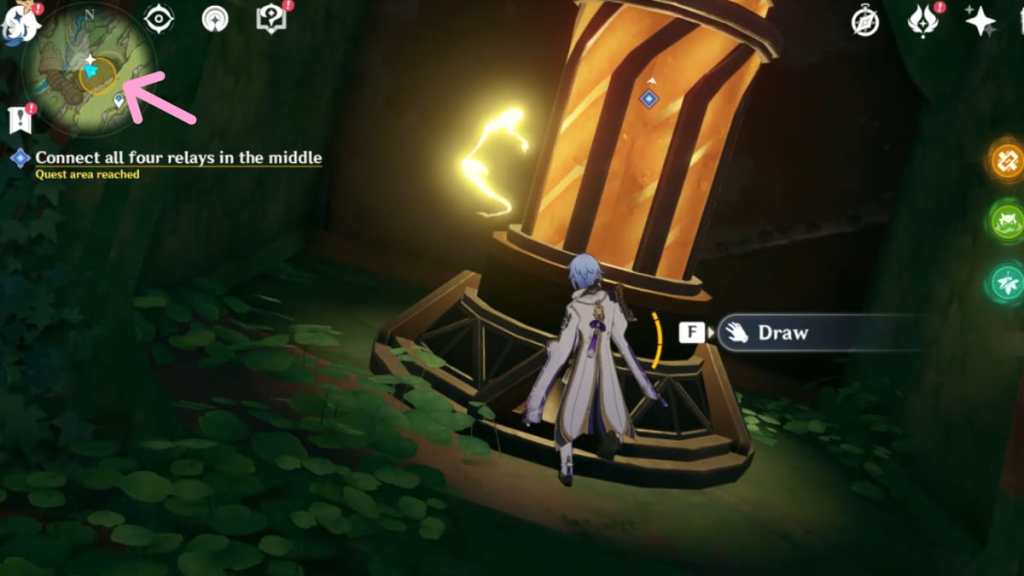
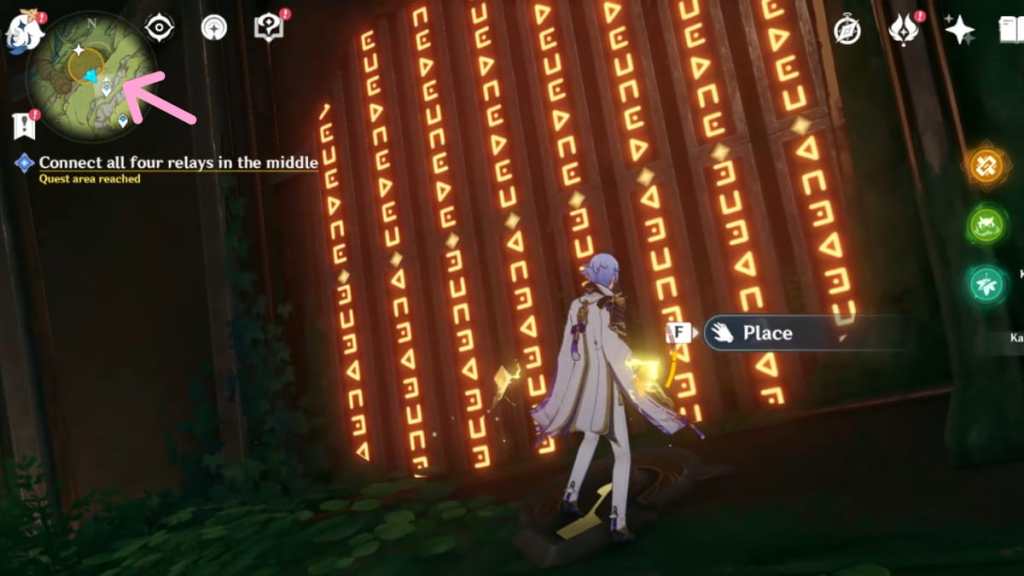
On the northwest of the room, you will find an activated relay. Interact with it to Draw the energy cube, turning the machine off in the process. Next, turn right and head to the locked gate located north of the room.
There are three things you need to do here.
- Place an energy cube on the platform in front of the locked gate to unlock it.
- Draw an energy cube from the relay machine.
- Draw the energy cube on the platform in front of the locked gate to lock it again.
At this point, you should have two energy cubes hovering around you.
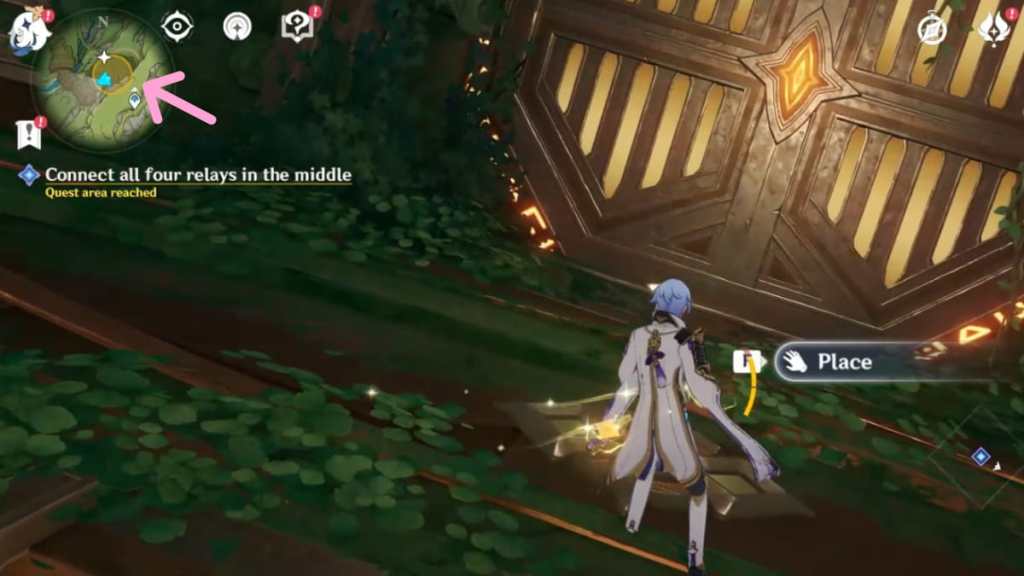
Next, head to the south of the room to find another locked gate. This part is optional but will reward you with some lore.
- Place an energy cube on the platform in front of the locked gate to unlock it.
- You can choose to read the Mysterious Chronicle inside of the room for lore, but it's optional.
- Draw the energy cube on the platform in front of the locked gate to lock it again.
At this point, you should have two energy cubes hovering around you.

Next, right beside the previous gate, you'll find another similar gate, slightly to the southwest. This part is optional but will reward you with a Chest.
- Place an energy cube on the platform in front of the locked gate to unlock it.
- Loot the Remarkable Chest inside the room.
- Draw the energy cube on the platform in front of the locked gate to lock it again.
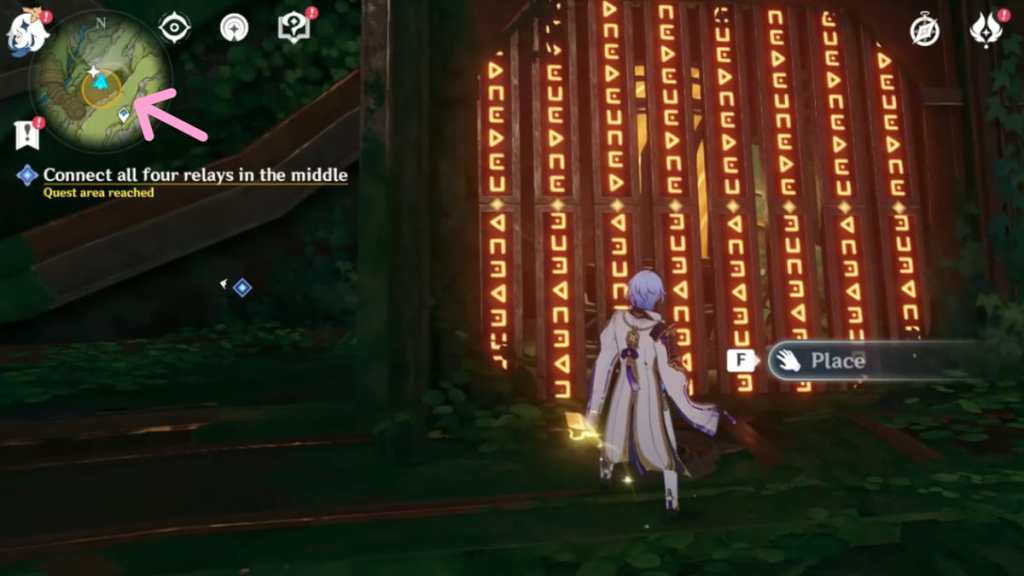
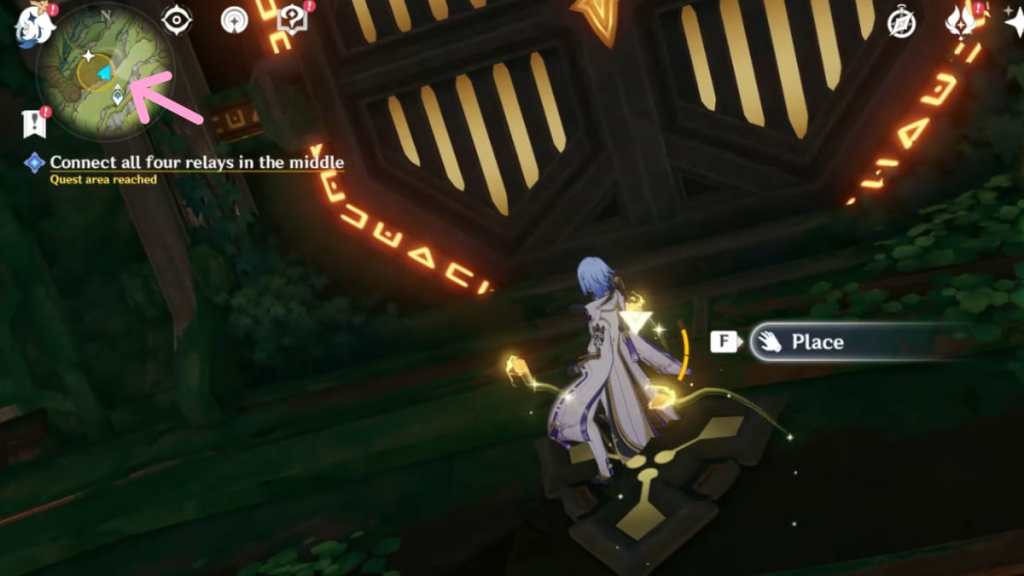
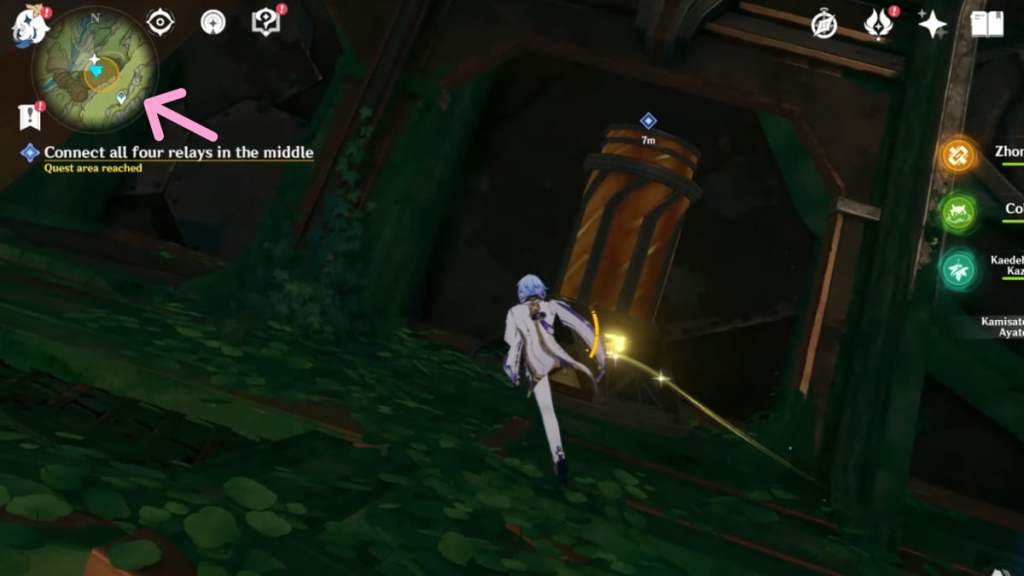
Next, head to the locked gate facing west of the room, as pictured above. Follow the instructions below:
- Place two energy cubes on the platform in front of the locked gate to unlock it.
- Inside the room, pick up an energy cube on the ground.
- You can choose to read the Mysterious Chronicle on the right side of the room for lore, but it's optional.
- Exit the room and Draw the two energy cubes on the platform in front to lock the gate.
At this point, you should have three energy cubes hovering around you.
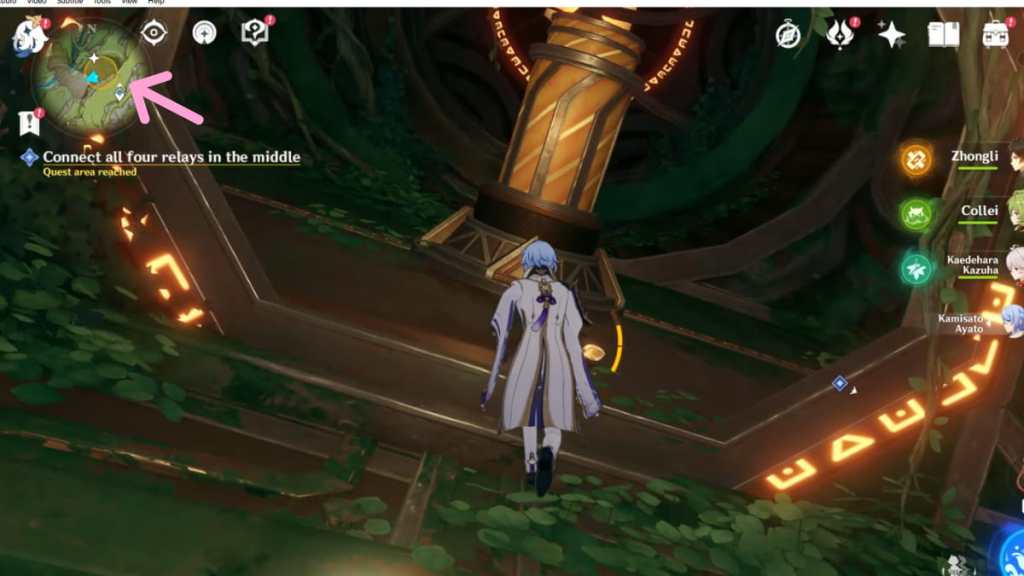
Next, head to the locked gate east of the room and follow the instructions below.
- Place three energy cubes on the platform in front of the locked gate to unlock it.
- Inside the room, pick up an energy cube on the ground.
- Place the energy cube into the relay inside the room. Be careful—a Ruin Sentinel will spawn!
- Exit the room and Draw the three energy cubes on the platform in front to lock the gate.
At this point, you should have three energy cubes hovering around you. Now you need to activate the three other relays. You must do them in this exact order.
Return to the gate west of the room and follow the instructions below.
- Place two energy cubes on the platform in front of the locked gate to unlock it.
- Inside, Place one energy cube into the relay machine to activate it. Be careful as a Ruin Sentinel will spawn!
- Exit the room and Draw the two energy cubes on the platform in front to lock the gate.
At this point, you should have two energy cubes hovering around you.
Next, head back to the gate north of the room and follow the instructions below.
- Place one energy cube on the platform in front of the locked gate to unlock it.
- Inside, Place one energy cube into the relay machine to activate it.
- Exit the room and Draw one energy cube from the platform in front to lock the gate.
At this point, you should have one energy cube hovering around you.
Related: How to get all Sumeru craftable weapons in Genshin Impact
Return to your starting position northwest of the room and Place one energy cube on the relay. This will complete the quest objective. A Black Serpent Knight named Ynghildr will appear. Defeat him and jump down the elevator to speak with Jazari.
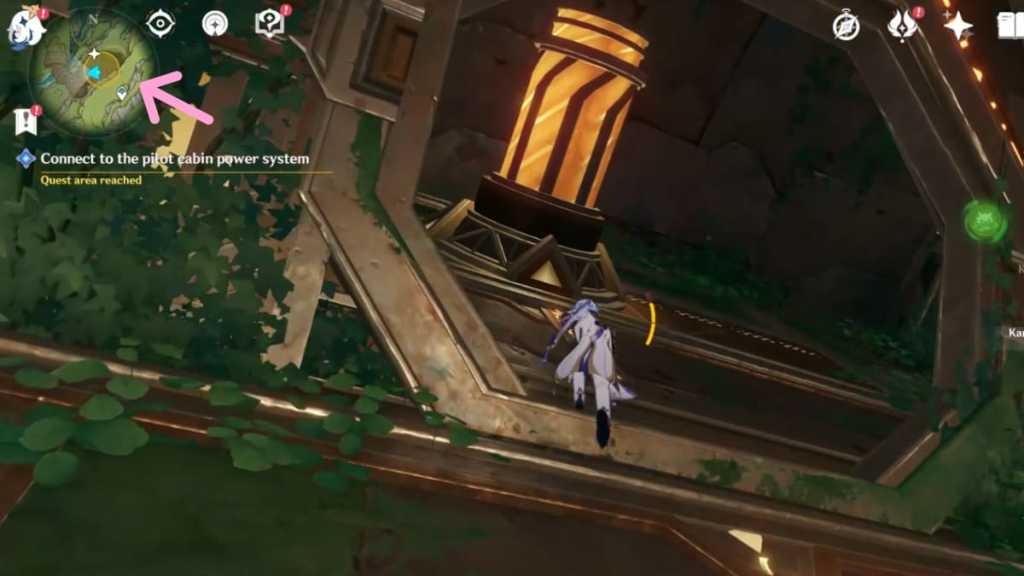
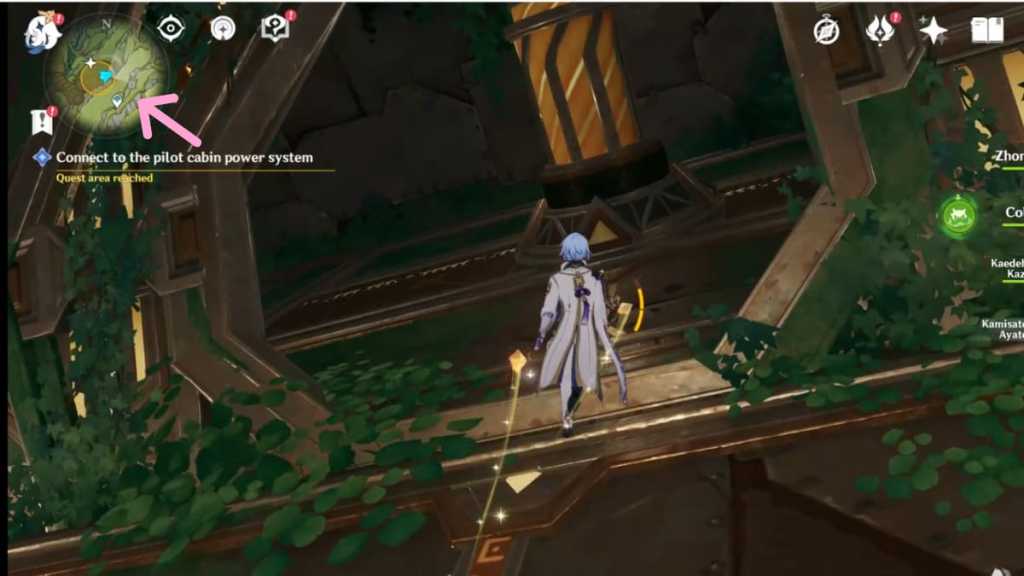
Connect to the pilot cabin power system
Interact with the platform in front of the elevator and choose Go to the top level. Wait for the platform to go down before stepping inside and wait for it to lift you up to the top floor. You can complete the two gates here in any order.
West gate
Head west to find an opened gate with a relay machine inside. Draw an energy cube from the relay. Inside this gate, there are two more locked gates to the left and right.
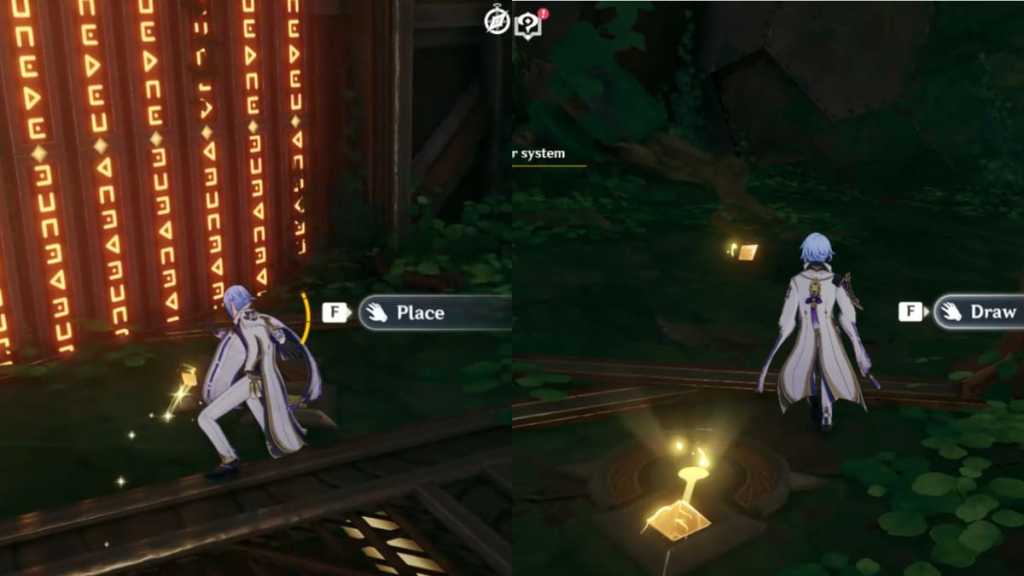
- Turn right and place an energy cube on the platform in front of the locked gate to open it.
- Pick up the energy cube inside.
- Exit and Draw the energy cube on the platform.
You can do the same for the gate on the left, but it's optional as you'll only find a Mysterious Chronicle—a must if you love lore! Once you're done, Place the energy cube back on the relay machine to activate it again.
East gate
Next, head to the gate in the east and immediately turn right to find another locked gate.
This part is optional but will reward you with a Chest.
- Place an energy cube on the platform in front of the locked gate to open it.
- Loot the Luxurious Chest inside. It's pretty well-hidden, but reference the image above to help you find it.
- Exit and Draw the energy cube on the platform.
At this point, you should have one energy cube hovering around you. You can also head left of the relay to find an entrance with Zandik's Note, which is optional but a great read for lore. Once you're done, Place the remaining energy cube onto the relay machine to complete the quest objective.
Enter the pilot cabin
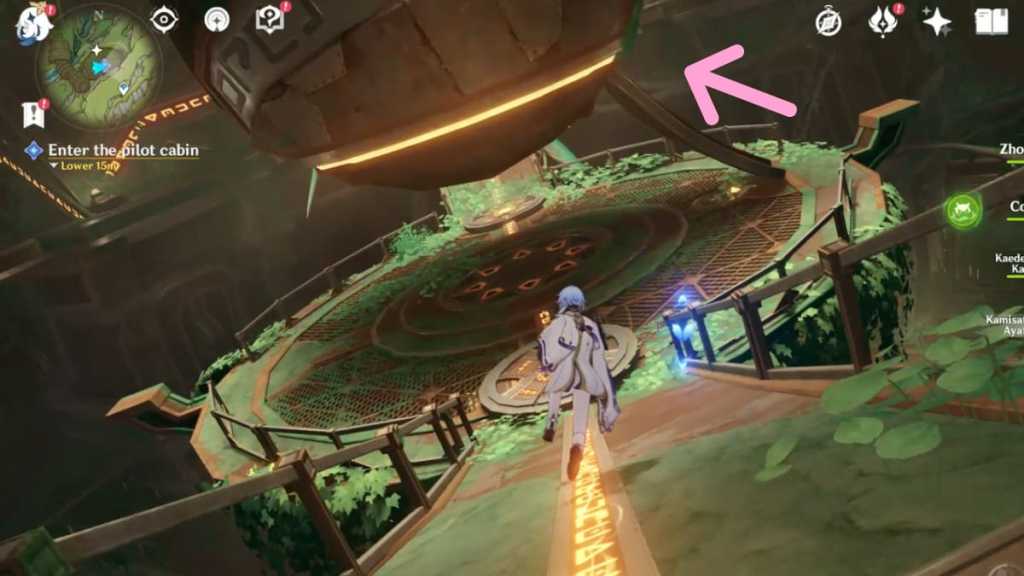
After the small cutscene, some stairs leading to the center of the room will appear. Climb up to find a glowing spot, which will prompt dialogue with Jazari.
Activate the ruin golem

Interact with the controls in front of the monitor to open up the Ruin Grader's field of view. You need to aim at the exact spot indicated in the image above and click Enter to prompt the Ruin Grader to launch one of its arms. After the small cutscene, speak to Jazari to complete the World Quest and automatically unlock the next part of the questline, Vimana Agama: Dev Delver Chapter.
Check out our guides on What are the ear pieces worn by Sumeru NPCs in Genshin Impact? and What is the giant floating pyramid you can see from Sumeru in Genshin Impact? to learn more about Sumeru's captivating lore.